DearMissMermaid
Well-known member
Before and After
Work in Progress
My whole life is a work in progress. I am living in my forever home, an old little Class C that is 28 by 7 feet. No slide outs or pop outs.
It's tiny home living!
Since I have no car, I spend an inordinate amount of time at home. One would think this would be a fabulous money saving idea.
Mostly it is!
But I get tired of the decor and I am often seeking inexpensive solutions to change it up to something soothing and comfy.
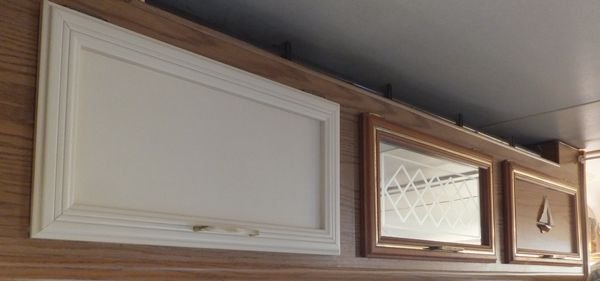
My motorhome like many came with a lot of real and fake wood. Too much wood!
I wanted to paint the interior cabinets. However the work to do that and the resulting cost is just way out of line with my skills and budget.
Lately I have a friend visiting me and we have loads in common. Mostly that we are both eccentric and beat to a very different drum. After that we are vastly different.
Think outside the box!
We found cabinet faces in the dumpster that were stark white and carried them back to my rig. None of them fit, but it gave me ideas. What if just the cabinet faces were painted off white buttery?
We returned the found cabinet faces since we could not use them. They had newer brass pulls but the screw holes were radically different so that was a no-go salvage.
My friend pointed out the path f least resistance would be to remove them, and spray paint them outside then put them back up.
So we did a few drawers as a test run.
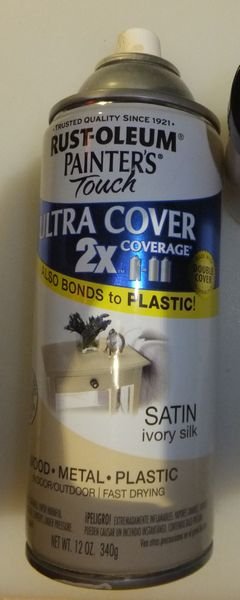
The spray paint color available was either full on yellow or beige. I wanted a pale buttery color, but I compromised with a lean towards beige.
Here are some work in progress pictures.
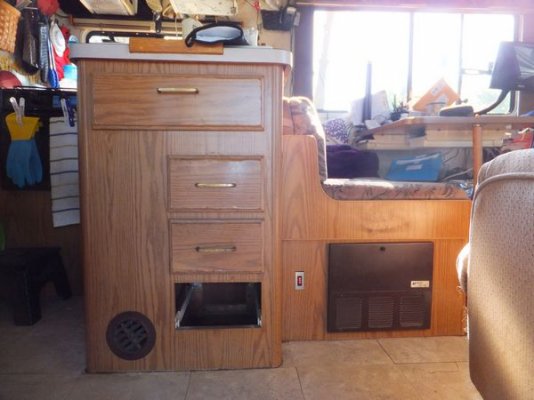
The first is BEFORE, a view from the entry door with the kitchen counter and drawers straight ahead, the kitchen to the left and the dining/desk booth area to the right.
We had already snatched the bottom drawer out for a test run. Then we decided to do all 3 drawer faces. The 4th one at the top will be done later.
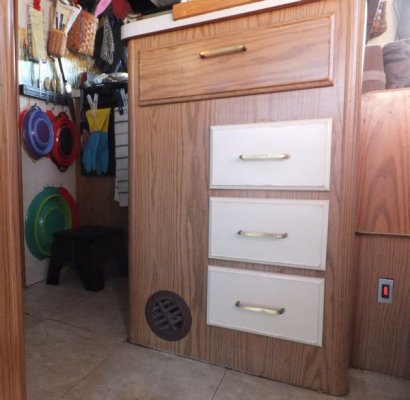
AFTER, we have our test look finished. Those are the original brass pulls, we kept them. They cost a fortune. We tried to clean them up some what to look nicer. They've had 23 years of grimy handling.
I love the new look, while it's not as buttery as I had hoped, they do seem to pop and give the rig a new look.
On the left is the lower side of my infamous galley wall that hasn't come tumbling down yet.
What's hanging on the lower hooks are some of my beloved and well used collapsible bowls and colander.
The purple bowl is a "Squish" 1.5 quart and the green one is a 5 quart. Squish makes a 3 quart which I do not own (yet!).
I prefer Squish because it comes in fun colors, there is a hole for hanging, they are oval, they have a spout. I use elastic bowl covers if I store something in them. Mostly I use them for mixing bowls then decant the final recipe into a smaller bowl with a screw on lid.
The colander is red with stainless steel and silicone. It is awesome. I use it almost daily washing produce or draining things like beans or pasta.
Gotta run now, more sanding and painting to do.
Life's a mess!
So what do you think?
Work in Progress
My whole life is a work in progress. I am living in my forever home, an old little Class C that is 28 by 7 feet. No slide outs or pop outs.
It's tiny home living!
Since I have no car, I spend an inordinate amount of time at home. One would think this would be a fabulous money saving idea.
Mostly it is!
But I get tired of the decor and I am often seeking inexpensive solutions to change it up to something soothing and comfy.
My motorhome like many came with a lot of real and fake wood. Too much wood!
I wanted to paint the interior cabinets. However the work to do that and the resulting cost is just way out of line with my skills and budget.
Lately I have a friend visiting me and we have loads in common. Mostly that we are both eccentric and beat to a very different drum. After that we are vastly different.
Think outside the box!
We found cabinet faces in the dumpster that were stark white and carried them back to my rig. None of them fit, but it gave me ideas. What if just the cabinet faces were painted off white buttery?
We returned the found cabinet faces since we could not use them. They had newer brass pulls but the screw holes were radically different so that was a no-go salvage.
My friend pointed out the path f least resistance would be to remove them, and spray paint them outside then put them back up.
So we did a few drawers as a test run.
The spray paint color available was either full on yellow or beige. I wanted a pale buttery color, but I compromised with a lean towards beige.
Here are some work in progress pictures.
The first is BEFORE, a view from the entry door with the kitchen counter and drawers straight ahead, the kitchen to the left and the dining/desk booth area to the right.
We had already snatched the bottom drawer out for a test run. Then we decided to do all 3 drawer faces. The 4th one at the top will be done later.
AFTER, we have our test look finished. Those are the original brass pulls, we kept them. They cost a fortune. We tried to clean them up some what to look nicer. They've had 23 years of grimy handling.
I love the new look, while it's not as buttery as I had hoped, they do seem to pop and give the rig a new look.
On the left is the lower side of my infamous galley wall that hasn't come tumbling down yet.
What's hanging on the lower hooks are some of my beloved and well used collapsible bowls and colander.
The purple bowl is a "Squish" 1.5 quart and the green one is a 5 quart. Squish makes a 3 quart which I do not own (yet!).
I prefer Squish because it comes in fun colors, there is a hole for hanging, they are oval, they have a spout. I use elastic bowl covers if I store something in them. Mostly I use them for mixing bowls then decant the final recipe into a smaller bowl with a screw on lid.
The colander is red with stainless steel and silicone. It is awesome. I use it almost daily washing produce or draining things like beans or pasta.
Gotta run now, more sanding and painting to do.
Life's a mess!
So what do you think?
")