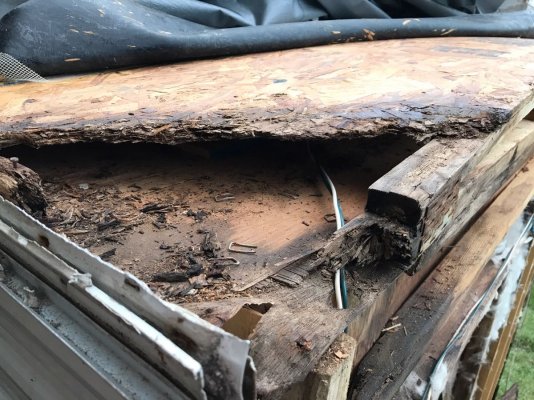
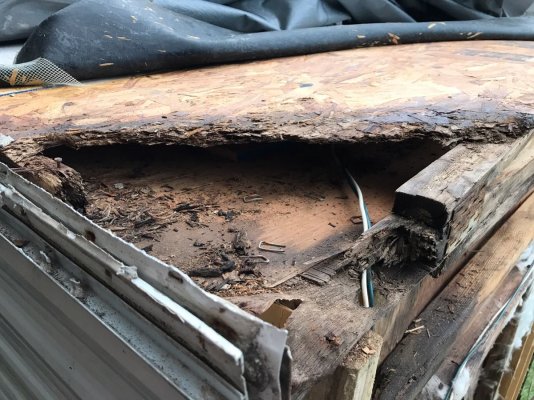
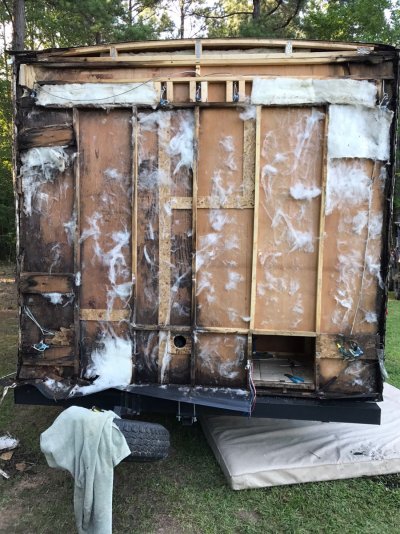
tip: make sure you check/re-seal the awning rails on both top sides !. make sure you check the awning lag bolts !. these area's will lead to water run off to each end of your camper, and you will have water damage. you can just re-seal these with no sagging sealant ?, or, pull the awning down, and replace the putty tape under them ?, BE WARNED !!!, that awning is a two or three person job to put back on your camper !! ( been there..done that..lol ). I had a stupid awning install on my camper, and who ever installed the awning lag bolts ?, ran the lag bolts right across the drip rail !!..very dumb !..lol. needless to say, I had to drop the new awning rails I bought about 1 inch, so I could raise the awning top brackets up enough to clear the drip rail, this way, no water would run down to either end, and run straight in through the lag bolts, so far, with all this heavy rain I have had here lately..NO LEAKS SO FAR !. I also noticed on a pic ^^^ from your first post, and seen where your clearance lights were before you removed the back siding ?, and from looking at your back end now, I see a lot of water damage right where some of the lights were ?. make sure to seal your lights up good with some non-sagging sealant as well
")
. too bad your so far away ?..I got caught up around here, if ya was a lot closer, I would lend you some help
. too bad no one is closer from here, and willing to give ya a hand. I deff would if ya was closer
I know how your feeling about all this..like I said..i too..was in the same boat as you !!, not once...but twice I had to repair my roof !. I had to gut the whole front inside of my camper to repair it, as well as rebuild all but one roof truss !, I know what your going through..trust me..i really do !!!. it is not the end of the world, yes..it sucks..i know it does !..lol. but..this can be fixed !!!, if I can do it ?, then surely you can too !. and I know dang well, there are others on here, that was in the same boat as you, me were in, or are in ?. if they haven't been were you are now ?..they will be !..lol. hang in there
.
Yes,yes and yes, there are two types of campers(at least in my price range) one that is leaking and one that will leak. One good thing is I'm learning a lot, I just wish it was not on the job training ?
 RenderedContent-740CC968-1E1A-4678-B186-7B4141BB0815.JPG225.4 KB · Views: 98
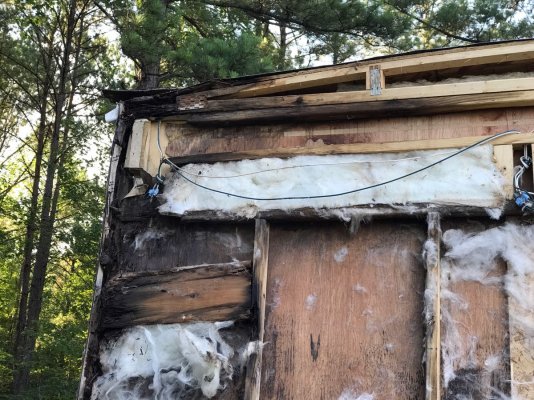 RenderedContent-74C263F0-D737-4BC3-8C9F-EB693C9A95EE.JPG254.7 KB · Views: 95
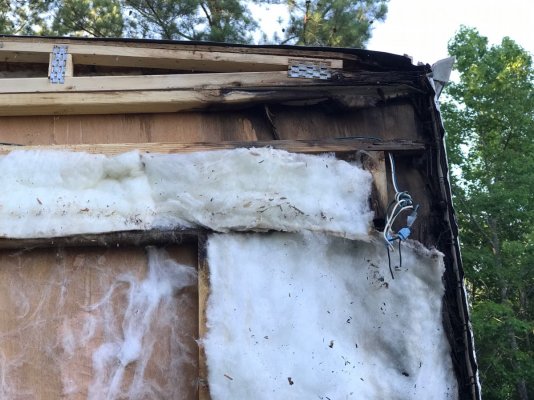 RenderedContent-C0224251-355E-44D7-8C53-B41F4C482357.JPG170.4 KB · Views: 78
 RenderedContent-93535E4A-B54E-4765-BDFC-664DD61E3DFF.JPG290.8 KB · Views: 79
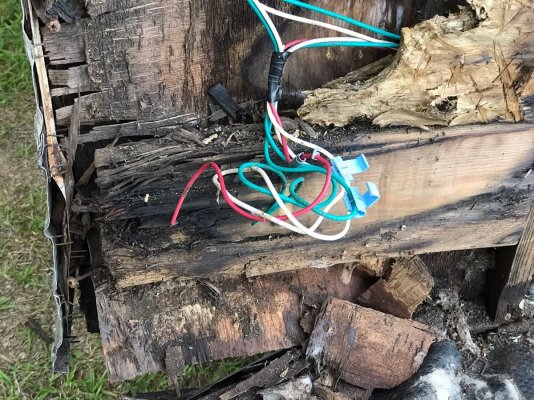 RenderedContent-93535E4A-B54E-4765-BDFC-664DD61E3DFF.JPG290.8 KB · Views: 79
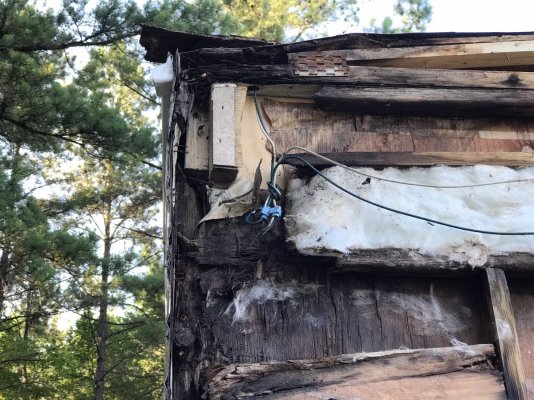 RenderedContent-E6D5604E-773C-4CD0-8FD5-C29097592566.JPG228.2 KB · Views: 79