LED Lights

The friendliest place on the web for anyone with an RV or an interest in RVing!
If you have answers, please help by responding to the unanswered posts.

grashley

Well-known member
Joined
May 7, 2015
Posts
6,610
Location
Western Kentucky
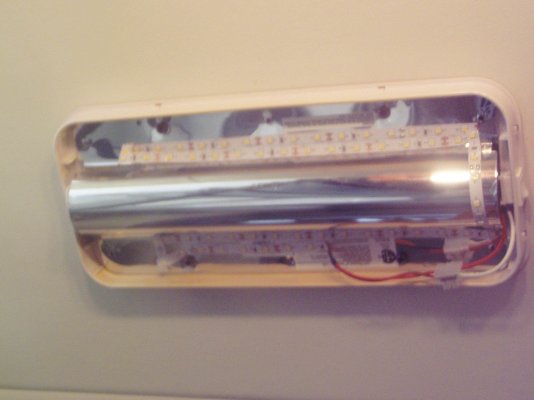
My bathroom overhead light has two F8T5 fluorescent tubes.  One is burned out.

Do you suggest:

1.  Spend $6 for a replacement fluorescent tube.
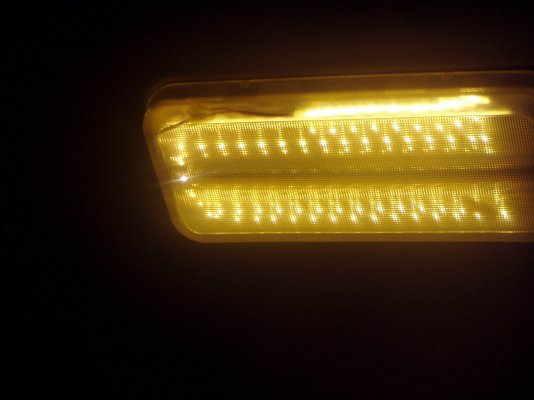
2.  Spend $18 for LED replacement tube / light. 
3.  Spend $36 to replace both tubes, but keep the fixture.  This keeps a balanced light output from each light.
4.  Spend $54 and replace the fixture with a 3 tube LED fixture.  It has individual light switches, but it would be on the ceiling.

For 2 or 3, I note the new LED has a cord attached, so it is not quite a direct twist the pins in replacement.  What wiring is needed?
I assume for #4, I simply replace the fixture and attach 12V feed wires.
 
Replacihg just one tube may not work, many fixtures need both to work.. What I'd do is spend about 10 bucks and an hour's labor.. I get 5 Meter long LED strips from Amazon, they are not water resistant and have peal and stick backing. I cut 'em in to "Fixture long" lengths, doing a bit of a fancy cut so I cut always at the solder pads and cut so one end has only positive pads and one negative.

Then I soulder on bus lines and test. clear any shorts, and hook 'em back up.

NOTE: some of this is "Skills needed" work, and I do have the training. but I like the result.

Did all three of my main room lights. the over the door light I did differently actuall not as happy with how that turned out, may re-do it later.. have more strips on hand but out of fixtures to modify.
 
I replaced all the lights in my 5er with leds i got off ebay from a guy with good reviews in total i spent about $100 on bulbs now all my interior are led im working on the outside this year

My truck is 100 % led and i just added 5 high intensity led light bars from


https://www.rigidindustries.com/


They are the best
 
Use these and you will not have to do any soldering,  Use heavy duty double sticky back tape to attach them.  $15 and you can do 5 light fixtures.

https://www.amazon.com/gp/product/B00FMJ3NJE/ref=oh_aui_detailpage_o08_s00?ie=UTF8&psc=1

Also there is a similar thread about this already running:

http://www.rvforum.net/SMF_forum/index.php/topic,111952.msg1011115.html#msg1011115
 
50 cm (1/2 meter) looks interesting.... Thanks.. NOTE. The strips I use. another technician here does origami with 'em. (Folds them so they zig zag) no soldering that way either. I do not fold.
 
Pictures I posted on the other thread:

http://www.rvforum.net/SMF_forum/index.php/topic,111952.msg1011309.html#msg1011309
 
When I did mine instead of just two strips.. I removed the center bit and the ballast, Pounded a few things flat, And then put strips side by side all the way across the face of the now smooth plate.

Much more light. alas the photo did not take when I tried it.
 
I also removed all of the lights bits under the cover.  I retained the covers to hide the wiring and wire nuts, just looked liked a cleaner install.

P.S.  My photo trick is to upload them to Facebook and then copy and resave them in a smaller version to post here.  I am sure there is software that will do the same thing I just don't feel like dealing with it.
 
It is not reinstalled yet, but I had about 3 ? ft of 2835 LED strip lights left over from another project. I gutted the fixture.  I put the LED strip on the reflector of the old fixture.  The folding / origami trick worked very well.  When reinstalled and light off, it will look no different than before.

I use an Apple computer, and Resize Lite is a free, easy to use program to "shrink" my pictures so I can post them here.
 
Pics at last!!  I used some "left over" 2835 LED strip lights.  I gutted all wiring from the old florescent fixture and wired the LED strip light directly to the switched 12V ceiling wires feeding the old fixture.  The origami trick worked great to eliminate all wiring except to power.  One pic is with lights off to show the strips.  Other pic is with diffuser cover in place and light on.
 

Attachments

  • P2250391.jpg
    P2250391.jpg
    194.8 KB · Views: 20
  • P2250395.jpg
    P2250395.jpg
    181.6 KB · Views: 16
The LED strips are straight.  To connect parallel strips, either cut and solder or use pre wired connectors or get creative.

To make my parallel strips, I find the free space between LED, then fold under at a 45 deg angle AWAY from the intended direction, then a 90 deg fold over the top of the strip.  I now have a strip with a 90 deg turn and no LED on the bottom.  Repeat this procedure and the strips are parallel.
 

Attachments

  • Photo on 2-26-18 at 7.39 PM.jpg
    Photo on 2-26-18 at 7.39 PM.jpg
    198.8 KB · Views: 12
  • Photo on 2-26-18 at 7.40 PM.jpg
    Photo on 2-26-18 at 7.40 PM.jpg
    198.5 KB · Views: 13
  • Photo on 2-26-18 at 7.40 PM #2.jpg
    Photo on 2-26-18 at 7.40 PM #2.jpg
    202.1 KB · Views: 14
Back
Top Bottom