85IrocZ-28
New member
I have been Jeeping for years, and love to spend time camping. We recently had a daughter, and I figured a trailer would be the way to keep camping a reality for our family. I picked up a 1999 starcraft single axle hybrid trailer that had been damaged due to a tire blow out. Fixing it has been a fun project and we have one great camping trip under our belts.
Knowing where we go, I knew the trailer needed more height. Due to locations of the grey tank lines, I needed to lift at least 5 inches in order to keep the plumbing lines connected in one location for draining. I picked up some 2x6 steel 3/16 wall tube. I figured 1/4 inch was overkill, and 1/8 wall didn't seem quite strong enough to carry the weight.
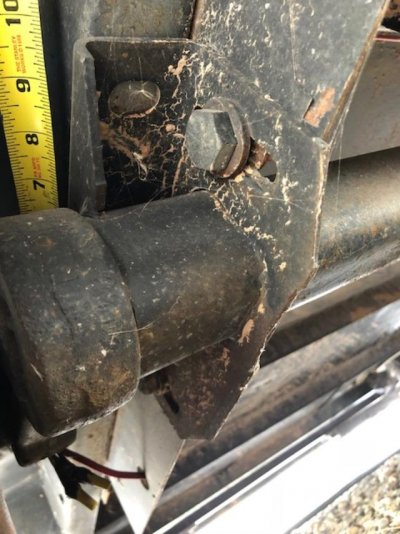
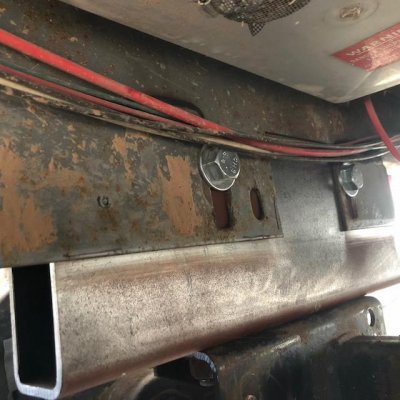
The Starcraft Travelstar 17CK came with a torsion axle, easy enough to lift. You can see that the stock axle rests on the frame, and bolts only to an inboard side flange.
https://imgur.com/H8s6wAo (see "factory install image")
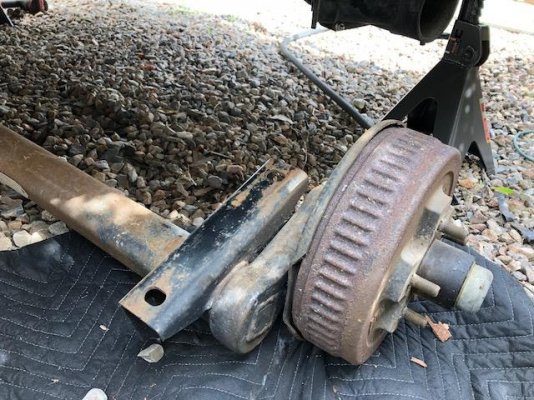
I dropped the axle after making several measurements. I also dropped a plumb bob and marked the fenders as the line crossed the center of the hub. This was to ensure I could line the axle back up exactly as it was. The lining up of the axles would be even of greater importance with dual axle trailers.
https://imgur.com/cRlzKpy (see "removed axle")
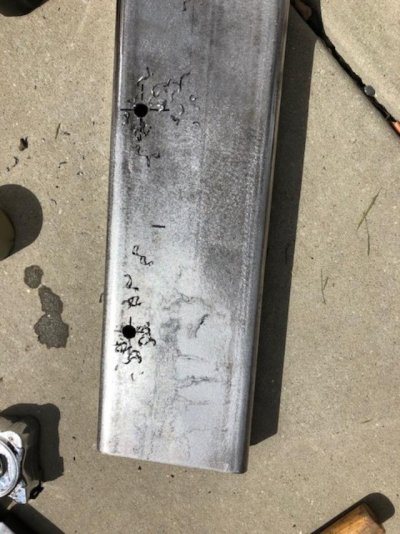
I drilled the tube. The holes on the bottom are line up with the side holes drilled for the side flange. I left the 2x6 longer than the axle pad itself in order to disburse the load a bit further over the 2x4 steel of the trailer frame. I drilled in a series of holes with increasingly larger bits. I was out of cutting oil, so I filled the bottom of a plastic cup with WD40 and kept the bits cool by continually dipping them.
https://imgur.com/y55l9Mq (see "initial drilling)
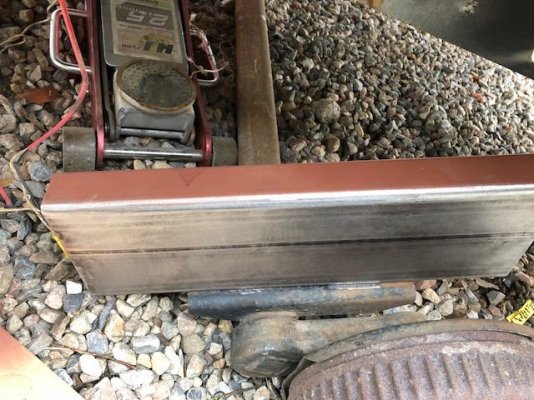
You can see the holes lined up. I drilled the holes fairly high on the sides to get as close to the trailer frame as possible when mounting the flange.
https://imgur.com/Up3B7ne (see"all drilled")
I re-used the hardware that bolted the axle to the side flanges, and bought new hardware for the remaining as the factory install did not bolt upwards into the frame of the trailer. On both the axle and the flange, it wasn't easy to get to the hardware on the inside of the flange. It took a few tries. I used wrenches and screw drivers to pin the hardware in place while I tightened the hardware from the outside.
https://imgur.com/x5EMSEt (see "mounted to axle")
The bottom bolts were mounted and drilled slightly offset. The holes on the axle mounting pad are centered, but the axle mounting pad is wider than the 2x6 so they rest to the inner side of the landing pad.
https://imgur.com/TldReYO (see "axle rear view")
The stock flanges were stitch welded fairly strong around the inner and upper side of the frame. Before mounting the axle, I stitch welded a few spots between the flange and the trailer frame to provide additional lateral support from the flanges. I left the hardware a bit loose until the axle was raised into place and everything was measured and lined up properly. The hardware was all tightened down before and welding took place. With just the hardware tightened, everything felt very solid.
https://imgur.com/8VJhX0i (see "stock flange")
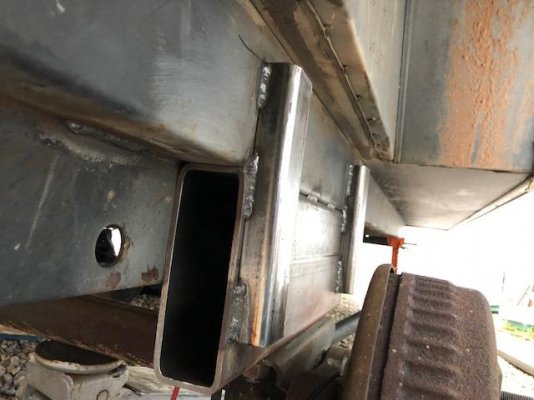
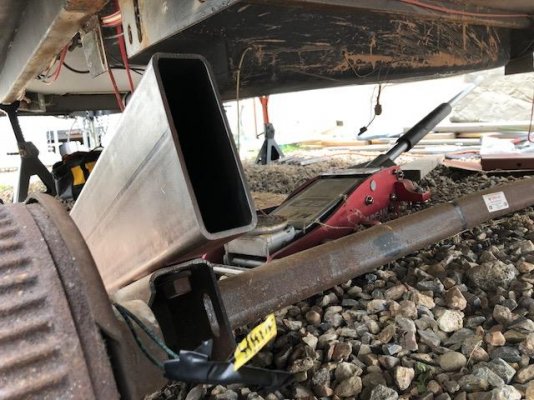
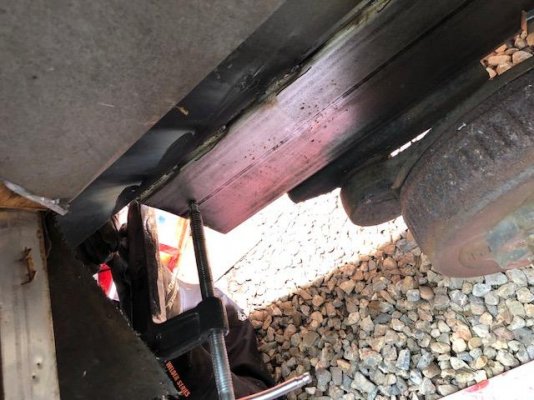
I used a jack to raise the axle back up into position. The trailer was supported with four 6-ton jacks, one at each corner during this project. I bolted the new tube to the inner flange, high and towards the trailer frame for good support.
https://imgur.com/NoOLoee(see "bolted high")
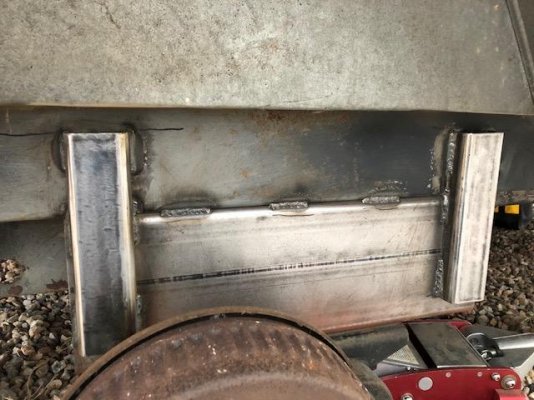
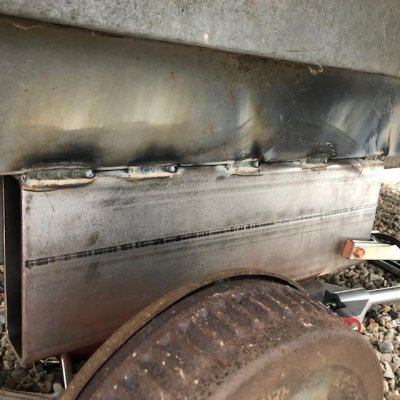
I stitch welded the spacer lift to the frame
https://imgur.com/pwCjtGo (see "initial stitches")
I then stitch welded the rear flange to the lift spacer.
https://imgur.com/Z37dmqK (see "rear stitches")
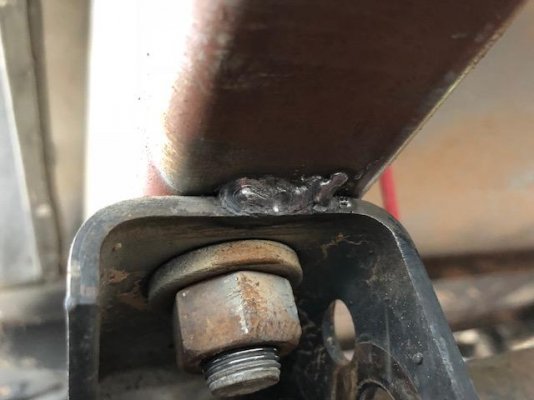
When this trailer was built in the factory, I believe the frame rails were constructed about 1/8 of an inch too far apart. The "driver side" if sitting in the tow vehicle, was slightly bent inward. The axle took a bit of prying to get it down when I removed it because it was pinched in place. I spaced the blocks on my axle to match the frame, and then used a c-clamp to move the flange back outboard and weld it in place.
https://imgur.com/MJ6Eo2b (see "c clamp flange")
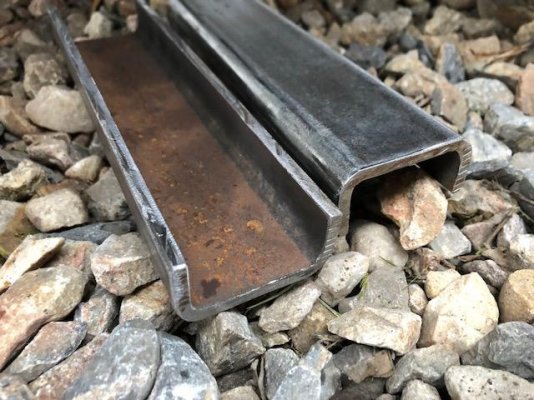
I had some left over 2x6. I cut the edges off of both sides to make some c channel. Although the stock flanges provide some lateral support, after lifting this high, I wanted to make it more ridged to ensure there wasn't a failure of the lift block attachment.
https://imgur.com/Equ9S0X (see "c channel")
Knowing where we go, I knew the trailer needed more height. Due to locations of the grey tank lines, I needed to lift at least 5 inches in order to keep the plumbing lines connected in one location for draining. I picked up some 2x6 steel 3/16 wall tube. I figured 1/4 inch was overkill, and 1/8 wall didn't seem quite strong enough to carry the weight.
The Starcraft Travelstar 17CK came with a torsion axle, easy enough to lift. You can see that the stock axle rests on the frame, and bolts only to an inboard side flange.
https://imgur.com/H8s6wAo (see "factory install image")
I dropped the axle after making several measurements. I also dropped a plumb bob and marked the fenders as the line crossed the center of the hub. This was to ensure I could line the axle back up exactly as it was. The lining up of the axles would be even of greater importance with dual axle trailers.
https://imgur.com/cRlzKpy (see "removed axle")
I drilled the tube. The holes on the bottom are line up with the side holes drilled for the side flange. I left the 2x6 longer than the axle pad itself in order to disburse the load a bit further over the 2x4 steel of the trailer frame. I drilled in a series of holes with increasingly larger bits. I was out of cutting oil, so I filled the bottom of a plastic cup with WD40 and kept the bits cool by continually dipping them.
https://imgur.com/y55l9Mq (see "initial drilling)
You can see the holes lined up. I drilled the holes fairly high on the sides to get as close to the trailer frame as possible when mounting the flange.
https://imgur.com/Up3B7ne (see"all drilled")
I re-used the hardware that bolted the axle to the side flanges, and bought new hardware for the remaining as the factory install did not bolt upwards into the frame of the trailer. On both the axle and the flange, it wasn't easy to get to the hardware on the inside of the flange. It took a few tries. I used wrenches and screw drivers to pin the hardware in place while I tightened the hardware from the outside.
https://imgur.com/x5EMSEt (see "mounted to axle")
The bottom bolts were mounted and drilled slightly offset. The holes on the axle mounting pad are centered, but the axle mounting pad is wider than the 2x6 so they rest to the inner side of the landing pad.
https://imgur.com/TldReYO (see "axle rear view")
The stock flanges were stitch welded fairly strong around the inner and upper side of the frame. Before mounting the axle, I stitch welded a few spots between the flange and the trailer frame to provide additional lateral support from the flanges. I left the hardware a bit loose until the axle was raised into place and everything was measured and lined up properly. The hardware was all tightened down before and welding took place. With just the hardware tightened, everything felt very solid.
https://imgur.com/8VJhX0i (see "stock flange")
I used a jack to raise the axle back up into position. The trailer was supported with four 6-ton jacks, one at each corner during this project. I bolted the new tube to the inner flange, high and towards the trailer frame for good support.
https://imgur.com/NoOLoee(see "bolted high")
I stitch welded the spacer lift to the frame
https://imgur.com/pwCjtGo (see "initial stitches")
I then stitch welded the rear flange to the lift spacer.
https://imgur.com/Z37dmqK (see "rear stitches")
When this trailer was built in the factory, I believe the frame rails were constructed about 1/8 of an inch too far apart. The "driver side" if sitting in the tow vehicle, was slightly bent inward. The axle took a bit of prying to get it down when I removed it because it was pinched in place. I spaced the blocks on my axle to match the frame, and then used a c-clamp to move the flange back outboard and weld it in place.
https://imgur.com/MJ6Eo2b (see "c clamp flange")
I had some left over 2x6. I cut the edges off of both sides to make some c channel. Although the stock flanges provide some lateral support, after lifting this high, I wanted to make it more ridged to ensure there wasn't a failure of the lift block attachment.
https://imgur.com/Equ9S0X (see "c channel")
Attachments
-
 factory install.jpg81.7 KB · Views: 39
 -
 removed axle.jpg83.2 KB · Views: 30
 -
 initial drilling.jpg92 KB · Views: 23
 -
 all drilled.jpg84.9 KB · Views: 23
 -
 mounted to axle.jpg72.2 KB · Views: 21
 -
 axle rear view.jpg65.7 KB · Views: 25
 -
 stock flange.jpg73.7 KB · Views: 21
 -
 bolted high.jpg57.8 KB · Views: 25
 -
 Initial stitches.jpg59.8 KB · Views: 26
 -
 rear stitches.jpg37.6 KB · Views: 23
 -
 c clamp flange.jpg56.3 KB · Views: 26
 -
 c channel.jpg64.4 KB · Views: 32