djw2112
Well-known member
I did finally get some foil tape and decided to refoil all the AC vents. I am still shocked every time i look at a factory job as to how they try to save a penny here and a penny there all at the cost of performance, while causing a consumer issue. Here is why their foil job failed and i am sure it is like this in other MFG as well.
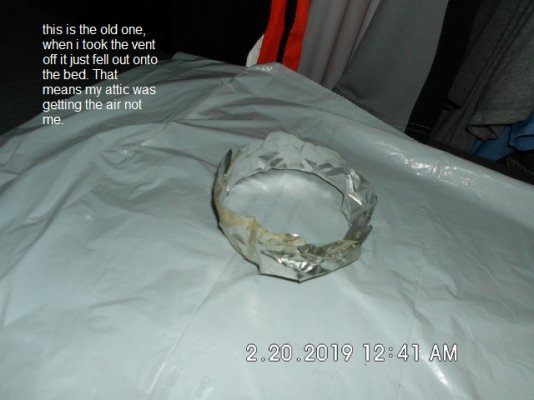
1. The foil is super duper thin, you could almost break it by blowing on it, unlike the stuff at lowes and other places which is thick and sturdy.
2. They used 7 individual pieces to make up the circle instead of just one piece, which means you have 14 seams that could fail.
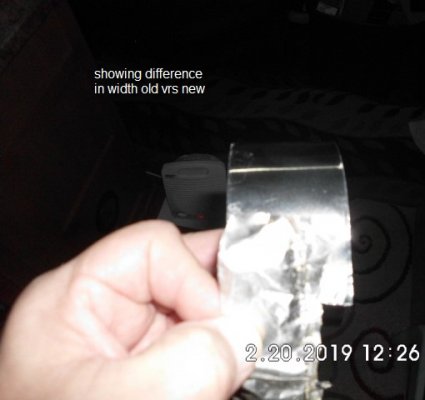
3. Their special foil is only as wide as the gap and no more than that. So that means if something does not stick right or the person applying the foil does not apply it perfectly, it will fail to seal the vent.
So i removed all the foil from the vents and then replaced it. It is a very easy job to do, anyone can do it and there is no easier way to increase the amount of air you get in your RV. Cold air is expensive to create and every little bit helps, so for just a few bucks and 35 minutes of your time you could increase your cold air flow into your RV.
The hardest part of this is getting the white paper backing off the tape, sometimes its easy, sometimes it can be a booger, especially with no fingernails.
1. be sure if this is over a bed or something you dont want to get dirty then use a trash bag or something to cover it up first, you will get small wood debris and dust when you remove the vent. Remove the cover, most take 4 screws (use a square head bit, although sometimes a philips will work).
2. remove the old foil
3. keep the white backing on for now. And make a circle around the hole using the foil tape to measure how much tape you need, its better to have too much then not enough so measure long not short.
4. only remove a small portion of the backing at one time, if you remove all of it, it will curl up on you and the piece is wasted.
5. press the new tape covering the gap and try to start it straight, if you start it straight then it will stay straight all the way around.
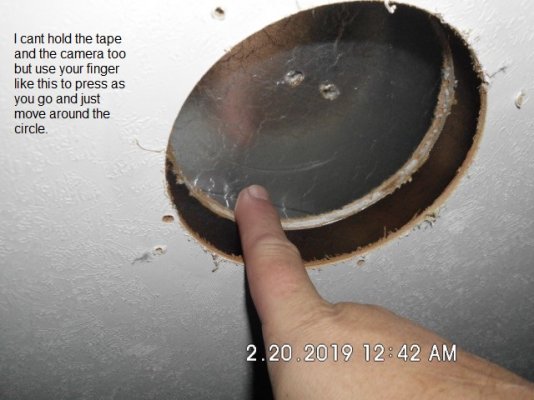
6. take your time this is not a race, make sure it is secure to the gap before you peel more backing off, use your finger as i show in the pic to push the tape against the opening. see pic If it is not stuck on there you will pull it and this stuff does not stretch so you will end up with a side that is too short, take your time and stick it good then move on around the circle.
7. if you have overlap that is ok just use it.
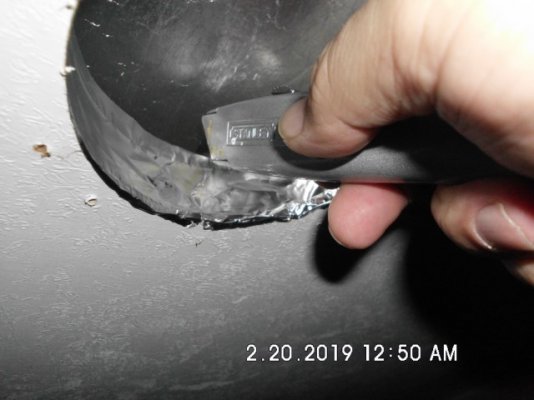
8. after you complete the circle you may have some foil sticking above or below the circle, since this tape is wider. Just use a knife as i did and cut little slots in the extra foil about every inch or so and then fold it over and make sure it is stuck. If the extra is on the bottom just make sure it does not show after you put the vent on, if so then just trim it off.
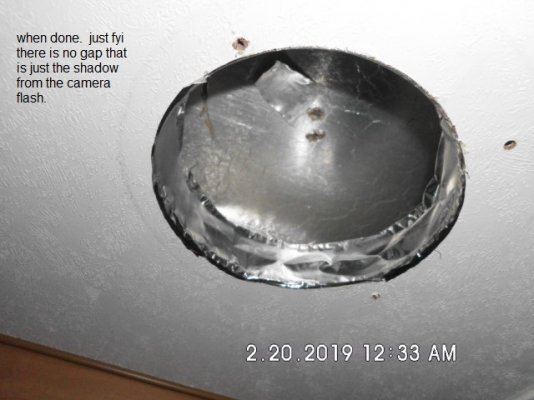
9. Then run your finger around the hole once more to be sure it is secure and all sealed.
10 Replace your vent and done.
here are some pics
1. The foil is super duper thin, you could almost break it by blowing on it, unlike the stuff at lowes and other places which is thick and sturdy.
2. They used 7 individual pieces to make up the circle instead of just one piece, which means you have 14 seams that could fail.
3. Their special foil is only as wide as the gap and no more than that. So that means if something does not stick right or the person applying the foil does not apply it perfectly, it will fail to seal the vent.
So i removed all the foil from the vents and then replaced it. It is a very easy job to do, anyone can do it and there is no easier way to increase the amount of air you get in your RV. Cold air is expensive to create and every little bit helps, so for just a few bucks and 35 minutes of your time you could increase your cold air flow into your RV.
The hardest part of this is getting the white paper backing off the tape, sometimes its easy, sometimes it can be a booger, especially with no fingernails.
1. be sure if this is over a bed or something you dont want to get dirty then use a trash bag or something to cover it up first, you will get small wood debris and dust when you remove the vent. Remove the cover, most take 4 screws (use a square head bit, although sometimes a philips will work).
2. remove the old foil
3. keep the white backing on for now. And make a circle around the hole using the foil tape to measure how much tape you need, its better to have too much then not enough so measure long not short.
4. only remove a small portion of the backing at one time, if you remove all of it, it will curl up on you and the piece is wasted.
5. press the new tape covering the gap and try to start it straight, if you start it straight then it will stay straight all the way around.
6. take your time this is not a race, make sure it is secure to the gap before you peel more backing off, use your finger as i show in the pic to push the tape against the opening. see pic If it is not stuck on there you will pull it and this stuff does not stretch so you will end up with a side that is too short, take your time and stick it good then move on around the circle.
7. if you have overlap that is ok just use it.
8. after you complete the circle you may have some foil sticking above or below the circle, since this tape is wider. Just use a knife as i did and cut little slots in the extra foil about every inch or so and then fold it over and make sure it is stuck. If the extra is on the bottom just make sure it does not show after you put the vent on, if so then just trim it off.
9. Then run your finger around the hole once more to be sure it is secure and all sealed.
10 Replace your vent and done.
here are some pics