Securing panels to roof - screws won?t bite down

The friendliest place on the web for anyone with an RV or an interest in RVing!
If you have answers, please help by responding to the unanswered posts.

ryancousins

Member
Joined
Apr 19, 2019
Posts
21
I used the self-tapping screws that came w the brackets and they don?t really grab hold of much. They?re not super loose either but I?m wondering if going down the highway could cause air to whip in between the inch or so gap between the roof and bottom of the panel and eventually rip the panels right off? Should I get some toggle bolts?
 
Hard to say, since "grab" is really subjective.  RV construction varies, but you are probably screwing into 1/4" luan backer. Panels seem to stay solid in place with just the screws (caulked, of course), but it's hard for someone else t judge without actually feeling the "grab".
 
I don't think you should be using self tapping screws. I think that it actually removes some of the would material. It's like pre-drilling the hole.  I would use just regular wood screws. IMHO. I could be wrong.
 
I used two sheet metal screws per corner bracket. Used my drill/driver to run the screws most of the way down then finished by hand so I could feel as they snugged. I got good hold on each one.
The brackets also had that high-strength double-sided tape. 10,000 miles later none are showing signs of failure.

I?ll be removing them soon to install the motorized remote controlled tilting mounts from https://www.solarvector.net/

They mount with a single bolt at each corner. I?ll use Stainless Steel 1/4-20 Jack Nuts (from eBay) pictured below.
 

Attachments

  • 94A04610-CEE4-4B50-80B4-B4C7C2DAB4DB.jpeg
    94A04610-CEE4-4B50-80B4-B4C7C2DAB4DB.jpeg
    16.4 KB · Views: 25
It might also help if you could tell us what kind of rig you have. motorhomes tend to have fiberglass roofs, while fifth wheel and travel trailers may have rubber and plywood. the answers you have received thus far seem to presuppose a motorhome with a fiberglass roof. Is that correct?
 
It?s a 2007 Forest River Surveyor 160t. It has the Rubber type roof. I ended up covering all the brackets with Dicor lap sealant and have taken it out a few times for the weekend and I?m pretty confident the panels aren?t going anywhere, despite the screws not biting much into anything. I figured that underneath the rubber material there might be some 1/4? luan or plywood at most so I figured there wouldn?t be much to bite into anyhow.
 
If what you have works, then that's probably all that needs to be done.


When I mounted my panels, I overdid it. 4 attachment points would have been plenty, but I used 6. I used 2 screws per attachment point, and I used number 12 wood screws directly into the roof with no pilot hole, specifically because mine is also a rubber roof with 3/8 plywood underneath it. They are very tight. :)  I put butyl tape underneath the attachment points, and ran the screws through all of that. There was no need for me to dicor the holes with the butyl underneath.
 
My answer assumed a "rubber" material over plywood.

The jack nuts will work with this or fiberglass.

Sorry Rene, but I'd never use conventional wood screws on a thin plywood or fiberglass roof. Wood screws would have to be perfectly sized to not run the unthreaded shank into the wood. I think pointed sheet-metal screws will have much better holding power and would be my choice.

I used a power driver to run the screws within a 1/4" of seated, then finished with a (gulp) hand screw driver. Stop tightening 1/3 of a turn before it strips the threads. As others have said, it's an acquired feel!

Tom
 
I used the screws that came with the bracket kit. I can?t remember if they were wood screws or a self-tapping sheet metal style screw.
 
Tom:


Yeah, I did the same thing. Used the 18 volt drill to drive the screws until they touched the aluminum mounting bracket, then tightened the rest up by hand until the butyl began to squeeze out. Just too easy to strip it with a power driver otherwise.


I too used pointed metal screws as they are threaded right up to the base of the head. Gives much better grab on thin material.
 
Heli_av8tor said:
Sorry Rene, but I'd never use conventional wood screws on a thin plywood or fiberglass roof. Wood screws would have to be perfectly sized to not run the unthreaded shank into the wood. I think pointed sheet-metal screws will have much better holding power and would be my choice.
Tom, I was thinking that the bracket would be thick enough that the un-threaded shank would end up in the bracket and the butyl tape would also add some thickness.

And they are available threaded all the way:
https://www.homedepot.com/p/Simpson-Strong-Tie-8-x-1-1-4-in-Phillips-Wafer-Head-Strong-Drive-Screw-100-Box-SD8X1-25-R/206101783
 
timely thread...I'm getting ready to install my new panel over the weekend if all goes as planned.
I'm really hoping my plan will let me bypass that concern ryancousins had in the original post here.

I have the rvroof.com product on my roof, so no caulk up there.  They said they'd re-spray the panel mounts for a fee...sounded like it might be a couple hundred or so...
At first I was planning to do it so I can maintain my "leak free" and "nearly" maintenance free roof...Also it would add tremendous strength to the connection.
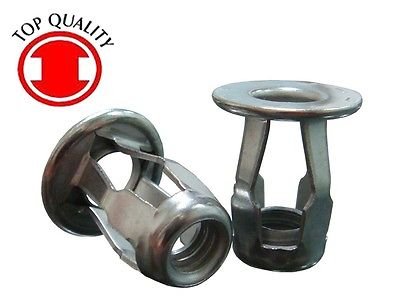
Because of that, I ordered some taller brackets from ebay, just like the ones that Renogy provided except stainless steel and taller.  I went with them because if I have rvroof.com spray them on they'd essentially be permanent...and if I ever needed to remove the panel it would be a royal problem to get at the attachment screws and nuts on the underside.  The taller brackets give more room to work.

...but scheduling it, the hassle of dropping it off and picking it up had me rethinking the need to spend that extra money.

I have some double stick eternabond and some butyl tape left over form previous projects.  Plan at the moment is to clean the roof, then stick the brackets down withe the doublestick eternabond, then screw through that.
I have the drawings from Thor, and along with my stud finder I think I have been able to locate the aluminum structural tubes.  the spacing should allow me to get one of the two screws for each bracket into that aluminum.  I'm hoping it will grab tight so I can skip the second screws into the thin luan ply.  Then I'll seal the whole thing up with dicor.... or I might put a layer of eternabond web seal over the screws, then the dicor over that just to protect the webseal.

I appreciate the posts here reminding me to do the final screw turns by hand!  Something I have always known but rarely seem to ever do!
 
>and if I ever needed to remove the panel it would be a royal problem to get at the attachment screws and nuts on the underside.  The taller brackets give more room to work.<


Which is the reason I made my own 'L' shaped brackets from aluminum angle, then attached them to the SIDES of the panels with aluminum pop rivets. If I ever need to remove a panel, I can just drill the head off the pop rivet and never disturb the bracket to roof joint.


I have a step by step in the solar section with pictures if you are interested under the heading "1230 watt solar install"


Frank
 
thanks Frank.  I'll search for that for ideas....
I've probably already seen it as I've been researching this for a while now, but I'll look for it just in case I didn't!
 
I have an idea....

I have used Gorilla glue on a number projects and this stuff is awesome.  It foams up (kind of) and pushes into cracks and crevasses.  I was thinking if you ran the screw into the roof material, then remove it and squeeze a little Gorilla glue in the hole making sure it gets down into the wood.  Then reinsert the screw and tighten, it would make the wood around the screw pretty firm/hard.  Not exactly sure what you would run into if you needed to remove the screw for some reason.  You could test that potential problem pretty easy with a scrap piece of wood.

My 2 cents........
 
Back
Top Bottom