Sportsmobile Penthouse Raised Roof

The friendliest place on the web for anyone with an RV or an interest in RVing!
If you have answers, please help by responding to the unanswered posts.
Hit The Road Jack said:
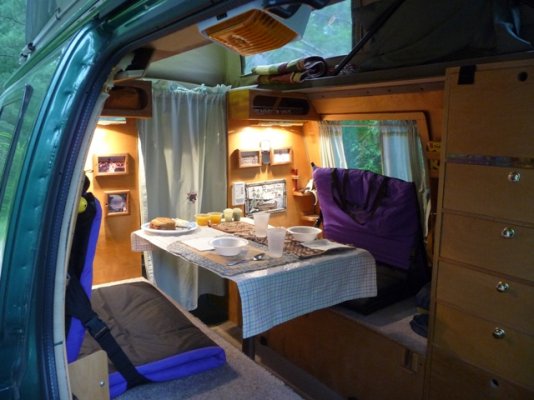
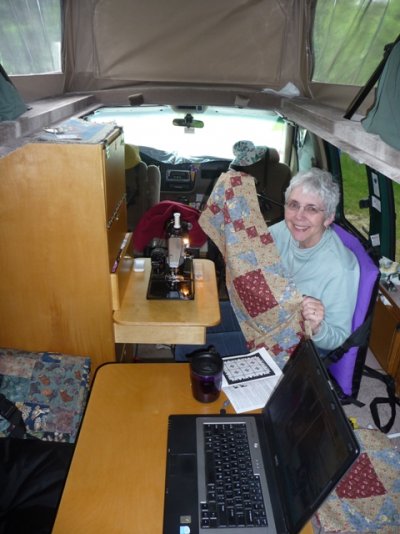
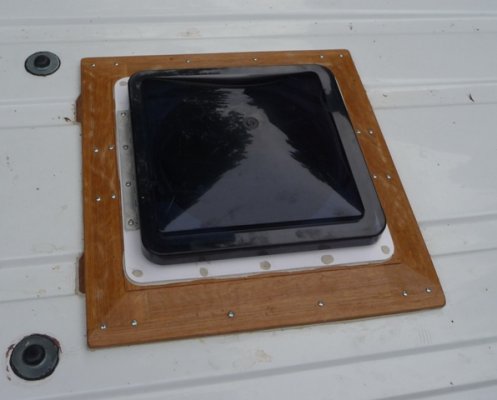
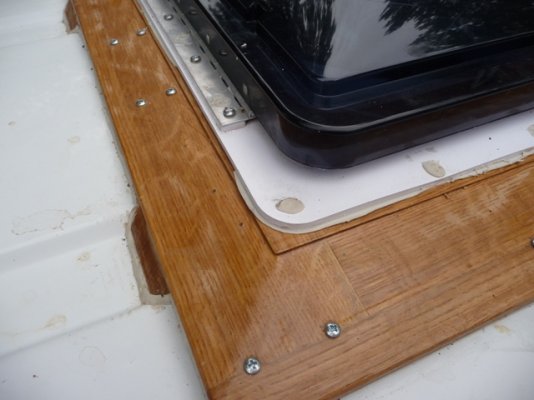
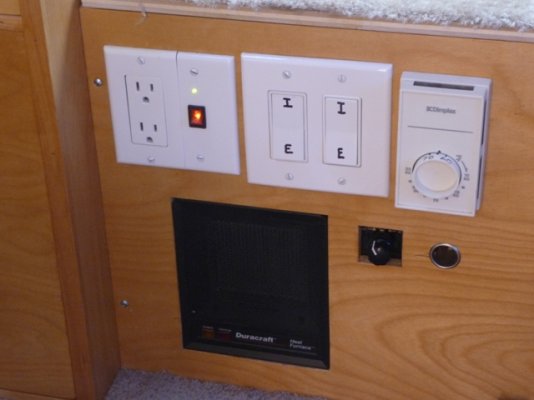
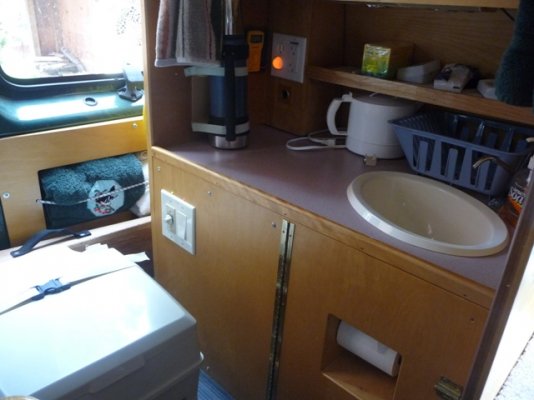
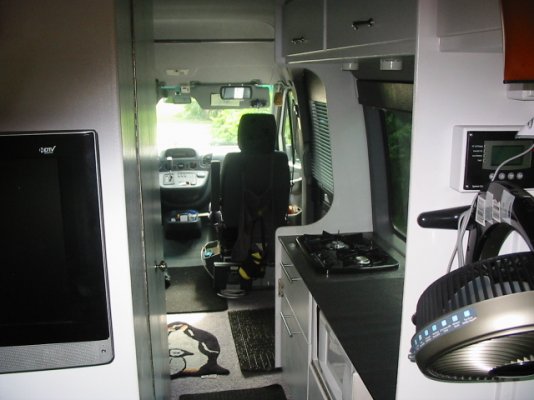
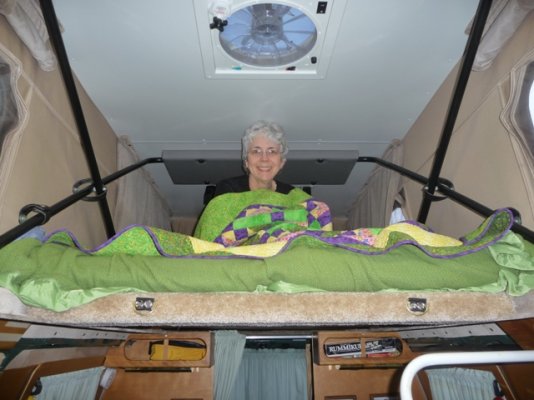
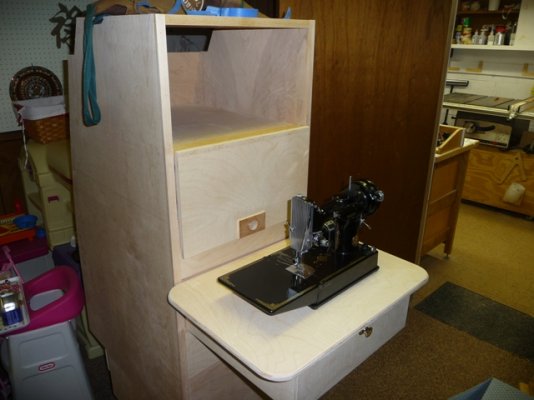
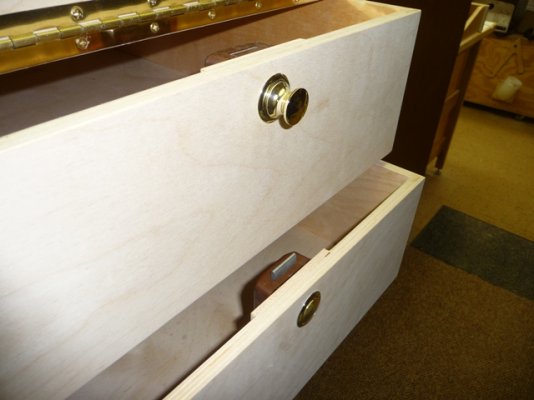
Yes I do S J Strait !

BTW, I did all the conversion on my own... :)
Very nice! You did a nice job. It will give you many years of enjoyment. You take pride in your work and it shows.
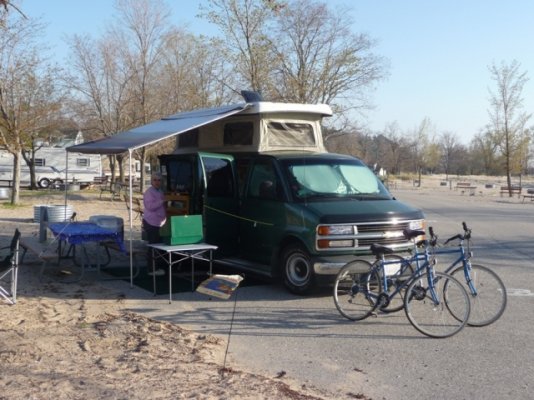
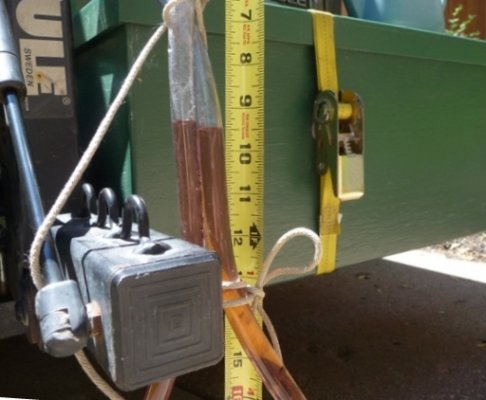
 
We just got back from a 3 day shake down trip to Pen****er, Michigan and the Charles Mears State Park.  I will post the trip later in the trip report section.


Attachments

  • 1c.JPG
    1c.JPG
    192 KB · Views: 121
  • 1ca.JPG
    1ca.JPG
    198.4 KB · Views: 109
  • 1e.JPG
    1e.JPG
    221.1 KB · Views: 122
  • 2c1.JPG
    2c1.JPG
    150.2 KB · Views: 117
  • 3b.JPG
    3b.JPG
    203.4 KB · Views: 140
Len and Jo said:
Oh yes,  I found a roof raising assist method!  The penthouse roof is spring loaded.  You have to push up from a crotched position to start raising it.  (When it is down it wants to stay down and when it is up it wants to stay up).  After it is about 1/3 of the way up and you have to hold onto the it as the spring load now wants to pop it up and hold it up.  Trying to push up while bent over is not a trivial task.  So, instead of opening doors to let air in as you raise the top.....close the camper up tight....run the van engine and turn the van blower to outside air and put it on HIGH.  Now with the van internal positive pressure the penthouse roof goes up real easy!!
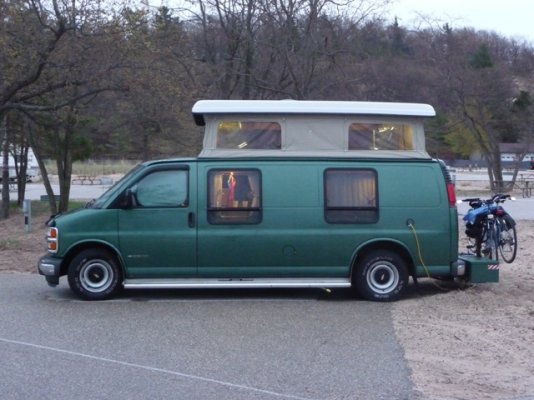
I commented on a way to ease raising the PH roof in a previous posts    Well today I did some measurements.  I know I have to much time on my hands.

I made a simple manometer out of some tubing, colored water and a measuring tape.  Then ran the manometer through the back doors and measured various blower combinations.  See picture below.

Fantastic Vent .... 1/16 inches of water.....must be designed for air volume not pressure
FV plus van blower ..... tat less than 3/16 inches of water
Van blower only.....7/32 inches of water

The PH roof is 50" x 128"  or 7552 sq. inches
7/32" of water is 0.01823 feet of water.  A column of water generates 0.5 psi per foot of water

PH Roof Lift Assist = 7552 x 0.5 x 0.01823 = 69 LBS
So if one does uses this method rather than the Sportsmobile method of just opening the doors and pushing the roof will go up easier.  FYI

And again, Yes I know I have to much time on my hands.


Attachments

  • 0 Set Up.JPG
    0 Set Up.JPG
    131.2 KB · Views: 56
  • 4 Van Blower Only.JPG
    4 Van Blower Only.JPG
    137.4 KB · Views: 40
Look Great That the same one i had on my Sportmans E150 Van. Loved it!!
 
Len and Jo said:
PH Roof Lift Assist = 7552 x 0.5 x 0.01823 = 69 LBS
So if one does uses this method rather than the Sportsmobile method of just opening the doors and pushing the roof will go up easier.  FYI

Nice numbers. 
Nice work.
Thanks for posting!
 
Some progress being made.

Right now we ONLY stand up when we REMEMBER we can ;D   Being able to stand (when we remember) means that we can have a different interior design.  We did not have floor to ceiling cabinets installed before so that we had ample room to turn around.  Now standing up that issue has gone away and we are installing a 5 drawer cabinet unit.  This unit also more than makes up for the overhead storage we lost when the penthouse top was added.

The unit carcass is made out of 1/2 inch and 3/4 inch birch plywood.  The bottom two drawers are for heavy canned goods and have 1/2 inch bottoms.  The large bottom drawer also has drawer guides installed for ease of opening and closing.

Jo has decided that she wants to take her small portable sewing machine when we travel.  So I made one drawer at the right height for her to set up to and made a small table top for the machine that will fit in "the sewing drawer".  She's happy then I'm happy.

Found the push button locking knobs at Rockler's.  In the tight space of our 'B' they will stay out of the way when the drawers are locked and only stick out when we want to get into a drawer.  They only had four in stock when I got them, hopefully I can pick up the last two I need today.

Hope everyone had a safe holiday.


Attachments

  • 32 Cabinet Frame s.JPG
    32 Cabinet Frame s.JPG
    193.8 KB · Views: 100
  • 32b Drawers s.JPG
    32b Drawers s.JPG
    204.2 KB · Views: 108
  • 32d Sewing Table s.JPG
    32d Sewing Table s.JPG
    196.2 KB · Views: 95
  • 33a Drwr Knobs-Locks s.JPG
    33a Drwr Knobs-Locks s.JPG
    180.7 KB · Views: 76
  • 34a Cabinet Van Fit s.JPG
    34a Cabinet Van Fit s.JPG
    224.8 KB · Views: 107
See Growing 'B' Experience with Food and Space that is posted in this section.  It has many photo's.

Basically one carries our oven supplies:
1. 12 inch dutch oven
2.  8 inch dutch oven
3.  charcoal box containing 3/4 of a large bag of brickets.
4.  charcoal lighter
5.  charcoal lighting can
6.  various pans for holding hot coals or other stuff

The second box:
1.  two cloth folding chairs
2.  a small cloth folding table
3. a 'large' (everything is relative in a 'B') aluminum folding table
4. bag of pie irons
5. various pieces of heavy aluminum to keep the dutch oven heat away from the folding aluminum table top.

Ground clearance has not been a problem to date.....have driven very slowly a few times when I have left gas stations.
 
Will here is my last post for this project.  The van revisions for our new penthouse top is complete.  It was a fun project.  We gave it a try for a long week end.  We went up to the Mio Michigan area.  Joanne now has the Kirtland's warbler on her birding life list.  There are only about 1000 pairs of these birds and we were lucky to see 3-4 of the males on our trip.


Attachments

  • sa Meal Table.JPG
    sa Meal Table.JPG
    175.7 KB · Views: 104
  • sb Table to Bed.JPG
    sb Table to Bed.JPG
    216.2 KB · Views: 95
  • sc Table Games.JPG
    sc Table Games.JPG
    187.1 KB · Views: 106
  • sd Work Table.JPG
    sd Work Table.JPG
    233 KB · Views: 102
  • se Sewing Table-Cabinet.JPG
    se Sewing Table-Cabinet.JPG
    216.8 KB · Views: 105
  • sf Sewing Table Progress.JPG
    sf Sewing Table Progress.JPG
    229.3 KB · Views: 95
  • sg Cabinet.JPG
    sg Cabinet.JPG
    162.8 KB · Views: 103
  • sh Cabinet.JPG
    sh Cabinet.JPG
    220.1 KB · Views: 104
I'm almost sorry to learn that you've finished, because I have enjoyed the updates and the pics.

Great job!
 
Postscript... ::)

Thought I could add some follow-up info.

1) Drip, Drip.   My wonderful Fantastic Vent installation had to be redone sooner then planned.  When I installed it I was thinking painted metal van roof not fiberglass roof.  The caulk I used "sealed" very poorly to the fiberglass.  That being said I was planning on redoing it when I first did it.  Just not so soon.  The penthouse has effectively 5 joists (strips of 5-6" wide plywood) running fore-aft and when I installed the fan I had to cut one.  So I did want to revisit the vent and sister the cut middle "joist" into the ones on either side of it.  So I made an oak frame out of 4/4 oak to tie the joists together and to really stiffen the area around the vent.  Also used my personal favorite sealer (sticky rope caulk) to seat the frame in and the fan.  The frame is a true 1" thick at the vent and tapers down to 1/2 inch at the edges.  It is also 4-5 inches wide.  When I screwed it down is setting on a bed of caulk as wide as the frame...lots of squish out.  The oak is sealed with epoxy and is yet to be painted white.

See first two pics.

2)  When I first did the van in 2000 I had a 500 watt Tripp-lite inverter wired to the house battery with 6 gage wire.  The 500 watter was toasted on our Alaska trip and I replaced it with a 1000 watt Tripp-lite but DID NOT upgrade the wiring.  With the penthouse upgrade I now have two house batteries and have upgraded the wiring going to the inverter too double 4 gage wires.  Our inverter has been (and still is) mounted out of the way in the back of a cabinet.  So any time we want to turn it on or off we have to open a door.  Out of sight out of mind.  Result being we have left if on many times while dry camping when we did not need to and wasted some precious battery amp-hours.  Following the Tripp-lite lead I stripped the controls out of the front of the inverter and now have them mounted on the face of the storage cabinet.  THIS HAS TURNED OUT TO BE REALLY CONVENIENT AND A NICE MODIFICATION.  Joanne and I both really like it.

See thrid pic

3) We liked moving the inverter switches so much that I have also done that for our battery charger.  Also added a 12 hour mechanical timer to the charger controls to control charging time (ie: In the past I have sometimes forgotten it and have left it on when parked in our drive way).

See 4th and 5th pics

4)  Now having two house batteries with 230 amp-hours of capacity my trusty charger MIGHT not be large enough to recharge the batteries in a timely manner.  Have been investigating replacement chargers.  Will not act on this until we have spent some time camping with our present configuration.  Could be O.K.  Oh yes, my present charger is the Exide 10amp two stage charger on the graph.

For those interested pic 6 has some over lays of APPROXIMATE charging curves of various chargers I have been looking at.

For thse interested pic 7 represents my latest van wiring.

Happy Trails to you
 

Attachments

  • 31h Re-installed Vent.JPG
    31h Re-installed Vent.JPG
    141.3 KB · Views: 50
  • 31i Vent Frame.JPG
    31i Vent Frame.JPG
    180.9 KB · Views: 43
  • 26eb Inverter On.JPG
    26eb Inverter On.JPG
    126.4 KB · Views: 46
  • 26fa Charger Switches.JPG
    26fa Charger Switches.JPG
    144.8 KB · Views: 52
  • 26fb Timer Running.JPG
    26fb Timer Running.JPG
    84.5 KB · Views: 40
  • ESTD BATTERY CHARGING CURVES SMALL.JPG
    ESTD BATTERY CHARGING CURVES SMALL.JPG
    140.1 KB · Views: 54
  • WIRING POST APR2009 SMALL.JPG
    WIRING POST APR2009 SMALL.JPG
    186.5 KB · Views: 44
Back
Top Bottom