baadpuppy's schoolbus conversion... unleashed

The friendliest place on the web for anyone with an RV or an interest in RVing!
If you have answers, please help by responding to the unanswered posts.
Thanks for the prompt reply Jim!

I can now see why a 5' 8" or taller person would require a higher ceiling.

BTW, I really respect the fact you care for the safety of the bird family...I'd do the same... ;)
 
No real update on the bus.

It is about halfway cleaned out now.  Still have to finish that.

I've been sidetracked by the need to help out my family with things and also with getting engaged.

My parents recently purchased an old 1979 (I think) Apache pop-up with hard sides.  We've been doing a lot of work getting it ship shape, and mom took it on the first camping trip last weekend.  She says it tows great, and is wonderful compared to tent camping.  It is very basic, with just 1 light, 1 battery, and only a sink for plumbing, and a gas stove that we need to get tested before it gets used.

I've also managed to get the old cobra malibu motorhome cranked up and moved for the first time in over a year.  The original battery is toast, as are the original house batteries (which were boiled by the converter before I bought it).

The front windows of the old motorhome are about to pop out, and the window seals on most of the other windows are shrunk and dry.  I plan to pull them all and hope to find a buyer for the windows that are still in good shape.

I have a buyer lined up for the two 13,500 btu A/C units.  Mom wants one of the skylight vents (the one with electric fan and lights inside it) installed in the pop-up if it will fit.  Dad and I will do our best to accomplish that.  That leaves 2 skylights needing a new home.

My uncle is interested in the chassis and driveline to put under an old farm truck he is restoring.  So that is good news.

On the bus side of things, I was given 6 UPS deep cycle batteries, but it turns out they're all seriously sulfated, and desulfation didn't work.  Add to those the chassis battery from the motorhome and the 2 house batteries from the motorhome, and I have 9 batteries to use for core when it comes time to build a good battery bank in the bus.

This week we'll be focusing on stripping the old motorhome down as far as we can.  That might take several weeks depending on weather, etc.  Most of the stuff that was stored in the old motorhome has been removed, so it shouldn't take too much effort.

The good news is that the admiral-to-be is fully supportive of the bus conversion plan.  The bad news is that she is on the opposite side of the country from me.    :(  I was just out in Oregon last week visiting her.  Beautiful area.  Even made it up to Walla Walla, Wa one day.  I really liked the cool weather, low humidity, and lack of mosquitos.

Anyway, not much else to say about the bus conversion.

jim
 
I have followed all of your posts, as you've moved along.  ;D

I'm trying to think of some project you could take on, in your spare time.  :D :D

I'll think of something.  ::)

Ray D  ;)
 
Tom said:
Congratulations on the engagement Jim!

Thanks Tom.

It has been a long time coming.  Still trying to figure out how we'll get her moved out here.  No matter how I look at it, it won't be cheap.

Ray D said:
I have followed all of your posts, as you've moved along.  ;D

I'm trying to think of some project you could take on, in your spare time.  :D :D

I'll think of something.  ::)

Ray D  ;)

Ray, I don't know if I have any spare time.  I spend all of my time doing research these days when I'm not busy with something else.  Thanks though!

I suspect that once my fiance is out here, there'll be even less time available to me.

jim
 
Luca1369 said:
Being someone who loves busses, I'd enjoy seeing some photos.

Steve

Hi Steve! Take a look at the "conversion" we did back in the early 80's.
1962, 32' WAYNE International w/ 550 Ci gas V-8 and a 5-spd manual.
Converted it to use as a bicycle racing team RV. Traveled all around the USA going to BMX races. Slept 12 kids on bunks with my private "quarters" over the engine at the rear. Had 100 gal water tank, blk & grey tanks, full fiberglass shower/can combo. 3 burner stove and a large 2-door fridge. Of course killer stereo and CB.
Painted it desert camo and built a 1" square tube roof rack the whole length of bus. THE STORIES!!!!!!! LOL......  :eek:
 

Attachments

  • history-2.jpg
    history-2.jpg
    14.1 KB · Views: 133
Finally, some more progress. Today was entirely a cleanup day, and I still have plenty left to do. 

Today I needed to move the 2 busses so that the grass underneath them could get cut. So, while they were out in the large parking area of the yard, I backed The Stowaway up to the side of unleashed, put the ramp between the two emergency exits, and finished moving the last of the extra stuff that was stored in unleashed into The Stowaway. My 12yr old niece helped me with this, which is impressive given the weight of some of the UPS battery backup units.

Once everything that needed to go into The Stowaway was loaded into it, I parked it in its new home behind the pool. I then backed unleashed in between the back of The Stowaway and my apartment, leaving just enough room to pull my pickup truck around to the emergency exit of unleashed.

While I've had the bus, I've been collecting miscellaneous metal, with an eye to perhaps being able to reuse some of it. I figured anything I couldn't use would sell as scrap. Of course, this started when the price of scrap was higher, so really I should've cashed it out back then. In any case, most of the metal was in the form of computers, and I finally decided I wouldn't use any of them at all in this project. Also, things like an old ironing board, part of a vacuum cleaner, and some other misc metal junk.

I kept all the aluminum separate. I'm still hanging onto my aluminum for now.

So, I pitched all the non-aluminum metal junk into the back of the pickup truck:


All ready for a trip to the scrap yard next week.

After that, there was still some misc stuff that needed to be unloaded and put up. I got all that done, then took a few pics of the interior of the bus:


Still left for me to do is to toss the old RV chairs which really aren't worth saving, get all the tools out, remove the sleeping back that is on the driver's seat, and remove the rest of the junk. After that, I can pressure wash the interior to get rid of all the bird poop and sevin dust and the traces of bird mites.

Hopefully tomorrow will be a nice enough day and I can get all of that done.

jim
 
Another day of cleanup progress. Yay!

In spite of the heat and humidity, I did manage to make some progress today. Eventually the heat faded a bit, then the mosquitos woke up hungry. Later this evening it cooled off enough to get up most of what was tossed out of the bus today.

I got all the tools together, put into the toolbox, ready to be cleaned up. I still haven't figured out what approach to take to get all the caked on bird poop and sevin dust off the tools without making them rusty, but I'm sure I'll figure something out.

Now that there's nothing of value to get ruined by rain, I decided to leave the windows open and let the bus air out and stay cooler.

I had 3 RV seats I had tried to mount in a jury rigged fashion last summer that needed to go. The fabric and padding is rotten and disgusting. The mechanisms are in bad shape. Rather than try to recover them, I'm just going to toss it all.

The wood I had used to build their bases also went out the side door.

I have some heavy gauge metal strapping that is often used to anchor mobile homes that I decided to hang on to. Combined with good brackets, it can make great tank mounting straps. I still have the slotted bolts and nuts for tightening them as well.

There's still some misc trash in the bus, as well as a lot of junk wiring. I'm probably going to throw out most of the wiring (speaker wiring) and save the good stuff.

I still need to scoop out the nest from the back window, and remove the cover over that area.

The exterior trim for the bus as well as all the original lights got moved over to The Stowaway.

There's a pile of junk that needs to be taken to the dump, including the RV seats.

It doesn't sound like much, and really, it isn't much. However, considering the heat and humidity, I'm pleased with the progress. Almost ready for washing.

Pictures:


jim
 
Tonight I drew up some extremely rough before and after sketches for what my bus currently is and what I plan.

The funky stair step area in the bottom left corner of the photos is the engine compartment, just left as a void in these sketches.

Thought everyone here might enjoy these.

Before

After

I hope this makes sense,
jim
 

Attachments

  • img_0103.jpg
    img_0103.jpg
    2.3 KB · Views: 86
  • img_0104.jpg
    img_0104.jpg
    2.4 KB · Views: 72
Well, today I managed to motivate myself to finish cleaning the interior of the bus. Mostly. After having swept everything to the front last weekend, it was quite a pile of stuff to sort through. It was an unpleasant job considering there was stuff that needed to be salvaged from the trash, a lot of trash, sevin dust poison, and a lot of bird poop.

After cleaning all that up, I dug out the pressure washer and attacked the interior. I avoided the engine compartment cover and anything aft of the rear floor heater, as the access cover to the engine is still not screwed down. I didn't want a lot of water on top of my engine.

The seat and dash are no longer looking like they got in the way of a flour explosion. The bird poop is almost completely gone. Some places the pressure washer just couldn't get it to come clean, but since the rubber floor is going to be ripped up in the near future, I didn't let that stress me too much. The worst of the mess is cleaned up.

There's still some stuff around the driver's foot area that I need to go through. The water is still draining/evaporating, so hopefully that'll finish by the time I get ready to work on it tomorrow. I'll need to make sure the dash still works after the bath it got today.

Also, I hope to start taking up the rubber and plywood floor tomorrow.

No pics tonight.

jim
 
wow, no update since august.

Let's see... last we saw, I had pressure washed the interior of the bus, and left the windows down prior to trying to remove them, with plans to remove the floor.

september...

october...

november...

december...

january...

The bus still sits there, with the pressure washer still inside, windows still down, leaves everywhere.

RL got in the way for a while there. Also, we've had some bad weather, and pretty much non stop wind.

This spring, I really want to get the roof raise done. However, I have serious reservations about accomplishing that with the near constant wind we have around here. I have a vision of doing the final cut, and a gust of wind picking up the roof and flipping it over on top of all the cars...

Right now, I'm shopping around for an inexpensive garage to be able to get the bus inside to work on it. Ideally, said garage would include attached living quarters, so I could just move there and work on it without having to schedule the work. I have a line on a place that might not open up until june or july for a decent price, but I want to get started prior to then.

Anyway, still refining the plan in my head and on paper, and just trying to work out logistics. Also trying to find a new (to me) commuter vehicle by the end of feb.

so, I'll post more as there is more to post...

jim

PS, the engagement ended, taking with it a bit of financial drain, making the budget for the conversion get back on track.
 
So we've had a lot of snow (blizzards even) here this winter, and now we're getting tons of rain. This has been an unusually wet winter, and most of the roads have standing water. The ground is beyond saturated.

During the blizzards, we started to store trash (in bags) in my bus. We also did some major housecleaning, and that went into the bus as well. Today, when the rain stopped and the sun came out, we decided to haul off the trash, and since the gas station and the trash transfer station are across the street from each other, I decided to take the opportunity to fill up the tank.

Before I could move the main bus out of the yard though, I had to get the shed bus (the stowaway) out of the way. I had mom drive it so she could get some experience with it. Well, about 10 feet from it's final parking spot, the left rear wheels sunk into mud, and we lost all traction. It sits there now, with the wheel sunk into the mud, waiting for a dry day to get moving again.

pictures: shed bus stuck in the mud

Now some of you might see where this story is heading already. I admit it is tragically funny.

Our driveway is carved into the ground quite a bit due to years of people driving in and out. It is also a bit narrow. Getting the bus in and out of the driveway has been a chore in the past, and I decided to try going out differently this trip. I didn't swing quite wide enough, and took out the mailbox. That's the second time in a month the mailbox got taken out, once by the snow plow. So, after killing the mailbox, I figure we've had our excitement for the day.

After getting onto the street, I started to worry, as I couldn't seem to get the bus up to 2nd gear, and it finally did it when the engine got around 2200rpm. Then, it didn't seem to want to hit 3rd. It took me a while to get the bus all the way up to 4th gear and lockup. After that though, it seemed to be smooth driving. I think I need a front end alignment unfortunately. I got up to 55mph, at 2500rpm, with only a small amount of diesel smoking. The ride was fairly smooth (for a mostly empty bus). Getting into and out of the transfer station was fairly easy. Unloading all the trash was also easy.

As luck would have it, the gas station was mostly empty, so it was trivial to swing in and get pulled up to a pump. Unlike when I took my trip from GA to VA in the bus, the diesel pump at this station had a really nice automatic shutoff when the tank was close to full. I put 20 gallons of fuel into my bus in less time than it takes to put 10 gallons into my little corolla. I really like that fuel pump. 

As I tried to figure the best way back home from the fuel station, I realized it would be all left turns, with no spots really adequate for swinging such a large vehicle around. So, I took a right, and took the long way home. This gave me an opportunity to run up to 55mph for a while on several different roads, and to get a feel for her again. It was enjoyable.

Then, I arrived at home. Here's where the fun really began.

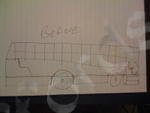
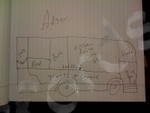
I missed the mailbox this time. I swung wide, but not quite wide enough... The left front wheel went up over the ditch bank on the far side of the driveway, but I should have gone another 3 feet out. The right rear wheels ended up coming into the shallow part of the ditch before hitting the right side ditch bank... And the storage box is on the right side. The storage box dug into the ditch bank, then the wheels started spinning on that side. You can't hear that from inside the bus like you can in a car.

Mom got out and looked to see what the problem was. She says the storage box was barely touching the ground. I sent her to get the 4x4 (5000 pound vehicle... but all we had to try with), while I sat there trying to think of a better answer. By the time she got the 4x4 pulled up in front of the bus, the bus had sunk into the mud up to the axle, and the box was definitely in the ground.

pictures: main bus stuck in the mud

We used the 4x4 to go down to the neighbor's house, and got them to bring their small tractor (not small, just the smallest one they have), and they pulled me out of the mud. I don't have pictures of that, as I was operating the bus at the time.

After he got me unstuck, we talked for a bit about the situation, and I asked him what he would recommend for us to do to get the driveway widened at the end and shaped properly for decent ingress/egress. He said legally we are supposed to get the state to do it, but that it takes many months to get them to do anything, and costs a lot, and even then, it won't be how you want it. He then offered to do the work for us, as well as install a 21' culvert, and make sure everything would drain properly. So, when the area dries out, he'll be fixing our driveway for us.

All in all, it has been an interesting day.

I have to say, I definitely liked getting the bus moving again. It's been too long. I definitely need some new tires on the back. I think if the right rear tires weren't pretty much slick, I might not have gotten stuck, as I probably could have kept moving enough. I also learned that hydroplaning isn't a concern in a big bus. I had to hit a large area of flooding faster than I would have liked, and the water just parted (leaving a huge wake) and the bus just drove right on.

Anyway, I'm hoping that in mid april to early may I'll be able to do the roof raise. I can't wait. Then I can fix my clearance lights, and actually be mostly legal on the road.

Anyway, I'll post more if I ever make any progress.
jim
 
In just over a week, I will be starting on the roof raise on my bus.  I'm taking a week off of work to focus on this project.  Everything else on the bus conversion is waiting for the roof raise, and I'll finally get to work on that roadblock.

The basic construction method of a school bus is that there are a bunch of tubular "bows" or ribs that run from one side of the body to the other, up through the window pillars and back down the other side.  On a Thomas built bus, the ceiling is constructed with steel panels that over lap at each rib.  The exterior is similar, with a slight difference (which I can't remember off the top of my head).

My plan is to remove all the windows down each side, as well as the inner and outer skin panels for the front most and rear most sections, causing the main strip of the roof to be separated from the front and rear caps of the bus.  I will then secure a set of 4 jacks at the four corner ribs of the remaining section, making sure it can't come apart.  I will then use a cutting blade to separate the top section from the bottom section with a cut made within the window pillar region of the ribs on each side.  The jacks will then be carrying all the weight of the ceiling.

I will jack the roof up being careful at every step.  Once the desired height is attained, I will insert steel tubing in 4 of the window pillars and tack weld them in place.  I will then work on making sure that everything remains square and plumb and true, and once that is verified, I'll tack weld in steel tubes in all the other window pillars.  I will then go back and weld up the seams that are left after the tack welds.  Once I'm certain I have enough support from the new steel tubes, I'll carefully unload the weight from the jacks, and remove them.

I plan to put in some Z bracing between the window pillars.  I want to maintain structural integrity, and this will be the most cost effective way to do so.

Eventually, I will re-skin the outside, and mount windows, etc.  That will be planned for during the week that I'm off, and I hope to be able to finalize the floor plan and know where the windows will end up being by that time.

I will eventually also have to deal with re-attaching the front and rear caps to the roof proper.  I plan to do a sculpted front so that I'm not stuck with a huge wall up front, but I want to maintain as much interior space as possible.  Basically, I want a less brick-like brick when I finish.  I haven't determined how I'll deal with the rear cap yet, but I have several ideas.  I will need to play it by ear as I go along.

I'll post as I make progress.

I really appreciate all the support I've had from everyone here.

jim
 
Good luck with your project, one day I want to do a conversion. I wiil be following you along the way.
How doe's the gas bus perform compared to the DP?
J
 
34footer said:
Good luck with your project, one day I want to do a conversion. I wiil be following you along the way.
How doe's the gas bus perform compared to the DP?
J

Thanks.  I'm looking forward to finally getting moving on this project.

The gas powered bus is a smaller unit, and lower weight bus.  It has a manual transmission.  It has a 366ci throttle body injected engine known as a "tall block" engine.  It has plenty of torque, and a reasonable amount of horsepower, and is actually a little peppy (for such a large vehicle).  It isn't a speed demon by any stretch though.

The vehicle is governed at 55mph, and I haven't found the governor to disable it.  It has a shorter wheel base than the pusher, so is easier to turn, but the tail swings wider than the pusher does as it has a larger amount of body behind the rear wheels.  Driving/riding in the gasser is about what you remember from going to school... rough.  Think farm truck with slightly better suspension.

The pusher is slow and plodding to get up to speed, but tops out around 65mph.  It takes longer to get there, but can hold it for hours.  The ride is nice and gentle.

The gas bus, being lighter, is affected somewhat more by wind when driving it.  The pusher is a dream to drive in wind.  I can't speak about severe wind though.

Making turns while sitting in front of the turn wheels does take some getting used to, but after you do, it is wonderful.

The diesel is averaging 8.5mpg.  I don't think the gas does that well, but I haven't paid for any fuel for it yet, so I can't say for sure.  I basically siphoned out all the gas from the old RV tank and from the secondary tank on my old pickup truck I sold, and that's what is in the tank of the gas bus.  The diesel bus has a fresh tank of fuel, as well as a fuel stabilizer, and algicide, and some sea foam.

Having driven both, I'm very glad I decided on a pusher.  Next week before I start the roof raise, I'll be getting the bus weighed empty at the local farmer's market (for free).  Then I'll know how much wiggle room I have for my conversion and cargo.

jim
 
If you were going to convert the gasser, would you need to raise the roof. (just wondering, I'm 6'3' tall)
J
 
34footer said:
If you were going to convert the gasser, would you need to raise the roof. (just wondering, I'm 6'3' tall)
J

You probably would.  I'm definitely raising the roof in my diesel.  The ceiling height (in both busses) is right around 6'0" or so in the center, and much lower at the sides.  After you add insulation, etc, you lose more.

A roof raise on a school bus isn't really all that bad from what I've read.  In a week or two, I should be able to relate my own experience with it.  There have been 3 or 4 really well documented roof raises on the skoolie.net forum, which all came out quite nicely.  And once you make the decision to raise the roof, 6" vs 36" is just a matter of scale.

hope this helps,
jim
 
Friday, I got started early on the roof raise prep.

I removed 2 windows, and managed to get one of the window pillars fully exposed.  I need to put together a steel order, then go pick up the steel.  I've managed to have some fun with the angle grinder.  I did break one of the windows getting it out.  The window frames are aluminum, so I'll have a nice pile for the scrap yard.

Yesterday, I took the bus to the farmer's market to get it weighed.  It's 21,560 pounds, leaving me 11,720 pounds for the conversion and cargo.  I hope I can keep it under the limit.  ;D

I've also figured out the trick to getting the bus in and out of the driveway without casualties.  I didn't get it stuck, and no mailboxes were damaged.  woohoo.  It'll be easier once the mailbox has been moved and the driveway end widened, but until then, I can at least not cause more damage.

I hope to get the steel ordered today, and hopefully even get it picked up either today or early tomorrow.  I'm waiting for the truck to get out of the shop to see how much money is left in the roof raise budget, so I know how much of the steel I can get.

The weather is improving.  It's nice and sunny, temps in the 60s, with a very slight chill to the breeze.  Nearly perfect.

jim
 
If I'm going to do a project like that I'd better take a welding class. Are your welding skills top notch?
J
 
Back
Top Bottom