Survey of CRT TV to LCD replacements

The friendliest place on the web for anyone with an RV or an interest in RVing!
If you have answers, please help by responding to the unanswered posts.
To John....

>A slight tangent:

>A friend of mine told me several months ago my DirecTV HR20 DVR was a prized possession since it has the ability to receive digital over-the-air TV.  I moved the >antenna from the converter box to the HR20 and went through config, and there were the locals.  The big issue is there is no tuning indicator for over-the-air that i>s easy to access (that I found.)

Also available with the Dish 211k HD receiver; only thing is that the electronic program guide (EPG) does not have a clue as to the programming.  What I do is have the batwing antenna through a splitter  feed both the TV and the Dish Receiver so that I may check out the local OTA signals so as to best position the batwing before going through the re-installation of the hard dirve to the satellite receiver.  The guide only shows "Digital Service" when away from the local (Louisville) area.

BTW, I checked out the Grayson Highlands park after Gaffney...I'll comment on that some other time.

Wendell
 
Hi Wendell - I guess the HR20 is a little smarter than your Dish receiver.  Don't forget you will have signal loss through a passive splitter (i.e., a non-amplified device), so in a marginal signal area you might have problems capturing the signal.

Grayson - how about that ride to get there?!?
 
This is a link HERE to a post I made a few days ago.

I used a Samsung Model: LN32B550K1. You can see it with specs HERE.
It fits on the outside of the wood trim frame. I did have to trim 1/4 inches off the two adjacent cabinet door edges so the TV would fit between them. Some light oak stain and some polyurethane varnish and you really can't tell they were trimmed.

I lined the area behind the TV with 3/4 inch plywood covered with left over laminate flooring strips.

As you can see in one of the pictures in the earlier post, there is a fiddle that can be raised to access the area under the floor of the new storage area.

The travel hold down method is also shown in a picture  in a later part of the post.
 
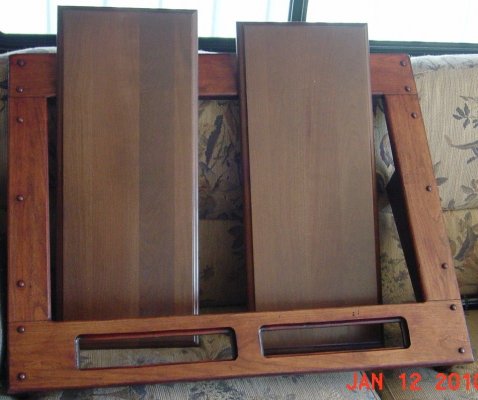
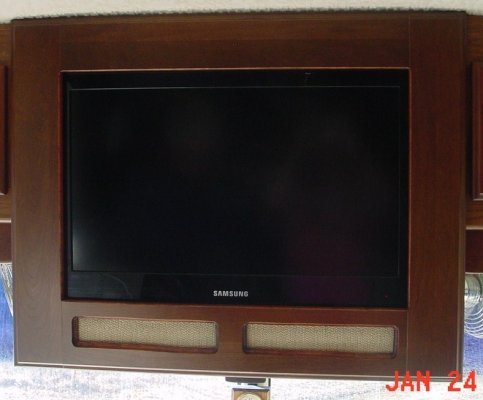
I started about a week ago to replace my front crt with a lcd.. Everything went well until I started staining the new cherry wood face frame.  I could not get it to match the original like I wanted.  I think I have solved the problem ,I have ordered two drawer fronts from Winnebag that will have the factory finnish on them.  I can build my tv face frame from these and it should look like a factory job. More later
Bunky
03 Journey 39wd with concert cherry cabinets.
 
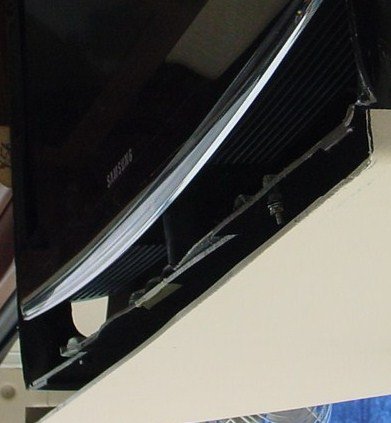
"The hardest part was cutting the metal and then re-attaching the metal base and getting the trim to look acceptable.  I attached some photos that will illustrate the whole ordeal."

Looks great Gary, so how exactly did you cut the plastic and reattach and/or finish off? It looks real good but wondered how to handle that portion of it. It seems that most people put in fillers which is understandable but we would like to make it look stock which appears that you have pulled it off.

Thanks, Dar
 
Art,

I am always wanting to learn stuff and didn't think I was squeamish, but when I read about using a magnet to keep the filings out- I had to look away.  I think if I ever replace the Jensen I have in the overhead, it will be a less invasive operation...what it will be -I don't know yet.  Great post and pix though, thanks!

Merry Christmas.
 
PICTURES CAN BE SEEN HERE

So... for the back of the coach I went to bet buy and bought a LCD TV that worked with the previous 12v 5a adapter that the stock tube TV used. I was shocked, but maybe not as shocked to see 2 110 outlet back there as well. I got a quick release and some push on coax cables from Radioshack. I just kept it simple with 5/8 AC plywood and some hinges and a table lock. Took about 2 hours.
TV: Insignia Model: NS-19E430A10
Quick Release: Ergotron FX30
Coax Adapter: Right angle push on

For the front TV, well lets just say that was FUN! had to re-inforce using a 4x4 and some guide rails for the tv support that I made from Home depot. I took the bottom trim off and used that as a stencil to cut the plywood that I used on top of the metal shelf. I still have some trim work to do, but all in all its supported pretty well (knock on winnebago wood).
 
Finally - the tube TV in the Horizon will be junked  ;D!  Newegg <a href="http://www.newegg.com/Product/Product.aspx?Item=N82E16889200035">had a deal</a> I could not pass up.  It's a 32" 720p Hitachi LCD for $339 plus free shipping.  The 720p will be fine for the coach - not a lot of content is 1080 anyway.

$339 is over a hundred bucks cheaper than WallyWorld's Internet price.  This TV has gotten pretty good reviews, so I'm comfortable with the purchase.
 
We have a 2007 Winnebago Journey and we replaced our front tv with a 26"Sanyo Flat Screen that fit perfectly into the space without altering or making any cuts to the frame. We did add a trim board to the face of the cabinet. We used a wall mount and retained the base mount. It is very stable and weighs about 17 lbs. versus 75 lbs on the Sony. We will attempt to send some pictures.

Iron Horse

P.S. The attachments are too large and I don't know how to make them smaller to send the pictures. If anyone can help, will be glad to show our remodel job.  Thanks
 
Iron Horse said:
...P.S. The attachments are too large and I don't know how to make them smaller to send the pictures. If anyone can help, will be glad to show our remodel job.  Thanks
I thought we had a forum resource about re-sizing photos, but I couldn't locate it.  Stand by while I find out.
 
John Canfield said:
Finally - the tube TV in the Horizon will be junked  ;D!  Newegg <a href="http://www.newegg.com/Product/Product.aspx?Item=N82E16889200035">had a deal</a> I could not pass up.  It's a 32" 720p Hitachi LCD for $339 plus free shipping.

John,

    You must have bought the last one.  I checked NewEgg and they are now out of stock on the item (Sold Out).
 
Luca1369 said:
You must have bought the last one.  I checked NewEgg and they are now out of stock on the item (Sold Out).
Oh NO!  I'm sorry about that!  In fact the UPS guy delivered ours a couple of hours ago.  The mount will be delivered tomorrow.

BTW, it looks like doing the speaker mod (adding a couple of resistors to each speaker for a variable line-level output) will be extremely simple.  I have the TV on my workbench/desk right now laying face down.  The back part of the case will be easy to remove and the speakers are right there on the bottom in plain sight.
 
When I replace my rear TV with LCD I'm going to use a bracket system that move up an down and in and out so we can use the TV area for storage. I think that would be the best way to handle it.


Gary
 
Iron Horse said:
We have a 2007 Winnebago Journey and we replaced our front tv with a 26"Sanyo Flat Screen that fit perfectly into the space without altering or making any cuts to the frame. We did add a trim board to the face of the cabinet. We used a wall mount and retained the base mount. It is very stable and weighs about 17 lbs. versus 75 lbs on the Sony. We will attempt to send some pictures.

Iron Horse

P.S. The attachments are too large and I don't know how to make them smaller to send the pictures. If anyone can help, will be glad to show our remodel job.  Thanks
Finally I found what I was looking for. Here's a useful thread with lots of good suggestions.
 
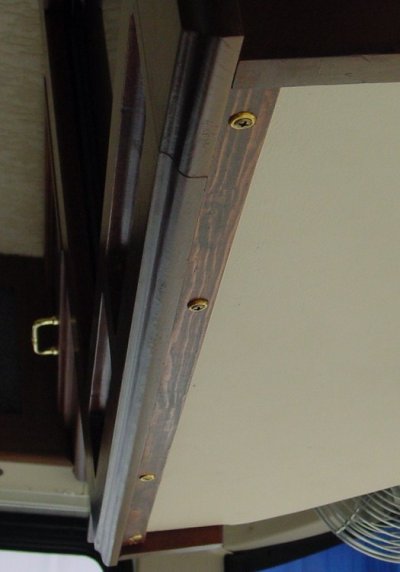
These are pictures from my original post about replacing my crt with a lcd.  I also made a clock from scraps and used the rear view mirror bracket to mount it.  I built the frame out of drawer fronts I ordered from Winnebago.
 

Attachments

  • 002.JPG
    002.JPG
    43.7 KB · Views: 244
  • 008.JPG
    008.JPG
    179.5 KB · Views: 243
  • 013.JPG
    013.JPG
    71.4 KB · Views: 203
  • 094.JPG
    094.JPG
    102.4 KB · Views: 287
Very nice job!  You're inspiring me to get my change-out started.  Got my Hitachi LCD modified for adjustable line-level audio out (to feed the Q-surround), now the hard part begins  :D
 
John Canfield said:
I thought we had a forum resource about re-sizing photos, but I couldn't locate it.  Stand by while I find out.
I think you can rite click on the photos and click on edit and drag the box around the picture to make it as small as possible and still show the content.

Bunky
 

Latest posts

Forum statistics

Threads
131,981
Posts
1,388,593
Members
137,727
Latest member
Davidomero
Back
Top Bottom