rolled vinyl flooring

The friendliest place on the web for anyone with an RV or an interest in RVing!
If you have answers, please help by responding to the unanswered posts.

joeyg1217

New member
Joined
Sep 21, 2007
Posts
3
I am thinking about replacing my worn-out carpet with marine grade, rolled vinyl flooring. I have seen many products such as Flexiteek, NUTeak, and others that have the look of teak decking but at a fraction of the cost. This flooring comes in planks, 4X8 sheets, and 6' wide X (up to 60') rolled sheets. These companies also make stripping for edges and joints and are supposedly easy to install. Has anyone used these products in an RV application? What product would you recommend? Do you recommend DIY installation or should I look for "professional" installation? Thanks.
Joe
([email protected])
 
A friend has one of the wood grain vinyls in his 2004 Endeavor and it looks fine. His isn't even high grade stuff.

Replacing flooring is certainly within the range of DIY but whether your skills are up to it or not I cannot say. I would not suggest it as your very first flooring job,though. RV's have a lot of things to remove, a lot of tight cutting and fitting (cabinets, driver seats & pedals, entry stair, etc) and there is the are under the slides to consider (if you have slides).

We have a member here who can do a great job if you want professional. Contact Ernie Eckberg for any kind of flooring work.

Ernie Ekberg (aka "Ernie Carpet")
Weatherford, Texas
817-475-3991

[email protected]
 
Thanks, Gary. That kind of material is probably great stuff. Quite frankly, I have never heard of it.  There are a lot of great residential vinyl material that would be so much easier to handle then 6 x60 and 4x 8 foot sheets that unless you have worked with that before in a coach/rv application, might be quite an undertaking.
Ernie- 37 years in the "bidnezz" of installing
can you send a link so I can see this material?
thanks
 
I used vinyl squares with great success over a year ago. They are holding up extremely well. I just did the back bedroom but considering how well these self-adhesive vinyl tile squares are holding up, I'm considering doing the rest of the floor with them.

Back bedroom floor Before:
Before

Back bedroom floor After:
After

It's something to definately consider!

The worst part of this project was, was removing the THOUSANDS of staples the manufacturer used to adhere the carpet. I swear the guy that did the job was getting paid by the staple!
 
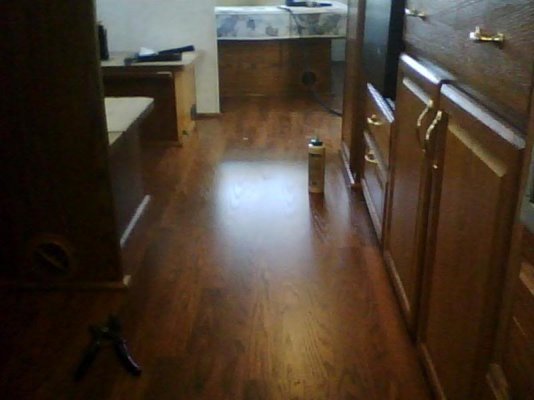
I put a pergo typle floor down in my Prowler. The difference is night and day.

If I could figure out how to easily post pics here, I'd show you.

;D
 

Attachments

  • Prowlerfloor.jpg
    Prowlerfloor.jpg
    35.5 KB · Views: 123
Sportsdad...I was wondering when you lifted the carpet in the back, what was under it?  And did you need to put anything between the subfloor and the vinyl tile squares?  I was wanting to do this with a portion of our MH but thought maybe the subfloor might be too uneven and rough.

Ruth
 
Under the carpet is probably linoleum and under that is probably plywood or some similar subflooring materials. I did the squares in my TT, not a big job but as someone said, "all them staples." I had a few places where there were small holes and/or indentations so I filled them with wood putty (Rock hard). I also leveled the seams with the same product, sanded, and then applied the vinly floor primer/sealer that you can buy at Lowe's.

Great looking end result, biggest aggravation after the staples was pulling the paper off the squares. The glue is so strong that after a while, your fingers will literally stick together. I remied that by have a rag handy dampened with mineral spirits. You can also use the same rag when you're done to wipe up any excess glue that makes its way to the surface. 

Even buying the highest priced tile squares, I found  this project to have given me the biggest bang for buck in the visual improvement category
 
I just finished removing all the carpeting in my 06 Ellipse. As others have noted preparation is key to the job. My carpeting came up easy -, there were few staples. But the tile was a terror with the glue mess. I put down 36 in by 12 in strips of Trafficmaster Allure purchased from Home Depot. This was my first flooring job. I would say that it took about 60-70 hrs of prep time and about half to install. I recarpeted the slide and over the engine. Whole project cost about $800. I overbought on the carpet so I would guess the job could be done for less. Best move I have made, the DW is finally happy with the flooring. Easy to clean etc.. One day I'll figure out how to upload pictures. It turned out to be a fun project.
 
ruthandken CDN said:
Sportsdad...I was wondering when you lifted the carpet in the back, what was under it?  And did you need to put anything between the subfloor and the vinyl tile squares?  I was wanting to do this with a portion of our MH but thought maybe the subfloor might be too uneven and rough.

Ruth
Nothing but plywood under mine. I sanded it with 80 grit and vacuumed, then applied the tile.
 
Sportsdad said:
Nothing but plywood under mine. I sanded it with 80 grit and vacuumed, then applied the tile.

When I pulled the carpet I had a wool like pad under that was about 3/8' thick and full of dirt & sand. This is what took most of my time pulling this and getting like another poster said pulling the 1,000 staples out.  I also had plywood with metal sections ( where pipes crossed over from the fresh water tank & gas line from the propane tank ) This was a good discovery as I now know that if the inside of the MH is above freezing I will not have burst pipes. But on with the topic at hand. I cleaned the floor but did not do a level due to the metal sections but did put down a 1/4" pad. This was to reduce the noise and to maintan a moisture barrier. The product I used was the Trafficmaster plank style vinyl flooring. This flooring includes an attached rubber pad and is a floating type of flooring. Very quiet and feels good in socked feet. Even has a texture like wood plank.
 
A word to the wise,
When removing any floor in an RV, keep in mind that manufacturers often run wiring and sensors close to the top surface of the subfloor.  As such, by simply pulling carpet out from under a slideout, you can trigger a sensor that will completely lock your slideout in its extended position.  So, truly investigate the complexity of the coach, and take gentle care of such a process to ensure that no greater problems will present themselves.

If you are unsure, better to consult an expert to do such a project on your behalf.  It could save you money and heartache down the line.

Grant
 
When removing any floor in an RV, keep in mind that manufacturers often run wiring and sensors close to the top surface of the subfloor.

What kind of sensors do RV manufacturers run under a slideout that are close to the top surface of the subfloor?
 
rsalhus said:
What kind of sensors do RV manufacturers run under a slideout that are close to the top surface of the subfloor?

In some RVs, for example, when flooring material and/or the subfloor is altered in any way under a slideout or at the outermost edge of the slideout, the slideout will remain locked in the fully extended position.  In a few cases, this occurred when customers of ours, looking to expedite their flooring replacement, elected to remove the carpet themselves.  When they did so, they yanked the carpet and / or other materials out from under the slideout.  When the slideout was extended afterward, it would not move back inward.  In follow up with these customers, their manufacturers suggested that as a precaution to the slideout's operational ability to move in and out,  the slides had sensors built in to their design that monitored the integrity of the floor underneath them.  As such, if totally removed, they would lock in their outermost positions until rectified.

This issue was generally more relevant with the first few early waves of slideouts used in motorhomes, but the important thing to note is that it is generally best to look before you pull.  By taking your time, and even cutting around areas that are a bit suspect, it could save you much time and aggravation.
 

Latest posts

Forum statistics

Threads
131,964
Posts
1,388,314
Members
137,718
Latest member
urnwholesaler
Back
Top Bottom