1st part of remodeling motorhome

The friendliest place on the web for anyone with an RV or an interest in RVing!
If you have answers, please help by responding to the unanswered posts.
PatrioticStabilist said:
Anyone have an idea of how to clean our front seats in the cab?  They are sort of a velour kind of stuff and not very clean.  We saw some used ones on Craigslist we considered buying but they said they were filthy so no use in that.  I thought upholstery cleaner and vacuuming them good first, but not sure.

I have yet to find a stain that "Tuff Stuff" phone cleaner can't get out of upholstery, carpeting or anything else that I have tried it on. Another one that I am fond of would be "Resolve Carpet & Upholstery Cleaner High". Otherwise if you have a carpet cleaner with a hand held attachment, that might be a good place to start.
Good luck with that!
Dar
 
I don't think it did to bad for 20 year old upholstery or almost.  The leather seat in my then new 2006 Lincoln truck started discoloring and the dealership didn't want to do anything and it was only a few months old.  So I think this has cleaned up pretty good.  I used Blue Coral chemical cleaner.  Scrubbed it in good then wiped it with a wet microfiber cloth, didn't do half bad.  The elastic in the back pouch was out so I rethreaded elastic, a firmer harder variety I use in sewing, need to do the passenger seat also.  There is a tiny tear at the upper right corner.  This was all behind seating and will be again once we build a couch so think it will be ok.

I took off all the covers I could unzip and washed them, I'm still in awe of the good condition they are in, they were just very dirty.

Tom did more greasing of areas today, not sure if he got them all yet. He got the step to working, for good who knows?
 

Attachments

  • Seat cleaning 002.JPG
    Seat cleaning 002.JPG
    518.5 KB · Views: 58
  • Seat cleaning 003.JPG
    Seat cleaning 003.JPG
    525.4 KB · Views: 49
We got the carpet finished in the cab.  I put new elastic in both door pockets and the driver seat pocket, have to do the passenger side yet.  All of them were sagging and sad looking. Tom got the seats back in. 

Ernie, I certainly appreciate all the work you do on flooring, whew! We are tired.

Done for this day.
 

Attachments

  • 004.JPG
    004.JPG
    450.8 KB · Views: 56
  • 005.JPG
    005.JPG
    434.2 KB · Views: 51
Tom, says he thinks there is a dead spot in the motor for the step.  He turned it and its been working ever since, so I guess we will leave it till it goes completely, he greased all moving parts on the step.

We found a roll of carpet at the parts store and are going to cover the board that spans the joint between the cab and the trailer proper. It's not exactly the same color of tan but its close enough.  So that needs to be done. One piece of flooring left to go in.  The piece of paneling in the corner by the entrance door, trim around the window. 

He is thinking of putting the left over carpet around the step part then rubber on the step. The last step inside the trailer is recessed and we step in it and trip over the metal edge so he put in a piece of plywood to bring it up even before we will cover it.

Then he is going to take one of the dinette seats and make a couch against the side wall behind the drivers seat.  Next to it we are hoping to have enough wood left from the second seat to make a small table or cabinet over the furnace for the television with a vent at the floor level.

We are getting pretty near finished.  Bought a new water hose, sewer hose and odor control stuff.  For now will use some of our twin sheets but I will make some to fit if I have time.
He also added me some new bigger spot type mirrows on the sides.
 
Last piece of flooring is in!! Yah!  Now he is working on the slanted board that goes between the cab and trailer proper.
 
Progress today

He got the flooring piece in between the cab and trailer part.  Home Depot wasn't open so I couldn't buy the trim piece he needed between carpet and laminate.

My curtains for the overhead bed are resewn and installed. New elastic in seat backs.

The last piece of paneling is replaced in the corner.  I cut it, he shortened it!  We have the window trim to put in yet.  Once the valance is up, the long curtains up and the chair reset you will not even see it.  I could not find any paneling any closer then this.
 

Attachments

  • Flooring in RV 001.JPG
    Flooring in RV 001.JPG
    419.2 KB · Views: 58
  • Flooring in RV 002.JPG
    Flooring in RV 002.JPG
    315.7 KB · Views: 46
  • Flooring in RV 003.JPG
    Flooring in RV 003.JPG
    357.9 KB · Views: 53
Ok todays project. All the trim is in, I have a few places to caulk.

Hubby has started on building in the couch.  I have to clean the end pieces of upholstery that's for sure.  We are putting the couch against the wall behind the driver. I have the covers I washed, threw the old foam away, it stunk.  I will need to buy 2 pieces to cut and put in those for the cushions.

Then to the left we are taking the table top and cutting it smaller.  He is moving the channel over toward the fridge, the one that held the end of the table top and fitting it in there.  Then the end piece with the screen which allows air to the furnace will be built in in leftover matching paneling to create a table.  This is were we intend to put our television.  It will give us 1 or 2 seats there as needed, the front passenger seat to turn around and the stand alone chair. We will still have the much needed storage under the couch seat.

Last night I made 2 fitted sheets smaller and added stronger elastic around the bottoms for the beds in back.  They are still to big but better then they were.  The next set I'm going to cut all the corners, cut off excess material and resew them to fit.  I have a bedspread I'm wanting to cut in two to just make a couple of fitted toppers for the beds.  Hubby is saying we need to have spreads that will double as blankets, of course, I don't agree. I will use these with Sue Anne and I and put a blanket on for him if he goes. 
 

Attachments

  • Seat Idea 002.JPG
    Seat Idea 002.JPG
    437.8 KB · Views: 48
  • Seat Idea 001.JPG
    Seat Idea 001.JPG
    501.6 KB · Views: 41
Tom is assembling the couch, the back and ends really need recovered, I have extra cushion material.  Should do it now but I don't want to stop him, not sure how much longer he has at home.

I still don't like the fit of the sheets so I'm making them smaller.

In case you didn't notice I enjoy taking pictures.  Can't wait to take some of the natural wonders out there.  They are everywhere you know.
 

Attachments

  • Making couch and redoing sheets 001.JPG
    Making couch and redoing sheets 001.JPG
    506.6 KB · Views: 57
  • Making couch and redoing sheets 002.JPG
    Making couch and redoing sheets 002.JPG
    510.6 KB · Views: 51
  • Making couch and redoing sheets 003.JPG
    Making couch and redoing sheets 003.JPG
    444 KB · Views: 59
Ok, couch is in awaiting foam for cushions that I have to go get.

I'm making a fitted sheet for one mattress, didn't like the way it fitted so cut it down and resewing and adding elastic all the way around.
 

Attachments

  • Fitting sheet to mattress 001.JPG
    Fitting sheet to mattress 001.JPG
    519.8 KB · Views: 82
  • Couch installed 001.JPG
    Couch installed 001.JPG
    402.4 KB · Views: 100
Tom stopped on the inside to replace the starter and batteries.  Said he didn't think it was that hard to get the starter out but wanted to make sure he got that done.  Then back inside, probably tomorrow to make the little table.
 
Wow, I just can't resist reading your BLOG. Guess I am not the only one.

  When do you folks stop to smell the roses?  I am happy to finish a 2 hour job everyday, then rest.  ;D

carson FL 84?

 
Tom and I just enjoy working on stuff, we always have.  I guess its just us, we love to have a project to work on.  However, because he is to leave soon we are trying to get this one done. We usually go a bit slower.

He had good luck on getting the starter off, he said it was accessible and only one bolt was a bit difficult until he found the right tool for it, so he is off getting that if he can and the batteries.

Here is the picture of my first sheet I remade. I cut all the elastic off, mitered the corners and did a french seam to make them strong. Then sewed in a casing and ran elastic in it. I have about a 2 foot long elastic threader that makes it pretty quick and easy.  Remember back when we ran elastic through casings with a safety pin? The first picture has been remade, the second still to do, it takes awhile to do them.
 

Attachments

  • Sheet remade to be made 001.JPG
    Sheet remade to be made 001.JPG
    389.3 KB · Views: 85
  • Sheet remade to be made 002.JPG
    Sheet remade to be made 002.JPG
    398.3 KB · Views: 68
Hubby got the new starter in, went in pretty easily was only $65.  But the new batteries were expensive, one was $185, 850 crank amps and the other a real good one for the house battery.

It started a lot better, sounded good and not draggy.  We are hoping that was the issue with it not starting the other day. He said we will take it for a run to let it heat up and see if it starts again. 

Also he said to buy the new motor for the step as we will need it one day.

He said next trip home maybe he can check the wheel bearings and see if they need repacked.

I got the other fitted sheet completed.  I'm just pooped tonight.
 
Today Tom is working on building some type of table by the couch and I will get the foam for the cushions.

Also pulled all the cooking stuff out of the RV found a complete set of everything, cookware, never used. Storage containers, measuring spoons, cups, etc, flatware the whole ten yards.  Looks like about all they used was some glasses and maybe some utensils .  All color coordinated, very pretty items so will not have to buy any of that, am cleaning it all up. I'm different I will cook in.  We will eat out sometimes but I will cook most of our food.  I also have a small 2 burner campstove I will use outside to fry smelly things like fish.  The cookware is very very light so likely will take some of my heavier skillets, like my old iron one I use the most.

He also decided to hook up the water and sanitize the lines.  We cleaned the water storage tank when it was out and cloroxed it at that time, it was nasty inside.  He is letting this set then going to run clorox through the water heater also.  The water coming from it had an odor.  In the cold water line he saw a bee go in.  After running the clorox through, 2 fell out when he removed the hose, so we are putting screens on the ends of the water access ports.  Does not appear to be any leaks anywhere, I was ready with the mop!!  The toilet flushes ok, shower works, sinks work, so lots of good things along with the issues we had.  But honestly a lot of our work was for cosmetics other then the 2 leaks we had.  The only light not working is the one over by where we fuel and hook up water directly, going to check, likely just a bulb.

The motorhome had a horrible smell when I bought it.  It's pretty much gone now.
 
My husband wants to know if he can swap me for YOU :-\ LOL The two of you are doing a great job.
 
Ahhh, you know he doesn't mean it.

Hey when I get a chance I will take a picture of my garden. It's about 80 X 60.  I need to weed the onions and till, I'm waaaaay behind on everything else around here believe me.  Weedeating, hubby mowed. Well never mind.

I have out 30 tomato plants, different varieties, head lettuce, bibb lettuce, cukes, squash, snow peas, bush beans, turnips, beets, cabbage, onions, carrots, bell peppers, about 5 hills of potatoes. Never planted those here want to see how they do. Tom was going to plow and disc up a 1/4 acre behind a rent house we have to plant sweet corn, but it was to wet and for some reason he didn't have time so that didn't happen. I will miss my corn. I learned how to garden from my dad and how to can from my mom.  They were both workin' fools back in their day. Good people, both gone now. I tried something I read about this year.  I use fish emulsion under the tomatoes, but it said put a whole raw egg under each plant when planting and it will put calcium in the soil and stop blossom end rot.  I've had that problem the last couple of years, we shall see, they sure look dark green.

I have 2 peach trees, one was loaded last year, went out to pick them and the squirrels ate all but one.  A dwarf orange tree that is loaded.  An apple tree that should produce next year, 6 grape vines, same thing waiting.  After all the years we lived here I had no idea fruit trees would do so well here till a few years ago.  I make tomato juice, can green tomatoes, beets, tomatoes, carrots, sometimes make salsa.  I'm hoping to produce enough this year to make relish, takes quite a bit to do so.

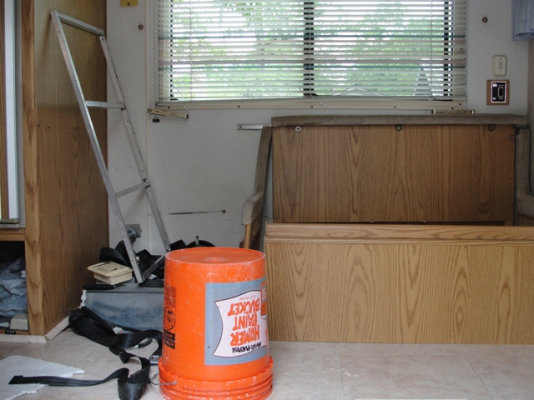
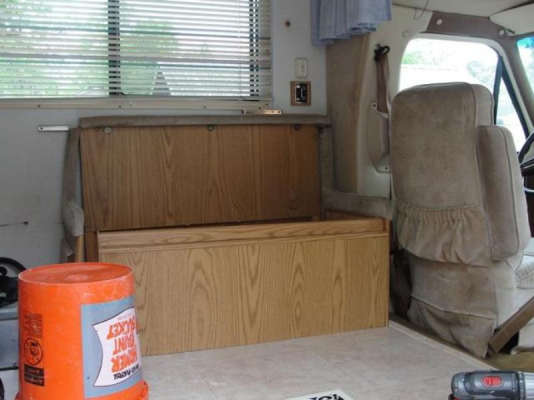
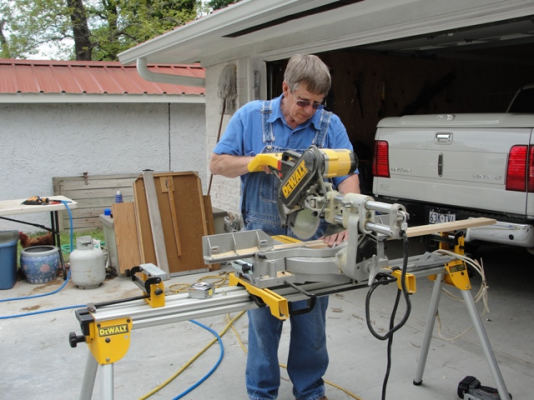
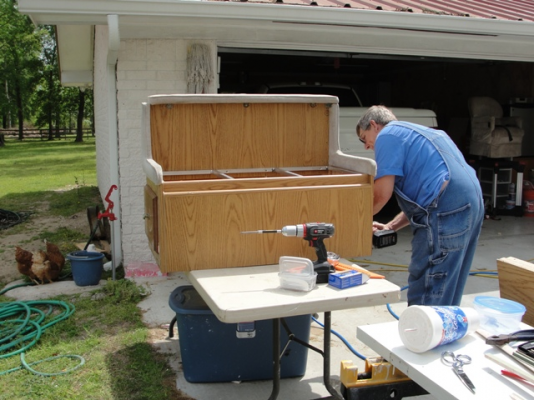
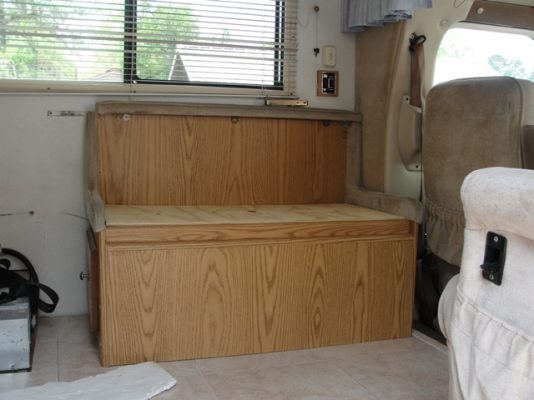
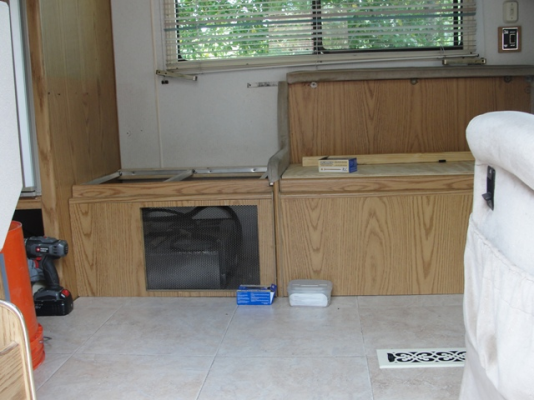
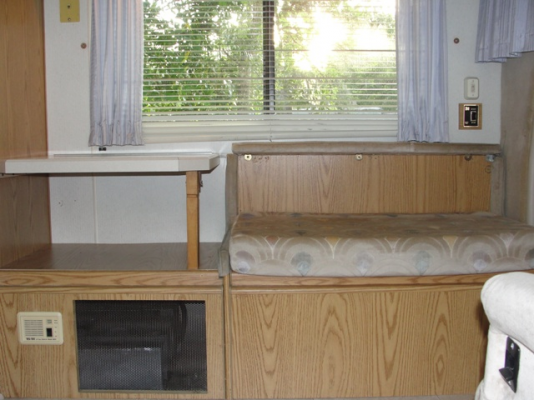
Ok, he is building in the little table, think it will look nice.  It has the vent for the furnace, he will put in the gas detector.  Then a shelf, then he is cutting the table top to make a top for it. A place for our TV and we think it will slide in on the shelf to store when driving.

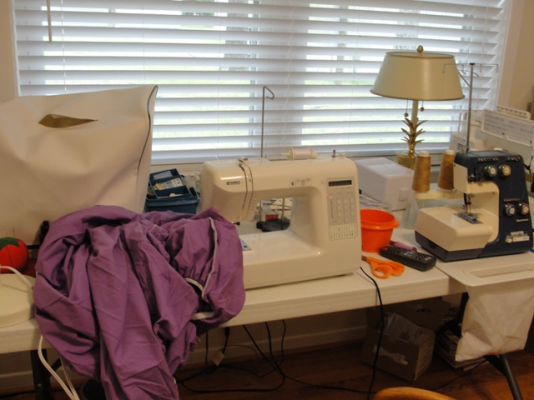
If he doesn't get time to check out the TV stuff, my tenant next door specializes in that and will fix it for me.
 

Attachments

  • Table by couch 001.JPG
    Table by couch 001.JPG
    420.4 KB · Views: 113
He finished his little table and furnace cover, not sure what I think about it, but guess its ok.

I have foam in the bottom cushion, getting ready to cut and fit it in the couch back.

He used the original tract on the wall and cut off the table leg and used it so they are not nailed down.  Also the top lifts off the furnace, he said you have to have access to work on it.  Makes sense to me.

He fixed several of the wheel covers, said he used stove bolts.  One of the dualies is missing an extension so has to buy that and put it on to air the inside one up.
 

Attachments

  • Couch & table 001.JPG
    Couch & table 001.JPG
    438.2 KB · Views: 87
We did do a couple of things today.  Even though I do not have the 2 side pices of trim for the long window, I had the top and bottom so I could put it together.  I am going to call around at salvage places and see if I can buy some.  PPL here in Houston had some that was really close but it did not have the curved side piece.  But you can't see it. The spots on the chair are sunlight. It sure made the living room area look better, didn't realize how shabby that made it look, and believe me we are not striving for shabby chic.
Tom replaced the black stripe at the top of the cabover, it was almost worn off.  He ordered the replacement stuff over the net.

I think we may finally be done now!
 

Attachments

  • Final fixes 001.JPG
    Final fixes 001.JPG
    404.1 KB · Views: 102
  • Final fixes 002.JPG
    Final fixes 002.JPG
    578.6 KB · Views: 90
Back
Top Bottom