Need Advice on what to do, laminate flooring or vinyl flooring, replacing floors

The friendliest place on the web for anyone with an RV or an interest in RVing!
If you have answers, please help by responding to the unanswered posts.
Two winters ago I replaced all the carpet in the living area with a laminate floating floor. I was worried about the slide rollers damaging the edge and possibly moving the floor a bit. My solution was to make two hardwood (oak) strips with a sloping edge on them that would help the rollers slide in and transition to the floor. (The original carpets were doubled over along these edges to perform similarly. Custom milling the darn strips cost almost as much as the laminate!!!)

The slides comes in and out without problems. (I did not remove the carpet on the slide because the 4 inch wide edge is steel and the gap between the floor and the slide when out is about 1.5". The carpet nicely hides this gap and makes a simple transition.) The oak piece, (easier seen in the second photo), is only fastened in a couple of places with double sided tape and doesn't move but the plan is to screw it down in the near future as it tends to warp a bit in the humidity.
 

Attachments

  • Floor2217b.jpg
    Floor2217b.jpg
    159.4 KB · Views: 161
  • DSC02219a.jpg
    DSC02219a.jpg
    165.5 KB · Views: 129
We also have skids instead of rollers on out flat floor slide. When we replaced our carpet with laminate the installer used a 1"X4" of some type of polycarbonate to fabricate ramps for the slide to follow up over the edge of the laminate floor. We also had some minor scuffing that I mostly fixed by adjusting the slide height last summer.

The scuff marks are fairly easy to remove with wood stain/polish and we also have a narrow strip rug in front of the sofa.
 
My solution was to make two hardwood (oak) strips with a sloping edge on them that would help the rollers slide in and transition to the floor.

This sounds like a good solution but I can't find where the strips are in either of your pictures.

The oak piece, (easier seen in the second photo), is only fastened in a couple of places with double sided tape and doesn't move but the plan is to screw it down in the near future as it tends to warp a bit in the humidity.

How wide and how thick are these strips and where do you have them positioned?  I am having trouble seeing them in the pictures.
 
Jeff said:
We also have skids instead of rollers on out flat floor slide. When we replaced our carpet with laminate the installer used a 1"X4" of some type of polycarbonate to fabricate ramps for the slide to follow up over the edge of the laminate floor. We also had some minor scuffing that I mostly fixed by adjusting the slide height last summer.

The scuff marks are fairly easy to remove with wood stain/polish and we also have a narrow strip rug in front of the sofa.

Jeff, was the polycarbonate 1"x4" or 1/4"?  I'm trying to envision what he'd do with a 1" thick piece of material in there.
 
Orick said:
Jeff, was the polycarbonate 1"x4" or 1/4"?  I'm trying to envision what he'd do with a 1" thick piece of material in there.

I went out and looked, it is actually 1"X2" and they beveled it with a table saw to make the ramp that the slide rides up on. It is not continuous but is in four 10" sections that are installed where the skids come up onto the floor.
 
Tim - I'm a little late on this one, but thought I would reply. I have a 34' 1994 Itasca Suncruiser that I bought about 3 years ago. Carpet was plain nasty, so I decided to do laminate myself. Long story short: looks great but almost killed me. Now I know why some of the dealer quotes were outrageous for this job. It took me about 4 weekends (I still work for a living and have 3 kids). I pulled out all furniture and all base cabinets except the kitchen and bath. Then pulled out all carpet (why they carpet bathrooms in RV's is a mystery). I replace some rotted flooring then stapled down a foam underlayment. From there it was just laying the laminate, which was the hard part. Lots of work trying to snap those things together while keeping previously installed pieces from coming apart. Then come all the dips in the floor! I used cardboard and foam shims to level as I went. Bedroom area and hall areas were tough due to the tight work space. After all was installed I had to engineer my way through the steps, then install the quarter round trim. The threshold where the laminate meets the carpet in the drivers area had to be "milled" on site - that was no fun. Looking back, I am pleased but would entertain a different route in the future. (I'm a sucker for buying old things and remodeling: houses, RV's, etc). Next time I may use plain old fashioned plywood sheets screwed down to the subfloor then stained and poly'd to suit my wife's taste. I have seen this done in commercial spaces that are being rehabbed - looks great, adds stability, and weight  :( , extremely durable, and is definitely easier to manage during installation. Plus, fewer gaps!
    I also tiled the bathroom floor, painted the interior, replaced all the old brass knobs/pulls/hinges. I actually paid someone else to reupholster all the furniture and window treatments, plus install new carpet around the drivers area. If anyone wants to see pics, let me know. Now that the work is done, we have decided to test the market to see if we can sell it. Need a different layout with the kids.
Good luck with your venture!
 
We went with carpet in our remodel. Why? Well, for one reason not mentioned elsewhere: I have a ten year old, and she loves to wander the motor home while we?re driving. Don?t tell NHP! With laminate, all I could envision was the slip-sliding-away at the slightest roll. Carpet precludes that. Moreover, I am afraid of leaks, and with the carpet we got (a highly water resistant commercial pile from HD) I have a sense that leaks will be far less damaging. I will tell you that we did not carpet under the shower pan as Winnebago saw fit to do. Why ever do they do that? But we did carpet under the rear couch: I like the look when we lift the couch to access the storage. Seems cleaner than bare flooring. And we did lay a new ? inch of birch plywood everywhere there wasn?t carpet. It is soooo very clean looking.

The carpet took maybe two hours to lay (recall that we had gutted the coach). Versus laminate which would have taken far longer. Somehow I still like the idea of carpet.

Joe
 
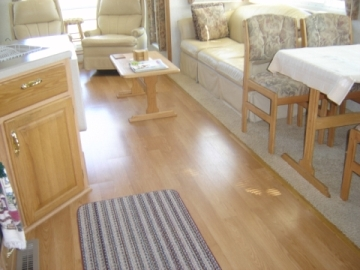
I recently ripped out my carpet and replaced it with vinyl tiles.  I was on a super tight budget so this was a do-it-yourself job. The fancy laminate flooring, or floating wood floors, was out of my budget. Still, the new vinyl flooring looks terrific. I used peel and stick tile. I wanted rid of my wall-to-wall carpet for health reasons.  Also, I like a clean home and there just is not room for me to haul around a big heavy duty carpet vacuum cleaner. Now I can just sweep up in minutes, mop with a paper towel as needed,  and it looks beautiful.

Friends volunteered to help with the job, so I wasn't by my lonesome.  Initially they tried to convince me to lay down new carpet, even called their carpet layer buddy to come over and try to beat it into my head that I needed to replace with carpet. He was pretty adamant that vinyl tile was a huge mistake, so  I gave it another 24 hours to mull over, but I still chose the vinyl.

I am completely happy with this choice. 

Here's how we did it:

First we ripped out all the old carpet and underpadding. While the original carpet was one piece with just staples around the edges, the padding was multiple sections, apparently laid down by a staple-happy installer.

We left the small bathroom (toilet and sink) carpeted (for now) and the small cockpit area, which is an inch lower than the rest of the motorhome flooring anyhow and has all those angles and curves. (I have a 28 foot Class C, with the van type  front end.) The bathroom is a split type, and it appeared the commode might have to be removed to get the carpet out, so it's left there for now. Another project, another day.

Before we ripped out the carpet, I borrowed a heavy duty carpet vac, the kind with the beaters on it, and vacuumed four times. Ha!  We still had an incredible dust storm, as we ripped out the carpet. Of course we were pulling out OEM 16 year old carpet, but how or why the carpet vac left that much crap behind, is amazing, probably because it just couldn't do the edges properly.

We cut up the carpet and it often ripped on it's own as it came out in multiple faded sections. I was parked in a friend's driveway and the trash haulers required that we roll it all up and tie it nicely with string, before they would haul it off. I ended up with about two dozen rolls of the mess, all tied in bows with string and they kept their word, and hauled it off with the garbage pickup.

Next I had a zillion staples to yank out of the subflooring, while learning a whole new, unprintable vocabulary. The staples were like zits, the more I ripped out, the more they seemed to pop up. Mostly, I sat on a small step stool (my knee is wrecked) with a pair of vice grips and used an ashtray to hold the removed staples. A magnet in the ashtray would have been a huge bonus.

Luckily my subflooring was in great shape except for the carriage bolts that poked through in some places. We bought some goop, I am sorry I can't tell you WHAT it was, as my friend kept the leftovers at his house. Anyhow, we used this goop to smooth over the carriage bolts, making them more like a gentle plane, than a humpy carriage bolt.

Picking out the actual tile took a long time. The first store had nothing I liked. I was carrying a swatch of material from the Motorhome, of the colors it is decorated in. I always carry this swatch around, as having a pleasing overall color scheme is very important to me. (I live in my Class C full-time, with no stick home to go to.)  I couldn't take a swatch of the OEM wallboard, but I studied it carefully, it's pretty neutral, a whitish background with abstract pale pink and light tan colors, all very subtle. Some of the walls are paneling and some are the wallboard that resembles wallpaper.

When I finally settled on a tile I liked, there wasn't enough inventory in the store. We debated whether to head to a 3rd store or to reconsider another tile. Finally I found one that would work for me.We bought at least 20% more than we thought we needed. In the end, we returned two whole boxes and still had a nearly full box leftover for the bathroom and possible future boo-boos. 

What I settled on finally, is like a faux marble with white, tan, and gray hues. I purposely stayed away from any tiles with lines, boxes or angles in the design. I didn't like the faux wood ones either, as I have plenty of wood already in the cabinetry and some of the paneling.  The motorhome has so many angles already, I didn't want the lines in the floor design to compete (and possibly make one dizzy or seasick).  Too much of a good thing can drive one batty. This definitely worked in my favor, as not all the angles in the motorhome are perfectly square and a vinyl design with additional lines and squares in the design, would have looked ridiculous, in my sized motorhome, with my not so straight lines. 

The subflooring was rough plywood, and it didn't appear to need sanding. We swept and vacuumed it before laying tile. We also used one of those newfangled dusters to pick up errant dust before each tile went down.  Because the entrance is where you notice the floor first, we centered out first tile based on the entry way (across) and the hallway (fore and aft).  Less than two dozen whole tiles went down, and the rest had to all be custom cuts.

My dining/office table booth area is raised about an inch higher than the rest of the floor, so I did that small area in the diamond pattern and I am pleased that I did so.

When all the tile was laid down, we used a pale gray caulk, to seal the edges all around, believe me this looks far superior than using basic white and compliments the flooring, blending right in. It gave it a professional look and hid any slight irregularities in the custom cuts. (I'm nerdy and wanted it near perfect.)

Anyhow, the caulking neatly hid any irregularities, you don't even see them now.  To smooth out a caulking job, wear plastic gloves, and use a teeny tiny bit of Joy dish soap on your finger, you'll be amazed how beautiful this turns out.

My 1994 motorhome has all brass and gold-tone hardware, so we bought the metal angle stock that is gold tone, to install where the step-up is inside the motorhome entrance and the step-up to the dining area and the step down to the cockpit. I plan to lay a neat bead of caulk on the edge of that too, as I've noticed when sweeping, that some of the dust wants to sneak up under there.

Overall, it took us about 6 days or so to do the entire job, start to finish,  but we weren't working hard and fast.  We did lots of goofing off and only worked a few hours here and there on it.

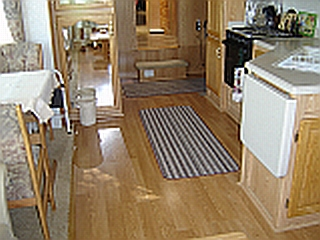
Installing vinyl tile doesn't mean you have to give up carpet, I have throw rugs. Actually, I had been cruising the Dollar General stores often. They get in eclectic camping gear and other bargain priced stuff. One day they had washable rubber backed rugs in this heavy duty commercial grade carpet.  At the time I bought 6 rugs, in 2 coordinating colors because I was trying to hide all the awful OEM carpet that was worn out years ago, long before I bought this motorhome, in December past.

The new tile really bounces off the light, making the motorhome appear larger.  I love the clean look as I was sick of that nasty faded filthy  wall-to-wall carpeting that never came clean. Also, my sinuses and breathing is so much better. Bye-bye allergens and germs.

But now since it's summer, I only use two throw rugs, one at the entrance and one by the bed.  The other four were washed and are rolled up in the basement. I've discovered that they also clean up nicely with just a garden hose and some soap, as well as in the washing machine. I don't use a dryer on them, as I want the rubber to last.

I've discovered in some campgrounds where the picnic table is in rough shape, I can  use the extra rugs to lay out across the picnic benches. This makes the picnic table look and feel 100% better and no worry about splinters in your derriere. 

If I end up in cooler weather, I can always lay down all six rugs again, to have lots of carpet.  The beauty of this system, is I don't have to haul around a big heavy-duty carpet sucker. The throw rugs shake out nicely or can be washed with hose or machine.

I am THRILLED with the vinyl tile.  The nice clean look, is impressive enough for me.  Since the rest of the interior is in near excellent shape, this completes the look.  8)
 
Dear Miss Mermaid,

Pics please! I'm dying to see what your flooring looks like.

Thanks!
Michelle
 
Here are some pics, I will do some better ones, But I had these on hand, my camera settings were wrong, but you can still see what's happening.

You don't have to give up carpet to have tile everywhere, you can still have throw rugs, in this case I have a washable one by my bed. That throw rug is actually made of the commercial grade carpet, so it shakes out really clean, but can be hosed down or thrown in the washer machine. Don't put your rubber backed rugs in the dryer, if you want them to last, dry on a line, or in my case, on a picnic table at the campground.

http://dearmissmermaid.com/tile2.jpg

By using a coordinating caulk between the wall and the tile, it gave it a finished look and hid any slight imperctions in the custom tile cuts. I used a pale gray caulk, not bright white. Hard to tell in thie pic, but the tile is white, with gray and tan faux marble look.
http://dearmissmermaid.com/tile3.jpg

This shows how bright, light and airy the tile looks, puppy dog (Harley) has already scattered his toys before I could snap the picture.
http://dearmissmermaid.com/tile1.jpg

For a silly video of the dog playing with a neighbor's cat, see this link:
http://dearmissmermaid.blogspot.com/2010/08/dear-miss-mermaid-makes-another-video.html
 
Thanks! It is gorgeous. I also loved the cat and dog playing video. :)

Michelle
 
I REALLY want tile in mine! After spending a REALLY long time cleaning the blood out of the bedroom carpet because one of the dog cut their paw open, it's confirmed that a new floor will be my first remodel project.
 
We just put down a vinyl plank floor in the stick house and and are considering a vinyl tile for the bathrooms.  We used a product called Adura.  It is about 1/8" thick with a hard surface that looks like a maple plank.  Friends have come in to see what we have done to the whole kitchen and they thought it was wood.  If you look closely or get down and feel it you know it is not.

I would recommend this type of product over wood, engineered wood or laminate for use in an RV or anywhere it could be exposed to water.  It is harder than all except the laminate.  If we ever redo the MH floor, we will use this type of material throughout and use area rugs where we want carpeting.  In addition we notice the floor feels warmer than the sheet vinyl that was there.
 
in2adventure said:
I REALLY want tile in mine! After spending a REALLY long time cleaning the blood out of the bedroom carpet because one of the dog cut their paw open, it's confirmed that a new floor will be my first remodel project.

We feel your pain having 3 dogs.  That's why if was really important to us to be able to eliminate all the carpet we could and went nose to tail with Allure.  Only the slides and "step" over the diesel engine in the b/r are covered with carpet.  A few matching throw/area/runner rugs and we're much happier campers!  Even at the beach and in the desert!
 

Latest posts

Forum statistics

Threads
131,964
Posts
1,388,314
Members
137,717
Latest member
aquaticvegetation
Back
Top Bottom