Skylight problem

The friendliest place on the web for anyone with an RV or an interest in RVing!
If you have answers, please help by responding to the unanswered posts.

Jim Godward

Well-known member
Joined
Mar 6, 2005
Posts
5,906
Location
Hillsboro, Oregon
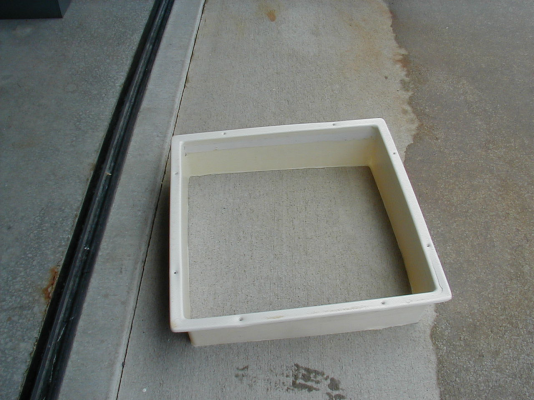
The "box" on the inside of my skylight has many cracks and a few breaks in
it.  I have got the replacement for it but since the manufacturer of mine is
" out of business" and I got a new different box.  I also received a new
skylight to replace the one on the roof as I am told that I must replace the
actual skylight on the roof of the MH to have a proper installation.

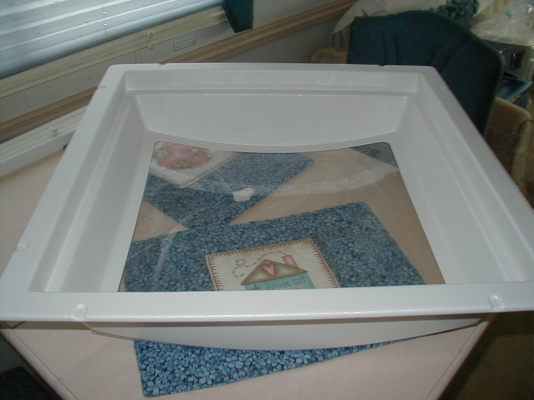
The new box is totally enclosed with a second window in it.  Once it is
installed I will have no access to the inside of the skylight unless I
remove the new box.  There is no sealing required inside with the new box.

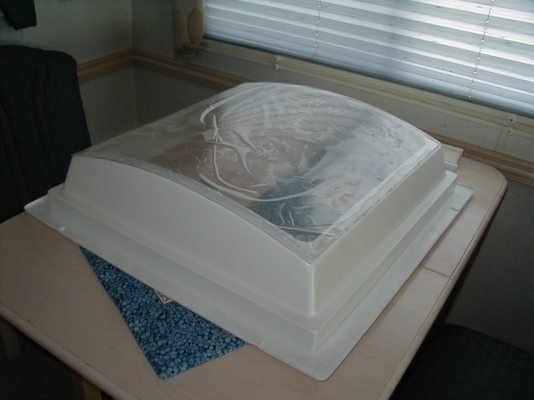
I have checked the dimensions of the new and the old skylight with respect to
the new box.  Both clear the box and the new one has about an additional
1/2" clearance over the old one.

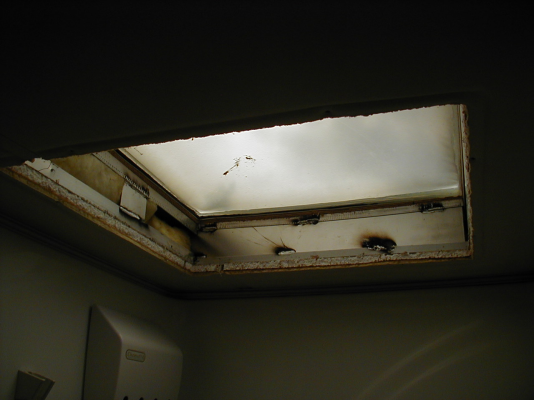
Do I really have to replace the old skylight?????

I would rather not unless it is necessary as the existing one has EternaBond
tape on it for a seal.  I have removed EB in the past and am not afraid to
tackle the job but don't want to unless necessary. 
 
Jim,

It's hard to say without actually seeing the new and old. It sounds like the second window helps insulate. I had that on my original skylight in the coach. Just replaced it before coming out here due to a crack. They sent one without the inner part. So far no problems but I would have preferred one exactly like the original.
 
Here are a few pictures to explain my situation.  The difference between the 2 actual skylights is 1/2" more clearance for a total of 1" with the new one instead of 1/2" with the existing one.
 

Attachments

  • P1010004.JPG
    P1010004.JPG
    1.4 MB · Views: 66
  • P1010001.JPG
    P1010001.JPG
    1.5 MB · Views: 54
  • P1010006.JPG
    P1010006.JPG
    1.7 MB · Views: 42
  • P1010005.JPG
    P1010005.JPG
    1.2 MB · Views: 47
Jim, it is difficult to understand your exact concern, but to me it seems to be a mechanical/cosmetic issue.  If the new trim piece fits up into the old hole and doesn't hit anything and the bottom lip surface of the new piece is wide enough to cover the marks left by the old trim piece, then I think I'd just install the new inside trim and be done with it.  With the new trim in place, can you see anything "undesireable" when you look up through it....undesireable meaning the edges of the roof cutout where the top cover is mounted or any of the structural bracing shown in your picture?  If not, again I'd just mount the inside trim.

I agree with you that it would be better not to disturb the Eternabond unless absolutely necessary.

The bit about having to install the top piece to have a proper installation is likely information printed for today's "minimal common sense" individuals who might consider cutting a hole in the roof of their RV and then just installing the bottom trim since it has a sealing glass in it.  ;D
 
tennsmith said:
I agree with you that it would be better not to disturb the Eternabond unless absolutely necessary.

The bit about having to install the top piece to have a proper installation is likely information printed for today's "minimal common sense" individuals who might consider cutting a hole in the roof of their RV and then just installing the bottom trim since it has a sealing glass in it.  ;D

Bob,

I think you have hit the nail on the head here.  That has been along the lines of my thinking but I wanted to run it around for a while before to see if anyone could come up with a good reason to change out the upper cover.  I tried a couple of local "RV Techs" and they said it has to be done.  So much for good information locally.

"RV Techs", I am being very generous calling them that although they do work for a local shop, I find them less than capable!!    :'(

I'll probably install tomorrow.
 
My trim piece under the skylight is old and cracked.. I'm seriously thinking about trying to make a wooden trim piece to go there that matches the stain color of my cabinets... doesn't look like it would be too awfully difficult..
 
The only comment I have is be sure to finish both sides of any wood you use there as it will be exposed to moisture!!  But you knew that, right!

I think it would look great, not sure about SHMBO though.  She turned down wood valences and window sills.
 
As long as you use the correct wood, such as teak, or seal it correctly you should be good to go..you can make anything out of wood! (if done properly).  If there is too much of a gap could you use expanding foam to seal it up?  I am a complete noobie, so I'm not sure about what to do with the roof.  I'm thinking since I just scraped a bunch of crap off  mine I need the stuff called "eaternabond" around all my vents and possibly the seams (even though they are getting trashed by me remodeling the old rotten wood).  Caulking can always be your friend, but if not used correctly can create a funnel for water and moisture to channel in.  Again, I am new..so my perspective is simply logical, not scientific.  8)
 
Eternabond is expensive, but worth every penny IMO.. I bought a roll of roof seam tape and covered my seams with it.. i also put it around the skylight and around the vents.. There were small leaks around the skylight and also the front seam before.. NO leaks now.. :)

I also bought a roll of their window tape and used it around the driver and passenger side windows (where it USE to leak.. ).. If nothing else, with the way I put the Eternabond tape around the window if there is a leak, It won't run in behind the wall..

You won't ever find me without a roll of Eternabond in my rig.. LOL.. It's sticky, sticky stuff though.. gotta take your time installing it..

The only caulk I use is the kind specifically made for RV's.. I usually avoid caulking wherever possible..

I would suggest reading this article if you haven't already...
http://www.phrannie.org/moisture.html
 
Back
Top Bottom