My Itasca off season project

The friendliest place on the web for anyone with an RV or an interest in RVing!
If you have answers, please help by responding to the unanswered posts.
Kim, The face frames are new poplar 1x2's and 1x3's. However, I do re-use what I can. The paneling is re-used from, mostly, panels taken from inside the closet. Fortunately, they were only stapled or bradded in place and not glued. Those (closet interiors) were replaced with luaun panels. I should have enough to finish all the cabinet exteriors with existing, matching, paneling. The cabinet doors are another matter, however, and I don't have that problem solved yet. I suspect I can have some made to closely match, but the finish may not match exactly.  Time will tell.
 
Counter top cut out and sitting in place for trial fit. Plastic laminate is next.
 

Attachments

  • ProgressII26.jpg
    ProgressII26.jpg
    22.6 KB · Views: 50
Jack,

Is there any real problem, other than clearance, using a deeper sink? And can you use standard kitchen faucets?

My bride is struggling with not having more room to dunk her dishes and pots....she would kill for a sprayer; the way it is now, shallow, we end up splashing everything doing dishes.

Kim
 
skyking4ar2 said:
Jack,

Is there any real problem, other than clearance, using a deeper sink? And can you use standard kitchen faucets?

My bride is struggling with not having more room to dunk her dishes and pots....she would kill for a sprayer; the way it is now, shallow, we end up splashing everything doing dishes.

Kim

None that I can think of, Kim. As long as it fits the available space. The drain would have to be reworked. I've changed the faucet sets in all of my RV's to a standard kitchen set.....no problems there either. Although none had a sprayer. Not sure if a sprayer would have sufficient pressure when using the on board water pump, though. I believe it would be OK...I just haven't tried it. My wife doesn't like sprayers, so we don't have one....not even in our home.
 
Great job.  You should be proud.  In looking at your last photo you might want to replace the drain vent valve.  They only cost a few bucks and access will never be better.
 
They are real easy to change.  The top usually unscrews and allows you to change the rubber flapper inside.  There are a couple different brands.  If the whole unit unscrews just take it off and take it to your favorite hardware/home improvement store and get a new one.
 
No problem changing it, Charlie. I was a pipefitter in the Navy. I'm just wondering why? Are they troublesome? I know it's 26 years old (unless someone changed it before I bought it). It is working now. There is water in the trap. My last RV had the same type and it was working fine, too. And it was in a 1976 Dodge class "C" (much older). Are you reccommending changing it just because it is easier with the sink out? Or is this type a trouble maker? I'm not really familiar with this type of plumbing vent other than the RV's I've had in the past had them.
 
The rubber flapper ages and gets stiff so it doesn't seal like it should and will let odors into the rig.  I just like to change stuff when it is readily accessible.  Guess it comes from working on boats so much.
 
boatbuilder said:
The rubber flapper ages and gets stiff so it doesn't seal like it should and will let odors into the rig.  I just like to change stuff when it is readily accessible.  Guess it comes from working on boats so much.

Ah! Ha! Now I understand. Change it, I will. Thanks again for the suggestion.

Edit: I removed and checked the valve. It is still soft and pliable. Maybe it has been changed at some point. JDD

I've worked on boats myself. In fact I designed a boat building jig (a revolving jig) a few years ago, and a builder in AK took the design further. A couple of photos of his version with boat attached in progress. A drawing of my original design showing how a boat can be rotated 360 deg. for ease in welding.
 

Attachments

  • deck frame_4a.jpg
    deck frame_4a.jpg
    52.6 KB · Views: 44
  • 14_6a.jpg
    14_6a.jpg
    35 KB · Views: 40
  • canoe build.jpg
    canoe build.jpg
    55 KB · Views: 28
Counter top almost finished. Sink and plumbing installed. Counter top oak edging ready for stain. Some trim along the back still to go. LP gas leaks are a pain....
 

Attachments

  • ProgressII36.jpg
    ProgressII36.jpg
    20.1 KB · Views: 50
Today, I tested the catalytics....along with the CO alarm. Not sure what happened, but the CO went up to about 58 ppm then I vented using the fan in the control panel. It went down to about 45 ppm (both heaters burning). Went in the house for a couple of hours and when I came out the CO alarm was reading 45 ppm and alarming. It shouldn't alarm at 45. Top reading was still 58 (I hadn't reset it). I then reset the alarm and the top. With both heaters burning it started at 45 and going down.....down... finally settling at 16 ppm. The only opening is the bathroom vent (cracked only) and various leaks (no windows). Why the initial test was so high and why the alarm sounded at 45 ppm is a mystery. Further testing may shed some light on things. If the readings stay at ~16 ppm, I'm happy.

Edit: I wrote the factory...awaiting a reply. Thinking about it, maybe the catalytics were burning off manufacturing impurities. The alarm could have sounded because the CO was high for about 3.5 hours. It's reading well below 20 ppm now. I'll test again tomorrow.

 
boatbuilder said:
Neat turning fixture.  Looks like a high end aluminum boat.

He built that one for his wife. Here's another photo. Same boat with canopy framing. He designs them with CAD then builds them. I wish I had his skills. Off topic, so will not post anymore here. I just hought it was interesting.
 

Attachments

  • canopy_2a.jpg
    canopy_2a.jpg
    103.9 KB · Views: 43
I just had another thought about the high CO readings. It may be the alarm itself causing the high readings. Reading the booklet that came with it, it states that many things can skew the output.....paint fumes, hair spray, even perfume. The wife had been applying water based Varathane to the luaun plywood......maybe the fumes caused the high readings. Or even the glue used in the counter top. I'm off to test again this morning.

Edit: Same result today. CO went up to 58 ppm. Turned off Wave 3, left Wave 6 on high. Waiting for results.
 
Jack, many thanks for posting your project.  You can see my little project in the "Jayne and Hero Come to Texas" thread if you haven't seen it already.

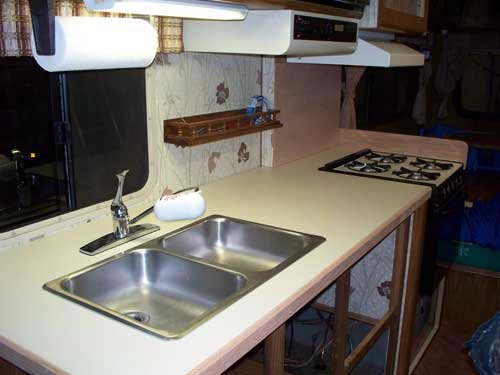
I really like your two drawers for the big closet idea, and will do it in my Fox.  One problem I'm dealing with in reorganizing is that the manufacturer could have made at least 9 drawers taller and longer in the Fox.  I live in it full time and have a good payload rating, so I plan to lengthen those drawers somewhere down the road.

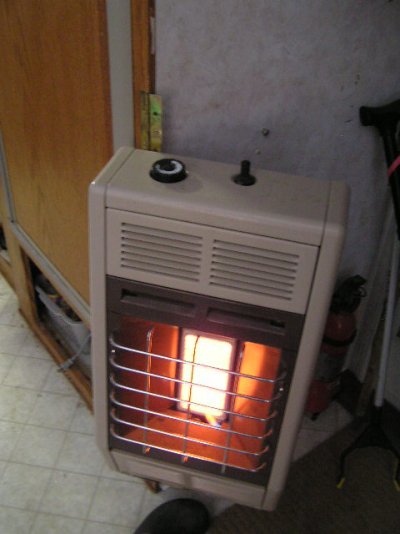
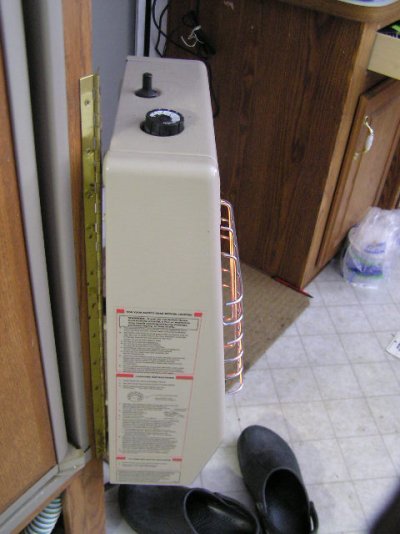
As far as the Waves, how did you mount them, or are you using the little feet?  I started out with a Wave 8, but after several years got tired of not having a thermostat for it.  It only had three settings; low, med and high. 

Two years ago I changed over to a one-brick propane heater with a thermostat.  It seems to burn less propane and the thermostat makes a big difference.  I have it mounted like I did the Wave, on a piano hinge mounted to the corner of the fridge.  For traveling, I swing it back against the wall and hook it over the screw in the wall.

Because the Fox is so well insulated, the one-bricker does a pretty good job down to the "teens" tempuratures.  Temps in the single digits I can still stand; I just have to bundle up a bit.  ;D

I always leave a window and one ceiling vent cracked a bit.  My CO2 detector has never alerted, so I'm keeping enough oxygen coming in.  If you don't have enough air coming in these heaters will eat up all the oxygen and you will wake up dead!  :'(

The Fox does have a furnace that also ducts around the fully enclosed and insulated tanks, but it is noisy like a 747 and I hate to run it.
 

Attachments

  • P1010003.JPG
    P1010003.JPG
    55.2 KB · Views: 42
  • P1010002.JPG
    P1010002.JPG
    58.1 KB · Views: 43
  • P1010001.JPG
    P1010001.JPG
    59 KB · Views: 40
Back
Top Bottom