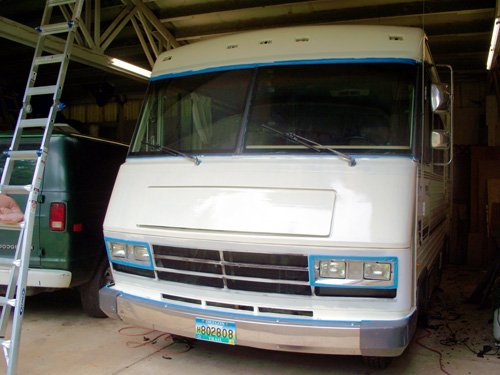
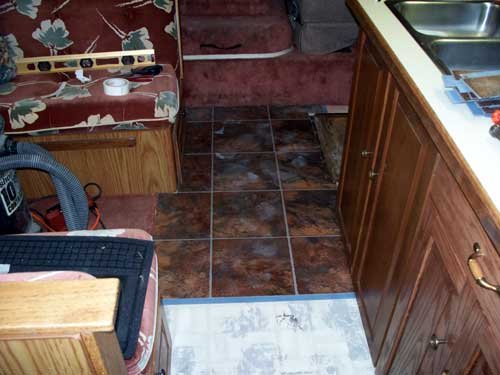
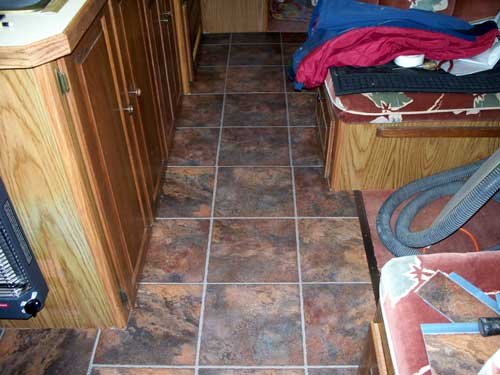
My Itasca off season project

The friendliest place on the web for anyone with an RV or an interest in RVing!
If you have answers, please help by responding to the unanswered posts.
M1894 said:
Jack does your exhaust system look like it has overheated in that area in the past? It might have just provided enough heat to cause further expansion of the foam in that area, causing the floor to buckle. A small hole through the floor outside of the raised area [probably inside a cabinet to keep it invisable.] should enable you to test for floor thickness and compare both areas to each other.

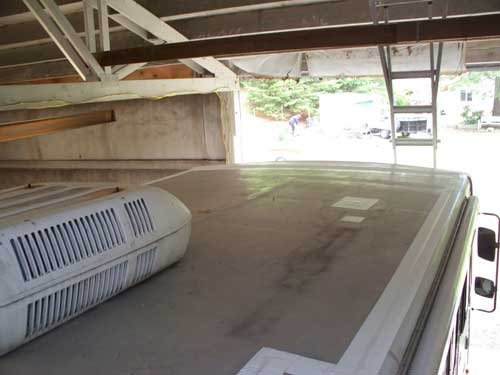
No. Everything looks normal. And I did cut a core sample (photo above) from the center (high point) of the hump and it is a normal thickness. 
 
Almost done on the inside. Some trim at the counter top and finish on the table edge trim yet to do. The seats need to be recovered, too. That's the wifes job. The outside is next. Eternabond to apply on the top. The old fridge vent to remove and seal. Front and rear end caps to paint and decals to remove and new stripes to paint.

More photo's: http://www.metalsmithpro.com/Itasca%20ProgressIII.htm
 

Attachments

  • Progress III 21.jpg
    Progress III 21.jpg
    24.3 KB · Views: 51
Jack,

That is some really time consuming effort you have put into this. And I really liked how you did the aluminum entry way. Reminded me that aluminum is a good choice for weight where appropriate.

I was interested in the way you attached the table with wing nuts. I am having a top built that will span my current table and the seats, stabilized with cleats on the edges of the existing table, and I was trying to figure a way to use the cleats and make something that I could disassemble easily.

Any chance you have a pic of how you did the wing nuts?
 
skyking4ar2 said:
Jack,

That is some really time consuming effort you have put into this. And I really liked how you did the aluminum entry way. Reminded me that aluminum is a good choice for weight where appropriate.

I was interested in the way you attached the table with wing nuts. I am having a top built that will span my current table and the seats, stabilized with cleats on the edges of the existing table, and I was trying to figure a way to use the cleats and make something that I could disassemble easily.

Any chance you have a pic of how you did the wing nuts?

Thank you.

I'll get some pic's. tomorrrow and post them.
 
I attached 1"x1"x1/8" aluminum angle to oak board. Drilled to accept screws. Under the table are two pieces of flat bar drilled and tapped for 1/4"x20 tpi, and drilled and countersunk for mounting screws. The 1/4"x20 tpi screw heads are round head. The table is counter bored for the heads so that it sits flush.

I hope the photo's are self explanatory. My rambling above may not be.

Photo's of table attachment to wall.


Attachments

  • table1.jpg
    table1.jpg
    22.7 KB · Views: 50
  • table2.jpg
    table2.jpg
    12.2 KB · Views: 47
  • table3.jpg
    table3.jpg
    19.5 KB · Views: 46
  • table4.jpg
    table4.jpg
    23.4 KB · Views: 50
Jack,

That was very clear and gives me several mounting options that I may use. I like the use of the metal for the fastening.

The idea of tapping the flat bar did not occur to me and I can use that concept to attach my cleats to my original table top.

Still designing in my head - thanks for even more ideas!
 
Jack, I like the wingnut/angle aluminum idea.  I can see a couple of places in the Fox where I can use that.

I'm still working on the slide-out gasket replacement.  It's taking much longer than I thought because there was rotted wood on the wall header behind it that had to be treated first.  THEN it's been rainy and cold for over a week.  I'm taking pics of the project and will post them soon.
 
Due to a sudden death in the family, I've, temporarily, put the project on the back burner. I hope to get back to it in the next couple of weeks. We are the estate executors and it has been very time consuming.
 
Sorry to read about your loss. Have greatly appreciated this thread. I'm doing a similar project and your work is very inspiring!
 
Jack, glad to see you are back!  I really appreciate all your posts.

One of these days I'll get around to posting my slideout wiper seal/frame replacemet project.
 
It's finally beginning to warm a little....very little.....Hopefully, I'll be able to paint the exterior soon. Yesterday, I began the removal of the decal striping with a heat gun and lacquer thinner. It works but is messy. For paint, I've purchased marine paint. They didn't have brown, so I mixed red and green and got a nice shade of brown. This will be used to trim and replace the striping. The base color will be oyster white. After the painting , I can replace the running lights and reseal the seams.
 
Experimenting with decal removal, today, I wiped the right side of the hood with lacquer thinner before I ran out, then sanded using a random orbit sander. First photo prior to sanding, second sanded with 180 grit paper.
 

Attachments

  • Ext6.jpg
    Ext6.jpg
    12 KB · Views: 54
  • Ext7.jpg
    Ext7.jpg
    11.2 KB · Views: 53
I'm back on track. Finished the counter-top yesterday. Prior to that I peeled, scraped, cleaned most all of the old roof sealer and replaced it with Eternabond. I removed and plugged the old fridge vent and TV antenna while I was at it. I've removed all the top clearance lights, cut the new lenses. I also removed all the "Itasca" tape from the hood. Now I'm hoping the weather warms a bit more so I can paint. Spring is slow in coming this year.

http://www.metalsmithpro.com/Itasca%20ProgressII.htm
http://www.metalsmithpro.com/Itasca%20ProgressIV.htm
 

Attachments

  • 100_2931.jpg
    100_2931.jpg
    23 KB · Views: 49
  • 100_2932.jpg
    100_2932.jpg
    20.3 KB · Views: 51
  • 100_2937.jpg
    100_2937.jpg
    21 KB · Views: 51
Finally getting some good weather. I've been removing tape decals from the sides using heat gun, scraper, Eraser wheel (great tool) and lacquer thinner. Almost there. Last Saturday, I masked and painted the front cap with first coat of Oyster white, using a 4" foam roller. the results are pleasing. I could have tipped it off with a brush to level out the stipple of the roller, but since the fiberglass is wavy, a high gloss finish might show off the waviness too much. I decided not to tip it off. I used Rustoleum Marine topside paint. This paint is self leveling, and really goes on smooth with a brush. A roller leaves a mild "orange peel" effect that is not bad. Today the masking tape comes off and after more prep. work, the grille area will be painted brown. Rustoleum did not have a brown in Marine paint, so I mixed equal parts of red and green. A nice brown results.

http://www.metalsmithpro.com/Itasca%20ProgressIV.htm
 

Attachments

  • 100_2957.jpg
    100_2957.jpg
    75.8 KB · Views: 40

Latest posts

Forum statistics

Threads
131,929
Posts
1,387,651
Members
137,677
Latest member
automedicmobile
Back
Top Bottom