Large bubble in fiberglass sidewall of 2000 journey...How to repair?

The friendliest place on the web for anyone with an RV or an interest in RVing!
If you have answers, please help by responding to the unanswered posts.

Ramzfan

Well-known member
Joined
Oct 31, 2010
Posts
68
Location
Reno, Nevada
I notice that there is a large bubbled area on the sidewall of my 2000 Journey that appears to be caused from the fiberglass delaminating from the interior foamboard. Any suggestions on how to repair this would be greatly appreciated.
 
Ramzfan said:
I notice that there is a large bubbled area on the sidewall of my 2000 Journey that appears to be caused from the fiberglass delaminating from the interior foamboard. Any suggestions on how to repair this would be greatly appreciated.

This is a toughy. How large is large? Is there any way to access that area....a louver, window or access panel that can be removed to gain access to that area? Attached is a picture of the side wall construction of my Itasca. Is yours the same? Notice that the fibreglass is actually glued to 1/8" plywood....not directly to the foam board. Is the separation between the plywood and foam or plywood and fibreglass? Is the plywood in good condition, or has it been wet and disintegrated? Are you a DIY'er? Depending on the answers to the above questions, there may be some things to try. I have some ideas....none tested, but so much depends on the actual conditions and construction of the side wall.
 

Attachments

  • side wall.jpg
    side wall.jpg
    258.9 KB · Views: 106
you might consider drilling a 1/4 inch hole in a couple of places on the bubble and then inject fiberglass resin into one till it leaks out the other then put pressure on all of the bubble with plywood and leave it their overnight. Make sureyou have paper between the wood and the sidewall. Remove wood and clean up with resin remover. If there is a fiberglass boat builder in your area you could check with him for other ideas.
Did this on a boat I owned and it worked well  clean up is the hardest part
Good Luck
Howard
 
The repair can be made with EPOXY RESIN (not Polyester). The problem is one of access. If you can get the epoxy resin in the area by removing a window or outside access door or louver, then the problem is not too difficult. If not then things get a bit tougher.

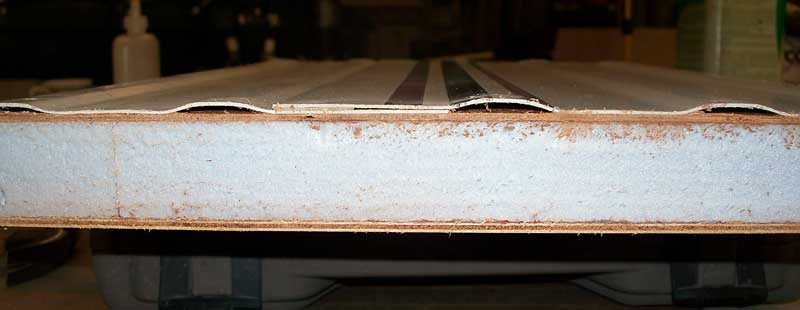
Epoxy resin is a thick liquid, so will probably need to be thinned. Epoxy resin will not affect the foam board, but I don't know the effects of the thinner(s) on the foam board. Some testing may be required. If the repair is between the plywood and the fiberglass, then this is probably not a consideration. Thinning instructions can be found here: http://www.ehow.com/how_5868793_reduce-fiberglass.html
Possible fixes:

1. If you can get to the area from the inside of the coach (inside a cabinet perhaps?), then a hole saw may give you enough of an opening to get the resin into the area. With a hole saw, saw a hole through the interior 1/8" panel, then remove the pilot drill and continue through to the void that needs gluing......being very careful not to go through the outside fiberglass. If the area to be re-glued is very large, you may need more than one hole. Remove the plug(s) and save it. Pour thinned resin into the void using funnel made of metal or cardboard or whatever, working (push and release) the fiberglass panel outside to spread the resin around. Shore up the loose area to hold the fiberglass tight until the resin hardens. Using foam and panel cement, glue the plug(s) back in.

2. A similar approach to fix 1 is to drill a series of smaller holes from the inside to the void and using a glue syringe, squirt the thinned resin into the void through the series of holes. Again, shoring up the side until the resin hardens. Caulk the holes that were drilled inside the cabinets.

3. If there isn't a way to access from the inside, then perhaps a series of very small holes outside in the fiberglass layer, just large enough for a veterinary hypodermic syringe with thinned resin can be used to get the resin inside the void........I don't know if the resin can be thinned this much, so some experimenting is in order. Epoxy glue can be used to fill the very small holes.

I'd go from inside if at all possible.
 
There is another  problem besides access - you have to clamp the outer skin down flat once you get the resin (or other adhesive) in place. Depending on location, that may require some ingenuity!

If you have to go from the outside, consider actually cutting the skin out with a shallow cutting power saw (kerf cut). That makes getting the adhesive in quite easy, and a thin line cut is not much more difficult to repair than a set of holes. In either case, you have to fill the holes and re-paint or otherwise refinish the area.


Edited to fix typo
 
Jack D said:
This is a toughy. How large is large? Is there any way to access that area....a louver, window or access panel that can be removed to gain access to that area? Attached is a picture of the side wall construction of my Itasca. Is yours the same? Notice that the fibreglass is actually glued to 1/8" plywood....not directly to the foam board. Is the separation between the plywood and foam or plywood and fibreglass? Is the plywood in good condition, or has it been wet and disintegrated? Are you a DIY'er? Depending on the answers to the above questions, there may be some things to try. I have some ideas....none tested, but so much depends on the actual conditions and construction of the side wall.

Hi Jack, to answer your questions...the bubble appears to be approx 18" wide and maybe 26" tall, in an odd shape. It's right in the middle of a large area on the passenger side with no windows near it. Thank you very much for the photo of the sidewall. I'm quite sure that mine is the same. I am assuming that the separation is between the fiberglass and the plywood, however I won't know until I attempt the repair. I am a DIY'r and am quite skilled in fiberglass repair, as I used to restore Corvettes. Your photo told me a lot about what I can expect to find once I get started. Thanks a lot and I welcome any suggestions that you might have. If you want to email me, my address is [email protected]
 
Gary RV Roamer said:
There is another  problem besides access - you have to camp the outer skin down flat once you get the resin (or other adhesive) in place. Depending on location, that may require some ingenuity!

This is what I meant by shoring it up. I would park alongside a building and shore it against that building to hold the material flat. Epoxy resins will give ample time to do this if you are ready with lumber and helping hands.
 
The technique that Jack described was also use by forum member John White. Here's John's article describing a similar repair in our forum library.
 
Check with Winnebago Owner Relations as well.  They usually replace sidewalls with a problem like that but maybe they can give you some pointers.
 
Here's another option, since it's in a large flat area. Working on the outside and using a 2.5"-3" hole saw, saw through the fiberglass near the top of the loose spot. Maybe even two holes, side by side. Now you have access to get the resin inside. After pouring the resin, oil-can the loose fiberglass several times to spread it around, then shore it to hold it flat until the resin cures. After curing and clean-up, install a small, sheet metal, louvered vent cover, like a range hood vent over the access holes you just bored. It will look like a normal vent and no one will be the wiser. If you have some, cover the holes first with Eternabond tape, then install the louvered vent cover.

Using this method gives easy access and with good clean-up, no patching or painting is necessary since the louver covers up the work area. Laquer thinner will clean up excess resin, but be careful that it doesn't remove paint or soften the fiberglass panel. Test in an obscure area first. DO NOT USE polyester resin. It will instantly desolve the foam that it touches.
 
Back
Top Bottom