Skylight Replacement

The friendliest place on the web for anyone with an RV or an interest in RVing!
If you have answers, please help by responding to the unanswered posts.

Water Dog

Well-known member
Joined
Sep 27, 2010
Posts
2,487
Location
Sumner, TX
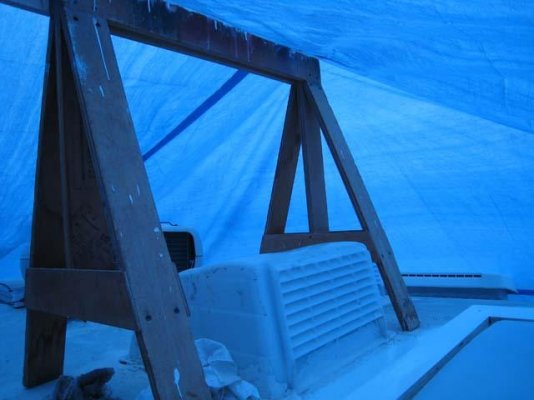
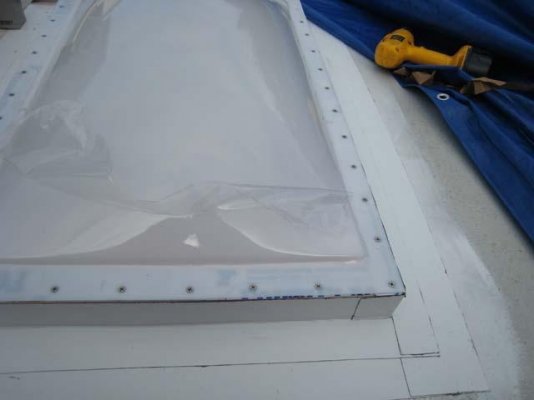
Well.... I climbed up on the roof of the MH the other day to see if I could find a small leak that we have been experiencing in hard rains in the cabinet just downhill of the skylight over the shower. Whoever owned this MH previously had obviously put caulking compound around the skylight using a shovel. I noticed that there was a small crack in the skylight itself, and as I cut away at the caulking around the edges the crack ran clear across the top. The outer cover was very brittle.

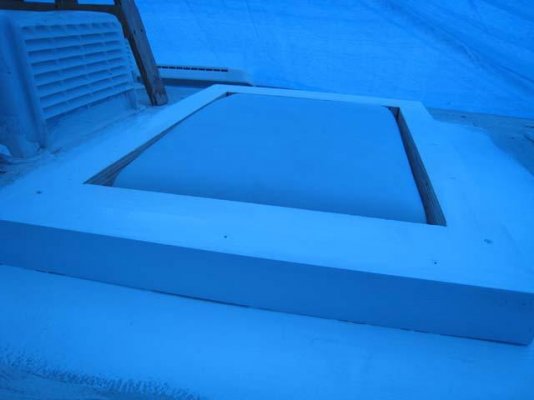
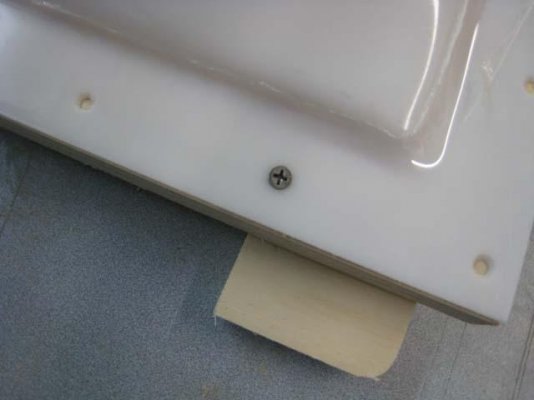
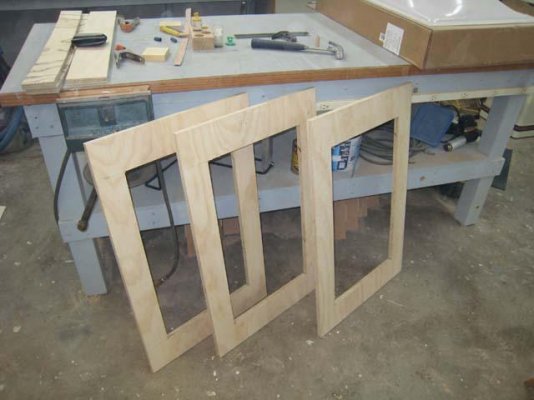
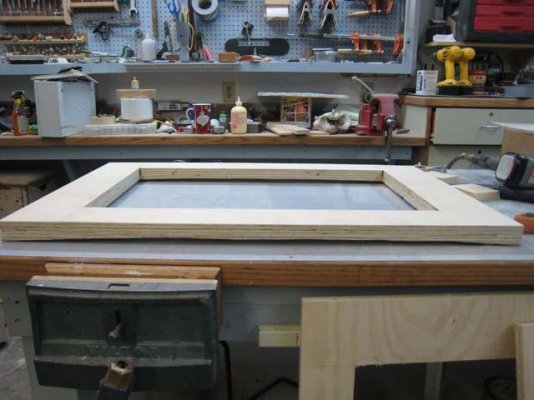
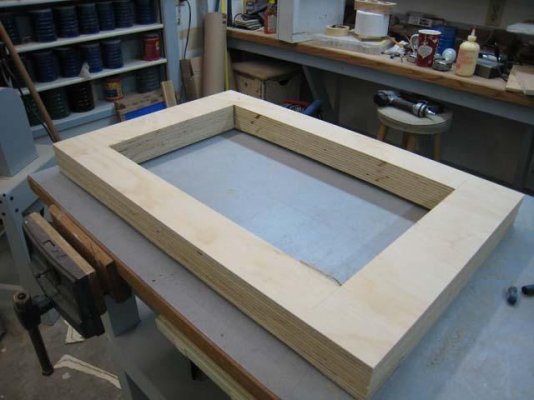
I headed down to the local rv dealer (actually 3) and attempted to find a replacement only to find that they would have to order one and couldn't guarantee it would be identical. Since this skylight is in two pieces (an inner and an outer) I decided to only replace the damaged outer portion and to go a little over size to get outside the old screw holes. Since I don't know if the new one is going to be tall enough to go over the inner part (which sticks through the roof by about 3") I may build a raised curb around the inner part for the outer one to sit on.

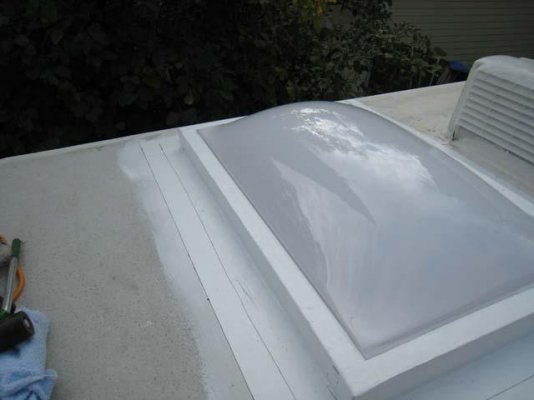
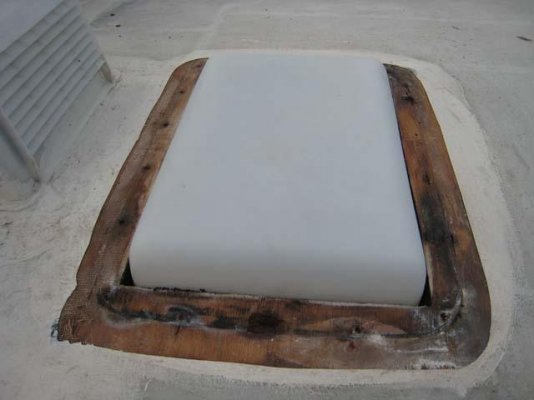
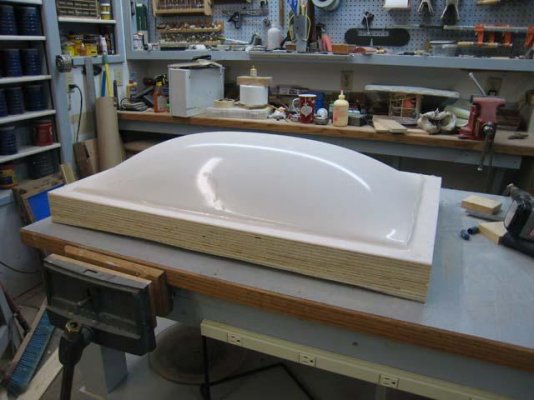
I know there have been some posts on here regarding skylights in the past few months, so I decided to take a few pictures of my project and post them here in case someone has to go through something similar. The first pic is with the outer part just sitting there, the second is the inner part that sicks up through the roof, and the third is the storm that will probably be here tomorrow afternoon-before I get my parts... :'(  Guess I better get out the tarp...!
 

Attachments

  • IMG_1156.JPG
    IMG_1156.JPG
    26.1 KB · Views: 138
  • IMG_1155.JPG
    IMG_1155.JPG
    27.5 KB · Views: 125
  • IMG_1157.JPG
    IMG_1157.JPG
    19.5 KB · Views: 105
Isn't that always the case when you have a hole in your roof- the clouds come up.
 
Ernie Ekberg said:
Isn't that always the case when you have a hole in your roof- the clouds come up.

Pretty much Ernie. I knew I shouldn't have started this right now, but the weather has been so nice the past week that it was hard to leave it alone.
 
My new outer skylight arrived today and it was way more shallow than the original. I am building a 2-1/4" high curb to set the skylight on. It's raining outside and I've tarped the MH so today I'm doing the shop work. The first thing I did was to make some scribe strips that will follow the contour of the roof so that the skylight will be able to sit flat. (pic 1)

Next I cut three frames out of 3/4" plywood with the outside dimensions the same as the outside flange dimensions on the skylight and the inside dimensions just slightly larger than the existing hole in the roof where the inner skylight sticks though. (pic 2)

I then glued and stapled my scribe strips to the bottom of one of the frames. (pic 3&4)

The 5th & 6th picture are of the frames stacked and then the skylight sitting on top. This is the way it will look sitting on top of the MH, although I will install the frames one at a time using prime guard screws. The sides of the completed curb will be sealed to the existing roof with Eternabond tape, then more Eternabond over the skylight flange and down the sides of the curb.

I plan on using a product called Fortiflash, (used for installing windows) which is a rubbery substance with a sticky back available at the home centers, as a gasket between the skylight and the plywood. I will countersink the 38 existing holes in the skylight flange so that I can use flathead stainless screws to hold it down. That will give me a smooth flange area to adhere the Eternabond tape to.

Hopefully it will stop raining in the next few days so I can get this finished. The neighbors probably really don't like my giant blue tarp....Actually, neither do I.
 

Attachments

  • IMG_1158.JPG
    IMG_1158.JPG
    32.8 KB · Views: 81
  • IMG_1159.JPG
    IMG_1159.JPG
    35.8 KB · Views: 80
  • IMG_1160.JPG
    IMG_1160.JPG
    34 KB · Views: 73
  • IMG_1161.JPG
    IMG_1161.JPG
    45.3 KB · Views: 66
  • IMG_1163.JPG
    IMG_1163.JPG
    36.5 KB · Views: 73
  • IMG_1162.JPG
    IMG_1162.JPG
    43 KB · Views: 95
If you want to be sure get some 3M 5200 to adhere the frames to the roof and together.  You can also use 4000UV it is not quite as strong but it will be more than adequate for your purpose.  I would also use an oil based primer before putting on the eternabond.
 
It's been raining all night and I and the DW are anxious to get the MH finished. We had a little break in the weather for a couple of hours this morning so I decided to use a saw horse to prop my big blue tarp up (pic 1) so I could get something done.

I got the first two frames installed on the roof and upon checking the clearances found I didn't need the third. That's great because I'd like to keep the profile as low as possible. I liked Charlie's suggestion about priming the wood and got that accomplished as well as some of the surrounding existing roof where I will be applying the Eternabond. (pic 2)

I also got the mounting holes around the edge of the new skylight countersunk, and while doing that noticed that the edge of the flange makes a pretty sharp corner. I decided to round over the edge just slightly, using a handy file, to ease the stress on the Eternabond tape that will be going over it. (pic 3 & 4)

I think I'm going to give the primer at least a full 24 hours to dry before continuing ........ I love having an excuse to go sit in front of the fire with a cup of hot coffee. I think the weather is supposed to get better Monday, so hopefully I will be able to un-tarp and finish it then.
 

Attachments

  • IMG_1168.JPG
    IMG_1168.JPG
    33.1 KB · Views: 78
  • IMG_1167.JPG
    IMG_1167.JPG
    19.4 KB · Views: 83
  • IMG_1172.JPG
    IMG_1172.JPG
    21.9 KB · Views: 87
  • IMG_1169.JPG
    IMG_1169.JPG
    19.5 KB · Views: 95
Got a break in the rain this morning, and was able to finish the skylight install.

I put down the first layer of Eternabond tape flat against the roof surrounding the curb. I have never used Eternabond tape before...now I'm sold. I started on the low side so the overlaps wouldn't have a tendency to trap water. I then put on a second layer that I folded so the horizontal part sat about half way out on the first layer and the vertical went to the top of the curb. I then marked and pilot drilled the screw holes that will secure the skylight to the curb before sticking down the Fortiflash to the curb. Once the Fortiflash was down I secured the skylight to the curb. (pic. 1)

The final step was cutting one more layer of Eternabond tape, folding over so that the horizontal was covering the screwed down flange on the skylight, and the vertical over the side of the curb. (pic 2)

Although probably not absolutely necessary, I think I'll run a fine bead of Elastomeric caulk along the upper edge of the Eternabond tape across the bottom of the skylight just to give the water a smooth transition to run off.

A good shot of rain is being forecast for tonight and tommorrow night here, so it will be a good test to see if this works....I'm a carpenter, but never claimed to be a roofer.  ;D
 

Attachments

  • IMG_1174.JPG
    IMG_1174.JPG
    19.5 KB · Views: 121
  • IMG_1176.JPG
    IMG_1176.JPG
    24.8 KB · Views: 124
Nice job with the tape laps.  You should be a roofer because you understand how to go about not creating a leak point.  As my former BIL taught me, always think that the layer you are working on can leak, what is going to catch it? 
 
boatbuilder said:
  You should be a roofer because you understand how to go about not creating a leak point.   

I shouldn't be a roofer because I am not particularly fond of heights and it's hard to work with just one hand while you're holdin' on with the other... ;)
 
boatbuilder said:
I told you, you should have been a roofer.

Maybe you're right Charlie. Do they make a hammer with a handle long enough to reach the roof from the ground? ;D
 
Very nicely done. My roof project is coming up soon. Purchased Eternabond a while back and did some of it where it seemed urgent, but lots more to do (after I finish the interior).
 
Dennis
Very nice job. You proved it when it didn't leak.

George
 
Back
Top Bottom