Laminate wood floor

The friendliest place on the web for anyone with an RV or an interest in RVing!
If you have answers, please help by responding to the unanswered posts.

ericcoplan

Active member
Joined
Apr 11, 2011
Posts
29
Location
Central MN
I am thinking of installing a laminate wood floor in the entire living room area of my fifth wheel. Installation should be a breeze with the experience that i have. My biggest concern is the slide. When the slide goes from the extended to the retracted position the bottom of the slide floor DEFINETELY rubs on the carpet in the living room. It is obvious also because the carpet is matted down where the slide moves back and forth. Scratching of the laminate i think will be inevitable.

I have searched every possible key word in this forum to try to figure out how I will protect this floor from the bottom of the slide floor.

1. Felt type pad attached to bottom of floor slide to protect floor (Pain in the $%& to install due to tight tolerance of floor to floor)

2. Have a separate felt type pad to lay down before slide is retracted (Kind of a pain to do every time we camp but not to bad)

Any suggestions on this subject would be greatly appreciated. Thanks Eric

 
We use a couple of throw rugs located at each end of the slides.  Make sure that you check the bottoms of the slides for anything that is sticking through the bottom.  W had a couple staples where they stapled the carpet to the floor in the slide itself.  Had to replace a couple boards where they were scratched.  post pics when you are done,
 
Check out what can be done with a little thought and planning.
 

Attachments

  • woodruffwood 005.JPG
    woodruffwood 005.JPG
    201.4 KB · Views: 232
I have searched every possible key word in this forum to try to figure out how I will protect this floor from the bottom of the slide floor.

I hear what you're saying.  The trouble with slides is that you can't see the bottom of the slide unless you either remove the slide or part of the RV flooring and sub-flooring under the slide.  Most of us have little idea of what the bottom of our slides look like or how it makes contact with the flooring as it moves in or out.  If you have carpeting, you can see how the carpet gets matted as the slide rests on it while retracted, but that's about all.  As far as I know, we don't even have the nomenclature defined to describe what's under there.  Does the slide move on glides or gliders, runners, tracks, or what and how many different types are there in RVs?

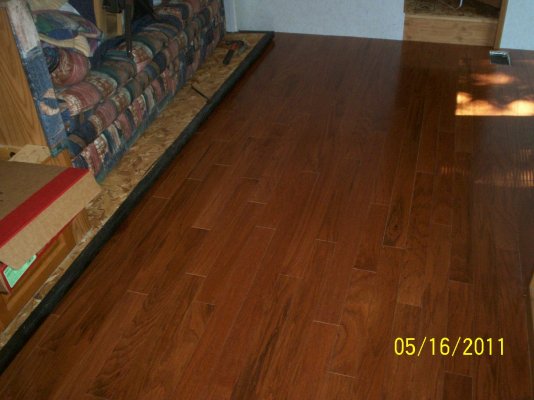
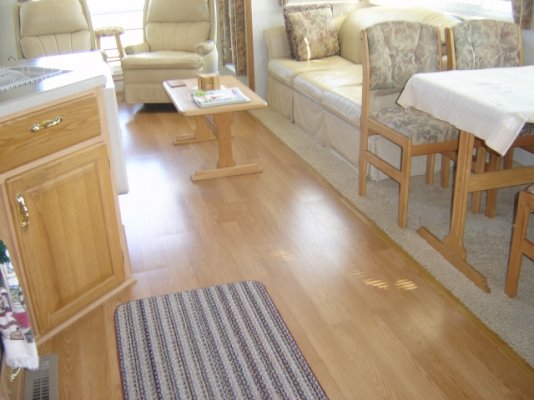
[font=verdana, helvetica, sans-serif]In my case, I had to remove carpeting (and pad) and a section of sub-flooring that had rotted directly underneath the slide before adding vinyl laminate (TrafficMaster).  Because of this, I was able to see the underside of our living room slide while the section of sub-flooring was removed.  The bottom, inside-most edge of our slide, running the full length of the slide, has what I would call a white-colored plastic (or similar material) runner.  It's about 3 inches wide and has beveled or somewhat rounded edges on the bottom of both the leading and trailing edges.  It is oriented perpendicular to the movement of the slide and is the only thing resting on the MH floor when the slide is fully extended. The screws that hold the runner to the floor of the slide are countersunk.  [/font]

[font=verdana, helvetica, sans-serif]After installing the vinyl laminate flooring, we worried that the slide runner would scratch the new flooring when the slide was extended or retracted.  So we initially used a large sheet of cardboard placed under the runner to let the slide ride up on and travel on.  After doing that several times, we noticed that the cardboard wasn't being compressed or damaged in any way by the runner and probably wasn't really needed, at least when the slide was being retracted.  So after a time, we quit using the cardboard altogether.  Now, almost a year later, we see some marks on the flooring where the slide moves in and out.  We suspect that something like very small gravel got stuck between the runner and the flooring and ended up scratching it as it moved in or out.  We don't know whether it occurred while extending the slide or retracting it.  It's impossible to see anything under there so all we can do is try and keep the floor as clean as possible before retracting the slide.[/font]

[font=verdana, helvetica, sans-serif]So the bottom line is that we still don't know a lot about slides or how to keep them from marking up new flooring as they move in or out.  RV manufacturers don't give us a lot of help in this regard either.  They install carpeting which hides everything and expect that to remain in the RV forever.  And when we decide we want a different kind of flooring, things get complicated rather quickly and we're left to sink or swim on our own.[/font]


One of the best tools that I have ever purchased is a fibre optic inspection camera. The unit has a 3 foot long wand and detachable color monitor. You can see
anywhere with this. Also, You can move the rubber seal down under the slide from the outside to see how your slide works. Bought that camera at Harbor Freight. I know they have some junk tools, but this thing works great
 
We vacuum and mop each time we retract the slide.
I also put door sweep strips behind the trim baseboard on the slides to keep pebbles and paper clips (our cats favorite toy - she is a master thief) from getting under them.

Other people have posted that these work.

I have a friend that uses thin pieces of aluminum sheet as a buffer.
 
How about a mirror laid on the floor to see the slide's interior underside?
 
If your slides are flush with the floor when extended, you should be able to start the slide in a foot or so and peer under it to get a good idea what you could be up against. Mine has rollers which were less of a problem than slides or rubbing pads.

I have re-done the living area in laminate after removing the carpet, a million staples, and the plywood/flooring in the kitchen area. I decided to leave the carpet in the slides themselves as the leading edge is a 6" or so steel plate and fastening down that edge would have been problematic. The carpet also hides the 3/4 in. gap at the edge of the slide which is necessary when the slide moves back in and starts coming up its ramp.

I also used strips of hardwood sloped downward on the edges (barely visible in the photo) of the floor where the slides come up and in on their rollers to prevent damage to the softer flooring material and continue the ramp effect that was previously supplied by the doubling over of the carpet edge. The roller marks were visible on the old carpet, but nothing has shown on the floor after 3 years.


Attachments

  • Floor2217a.jpg
    Floor2217a.jpg
    219.3 KB · Views: 128

Latest posts

Forum statistics

Threads
131,913
Posts
1,387,263
Members
137,664
Latest member
Joe-
Back
Top Bottom