Sequence of Roof recoat

  • Thread starter PatrioticStabilist
  • Start date
The friendliest place on the web for anyone with an RV or an interest in RVing!
If you have answers, please help by responding to the unanswered posts.
PatrioticSpecialist,

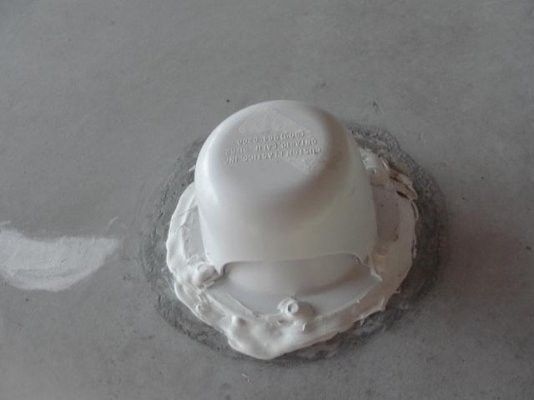
Have you tried a heat gun (on low-carefully) or an old hair dryer to warm the caulking? It makes a world of difference, especially when it is cold out.
By the way, I'm totally impressed with your "gumption" as us old folks call it. I plan on doing this very project when my roof warrants it and am watching yours carefully to learn your tricks that you discover on the way.
Don't worry about problems that come up, you'll handle them, as Elanore Roosevelt said "Women are like tea bags, you never know how strong they are until they are in hot water!"

Tom and Georgia
 
Hubby was telling me he had a heat gun, but honestly I just don't like cold.  I thought of putting a heater up there too for ME!  But I see where Tuesday and Wednesday its to get in the 70's.  I will drive the motorhome out from under enough to get in the sun, yet still access the roof by ladder.  But you know even the idea of a hairdryer is a good idea, it might soften it enough to help.  I told hubby I was a little leery of a heat gun on that old rubber roof, it might not do well.

We want to see how long this stuff lasts after we get it on, we figure we will have to put a new roof membrane in a few years if we keep it.  I just don't think its ready for that just yet, we will find out.

I think he is planning on getting 2 new AC's for it.  If I asked he would get them for me for Christmas, but I'm going for a satellite dome.  We aren't going to take the one off the Sightseer, its mounted well and though we likely won't get any money back on it, we don't want to mess up the roof where its mounted either. It works really well, I've very satisfied with the stationary one we got for it.

I want to get the skylights done so I can take it out and drive it, not good to just sit there. But I'm afraid to take it out with one out, well to get propane would be ok but not long.  It would probably come  up a rain shower and we don't need that.

Today I am going to go out and see if I can put the new sniffer in, looks simple enough, just a plug in and screw in a couple of screws and see if I can get the furnaces running.  I think when I opened the panel I saw a wire loose on one.  Will have to check again.  Hubby said they were both under the same access panel.  I turned on the back on and the blower ran, the front one did not.

Also want to see if I can put the new struts on the propane door, haven't looked to see how difficult that is  yet.  It's only 41 out right now.  They first said the in the 70's this week, just looked again now saying 60's.  I just freeze, always did up north so I like it warm.  I buy those nice warm fleece tops LandsEnd has and practically live in them all winter.
 
Well shucks, I got bogged down in paperwork today for rentals.  I'm trying to keep everything up to date in Quickbooks for taxes and I brought all the stuff current.  Bank recs, journal entries and all in prep for hubbies tax accountant.  His company requires us to use one of the big whatever they are now 3 or something CPA firms, I know nothing about international taxes, US, yes, but not those,  used to be 8 I think.  Anyway worked on all that today and was dying to work on the motorhomes.  It's like an invisible cage still has me, sigh.

But finally I got a lot of stuff out of the Winnie.  I know you guys say not to but I cranked up the diesel, started first time and built up pressure pretty quick to 60 psi.  The coach batteries were down and got them charged to turn on a light so I could see.  I did rev it to 1500 rpm's a couple of times.  I have got to get it out and drive it this week.  My issue is getting it out of our gate, I've said before that needs redone for me.

I took the lighted handle out that is broken in two.  The new one is to big, I looked at the old and I can see where the front where it sits in the holder was cut down to fit so likely have to do that, it appears to be acrylic.  Has the light strands down the middle or so it looks.  Hate to chisel on it. I sat that aside for now.

So after I had a light I took the sniffer off.  The new one has 2 wires, red and black and they sent me an adaptar they go into.  Has the little sleeves you push them into, have not yet, those 2 will mate up.  I wanted to see what I had in there.  It has 3 wires, 2 red and a black.  My adaptar on the other end has a white clip that you would just push the coach one into, however the coach ones are 3 separate wires with no clip.  My adaptars 3 wires are all brown, so I don't know which goes to which.  I didn't want to just sitck the wires in there afraid I would short something out.  So how do I tell?

Or do I get my electrician to do it for me? ;)

Now you see where I am lacking.  I have sworn I was going to go take a class on basic stuff like this and small engine mechanics and hubby just laughs.  I need to know this stuff.
 
I finally got the other motorhome cleaned, just need to vacuum and rewipe the fridge out, waiting for the floor I mopped to dry.

I went out and pulled the diesel out from under cover and I swear the minute I did we got a fine sprinkle, there was no RAIN in the radar for today and still isn't any nor does it call for any, as I had just checked it. It happened the exact minute I pulled it out.  So I back far enough under to cover the hole where the one skylight is out and of course not another drop, unbelieveable.

I'm finally ready to get up there and start again, but do I dare drive it up about 4 feet to be out from under there or not.  Am I getting some kind of message from above on this?  Jeez ???
 
I got the other skylight out, I had half the screws out the other day.  I need to clean up all around it, also got the other plumbing vent cover off, they were both rotten on top.

I saw on one where either the caulk had never been closed or over years it had shrunk, this was under the cover by the vent pipe coming up.  I know where that goes, down behind the gas sniffer.  I saw when I pulled it out some evidence that water had been there, nothing bad but it had been wet before.  Now I know why, when the top of this partially came off it let water infiltrate.  That's an easy fix, easily pulled away the old caulk will put new.

The second skylight is over the bathtub, it was totally rotten I was able to break it away where it was cracked, just had to finish removing the screws.  I have one screw I can't get out, have to take up a pair of pliers, I striped the head with the drill.  There was another skylight cover on the inside under it which is in perfect condition.  I noted the hole is steel lined.  I could see one area and I think the top is steel with luan type over it and then the rubber roof.  As solid as it feels that makes sense.  I also see that these are self taping screws so they have gone into the steel roof.  They all need replaced. Hubby wanted me to use wood putty to fill the holes but if its steel no point, the wood is not what it is screwed to.  I wonder if I should get slightly bigger replacement screws to make sure they are secure or will screwing them back into the holes with all the butyl added will be fine.  I will recover all the tops  of the screws the way they had them.  I'm also putting down eternabond, he doesn't like it because its hard to get off.

I do not like the areas between the skylights where they almost overlap, yes, its solid but I can sure see leak potential there, so eternabond is going in!

I see there is some rust on the steel around the skylight on the vertical surface.  I'm going to take my vacuum up and clean all that out as a lot of the caulk I was removing fell down in there between the skylight bubble and the sides and I can't get it out.  I think I'm going to paint around it inside with rustoleum just to be on the safe side. Also going to use white so it will help reflect a brighter color through it. And I'm going to put caulk down in there on the back side of the skylight around the edges to help seal it, I can see its sealed but won't hurt for sure.  I'm not taking it out, not going to mess with something that is not broken!!

The skylight inside in the Winnie is exactly the same as this, some things they just haven't changed.

I need to take photos of this too, will when I get back.

I got butyl tape but it was to narrow so going to get wider and need another plumbing vent for the second pipe, also screws.  And a new piece for the drill it won't take the screws out any longer.  They are 1/4 inch heads, so off I go.  We have a couple of RV places not far from here. I need to get mineral spirits too for cleaning.

I can't see how it would not have leaked in around this with the cracks in it but I don't see any evidence in the bathroom.  If it did wonder where it went, maybe it just sat in there, that would explain why there is some rust. 
 
Did my materials run, got screws a new nutdriver attachment for the drill, and a box of washers, the old one is history. They didn't have them in stainless, bet that's why they were $.15 each at the RV store.  He said just get them at Lowes or somewhere.

Got a wider butyl tape and another plumbing vent.  Asked about the adhesive at the RV store he said I could just use silicone on the couple of places of ripped rubber.  I found a kind at Home Depot that is water cleanup.  The guy checked to see if they had any leftover Dicor but didn't.

Also got rust inhibitor, hubby said if there is any that will stop it.  I vacuumed all around it the skylight on top and not much rust afterall just a couple places.  I got spray on and tight as the space around the skylight is I think I need brush on.  Then got white rustoleum to paint for over it.

On the hallway skylight, I think there is only 1 up there.  I was feeling around the hole in the hallway at the top and I wonder if there is something missing up in there.  I guess I won't know till I get it out, hummm.


Also got mineral spirits for cleaning around the openings.  After I get it all cleaned, I will caulk around the 2 plumbing vents, then I will put down the butyl tape, then screw the vents back down,  After that caulk the screw heads and a bead around the bottom then put eternabond on top of that at the bottom.  That should seal those really well.

I think I may paint around the one skylight and get it ready to go back in, then let that dry and start removing the last one.

Looks to be nice tomorrow so I hope to get it out at least and the vents in.  That might be all tomorrow.
 
I would be reluctant to use any silicone caulk, because nothing sticks to silicone once it is down. Ever again. If you need to touch it up later or add another layer, you are pretty much out of luck if you have used silicone. Got to strip the old out to add any new. But if you get it right the first time, it will certainly keep the water out.

If you can't find a caulk designed for use with EPDM, better to use any non-silicone exterior grade (window and door) caulk, or even a kitchen and bath caulk. Lowes carries Geocel Proflex, if I remember correctly, and that's a tri-polymer caulk that works well in most all RV applications. American Coach uses Geocel Proflex RV at the factory, on many types of seams.
 
I ordered the Dicor caulk so I could use that.  I'm with you, though I found some Loctite silicon caulk but I agree it doesn't seem right to me either. I need to look at it but I think it said paintable, I know you can't paint over ordinary caulk.

Need to read about the dicor to see if it will set up, or maybe I just need to bite the bullet and order the can of adhesive I need for $50, jeez I just hate to, seems like such a waste.
 
I just looked it up, its not paintable, so that's out.

I broke down and ordered the dicor 901 ba stuff.  guess I will have extra if anyone needs some. and if it doesn't dry up.
 
I need to take some pics.  I got the 3rd skylight out.  I put in one of the plumbing vents and caulked around the fridge vent.  I'm not so sure I like the Dicor caulk.  I don't know if it gets harder or not, that's why I tried it.

I cleaned with mineral spirits all around the fridge vent and was going to put down eternabond.  I rolled it after putting it down and it did not stick well.  I could loosen a corner and pull it off.  I think that the roof is to dirty or maybe chalky to put it down.  I'm going to see how this caulk does if I don't like it I may go back to the Proflex I used on another one, it was good stuff.

I put the butyl tape down before I screwed down the plumbing vent, hubby said on its own that stuff is excellent. Then I caulked the screws and around the edge of it.

I am waiting for the adhesive as I want to restick some of the rubber roof inside the skylights, especially the left one before putting them back in.

So that's where I am today.  It got 77 today, good day to work.  I have a lot to do and its going to rain 2 days then cool off, hard to do this stuff when very cool.  I want to reseal everything before we prime and put liquid roof on.  We are going to take the AC's out put primer down, liquid roof, then new gaskets and reinstall the AC's.  I can't do that but I can get most everything else ready.

I'm taking my spray rust inhibitor back and getting a small can of the brush on stuff for the bathtub skylight area.

Ok, out to take some pics.  I have lots of caulk to remove and you have to do it carefully so its going to take me awhile.
 
Here are some pictures
 

Attachments

  • DSC01319.JPG
    DSC01319.JPG
    43.6 KB · Views: 41
  • DSC01321.JPG
    DSC01321.JPG
    41.6 KB · Views: 39
  • DSC01318.JPG
    DSC01318.JPG
    37.8 KB · Views: 37
  • DSC01317.JPG
    DSC01317.JPG
    44.1 KB · Views: 44
  • DSC01316.JPG
    DSC01316.JPG
    40.6 KB · Views: 43
  • DSC01315.JPG
    DSC01315.JPG
    22.3 KB · Views: 45
You've certainly been a busy bee!  That's a heck of a lot of work!

ArdraF
 
Saves a heck of a lot of money, doing it ourselves.  That's the motivation, believe me.

I am waiting on the adhesive as some of the roof inside the skylights is not glued down.  Maybe it doesn't need to be but I'm doing it anyway before replacing them.  The old ones were in sad sad shape.

I hope to get the middle one a bit early so I can continue working on getting those installed, can't very well wash the roof down with big openings in it.

And the one over the hallway looks really good, not sure why you can't see all the old caulk that needs removed but believe me there is a lot of it.  And you have to be really careful not to gouge the membrane.

For some reason tonight I want ice cream.  My DD nor I need it but I may get some anyway, I just LOVE ice cream.

I have my doors open this evening its still 70, I LOVE weather like this, wish it would stay like this year around.

You know we had a horribly hot hot summer and drought here.  You should see my big oak tree by the house.  It's dropping millions and millions of acorns.  I have to blow them off almost daily.  There are so many it looks like a layer of acorn mulch, I've never seen anything like it.  I'm wondering if its an indicator of a long dry cold winter or something, must be some explanation in the old farmers almanac.
 
PatrioticStabilist said:
...I cleaned with mineral spirits all around the fridge vent and was going to put down eternabond.  I rolled it after putting it down and it did not stick well.  I could loosen a corner and pull it off.  I think that the roof is to dirty or maybe chalky to put it down...

I'm thinkin' the problem was you used mineral spirits to clean the roof. You should have used Eternabond's cleaner, acetone or lacquer thinner. Eternabond also makes a primer to use when conditions are less than ideal, such as a questionable surface or cool weather. When cleaning, apply the cleaner or solvent to a rag; do not flood the surface.
 
I'm thinking the same but I had read to use mineral spirits on a rubber roof, need to read on that further and  yes I used a rag, I did not pour it on.  I also cleaned around the plumbing vent with it and I let both places dry. I put butly tape then the caulk and it looks ok.  I hope it stuck good.

I will read more before trying lacquer thinner or acetone, I've used it on another roof, not rubber though.

I never thought about eternabond cleaner, would have to order that too, I'm sure.
 
Here's a link to Eternabond's website data sheet on their spray cleaner.  It's about 50% acetone.  I used straight acetone on mine (soaked rag) and the Eternabond sticks very well.  I wouldn't use it, though, where I didn't recover the area with Eternabond - just in case it softens the membrane.  Mineral spirits leaves an oily residue.  If you still are concerned about using acetone, you could try using mineral spirits then following up with denatured alcohol to clean the residue.
 
Acetone evaporates faster than mineral spirits but also penetrates the EPDM more quickly. But even the mineral spirits will be gone in less than 30 minutes

Caulk, especially EPDM caulk, is supposed to stay soft and flexible. It's a caulk, not plastic wood or epoxy filler. It is supposed to stretch and stay adhered as the roof joints expand and contract. When it gets hard, it's time to replace it.
 

Latest posts

Forum statistics

Threads
131,929
Posts
1,387,674
Members
137,677
Latest member
automedicmobile
Back
Top Bottom