captsteve
Well-known member
Well after much fear and loathing, I (on a nice sunny day) decided to tackle the job of redoing the floors in my rig.
After reading this forum many times and hearing the horror stories about slides and endless staples, I grabbed DW a razor knife and a pair of pliers and set to the task.
I moved the slide out about 3/4 of the way and lowered the leveling screws on the outside about 2" this gave me plenty of room to get the old carpet out and study what on the slide was going to destroy my new floor. Surprise surprise, all looked good, nothing there that could possibly mess my new floor up.
We removed the "offending" carpet in about 15 min. a few staples here and there and very little dirt to vacuum up. (for a 1998 unit it is really clean)
That's when I noticed the BEAR!!!!!!!!!!! it seems that the easiest way to put wood floor in the kitchen when building a new RV is to glue it to 1/4" plywood and lay the whole sheet in, then set the cabinets on top of that.
Damn, things were going so smooth to this point. After some pondering and studying, I just happened to measure the floor height and noticed that the laminate and backing were exactly 3/8" higher than the rest of the floor. A quick trip to Lowe's and a little skill saw work and Voila! the rest of the floor matches. ( three sheets of 3/8" plywood and a few screws was a lot easier than trying to cut the underlayment away from the cabinets.
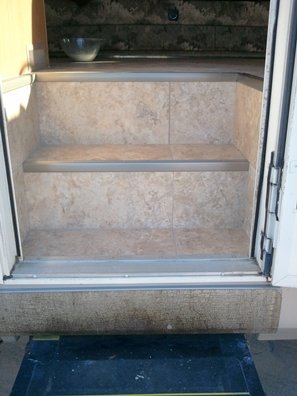
My choice in flooring was a 18" x 18" tapered edge stone looking, peel and stick vinyl. I found it at lowe's and with the tapered edge can be grouted.
Laying the tile was a snap. ( used tile tile primer first) Left a 1/8" grout line and grouted it.
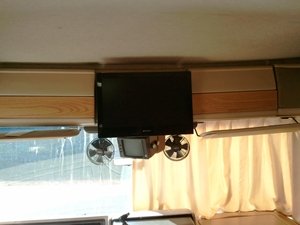
In all, the job was much easier than expected. ( didnt do the bedroom or cab) As a matter of fact, It motivated me to install a flat screen TV while I was at it. ;D
After I readjusted my slide I found that it never even touches the tile!
Here are some pic's of the job. We really love the way it turned out.
After reading this forum many times and hearing the horror stories about slides and endless staples, I grabbed DW a razor knife and a pair of pliers and set to the task.
I moved the slide out about 3/4 of the way and lowered the leveling screws on the outside about 2" this gave me plenty of room to get the old carpet out and study what on the slide was going to destroy my new floor. Surprise surprise, all looked good, nothing there that could possibly mess my new floor up.
We removed the "offending" carpet in about 15 min. a few staples here and there and very little dirt to vacuum up. (for a 1998 unit it is really clean)
That's when I noticed the BEAR!!!!!!!!!!! it seems that the easiest way to put wood floor in the kitchen when building a new RV is to glue it to 1/4" plywood and lay the whole sheet in, then set the cabinets on top of that.
Damn, things were going so smooth to this point. After some pondering and studying, I just happened to measure the floor height and noticed that the laminate and backing were exactly 3/8" higher than the rest of the floor. A quick trip to Lowe's and a little skill saw work and Voila! the rest of the floor matches. ( three sheets of 3/8" plywood and a few screws was a lot easier than trying to cut the underlayment away from the cabinets.
My choice in flooring was a 18" x 18" tapered edge stone looking, peel and stick vinyl. I found it at lowe's and with the tapered edge can be grouted.
Laying the tile was a snap. ( used tile tile primer first) Left a 1/8" grout line and grouted it.
In all, the job was much easier than expected. ( didnt do the bedroom or cab) As a matter of fact, It motivated me to install a flat screen TV while I was at it. ;D
After I readjusted my slide I found that it never even touches the tile!
Here are some pic's of the job. We really love the way it turned out.

")