zmotorsports
Well-known member
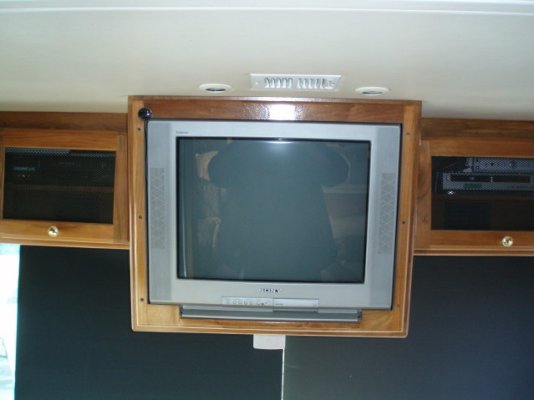
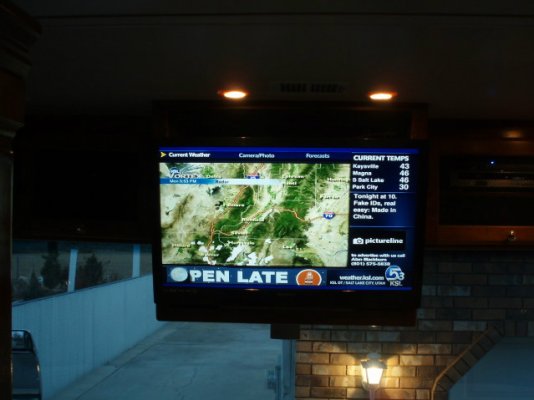
Well my wife and I finally decided to upgrade our old 24" CRT television in our Dynasty to a 32" LCD. The sound had been acting up last season so originally we were only going to upgrade the front TV but after completing it last night we decided to upgrade the one in the bedroom as well and then we could remove the analog to digital converter box permanently.
The procedure went well. I had done a lot of research and really didn't see too many mounting options that I was thrilled with. I didn't want the arm style because I wanted something a little more solid and we have no plans to pull the TV out or change the angle. We are pleased with the positioning where the original was for the most part.
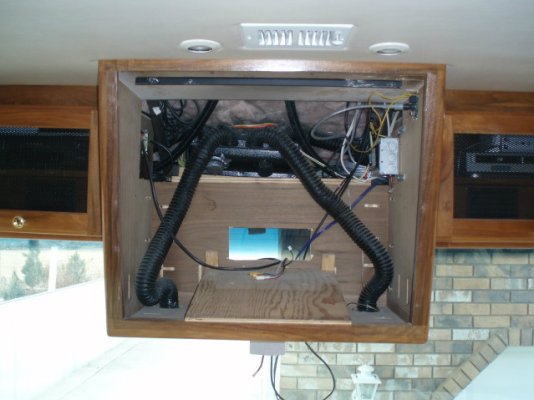
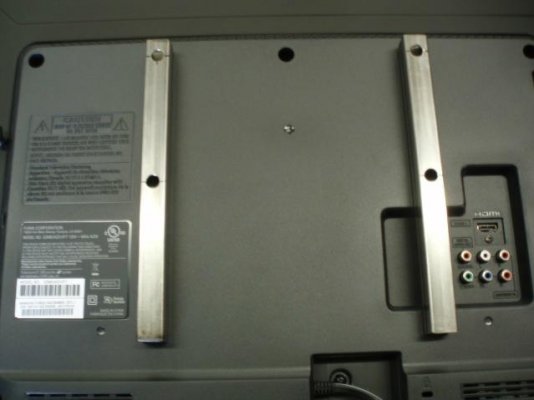
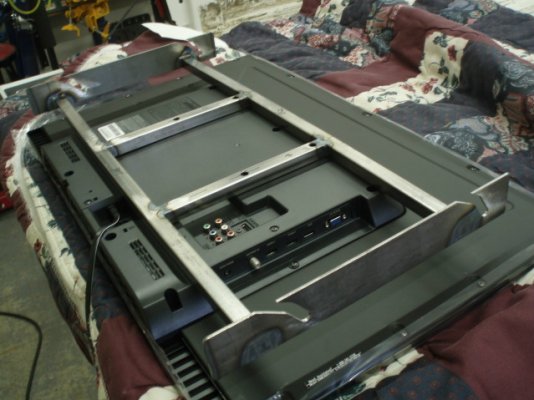
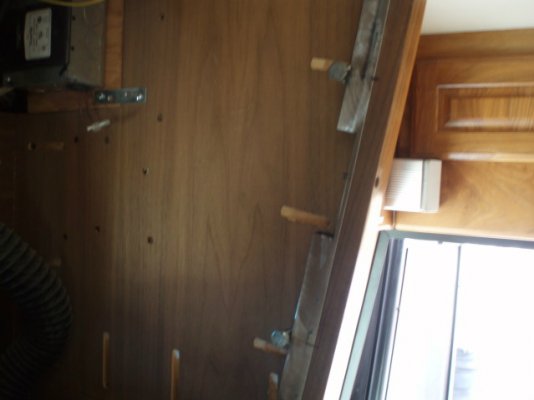
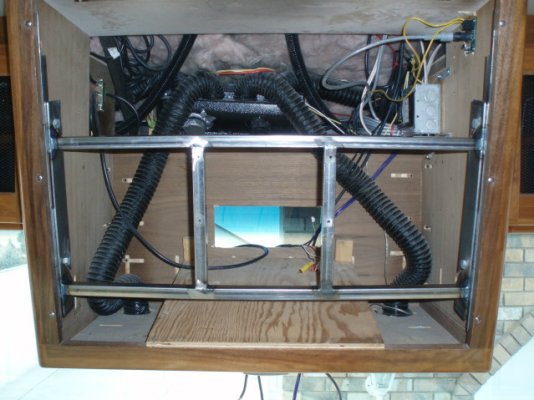
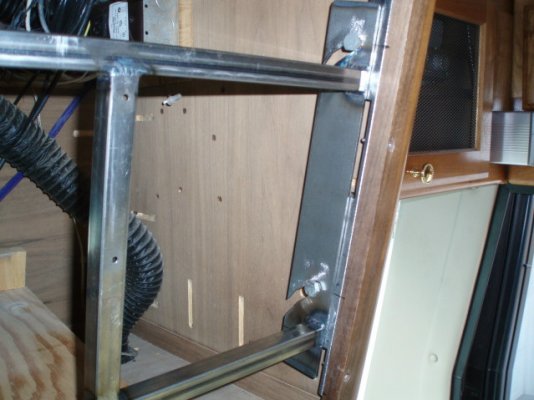
I came up with an idea to fabricate a frame work to mount the television to and then some inner brackets that would mount just inside of the cabinet so when installed the TV would sit flat against the front of the wood cabinet. My wife and I went looking for a TV the other night that was fairly thin so it wouldn't protrude out the front any further than the OE television yet we didn't want it sticking out the sides any wider than the television cabinet itself.
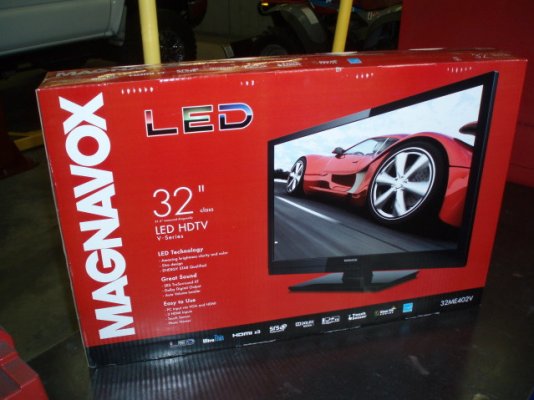
We found a 32" Magnavox that fit the bill perfectly. It is only 3/4" thick and is the exact width of our wood cabinet. I removed the trim ring and old TV and the new one sits perfectly flush agains the cabinet. After completion I will only need a small piece of walnut for the top and bottom of the TV to hide the gaps. I will wait until the rear TV is complete so I only have to make one trip to a cabinet shop for trim.
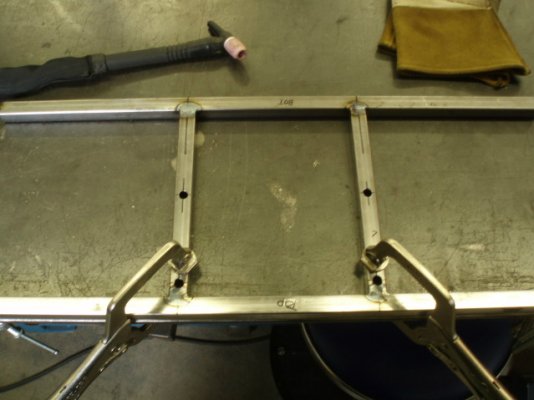
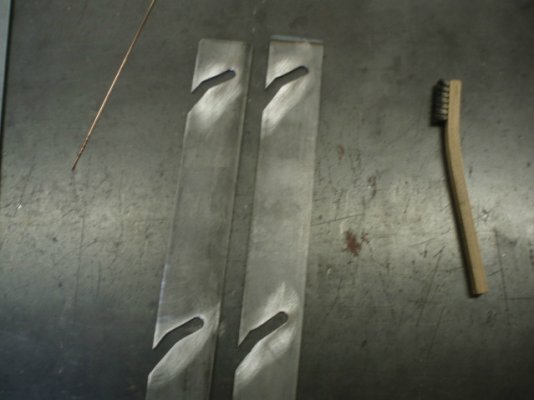
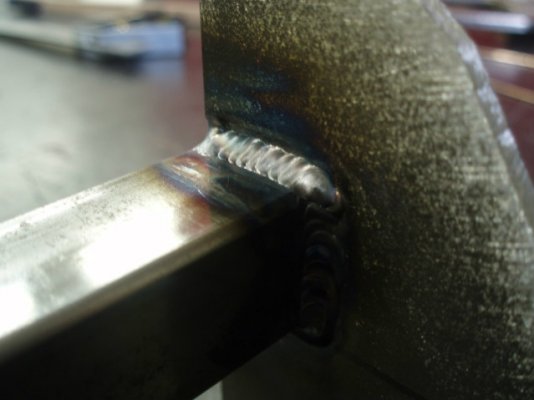
Attached are some pictures of what we started with along with pictures of the procedure showing the framework that I fabricated and how it mounts. Maybe this will give others ideas as to another option for mounting. Although I am probably one of the last people on the planet to finally upgrade to the flatscreen LCD revolution.
Thanks for looking.
Mike.
The procedure went well. I had done a lot of research and really didn't see too many mounting options that I was thrilled with. I didn't want the arm style because I wanted something a little more solid and we have no plans to pull the TV out or change the angle. We are pleased with the positioning where the original was for the most part.
I came up with an idea to fabricate a frame work to mount the television to and then some inner brackets that would mount just inside of the cabinet so when installed the TV would sit flat against the front of the wood cabinet. My wife and I went looking for a TV the other night that was fairly thin so it wouldn't protrude out the front any further than the OE television yet we didn't want it sticking out the sides any wider than the television cabinet itself.
We found a 32" Magnavox that fit the bill perfectly. It is only 3/4" thick and is the exact width of our wood cabinet. I removed the trim ring and old TV and the new one sits perfectly flush agains the cabinet. After completion I will only need a small piece of walnut for the top and bottom of the TV to hide the gaps. I will wait until the rear TV is complete so I only have to make one trip to a cabinet shop for trim.
Attached are some pictures of what we started with along with pictures of the procedure showing the framework that I fabricated and how it mounts. Maybe this will give others ideas as to another option for mounting. Although I am probably one of the last people on the planet to finally upgrade to the flatscreen LCD revolution.
Thanks for looking.
Mike.

")