rddub
New member
Hi all,
Just joined after gleaning a lot of good info over the years. I shall attempt to give back a little. On a recent trip I left my awning out with a storm brewing...Lesson learned..Close it up before you leave. I hit the web a found a replacement and ordered from http://www.rvpartscountry.com/RVAwnings. It was received in short order. I studied the A&E replacement guide and scoured the web. Everything seemed to involve messing with tension springs ??? I was determined to do it without touching the springs. Knuckle heads such as myself should never play with things under high tension. Mr. Murphy is always waiting in the wings. Pictures below show how I did it. It was very painless and took about 2.5 hours (including beer breaks). It required three helpers, A drill motor/3/8" bit, Dremel with cutting wheel and cylinder grinding bit, Dicor 501LSW self-leveling lap cement (great stuff BTW), Latex caulk and a cold 12 pack for the helpers.
Hope this helps...Ron
Attachments
-
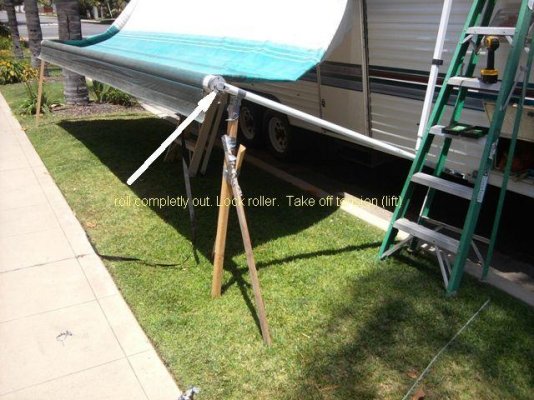 Step 1 support.jpg67 KB · Views: 298
 -
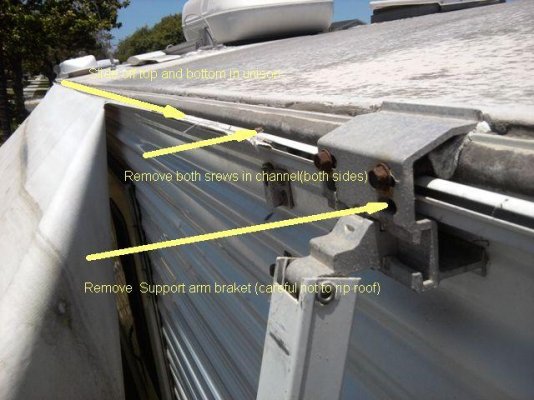 Step 2 disconnect top mount.jpg54.3 KB · Views: 249
 -
 step 3 drill out cap.jpg52.7 KB · Views: 248
 -
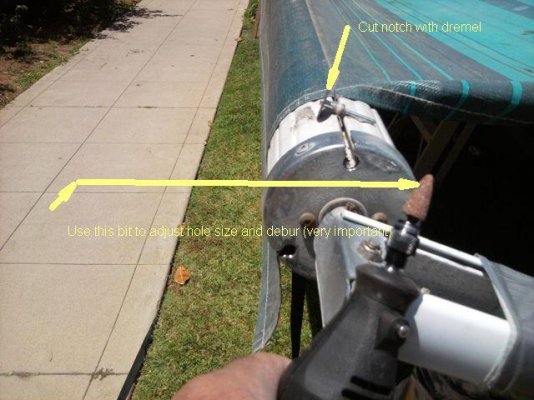 step 4 cut notch-debur.jpg53.2 KB · Views: 248
 -
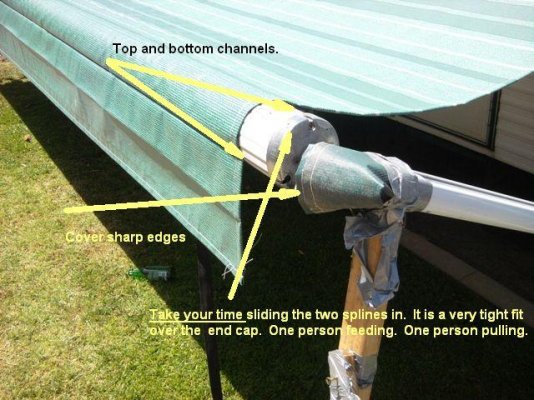 step 5 slid on bottom.jpg70.6 KB · Views: 240
 -
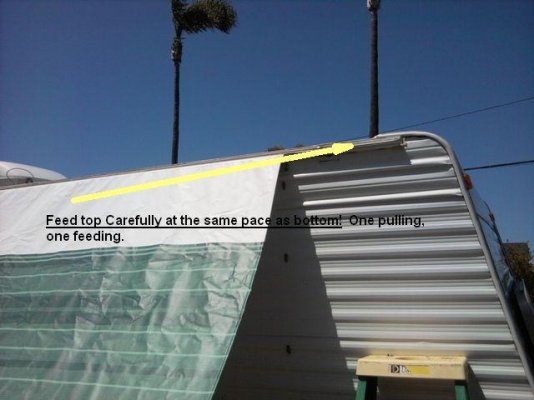 step 5A slide on top.jpg39.2 KB · Views: 229
 -
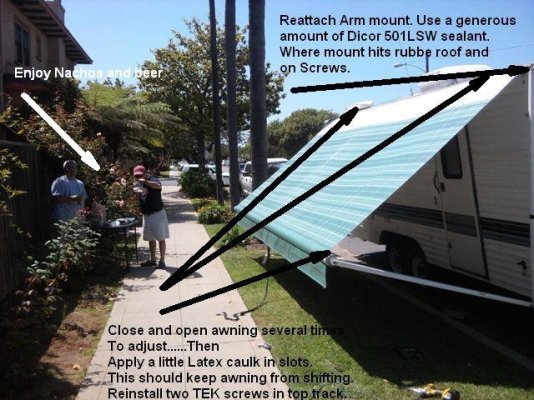 step 6 reattatch top mount and roll up-Done..jpg78 KB · Views: 228