Painted interior and cabinets ~ Please post your pics

The friendliest place on the web for anyone with an RV or an interest in RVing!
If you have answers, please help by responding to the unanswered posts.
Hi Gina, I just recovered my full MH with wallpaper during the winter season.  Thanks to everyone on this site ;D, I was able to do it all myself (scrub wallboard with TSP, fill holes, sand, fill again, sand again, prime, prime again, wallpaper with moisture resistant glue), and I have received compliments from friends (even though they think I'm nuts for taking it on).  Since you asked for photos, you can find them all at my Photobucket site:

  • Living: http://s1325.beta.photobucket.com/user/jaspurbeck/library/2004%20Itasca%20Horizon%20Updates/Living
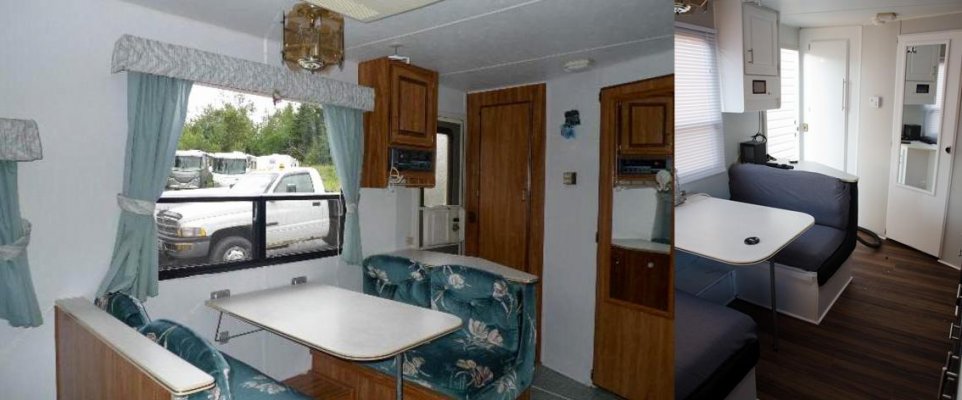
  • Dinette: http://s1325.beta.photobucket.com/user/jaspurbeck/library/2004%20Itasca%20Horizon%20Updates/Dinette
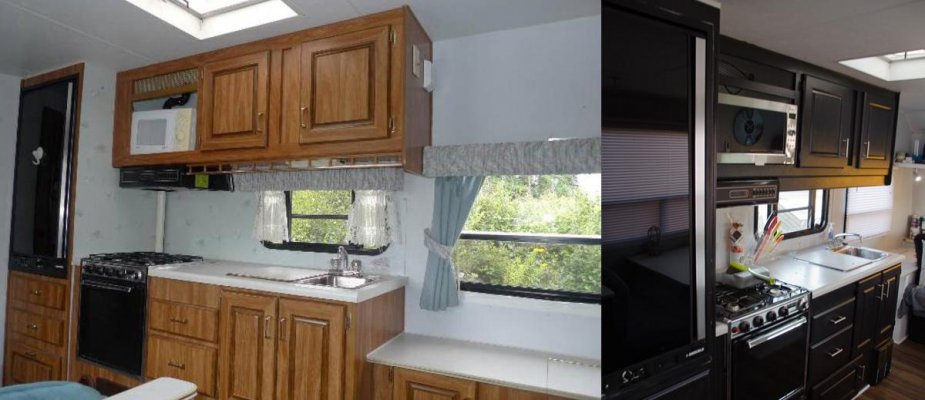
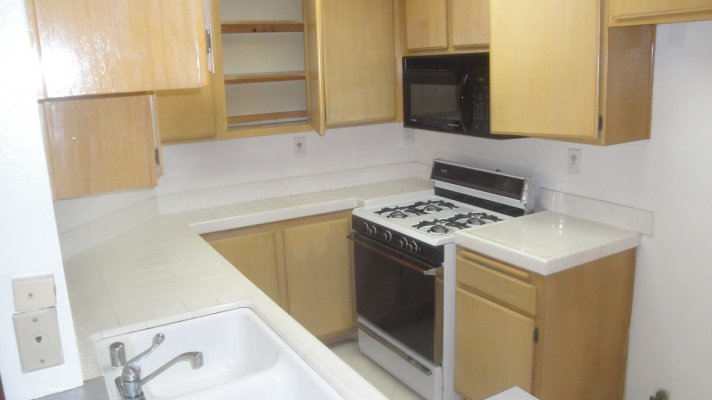
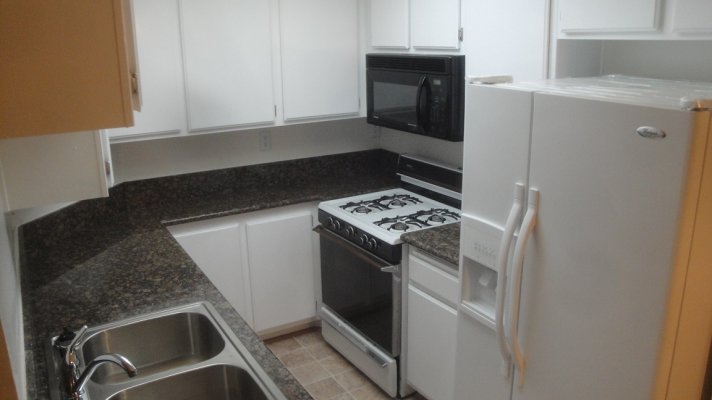
  • Galley:  http://s1325.beta.photobucket.com/user/jaspurbeck/library/2004%20Itasca%20Horizon%20Updates/Galley
  • Bathroom:  http://s1325.beta.photobucket.com/user/jaspurbeck/library/2004%20Itasca%20Horizon%20Updates/Bath
  • Bedroom:  http://s1325.beta.photobucket.com/user/jaspurbeck/library/2004%20Itasca%20Horizon%20Updates/Bedroom
  • Hall:  http://s1325.beta.photobucket.com/user/jaspurbeck/library/2004%20Itasca%20Horizon%20Updates/Hall
If I didn't have a good amount of wallpapering experience, I would definitely stick w/ the primer and paint, but I sure love the look of wallpaper.  Best of luck on your project and let me know if you have any questions.  I need to pay back this community for all that they shared, and giving me the confidence to take it on.  Wow, you'll love it when you're done!
  :)
 
Great job,

I've done a fair amount of wall papering also and that rig has lots of small spaces, tiny cuts and details.  Good for you for  going for it.  I  know that  is a lot of work!
 
They all look so nice!!!! And just when I thought I was done with mine..LOL  The ideas are flowing now........

 
One tip before painting interior cabinets.......

Be sure to clean all surfaces twice with TSP before sanding. If you sand 1st, you will force built up dirt & grease into the surface and even primer will have a harder time sticking.

1-2-3 primer is great for these projects and it can be thinned slightly so that you don't have to sand after priming. All of your paints are water based now and what you are painting is probably oil based. It is essential to clean & prime before trying to paint. If you don't, the paint will more than likely peel and will scratch very easily.

Don't be afraid to use a high gloss enamel paint. Water base paint of today is like the semi-gloss of a few years ago. The high gloss will give you a harder surface that is easier to keep clean and more scratch resistant.

Some of the new M/Hs that we looked at came from the factory with white painted cabinetry. I thought it looked bright and cheery.

Good luck with your project and have fun with it.
 
I love that first RV !!  Not quite realistic with our lifestyle and 3 young kids, but it is inspirational!  I really want to paint the cabinets, but I'm thinking that is too monumental of a task.  I will, however, be painting most, if not all, the walls ... bright colors ... the kids are anxious for the RV to feel more like a "house", and if that makes them happier with our choice to live here, then I will do it.  I have lots of painting experience, am an architect, and an enthusiastic crafter, so that part is easy.
 
here are some of the before and after pics of my 91 twenty foot trailer.

I primed all the cabinets and wood surfaces with oil primer sealer.  Filled all the holes from the blinds and painted the interior walls. 

The cabinets were painted with CIL Furniture and Cabinets melamine paint and has a nice tough surface, 
 

Attachments

  • 2452khg_20.jpg
    2452khg_20.jpg
    67 KB · Views: 144
  • Untitled-1.jpg
    Untitled-1.jpg
    80.4 KB · Views: 125
We are going to be redoing the inside of our coach by removing the valences and making new ones out of wood.  I then plan to paint the interior walls.  My cabinets are solid oak that have just had a fresh coat of vanish put on; and I love them, so will not be doing anything to those. 

However, I have a question.  How did you handle painting the walls, did you prime them, seal them...what?  I'm thinking of painting mine with "Kilz" paint as a primer, then putting on the color.

Marsha~
 
Marsha/CA said:
I'm thinking of painting mine with "Kilz" paint as a primer, then putting on the color.

Marsha~
I have found that "1-2-3 Primer" is a better "all round" primer that works well on almost any surface (except some plastic).

When we do any paint conversions or have any concerns about paint adhesion, I have my painters use "1-2-3"

Kilz is primarily designed for drywall but it works well on plywood and some other surfaces too. It was originally marketed for covering nicotine stains on interior walls. I have them use Kilz when there is any area that is hard to cover due to stains.
 
emoney said:
Marsha, I'm right in the middle of doing mine and I'm using Kilz and it seems to be adhering well.
Kilz will adhere well. The issue is how it cures. Kilz will cure relatively soft and may dent and/or scratch. "1-2-3" cures hard and resists scratching better. It also has "better" adhesion to previously varnished woodwork. Either will work.

Another tip is to use 1 light coat of a "Shellac based primer" on hard surfaces like Formica or Mylar. Allow it to set-up for 30-minutes then cover with "1-2-3". We've done that with real good success but again.... prep is everything.
http://www.amazon.com/13-oz-Shellac-Primer-Aerosol/dp/B000S8JOCY/ref=sr_1_4?ie=UTF8&qid=1363120535&sr=8-4&keywords=ZINSSER+BIN+SHELLAC+PRIMER

Any paint job will look great when it's finished.... It's what it will look like in a year or two that counts  ;).

I have been remodeling apartments for 14 years. Ever since the ban on oil based paints, successfully refinishing pre-varnished cabinets and oil based paints has been a real challenge. The problem is, no matter how much primer is used, cleaning with TSP, sanding and using the correct primer for the surface is essential. Get it wrong and the new paint (and primer) will peel off.

When you are finished, wait 7 days, then scratch the surface with your fingernails. If you get any paint under your nails, the adhesion has failed and will continue to fail worse over time..
 

Attachments

  • DSC06704a.jpg
    DSC06704a.jpg
    170.5 KB · Views: 102
  • DSC06762a.jpg
    DSC06762a.jpg
    190.3 KB · Views: 102
tstumpf said:
Nice job on that kitchen, Wavery!

-Roni
We've done 35 of them so far (in the last 7-8 years as tenants move out) and we've learned a lot about prep and materials to use. I use a prof painting contractor but it's still been a long learning experience. They had to do the 1st 5 or 6 over again. Doing it the 2nd time is 10 times the work of getting it right the 1st time. We have it down to an art now. I hope that sharing the painful experience that we've had along the way may help others.

BTW.... if you can get your hands on oil based paint for a project like this, you may have better success over the long haul.
 
Well, I'm not doing cabinets or wood; I'm painting wallpaper covered wallboard.  I thought about removing the wallpaper; but I think that will destroy the wallboard.  Then I thought of covering it with "contact" paper; but that would be the devil to work with.  So, I'm to the point of painting the wallboard with something like Ralph Lauren paint that I could give texture to the walls.  I'm planning on doing trail runs to see how I like the technique.

I'm not going to be able to get to this until my husband gets the new oak valences made.  The walls will be much easier to paint with all the valences and blinds off.

However, the RV park we are staying at here in Palm Springs is having a huge RV show in the park.......this remodeling stuff could all be a mute point.....naw...... I love my coach.

Marsha~
 
I am a tile and granite contractor and refit bathrooms. Last fall a client I was working for wanted her honey oak vanity updated without buying a new cabinet. As I was strolling thru lowes for plumbing materials for the job I spotted an interesting product for RUSTOLEUM. It ended up being the solution to the update. It works great and easy to apply ( though it takes so time). The product is tinitable in around 70 colors. I used the dark expresso color. It can either be a matte finish or go one extra step and apply a glazing coat. Of course with all "painted" products, I was concerned about brush strokes, however after completion there were NO brush strokes and a very nice finish as if it had be shot with a sprayer. The client was happy as was I and recommend it to all of my clients I talk to about updating cabinetry.
 
Back
Top Bottom