John Canfield
Site Team
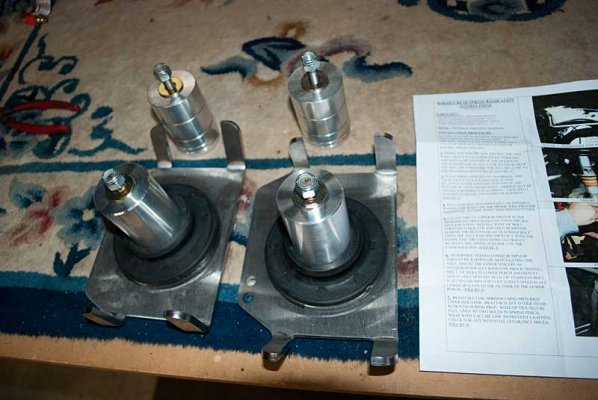
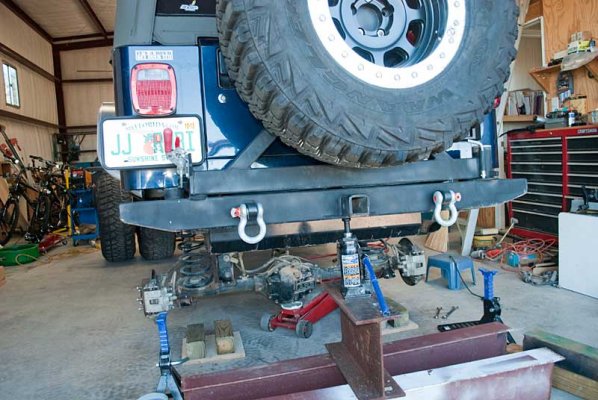
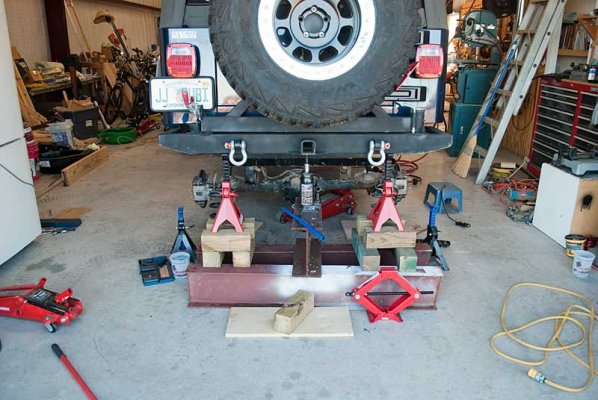
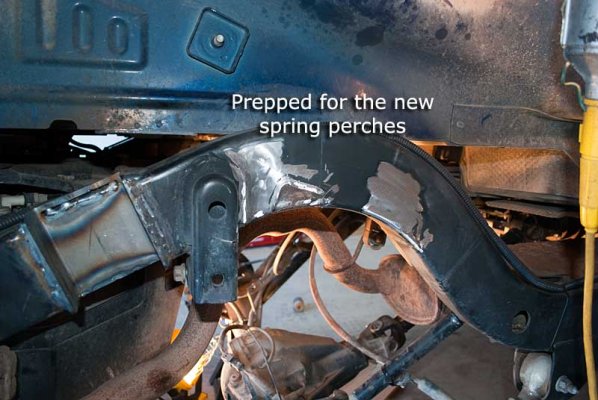
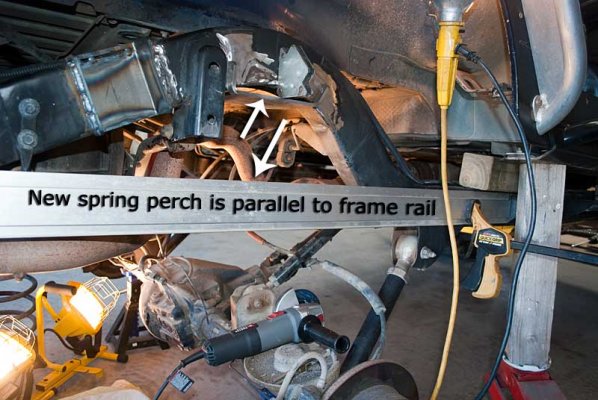
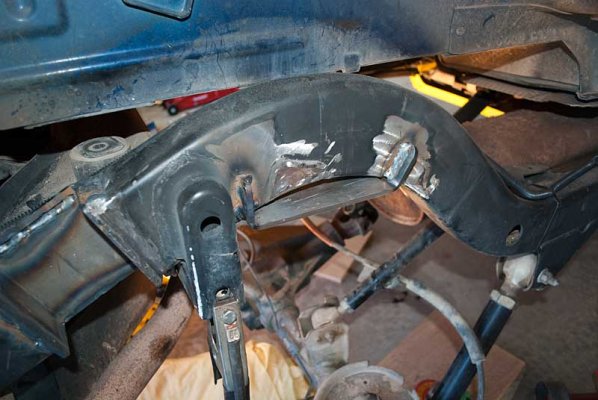
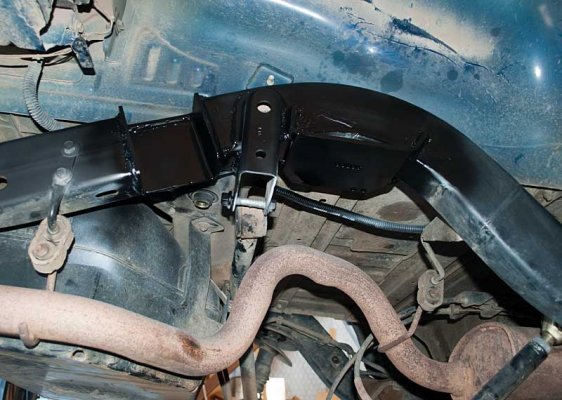
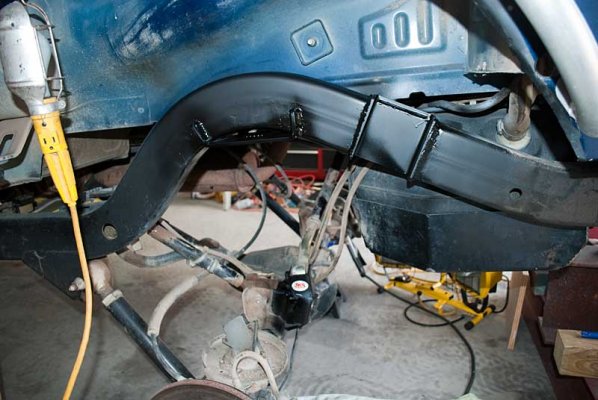
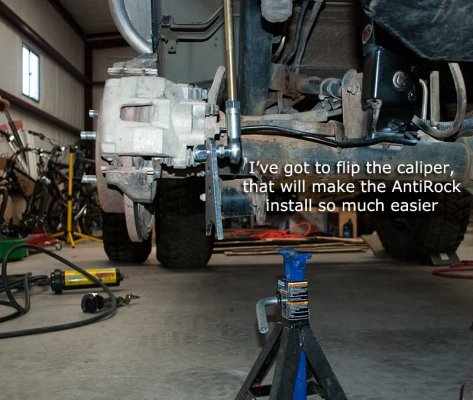
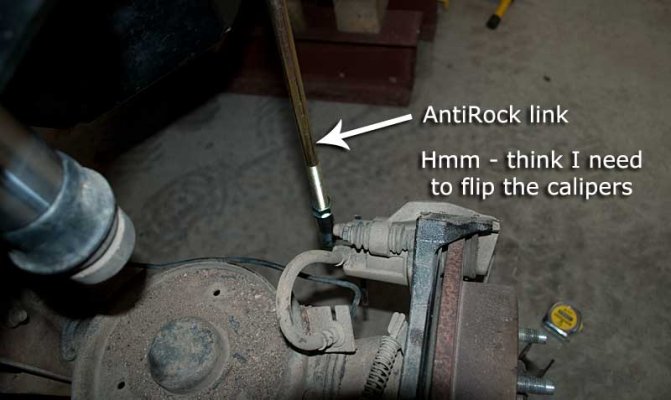
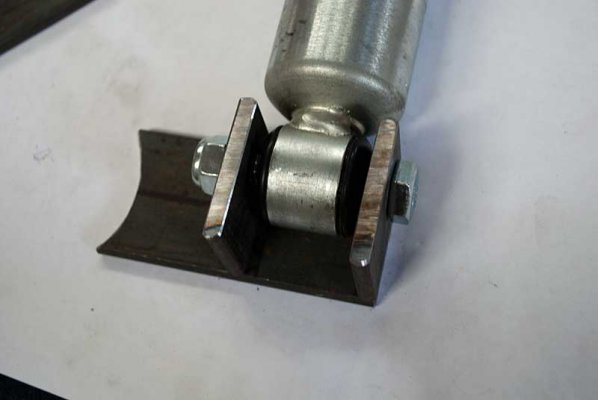
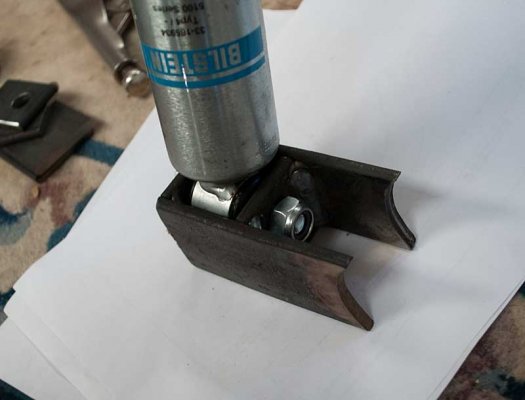
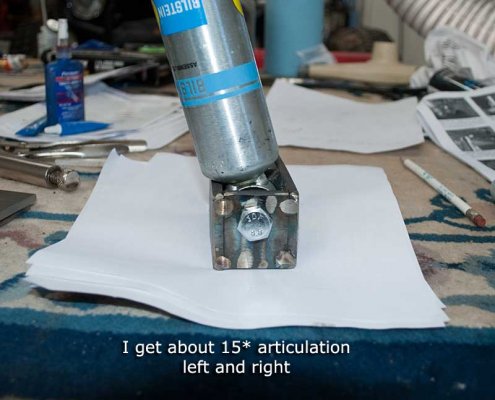
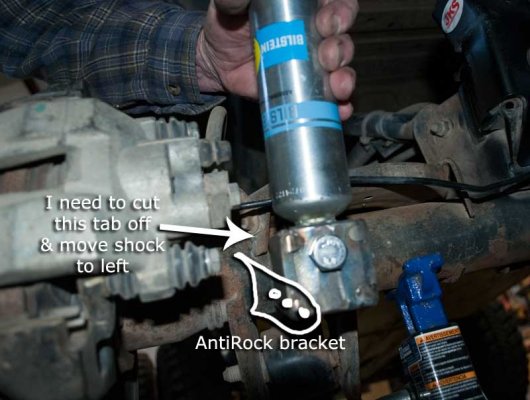
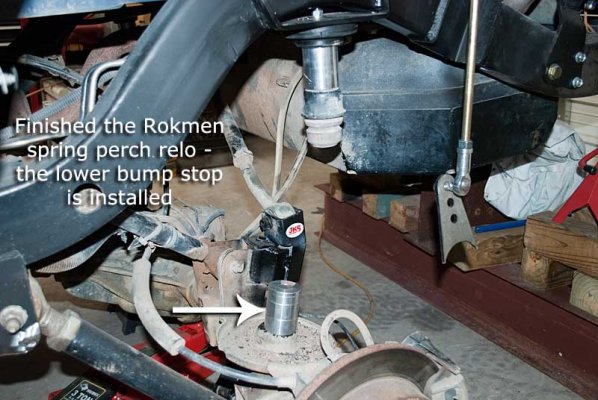
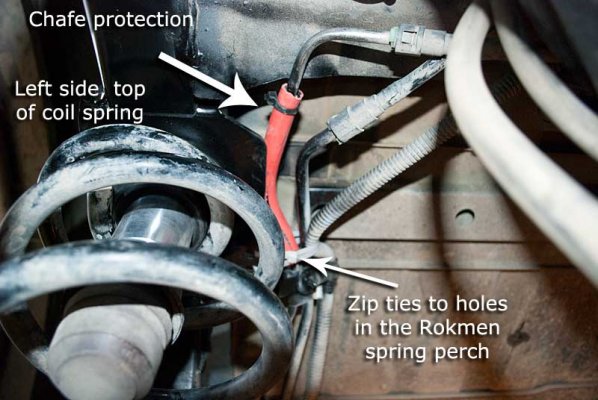
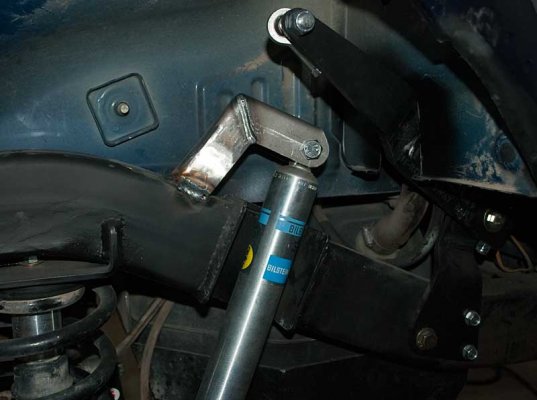
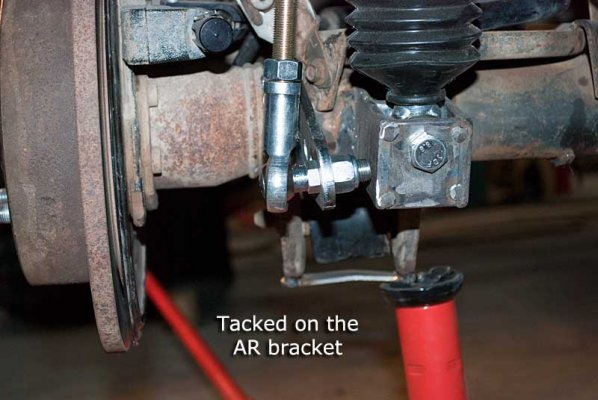
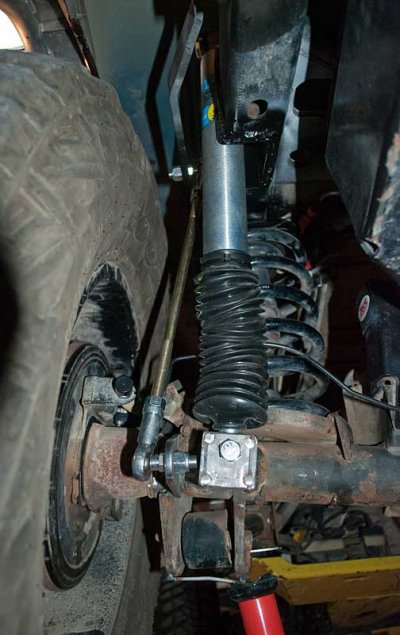
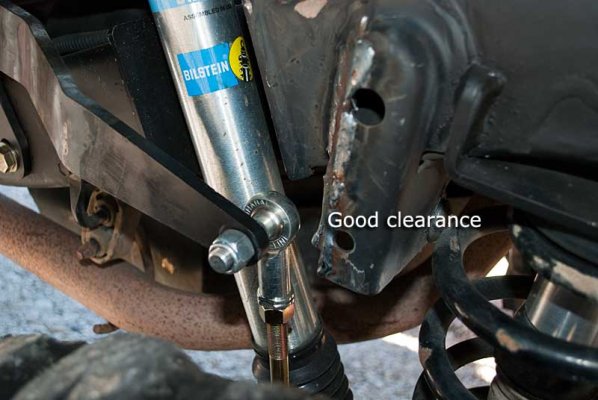
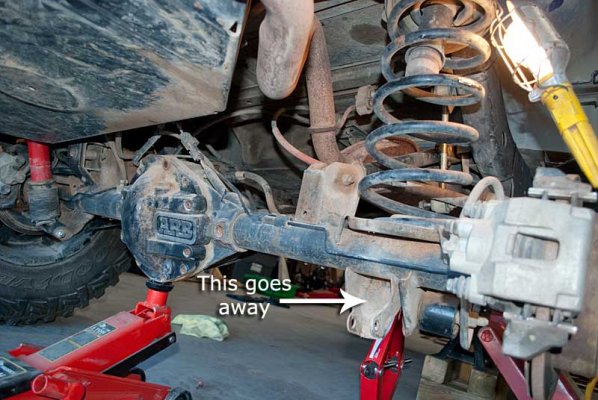
I'm copying my thread over from the Rubicon forum. What I've done to the rear axle is outboard the rear shocks (I ripped one out in Arizona), moved the upper rear spring perch aft to make it more perpendicular to the axle and installed a Currie rear AntiRock in place of the factory sway bar. Also I installed bump stops to prevent breaking the new Bilstein shocks.
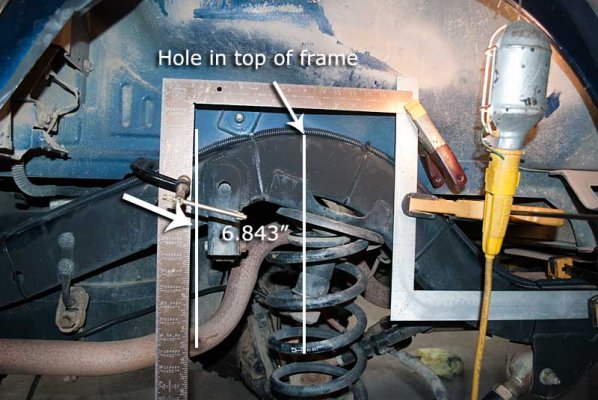
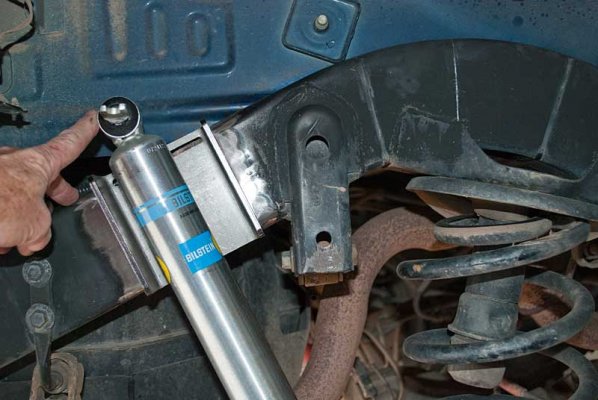
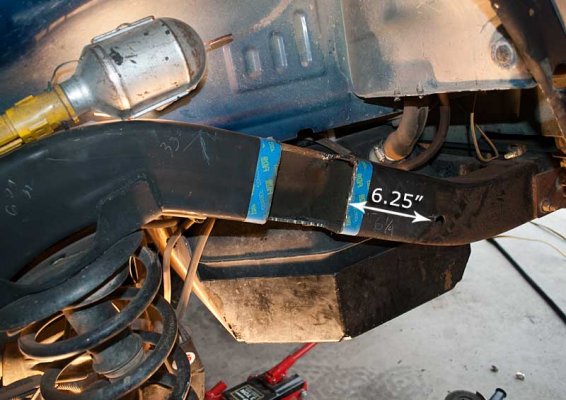
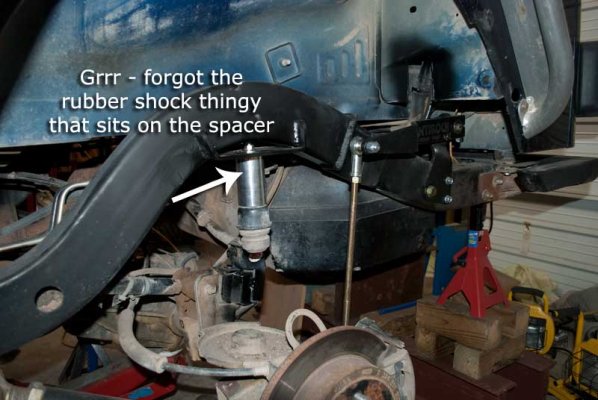
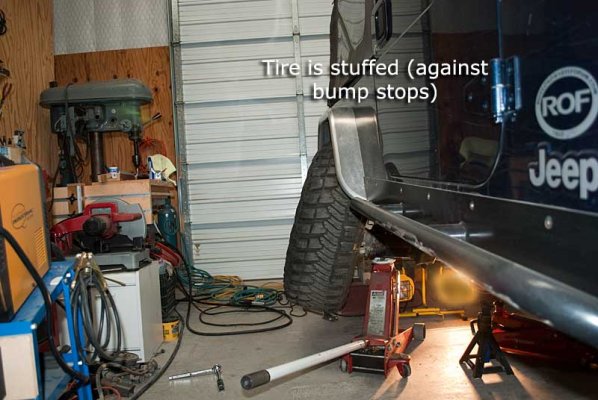
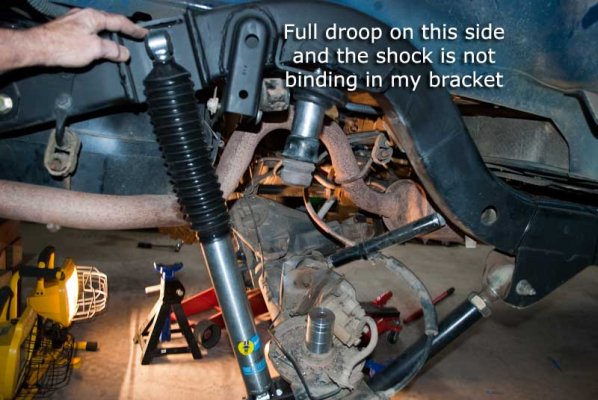
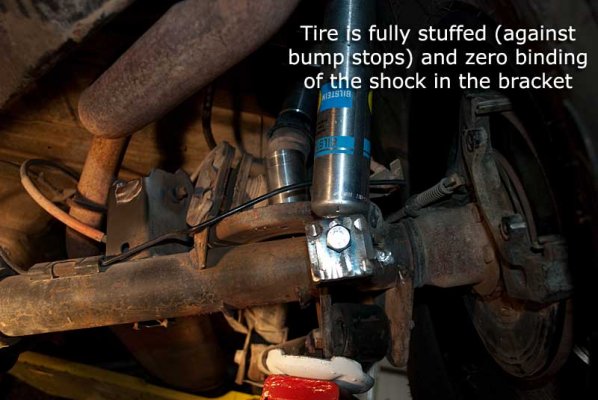
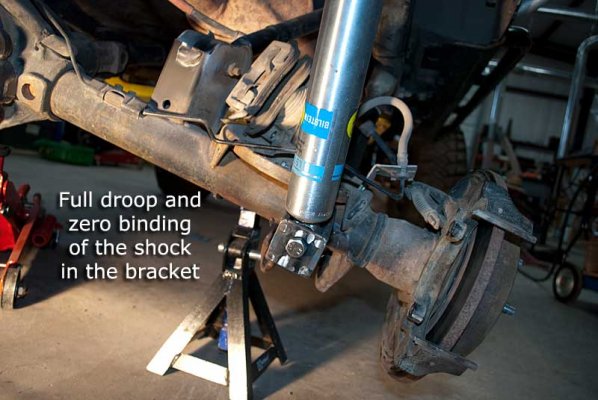
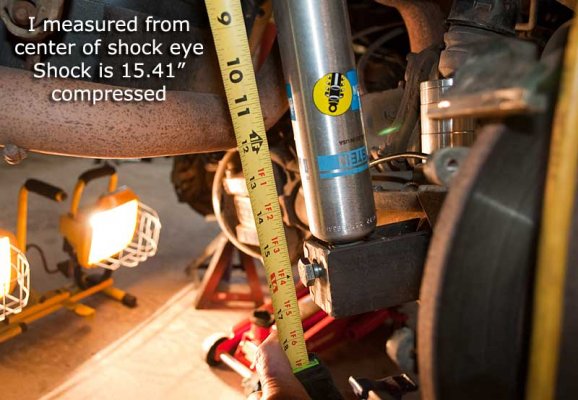
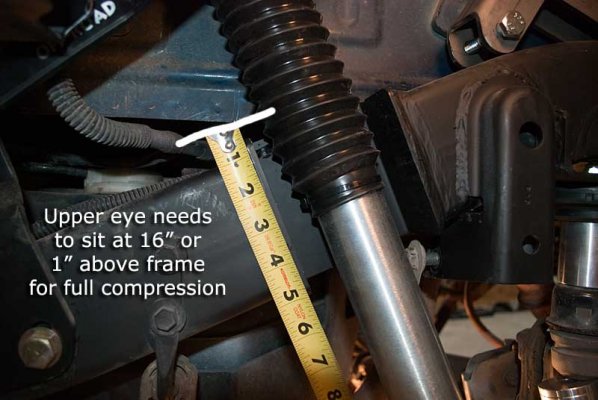
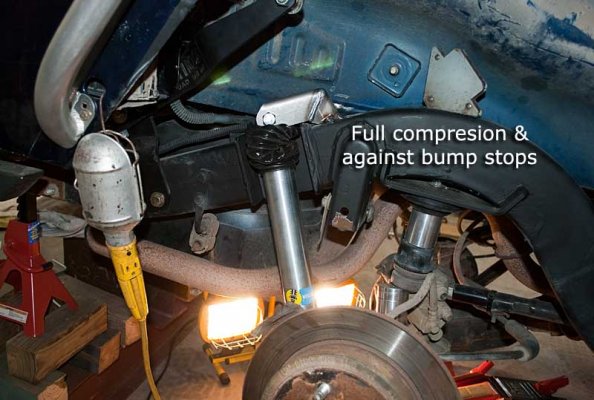
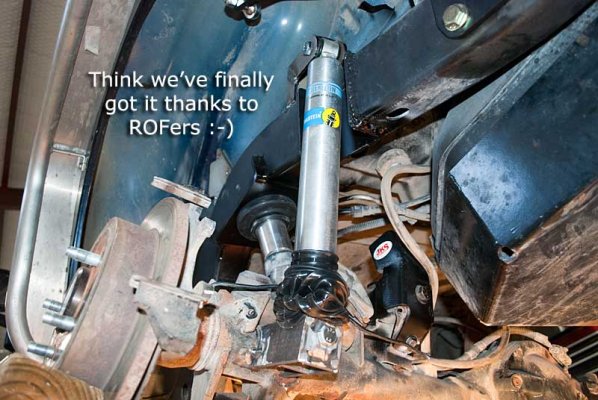
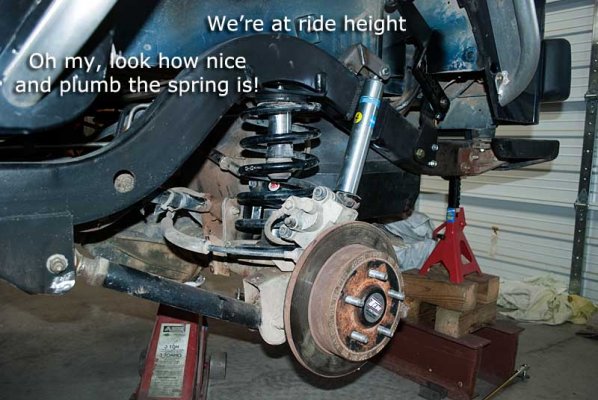
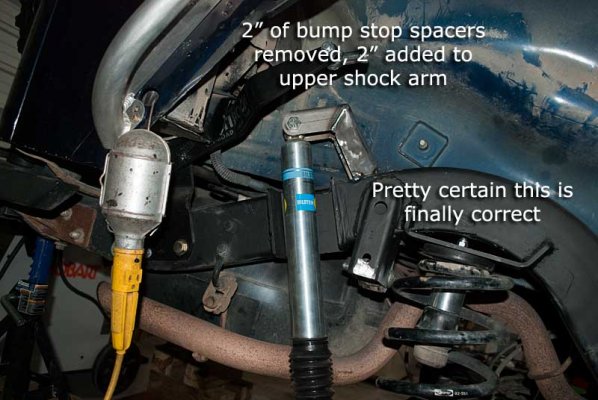
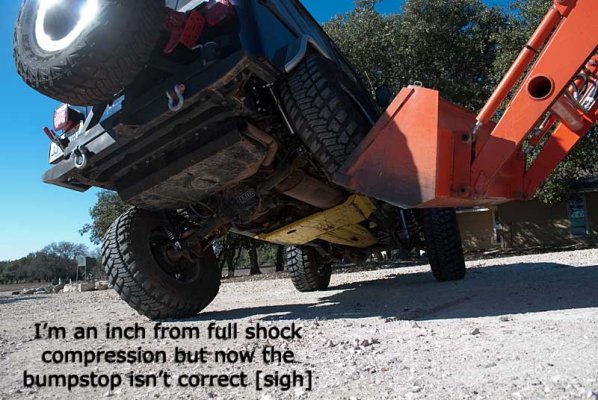
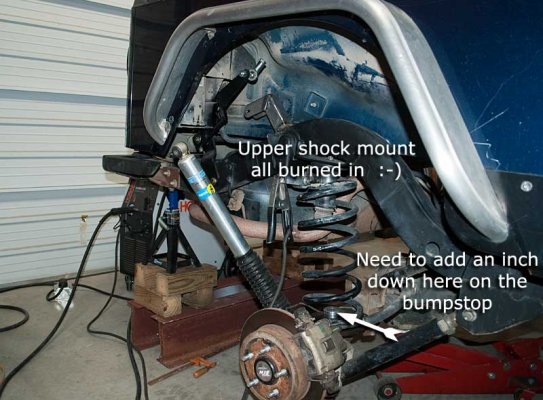
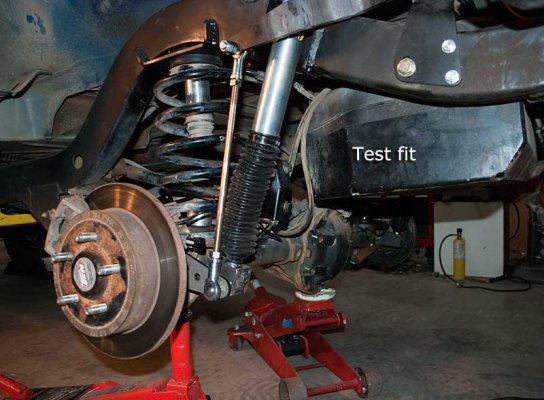
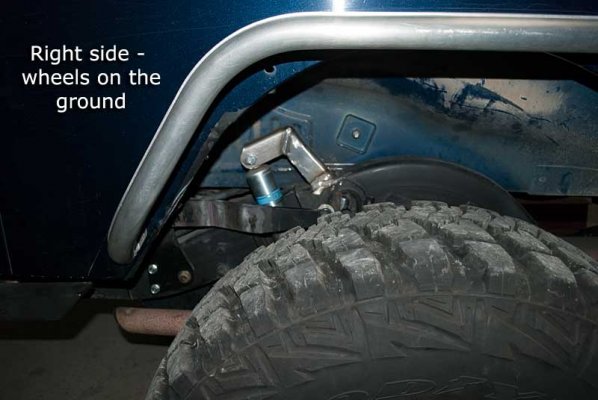
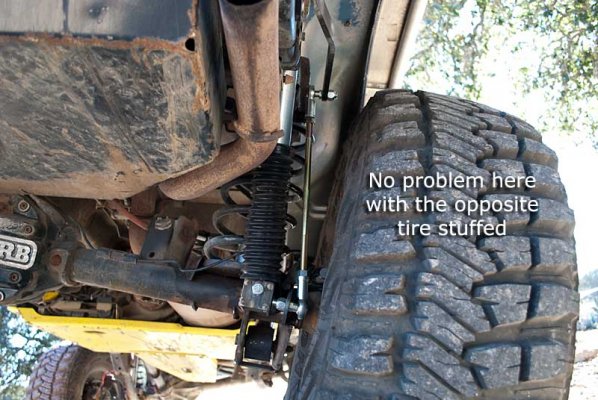
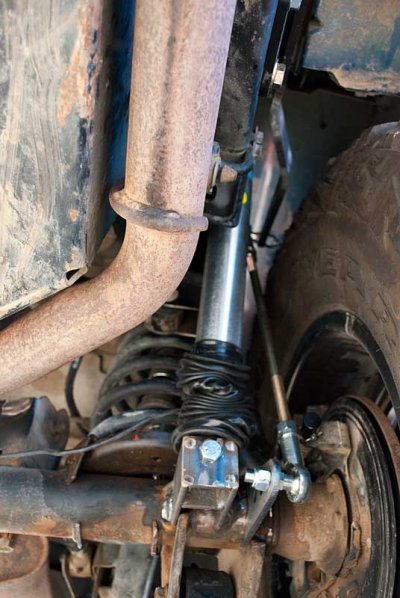
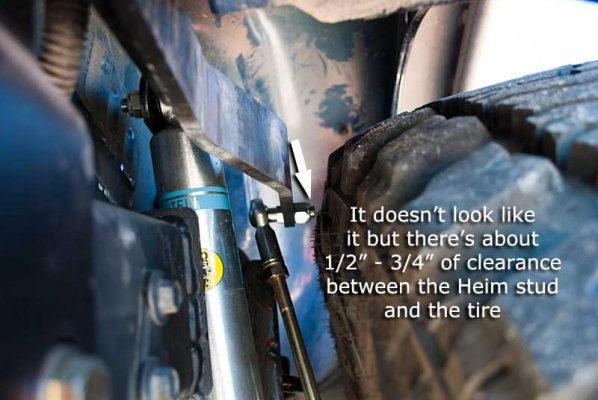
The Bilsteins have about 10" of total travel so it is critically important to set the bump stops (and the Clayton outboard shock tower height) to where there is about 5" of travel up and down from ride height. The bump stops prevent compressing the shocks too much and ruining them or breaking a mount (or stuffing a tire into a fender or wheel well opening.) It took a bunch to time to get this set up but the time was well invested, we've wheeled some tough trails and all is good.
------------- Let's get started ------------------
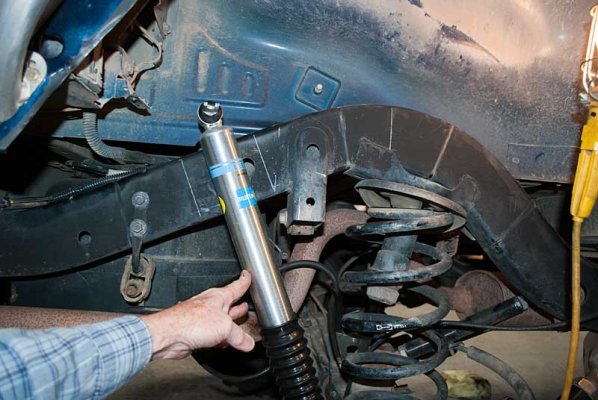
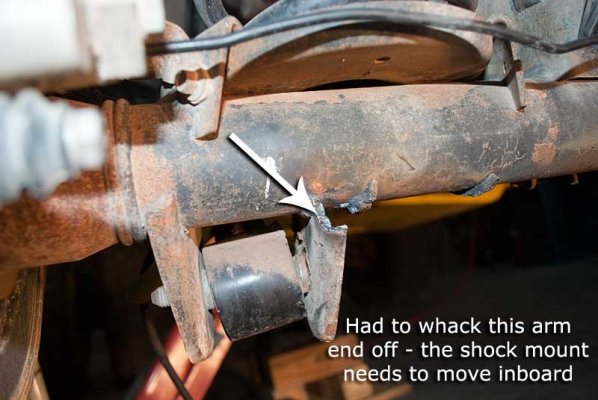
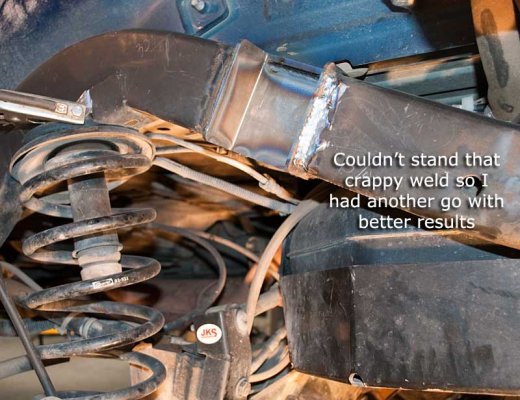
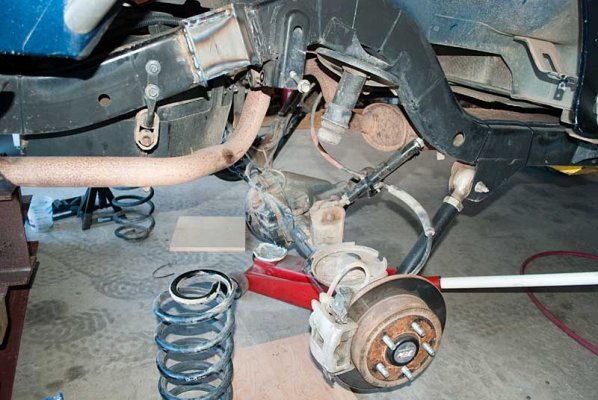
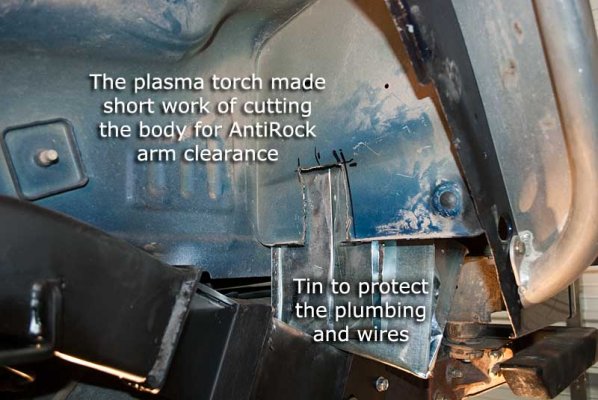
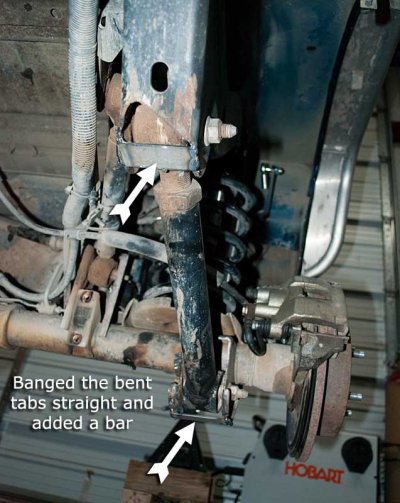
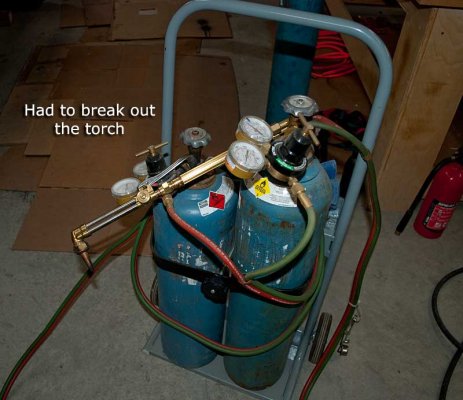
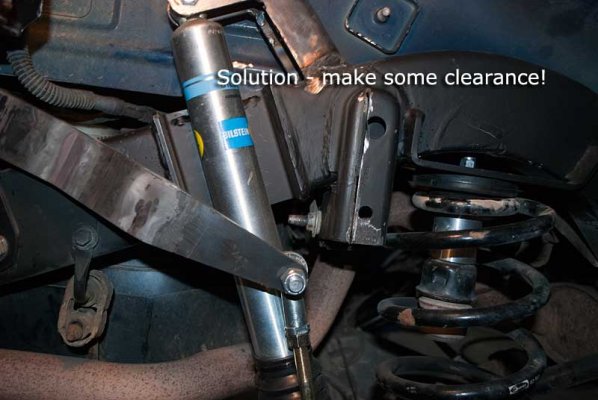
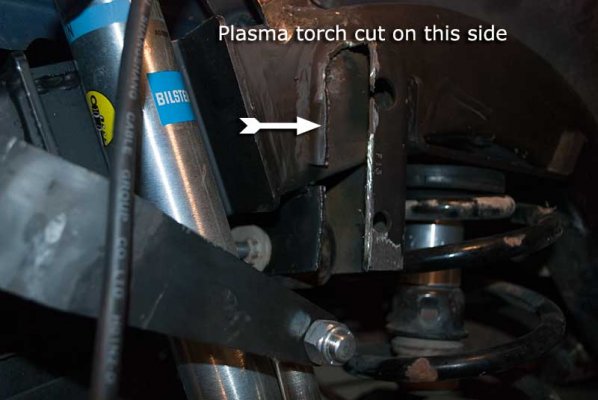
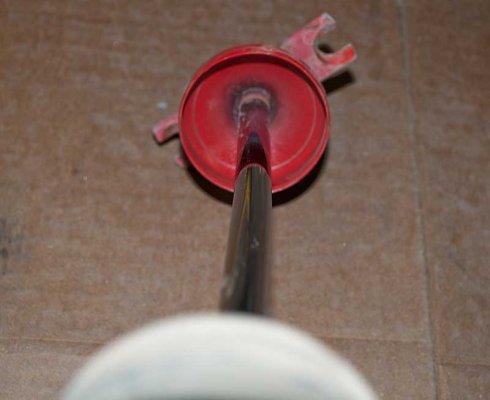
While not having anything to do with the rear axle, I replaced my front shocks to get that out of the way. Then I jacked up the the right rear, removed the tire, removed the shock (I discovered the shock shaft was slightly bent ), removed the sway bar on that side, removed the JKS shock extenders, and then used the plasma torch to cut off the shock mount from the axle.
Note to self: buy one of those funky welder head scarfs/cap/whatever they call it - I just hate the smell of burning hair :? . Also discovered it's easy to cut (or weld) while standing up with the work on my welding table but it's quite another thing to cut laying on your side trying to work around various obstacles. Then my air compressor pressure switch didn't cut on (the switch is having problems) and all of a sudden the plasma torch wasn't working right due to low air pressure. DOH!
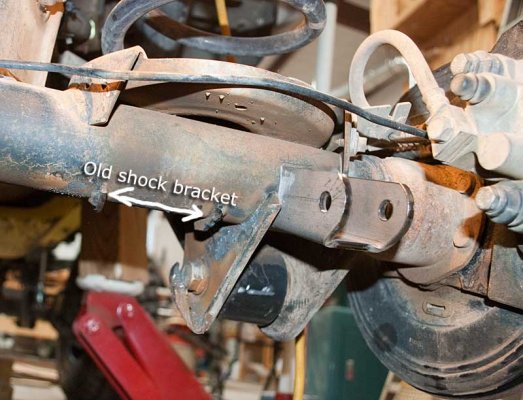
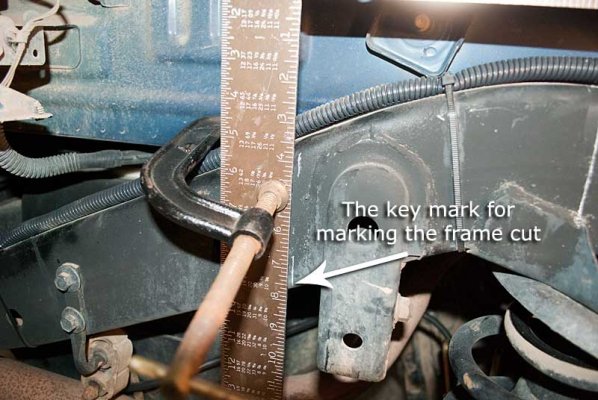
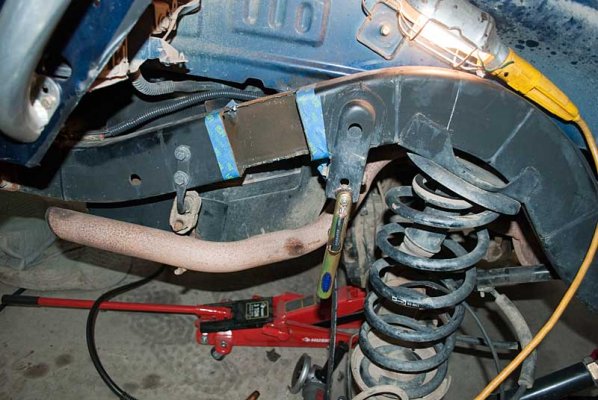
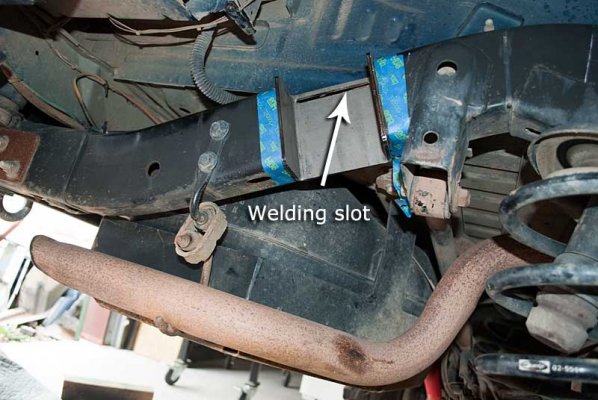
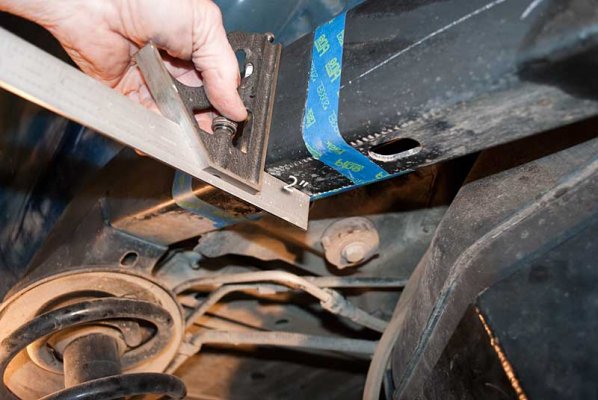
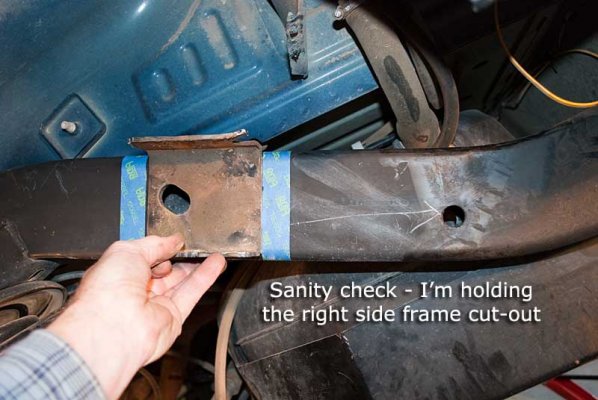
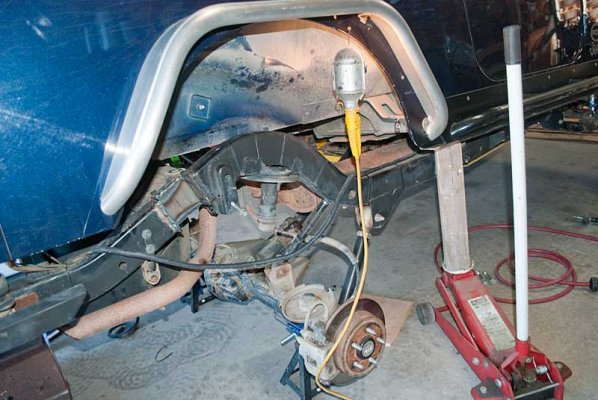
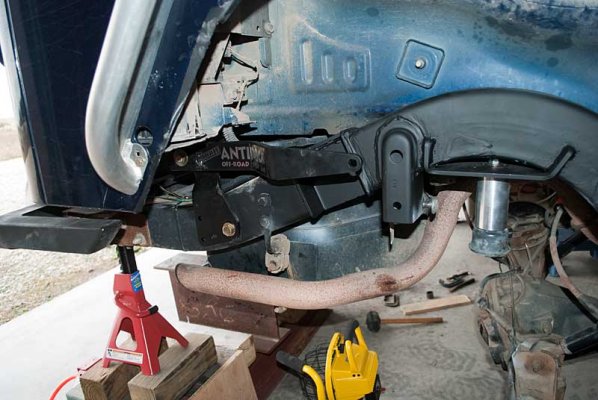
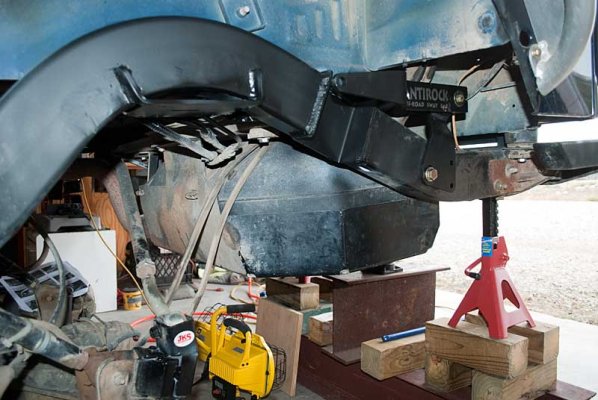
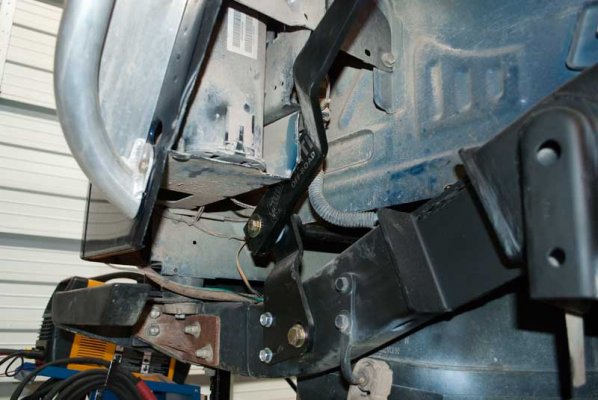
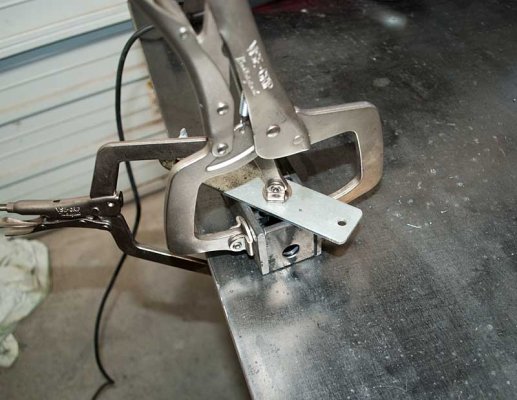
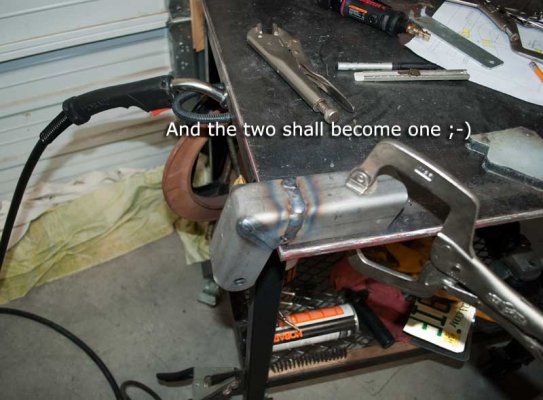
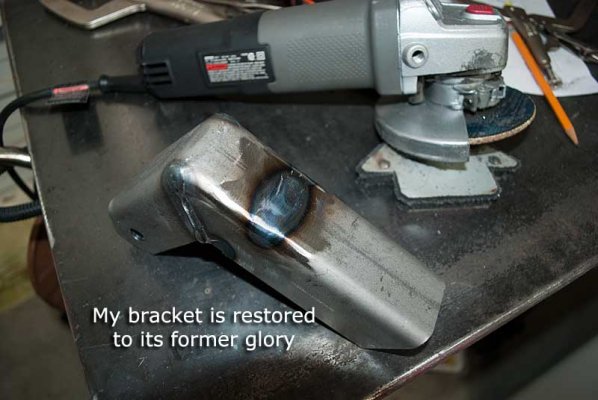
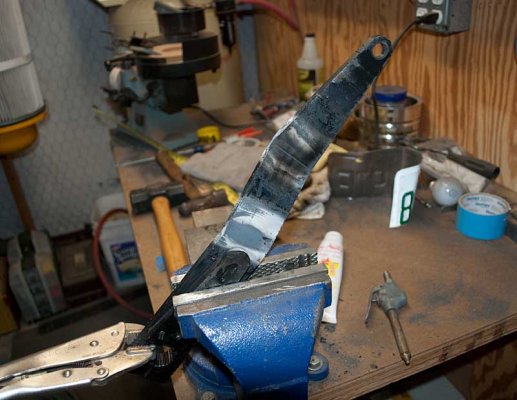
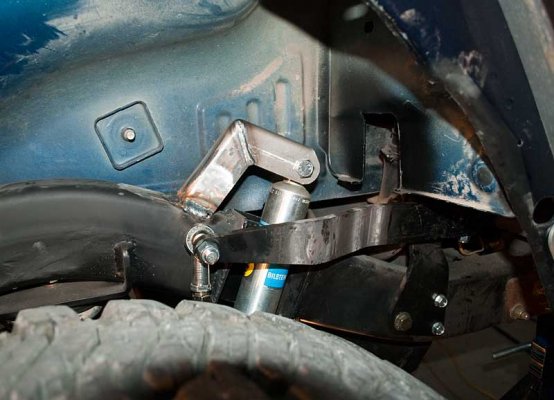
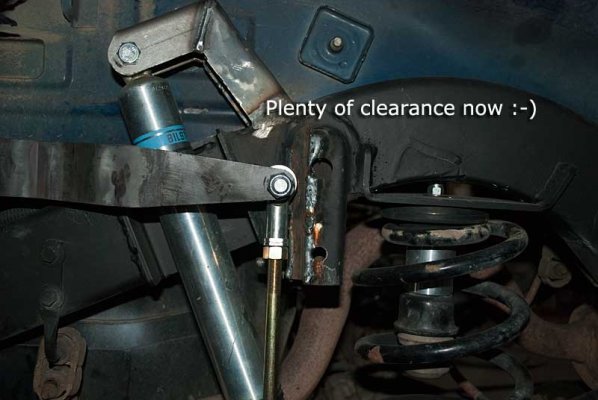
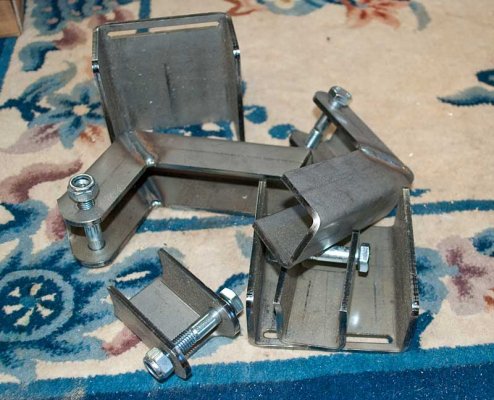
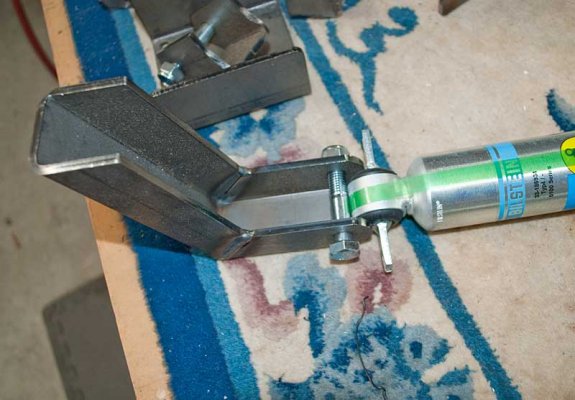
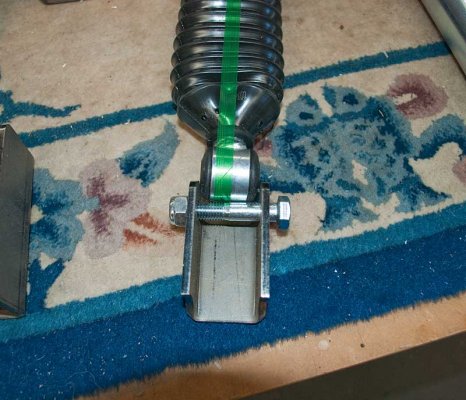
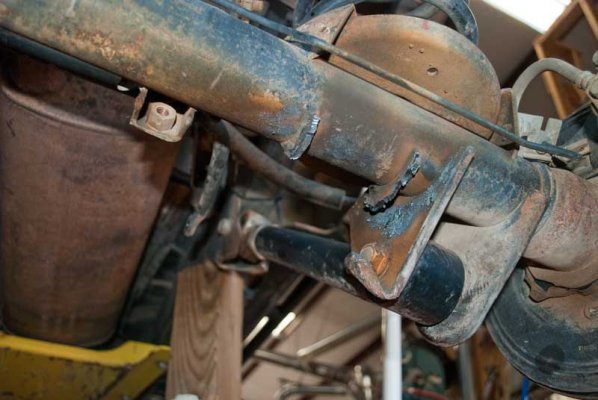
Finally got the shock bracket cut off and ready for some grinding tomorrow (for aesthetics - the new bracket will be welded in another area of the axle.) While I have everything up and exposed on the right-rear, I might as well cut the frame for the Clayton outboard shock bracket (they have a drawing showing exactly where the bracket is to be frenched in) and weld that in.
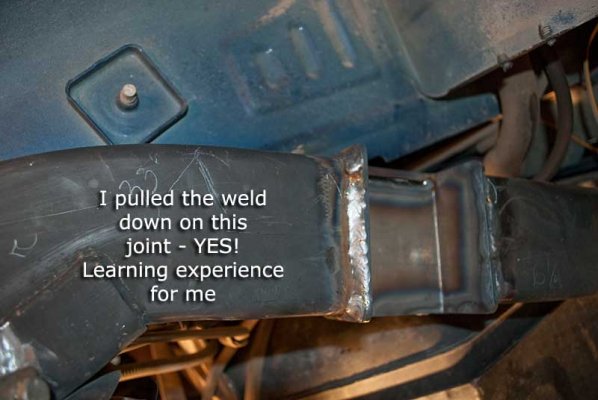
I'll tack in the new shock mount on that side, again there is a Clayton drawing showing exactly where the bracket goes but tacking it first is a great idea.
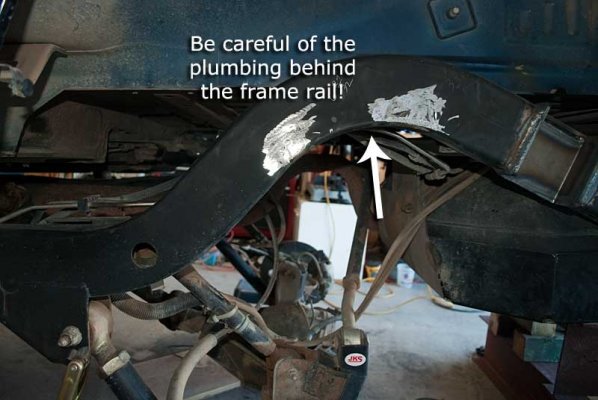
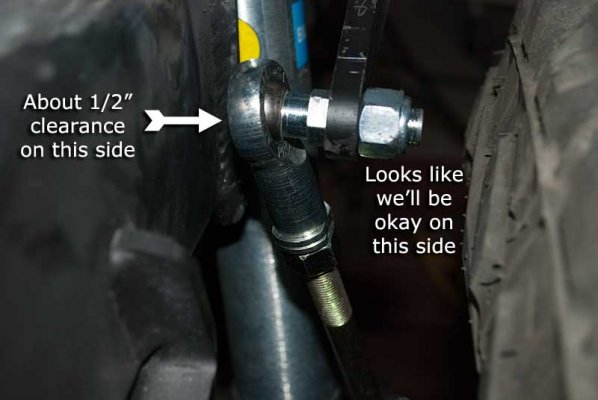
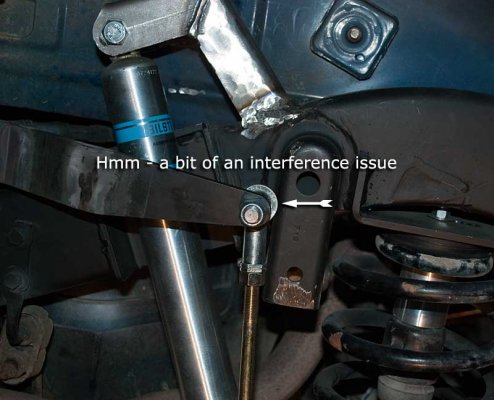
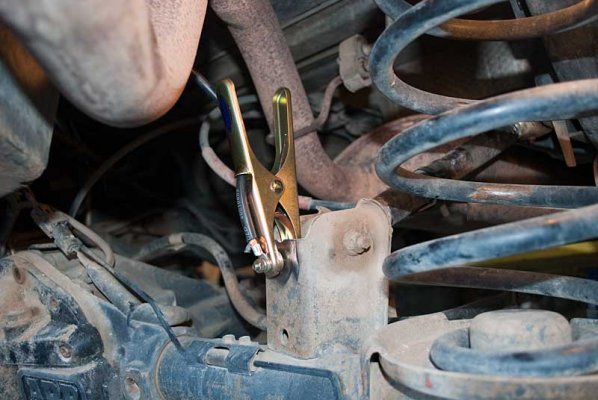
Errata: It looks like the brake line will be in the way of the new shock bracket - Hmmm.
The Bilsteins have about 10" of total travel so it is critically important to set the bump stops (and the Clayton outboard shock tower height) to where there is about 5" of travel up and down from ride height. The bump stops prevent compressing the shocks too much and ruining them or breaking a mount (or stuffing a tire into a fender or wheel well opening.) It took a bunch to time to get this set up but the time was well invested, we've wheeled some tough trails and all is good.
------------- Let's get started ------------------
While not having anything to do with the rear axle, I replaced my front shocks to get that out of the way. Then I jacked up the the right rear, removed the tire, removed the shock (I discovered the shock shaft was slightly bent ), removed the sway bar on that side, removed the JKS shock extenders, and then used the plasma torch to cut off the shock mount from the axle.
Note to self: buy one of those funky welder head scarfs/cap/whatever they call it - I just hate the smell of burning hair :? . Also discovered it's easy to cut (or weld) while standing up with the work on my welding table but it's quite another thing to cut laying on your side trying to work around various obstacles. Then my air compressor pressure switch didn't cut on (the switch is having problems) and all of a sudden the plasma torch wasn't working right due to low air pressure. DOH!
Finally got the shock bracket cut off and ready for some grinding tomorrow (for aesthetics - the new bracket will be welded in another area of the axle.) While I have everything up and exposed on the right-rear, I might as well cut the frame for the Clayton outboard shock bracket (they have a drawing showing exactly where the bracket is to be frenched in) and weld that in.
I'll tack in the new shock mount on that side, again there is a Clayton drawing showing exactly where the bracket goes but tacking it first is a great idea.
Errata: It looks like the brake line will be in the way of the new shock bracket - Hmmm.
") .
.