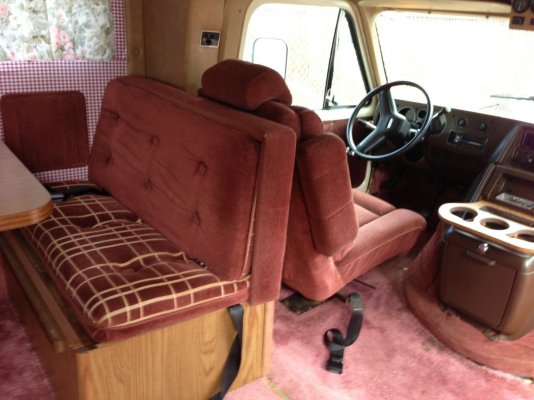
Hi. My BF bought a 22ft Winnie to live in during his work week. I think it was mostly original aside from really simple cosmetics like contact paper, curtains, carpet, etc. I have lots of pictures I'll try to learn how to post them on this site. Yesterday we spent the day tearing the interior out. We are down to bare metal/wood in much of it. The mattresses/cushions have all been thrown away and will be replaced, likely DIY. We have a month to get it live in ready again because he is giving his landlord notice today. He has permission to park at work and won't need to continue paying rent ") So we are hoping to really improve on this since it will be mostly used as his residence after a hard day of rowing on local rivers.
So we are hoping to really improve on this since it will be mostly used as his residence after a hard day of rowing on local rivers.
It is a 350 Chevy and he thinks it has the turbo 400 transmission on a 1 ton chassis. We aren't sure of the mileage, between 64K and 164K, or more I suppose. Mechanically it is in good shape from what he can tell, although the generator is not running steady. He thinks it needs a new carb, but is also considering just replacing it as he thinks it is the original. He was told it uses 1gph and would rather put a modern honda gen. in that space instead. It is big and ugly for sure! One goal is to lighten the load and put Winnie on a diet so to speak. So we will look for lighter materials when we can. It came with a really nice fridge/freezer that is new and runs propane or electric. That is my BFs favorite part I think is the new shiny fridge.
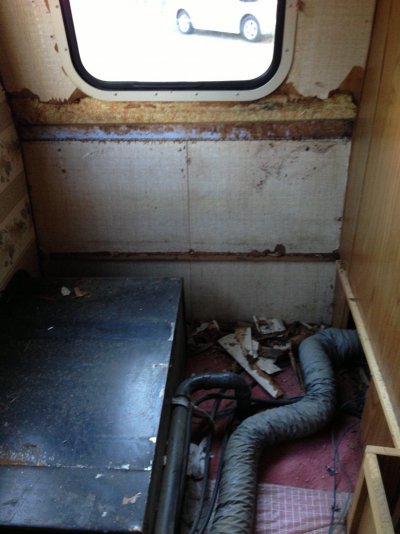
Yesterday we went from carpet and curtains to metal and wood. In the process, we found a couple of places with rotted crumbling wood. The tail end window over the master bed had rotten wood under the window. He scraped that out and has a smallish space down to a couple of inches between the bottom of the window and the next piece of wood below that which wasn't water damaged. IIRC about 5-ish inches? The plan is to use 1/4" stryo cut to fit and glued to the metal wall and then gluing 1/8" finishing wood to the top.
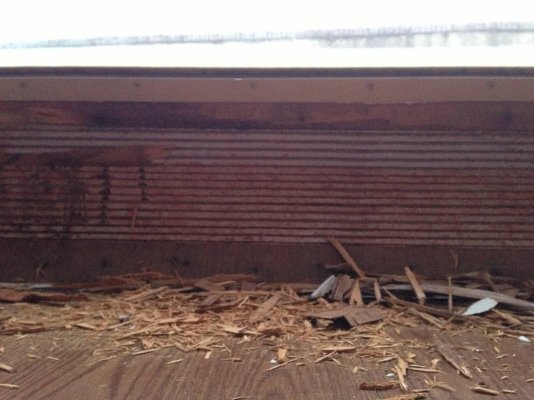
Another really rough spot is the front window of the over cab bed space. Actually it appears that most of the wood on the front sloped window of that space is rotten. The side between the window and the rv edge are mostly styro aside from the wood around the frame of the window and along the seams where the front meets the side. I pulled a bunch out yesterday, some even still damp. Since I'm smaller, I will be doing most of the tear down up there because I can move around easier in that space. I didn't really get to do much aside from remove the curtain buffers and contact paper on the sides over the cab. On the drivers side at least, the wood seemed pretty solid and appeared to have little evidence of getting wet. I think the panel on the passenger side might be in rougher shape though. Even the wooden platform for the bed is warped and damaged in the front passenger side corner. That is awaiting our next time to work on it in a few days.
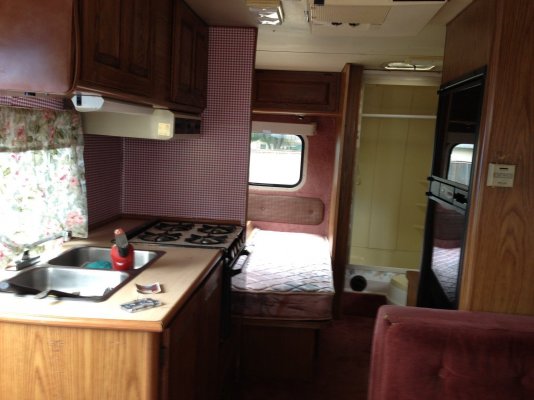
There are two other locations with obvious signs of water damage. One is under the window in the dinette area. And the other is below the exhaust for the stove. In both places, the wood appears solid and not rotten. I'm guessing it's a thin wood veneer over styro in both locations which gives the "solid" feeling. To fix the water coming in from the exhaust he is going to put a better cover, similar to the hooded ones used as dryer vents on homes.
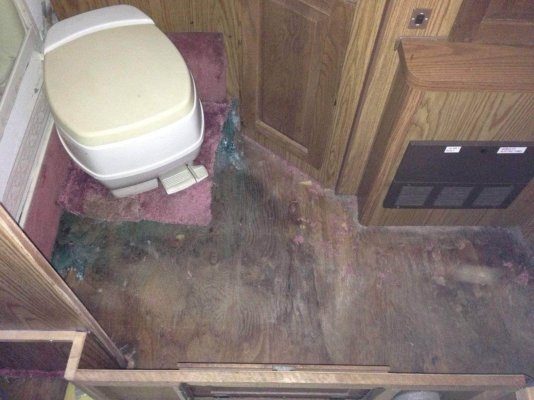
One thing that didn't get tackled yesterday was the toilet. It is sitting on top of this old yucky pink carpet that we pulled out. We are both fairly handy, but neither of us has pulled a toilet. That is one thing I'm supposed to research in the next few days so that we can get that done next.
Another thing is getting wallpaper off of two walls. The side wall of the master bed area with its window and the other side with the window, sink etc.
And, one last thing on my mind... is replacing the mattress and bed cushions. I've got measurements. I can kinda sew and am thinking that I could find good strong foam at a Joanns, Michaels or other such place. Fabric as well. For the master bed we are thinking of memory foam cut to fit. Is there a such thing? IDK, but I plan to find out. That or I guess order a mattress. It's 76" x 48".
Feel free to comment or ask any questions. I have lots of pictures of what we did yesterday. Funny thing is, I don't have a single picture of the whole exterior. We were so focused on getting the interior cleaned out. I am here to learn in hopes that maybe the good knowledge of others around here will help us along on this journey.
Thank you!
So we are hoping to really improve on this since it will be mostly used as his residence after a hard day of rowing on local rivers.It is a 350 Chevy and he thinks it has the turbo 400 transmission on a 1 ton chassis. We aren't sure of the mileage, between 64K and 164K, or more I suppose. Mechanically it is in good shape from what he can tell, although the generator is not running steady. He thinks it needs a new carb, but is also considering just replacing it as he thinks it is the original. He was told it uses 1gph and would rather put a modern honda gen. in that space instead. It is big and ugly for sure! One goal is to lighten the load and put Winnie on a diet so to speak. So we will look for lighter materials when we can. It came with a really nice fridge/freezer that is new and runs propane or electric. That is my BFs favorite part I think is the new shiny fridge.
Yesterday we went from carpet and curtains to metal and wood. In the process, we found a couple of places with rotted crumbling wood. The tail end window over the master bed had rotten wood under the window. He scraped that out and has a smallish space down to a couple of inches between the bottom of the window and the next piece of wood below that which wasn't water damaged. IIRC about 5-ish inches? The plan is to use 1/4" stryo cut to fit and glued to the metal wall and then gluing 1/8" finishing wood to the top.
Another really rough spot is the front window of the over cab bed space. Actually it appears that most of the wood on the front sloped window of that space is rotten. The side between the window and the rv edge are mostly styro aside from the wood around the frame of the window and along the seams where the front meets the side. I pulled a bunch out yesterday, some even still damp. Since I'm smaller, I will be doing most of the tear down up there because I can move around easier in that space. I didn't really get to do much aside from remove the curtain buffers and contact paper on the sides over the cab. On the drivers side at least, the wood seemed pretty solid and appeared to have little evidence of getting wet. I think the panel on the passenger side might be in rougher shape though. Even the wooden platform for the bed is warped and damaged in the front passenger side corner. That is awaiting our next time to work on it in a few days.
There are two other locations with obvious signs of water damage. One is under the window in the dinette area. And the other is below the exhaust for the stove. In both places, the wood appears solid and not rotten. I'm guessing it's a thin wood veneer over styro in both locations which gives the "solid" feeling. To fix the water coming in from the exhaust he is going to put a better cover, similar to the hooded ones used as dryer vents on homes.
One thing that didn't get tackled yesterday was the toilet. It is sitting on top of this old yucky pink carpet that we pulled out. We are both fairly handy, but neither of us has pulled a toilet. That is one thing I'm supposed to research in the next few days so that we can get that done next.
Another thing is getting wallpaper off of two walls. The side wall of the master bed area with its window and the other side with the window, sink etc.
And, one last thing on my mind... is replacing the mattress and bed cushions. I've got measurements. I can kinda sew and am thinking that I could find good strong foam at a Joanns, Michaels or other such place. Fabric as well. For the master bed we are thinking of memory foam cut to fit. Is there a such thing? IDK, but I plan to find out. That or I guess order a mattress. It's 76" x 48".
Feel free to comment or ask any questions. I have lots of pictures of what we did yesterday. Funny thing is, I don't have a single picture of the whole exterior. We were so focused on getting the interior cleaned out. I am here to learn in hopes that maybe the good knowledge of others around here will help us along on this journey.
Thank you!