Great camera APP for smart phones

The friendliest place on the web for anyone with an RV or an interest in RVing!
If you have answers, please help by responding to the unanswered posts.

JerArdra

Well-known member
Joined
Mar 3, 2005
Posts
1,814
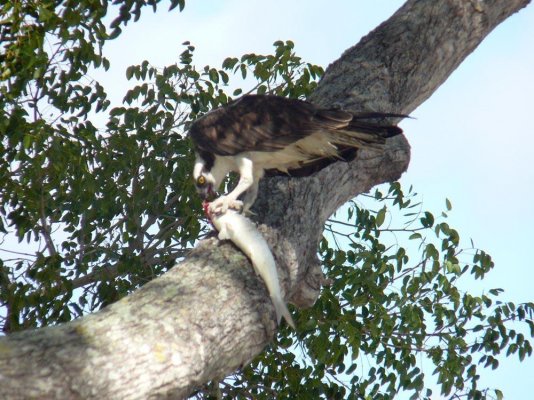
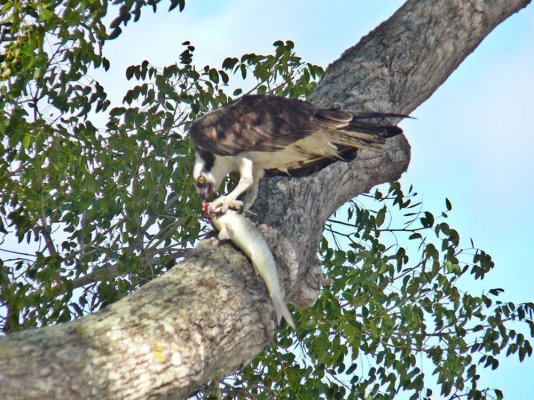
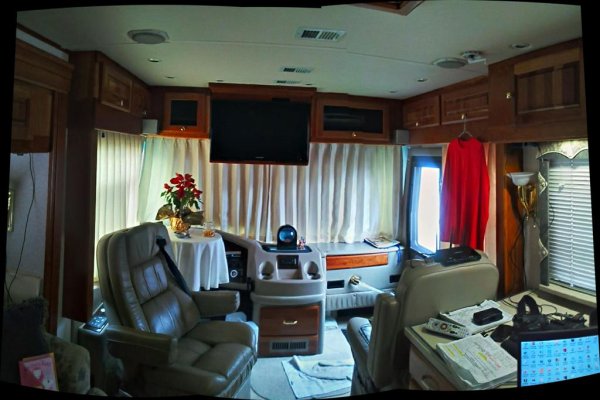
First let me say that my REAL camera is my favorite for taking pictures. 
That said, you should try the following APP in your smart phone.

A Photographer friend gave me this tip.  You might try this FREE APP.  It's
called HDR Camera for android phones and, I think, HDR, for iPhones.

When you take a photo it quickly takes 3 photos at 3 different light meter
settings (bracketing).  It averages the 3 photos and produces a single photo
that is more even in its exposure levels.  As you have already guessed it
makes dark areas (under exposure) lighter and darkens areas that are to
bright (over exposure) to give you a better photo and it does it quickly.
The photo only takes about 1 or 2 seconds longer than your phone's current
photo program.

I tried the free HDR APP and liked it so much that I purchased the FULL
version.  Your smart phone photos will look much better.

I suggest that you give it a try.

Jerry

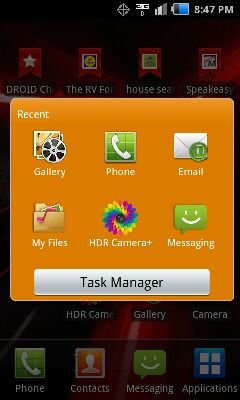
PS, If you have any trouble finding this APP I have included a photo of its ICON.  See the ICON in the middle of the bottom row in the attached photo.

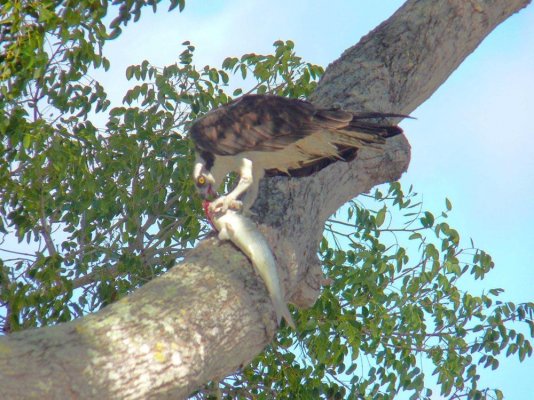
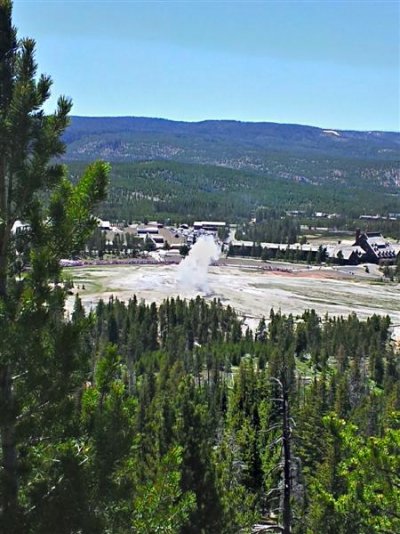
I also included a photo from up on a hillside looking down on the Old Faithful geyser taken with my smart phone and the HDR APP.  Notice how even the colors and brightness are from the sky on down to the trees that were below us.


Attachments

  • HDR Camera ICON.jpg
    HDR Camera ICON.jpg
    18.5 KB · Views: 44
  • Old Faithful HDR (Medium).jpg
    Old Faithful HDR (Medium).jpg
    60.7 KB · Views: 57
If you have Photoshop, you can accomplish the same thing after the fact. It is called a Contrast Mask.

1.  Make a duplicate layer.
2.  Set the layer mode to Overlay.
3.  Desaturate the duplicate layer so that it becomes black and white.
4.  Invert the duplicate layer so that it becomes a negative.
5.  Apply about 20 to 40 pixels of Gaussian Blur to the duplicate layer.
6.  If the effect is too extreme, reduce the % opacity of the duplicate layer.

I know that this sounds insane, but for overly contrasty photos, it works like magic. It actually duplicates a technique that is very difficult in the darkroom, so was not well known.

Joel
 
    Jerry, I'll bet you don't remember this - but one afternoon in Estes Park, CJ and I rode up the mountain with you and Ardra and stopped at a pull to look at the incredible view. I was shooting film in those days and always carried a one degree spot meter. As an old Ansel Adams guy, I didn't actually use his zone system in the darkroom - but with the meter, could determine the dynamic range of any proposed shot.

The human eye is so incredible that we are sometimes fooled - in that it can see 15 or so f-stops of range. A very high contrast picture. That means we can interpret texture in the highlighted area and texture in the darkest area - even though the contrast (which is what that means) is very high. Film in those days and digitals today have a much narrower dynamic range.

Adams figured a way during the development of black and white film how to expand the range of that film, but digital is different. So along comes HDR - or a way to photograph both ends of the range and use the best exposures on top of each other for the final image. These apps do this automatically - so the super bright sky is exposed differently than the darker areas otherwise.

OTOH, that's what I was showing you all there in Estes Park. If I take a spot reading on the darkest point in a proposed image and another in the lightest and find there are only, say, 3 or 4 stops difference, I won't bother with the scene because with no contrast, the is no depth to the image on film or paper. However, if over, say, 8 stops, I know that my camera cannot get both ends correctly - and that's where HDR (High Dynamic Range) apps go to work. I can also do this with the spot meter on my 50D or 260SX cameras. Howver, they may not be one degree meters, as with my hand held meter.

I noticed Jim Dick has posted a series of images on Face Book done with his iphone there in Yellowstone, yesterday I believe. Not sure if it's a built in or downloaded HDR iPhone app. The one you have on your Droid phone is the highest rated from the reviews I've read.

As posted, it's a more complex scenario with a real camera - and not all products (like Lightroom vs. PS) will do the work. I have another package called PaintShop Pro by Corel that does that I have been threating to try. I also downloaded the app you mention.

Question, Jerry. When doing auto panoramics on your Samsung Charge, the resolution automatically goes to the lowest available. Does that also happen on the HDR app? What about those with the iPhone HDR app. Does the resolution drop to the lowest available?

Thanks for the info and images, Jerry. It's nice that you shared this . . .  :)
 
Great Horned Owl said:
If you have Photoshop, you can accomplish the same thing after the fact. It is called a Contrast Mask.

1.  Make a duplicate layer.
2.  Set the layer mode to Overlay.
3.  Desaturate the duplicate layer so that it becomes black and white.
4.  Invert the duplicate layer so that it becomes a negative.
5.  Apply about 20 to 40 pixels of Gaussian Blur to the duplicate layer.
6.  If the effect is too extreme, reduce the % opacity of the duplicate layer.

I know that this sounds insane, but for overly contrasty photos, it works like magic. It actually duplicates a technique that is very difficult in the darkroom, so was not well known.

Joel
As an example:
1. Original overly contrasty with loss of detail in shadows and highlights.
2. Final improved version.
3. Duplicate layer deasturated, inverted, and 35 pixels of blur.
4. Same as 2 except without the blur.
 

Attachments

  • Original.jpg
    Original.jpg
    155.3 KB · Views: 35
  • Final.jpg
    Final.jpg
    159.9 KB · Views: 31
  • Magic Layer.jpg
    Magic Layer.jpg
    30.1 KB · Views: 23
  • No Blur.jpg
    No Blur.jpg
    148.9 KB · Views: 32
Bob,

Yes, both Ardra and I remember going up the mountain with you and CJ at Estes Park to take some photos and I also remember your explanation of using a spot meter.

Re panoramas:  the attached 3-picture pano inside our MH was done with HDR Camera.  It was very bad lighting.  It is 1024 X 683. 

It started to rain when I took the 2-picture clouds pano so in my hurry I did not hold the phone VERY steady.  It is 1024  X 494.

Instead of Panorama Factory I used a microsoft research panorama program to stitch these photos together.  Download it; I think you'll like it.  It's extremely fast and  you can load the pictures in any sequence and the program will figure it out.

http://research.microsoft.com/en-us/downloads/730cd6bb-6450-4e66-8101-a94e71cb0779/

Jim Dick has HDR in his iPhone.  He is the person who told me about it.

JerryF


Attachments

  • Pano stitch (Large).jpg
    Pano stitch (Large).jpg
    87.7 KB · Views: 29
  • Pano Cloud Final HDR (Large).jpg
    Pano Cloud Final HDR (Large).jpg
    57.8 KB · Views: 20
Joel,

That's cool that with PhotoShop you an do that fine of a fix or improvement. 

I'm probably not that patient.  Anyhow all I have is an old Ver 4 of Photo Shop Elements.  The only thing I ever do is to lighten dark areas using a slider and I do that very seldom.

The improvment between PIC 1 and PIC 4 is quite noticable.  Nice Job.

JerryF. 
 
Jerry my Motorola Droid has a HDR function built into the camera function.
 
Bob,

I use proHDR on my iphone4. I did show Jerry how the program worked and mine only takes two photos. His version for Android takes three photos. I have also tried taking three photos with my Canon DSLR and doing a photo merge with Elements 9. I like the iphone results much better and I don't have to do anything to make it happen other than tap the screen!

As we discussed earlier, I wonder what Ansel Adams would think of the new technology that is available today?  ;D
 
JerArdra said:
Joel,

That's cool that with PhotoShop you an do that fine of a fix or improvement. 

I'm probably not that patient.  Anyhow all I have is an old Ver 4 of Photo Shop Elements.  The only thing I ever do is to lighten dark areas using a slider and I do that very seldom.

The improvment between PIC 1 and PIC 4 is quite noticable.  Nice Job.

JerryF.

I use it often enough that I created an action for it. Now, it only takes a single click to start it and then another to select the amount of blur.

Joel
 
I just found this APP:  HDR FX Photo Editor Free.  I mention it because it allows me to quickly lighten dark under exposed areas of a photo using a slider just like my old version 4 of Photo Shop Elements does. 

When you use it you will see on the right side of the screen there is a list of options.  When you choose the option HDR you get two sliders at the bottom of the screen.  One is called Light and the other is called Strength. 

The light slider will make darks areas lighter on your photo without affecting other areas or colors.  But, can anyone tell me what the Strength slider does because I cannot see any difference in the photo when I use the Strength slider.

Help, what does the Strength slider do???

JerryF
 
  Narrowing the range can also be done with some images using flash fill. Sometimes allowing the flash to figure the forground exposure will work OK, but ususally I find that operating in manual mode is best, essentially dialling in the flash exposure to balance the flash to the background exposure settings.

In some cases it takes a lot  power from the flash to balance the light between both the background and forground. I shoot with a Canon 580SX flash - but also have 2 older Vivitar 283's. On each one, I added a rheostat that allows me to manually dial in what ever intensity I need. The shot of Ned and Lorna's rig was done with one of my 283's - and my first digital DSLR.

Here is my album of some of these types of shots. When you open the page, click the diagonal opposing arrows in the lower right of the first thumbnail image -- then click F11 for full screen. From there click the next/previous buttons.

http://www.flickr.com/photos/bob-bluecanon/sets/72157617789245721/
 

Latest posts

Forum statistics

Threads
131,974
Posts
1,388,531
Members
137,723
Latest member
CarlSpackler
Back
Top Bottom