Kevin Means
Site Team
This write-up describes how I mounted an LED light strip to the side of my motorhome.
On the awning side of our motorhome, there are only two factory-lights - a white LED porch light and an illuminated door handle - hardly enough light for seeing anything more than the entry area. To make matters worse, light from both of those sources is completely blocked when the passenger side slide-out is extended. I like to relax outside when camping but it seemed rather silly to always have to have a flashlight with me when I was bar-b-cueing, watching TV or just visiting.
With that, I began looking into a variety of 12 volt lighting options to reliably illuminate the awning side of our coach. LED light strips have become very popular with RVrs. Many systems are waterproof/water-resistant and, with some basic precautions, can be installed outside. They're relatively inexpensive, most operate with 12 volts, they come in a variety of colors, including single and multiple color variations - making them very versatile - and they can add different ambiances to the outside area. After considerable research, I bought a waterproof, flexible 3528 light strip that's five meters long with 300 multi-colored LEDs and it came with it's own controller and remote. I swapped the controller and remote for a WiFi controller - more on that later. LED light strips can be purchased from our sponsor, RVLEDBulbs.com.
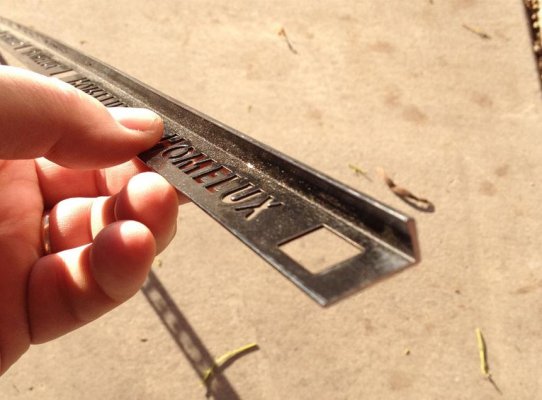
My awning is about 14 feet long so I had to trim a little off one end of the light strip so it would fit under the awning. I struggled with how best to mount the light strip to the MH, because I'm picky about its appearance and I really didn't want it to fall off while driving down the road. The light strip comes with 3M sticky-tape on one side that will adhere to the side of the motorhome but it's been my experience that those sticky things lose their sticky over time. So I went to Home Depot and bought two 8-foot lengths of a metal strap for about $6.00 (Picture 1). I'm not sure what these straps are normally used for but they're just the right size for attaching the light strips to them. I riveted two of the metal straps together for a total length of 13 feet and then, in addition to the 3M tape, I used silicon glue to attach the light strips to them. I also used the silicon glue to run a bead down the full length of each edge of the light strip. You'll notice in Picture 1 that there are words cut into the metal strap. That's where the light strip attaches. Since the back (sticky-side) of the light strip would be exposed through these word cut-outs, I also ran a bead of the silicon glue down the back-side of the metal strap - completely sealing all corners and edges of the light strip. The manufacturer of these light strips claim that they're "waterproof", and they look pretty well protected, but I wanted to hedge my bets as much as possible.
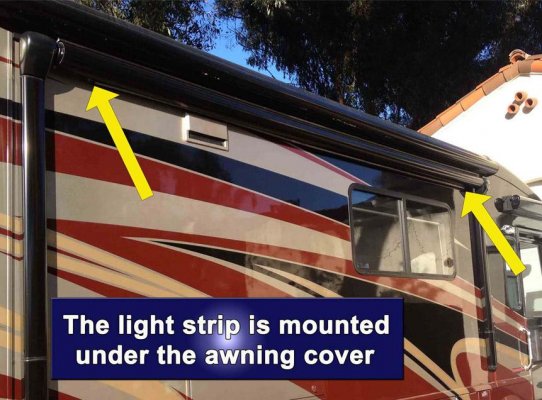
I didn't want to attach the metal strap directly to the side of the motorhome for a variety of reasons - one of them was, I wanted to direct the light from the LEDs downward somewhat, because the light strip was to be mounted high on the wall, directly under the awning cover. I did this so the awning cover would protect the light strip from the elements as much as possible, but unless light from the light strip was directed downward, the back of the awning cover would block a lot of the light strip's illumination. I also wanted to be able to use the light strip whether the awning was retracted or extended and mounting it under the awning would allow that (My awning is attached to the slide so light from the light strip is not blocked when the slide is extended).
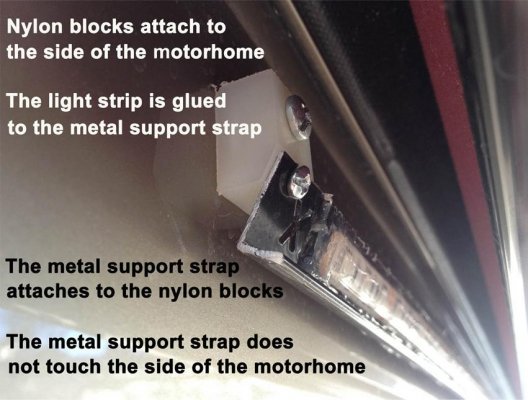
I found some sturdy nylon blocks for less than $3.00 at Home Depot. These blocks already had an angled side to mount the metal strap/light strip to, which would direct the light downward. I mounted these blocks to the ends of the metal strap, and then to four more places down the length of the strap (Picture 2). The nylon blocks were then screwed to the side of the motorhome, into expanding locking nuts, and the holes were sealed. (Drilling into my baby was the scariest part of the entire project). I had a tight area to work in, between the bottom of the awning cover and the top of the microwave vent, but it all just barely fit (Picture 3). In addition to the light strip being firmly attached to the metal strap, I can remove the metal strap and light strip assembly from the MH without having to remove anything from the MH wall.
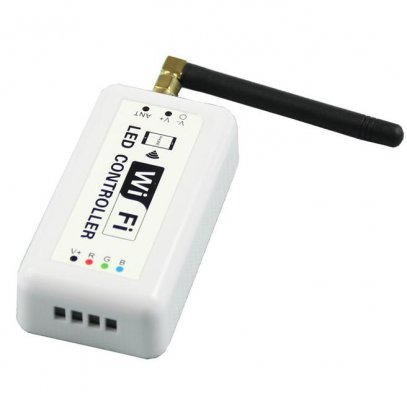
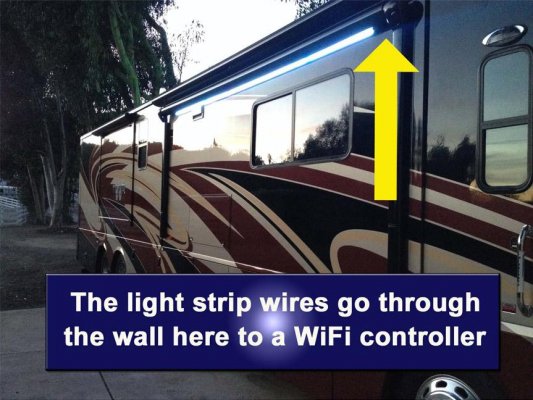
I covered the wires that extend from the end of the light strip with shrink-wrap, and ran them through a hole that I drilled in the side of the MH, to an unused section in the passenger-side overhead cabinets. That's also where I tapped into 12 volts for some existing interior reading lights. The hole was sealed and is not visible from inside or outside the MH, because it's behind the light strip. Inside the cabinet, I installed a 12 volt WiFi LED controller that is controllable with any smartphone (Picture 4). This controller cost $27.00, has a range of about 150 feet and works great with my iPhone 4S. The light strip and controller draw about 3 amps at max brightness - considerably less when dimmed.
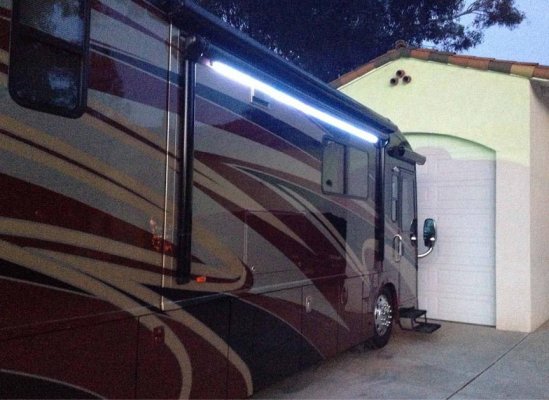
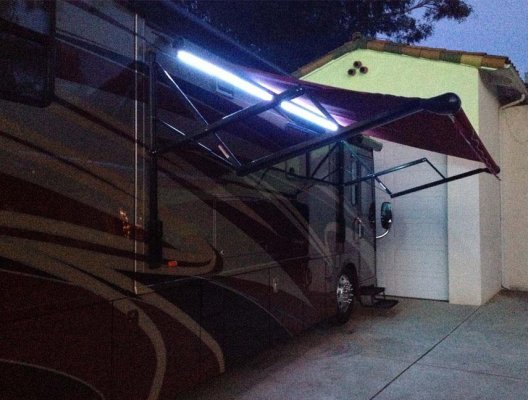
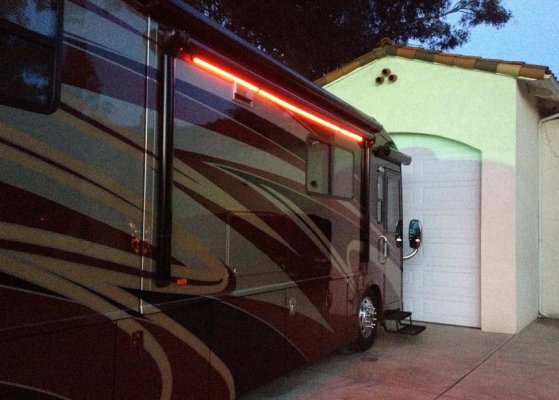
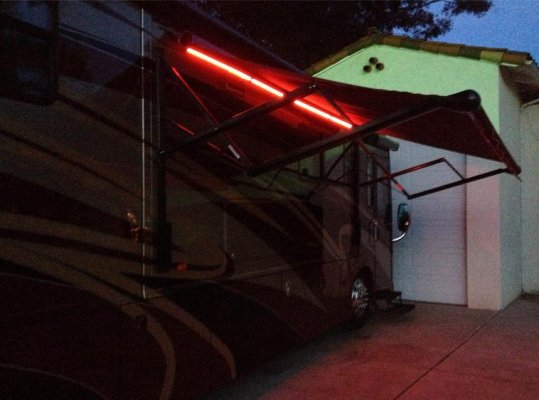
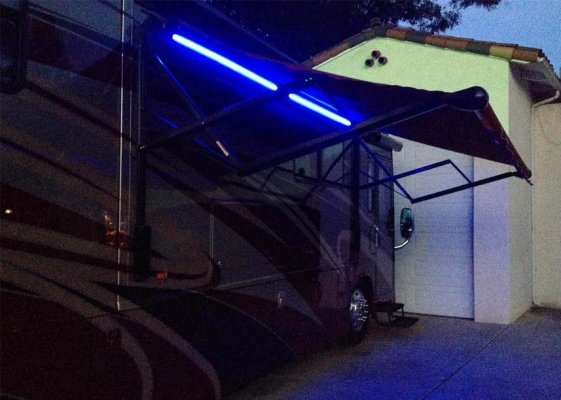
I've attached some pictures of a few of the different colors that the light strip will display. The brightness can be varied to any level and the light strip can display almost any color with a swipe of your finger on the smartphone app. This system is very versatile - controllable from most WiFi equipped devices. I primarily use it for the bright white light it emits, but other colors add a neat touch to the outside area. There are other functions as well, but some are, well... a bit silly in my opinion. If you're into pulsing lights synced to music - it'll do that too. I know this was pretty long-winded but I wanted to explain this fully in case someone else was considering a project like this. Hope it helps.
Kev
On the awning side of our motorhome, there are only two factory-lights - a white LED porch light and an illuminated door handle - hardly enough light for seeing anything more than the entry area. To make matters worse, light from both of those sources is completely blocked when the passenger side slide-out is extended. I like to relax outside when camping but it seemed rather silly to always have to have a flashlight with me when I was bar-b-cueing, watching TV or just visiting.
With that, I began looking into a variety of 12 volt lighting options to reliably illuminate the awning side of our coach. LED light strips have become very popular with RVrs. Many systems are waterproof/water-resistant and, with some basic precautions, can be installed outside. They're relatively inexpensive, most operate with 12 volts, they come in a variety of colors, including single and multiple color variations - making them very versatile - and they can add different ambiances to the outside area. After considerable research, I bought a waterproof, flexible 3528 light strip that's five meters long with 300 multi-colored LEDs and it came with it's own controller and remote. I swapped the controller and remote for a WiFi controller - more on that later. LED light strips can be purchased from our sponsor, RVLEDBulbs.com.
My awning is about 14 feet long so I had to trim a little off one end of the light strip so it would fit under the awning. I struggled with how best to mount the light strip to the MH, because I'm picky about its appearance and I really didn't want it to fall off while driving down the road. The light strip comes with 3M sticky-tape on one side that will adhere to the side of the motorhome but it's been my experience that those sticky things lose their sticky over time. So I went to Home Depot and bought two 8-foot lengths of a metal strap for about $6.00 (Picture 1). I'm not sure what these straps are normally used for but they're just the right size for attaching the light strips to them. I riveted two of the metal straps together for a total length of 13 feet and then, in addition to the 3M tape, I used silicon glue to attach the light strips to them. I also used the silicon glue to run a bead down the full length of each edge of the light strip. You'll notice in Picture 1 that there are words cut into the metal strap. That's where the light strip attaches. Since the back (sticky-side) of the light strip would be exposed through these word cut-outs, I also ran a bead of the silicon glue down the back-side of the metal strap - completely sealing all corners and edges of the light strip. The manufacturer of these light strips claim that they're "waterproof", and they look pretty well protected, but I wanted to hedge my bets as much as possible.
I didn't want to attach the metal strap directly to the side of the motorhome for a variety of reasons - one of them was, I wanted to direct the light from the LEDs downward somewhat, because the light strip was to be mounted high on the wall, directly under the awning cover. I did this so the awning cover would protect the light strip from the elements as much as possible, but unless light from the light strip was directed downward, the back of the awning cover would block a lot of the light strip's illumination. I also wanted to be able to use the light strip whether the awning was retracted or extended and mounting it under the awning would allow that (My awning is attached to the slide so light from the light strip is not blocked when the slide is extended).
I found some sturdy nylon blocks for less than $3.00 at Home Depot. These blocks already had an angled side to mount the metal strap/light strip to, which would direct the light downward. I mounted these blocks to the ends of the metal strap, and then to four more places down the length of the strap (Picture 2). The nylon blocks were then screwed to the side of the motorhome, into expanding locking nuts, and the holes were sealed. (Drilling into my baby was the scariest part of the entire project). I had a tight area to work in, between the bottom of the awning cover and the top of the microwave vent, but it all just barely fit (Picture 3). In addition to the light strip being firmly attached to the metal strap, I can remove the metal strap and light strip assembly from the MH without having to remove anything from the MH wall.
I covered the wires that extend from the end of the light strip with shrink-wrap, and ran them through a hole that I drilled in the side of the MH, to an unused section in the passenger-side overhead cabinets. That's also where I tapped into 12 volts for some existing interior reading lights. The hole was sealed and is not visible from inside or outside the MH, because it's behind the light strip. Inside the cabinet, I installed a 12 volt WiFi LED controller that is controllable with any smartphone (Picture 4). This controller cost $27.00, has a range of about 150 feet and works great with my iPhone 4S. The light strip and controller draw about 3 amps at max brightness - considerably less when dimmed.
I've attached some pictures of a few of the different colors that the light strip will display. The brightness can be varied to any level and the light strip can display almost any color with a swipe of your finger on the smartphone app. This system is very versatile - controllable from most WiFi equipped devices. I primarily use it for the bright white light it emits, but other colors add a neat touch to the outside area. There are other functions as well, but some are, well... a bit silly in my opinion. If you're into pulsing lights synced to music - it'll do that too. I know this was pretty long-winded but I wanted to explain this fully in case someone else was considering a project like this. Hope it helps.
Kev
Attachments
-
 1. Metal Support Strap 2.jpg62 KB · Views: 894
 -
 2. Light Strip Attachment 2.jpg74.8 KB · Views: 888
 -
 3. Final View 2.jpg95.4 KB · Views: 847
 -
 4 WiFi Controller 2.jpg21.5 KB · Views: 695
 -
 5 Light Stirp Wiring.jpg91 KB · Views: 829
 -
 White No Awning 2.jpg88.7 KB · Views: 692
 -
 White With Awning 2.jpg96.2 KB · Views: 600
 -
 Red No Awning 2.jpg85.1 KB · Views: 518
 -
 Red With Awning 2.jpg70.1 KB · Views: 415
 -
 Green No Awning 2.jpg89.4 KB · Views: 379
 -
 Blue With Awning 2.jpg78.1 KB · Views: 481
 You said you are going to completely enclose the LED strip with heat shrink. How is the light going to shine through the heat shrink? Maybe I misunderstood you. I guess you need to explain a little. Thanks.