Replacing carpet

The friendliest place on the web for anyone with an RV or an interest in RVing!
If you have answers, please help by responding to the unanswered posts.

Gary RV_Wizard

Site Team
Joined
Feb 2, 2005
Posts
81,724
Location
West Palm Beach, FL
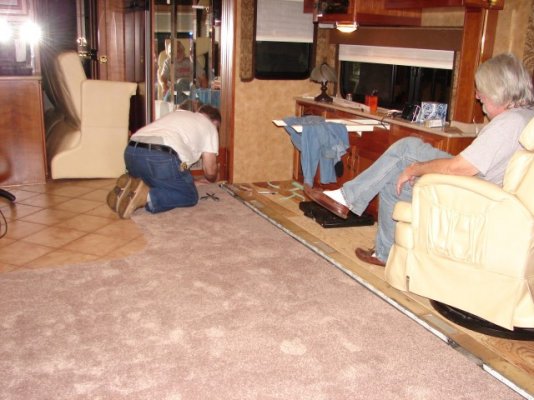
With help from good friend and fellow RVer Mike Wassing, I've been working for the past 10 days to replace all the carpeting in our triple slide, 40 ft coach. Though strictly an amateur, I have quite a bit of flooring experience in the stick house (though mostly tile and laminate) and so felt able to tackle this one on my own.  The two of us put in 4.5 eight hour days to get the bulk of it done and I've since added another dozen man-hours on finishing touches.  One of my conclusions is that the $2000-$2500 that RV flooring pros charge for this job is a reasonable price. That is labor only - your choice of carpet is extra. We spent $475 on a 12x20 piece of mid-grade of carpet, another $80 for 96 sq ft of top quality pad and about $100 on miscellaneous stuff, including edge binding for two pieces.

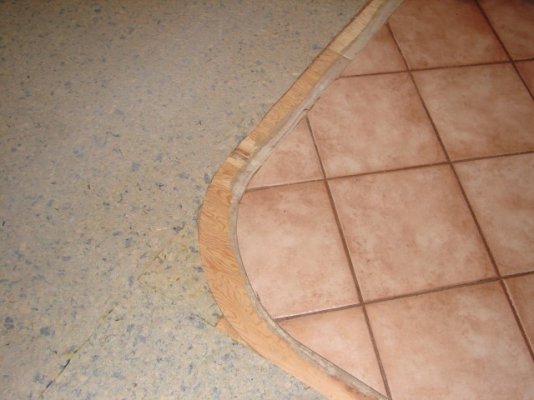
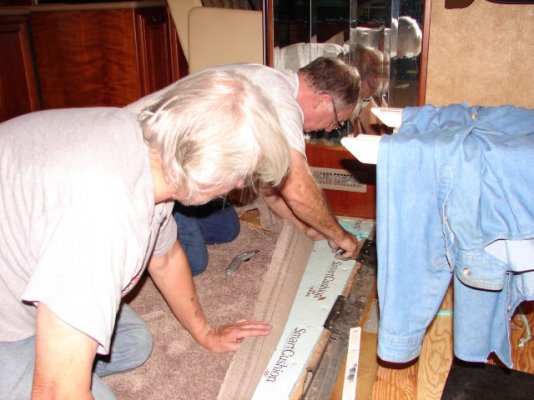
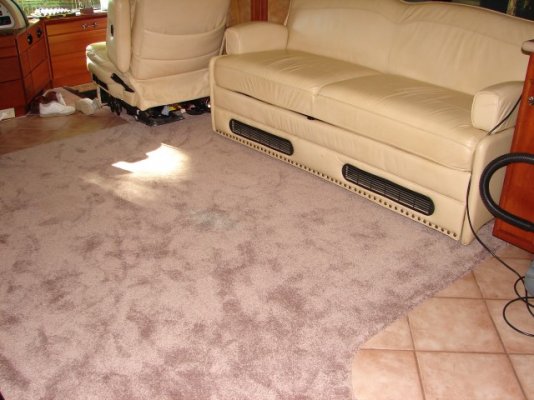
The 10 year old carpet was still in decent physical shape but had suffered badly from sun fade and discoloration where the inevitable spills had been cleaned up. Color-fastness was one of our major criteria in selecting the new carpet!  Getting the old stuff out was a major chore in itself, involving the removal of captain chairs, the sofa and my computer desk plus about a zillion staples.  We used the old pieces from the main floor and the largest slide as a template to cut the new pieces. Everything else we measured and cut from scratch. The new carpet is stapled in place like the old was. We used a Craftsman air-driven stapler and a portable compressor, almost a necessity for a task like this. It uses narrow crown staples and we mostly used the 3/4" length lus some 1" here and there where extra length was needed, e.g. where carpet is folded over on itself to form a blind edge.

I got a couple pieces back from the carpet binding shop yesterday and expect to get them installed today. The flush floor slide required one edge to be bound (the forward edge that slides across the main floor), and the entry step well cover piece required binding all the way around.

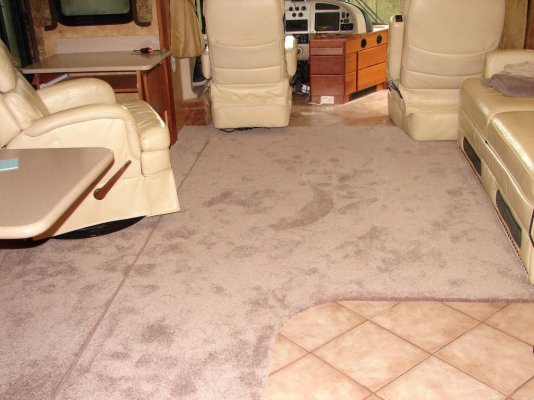
Here are some photos of the work in progress. Will add more photos when it is complete.
 

Attachments

  • Sofa and chairs removed.JPG
    Sofa and chairs removed.JPG
    94.5 KB · Views: 175
  • This curved edge was a challenge.JPG
    This curved edge was a challenge.JPG
    78.2 KB · Views: 143
  • Gary fits an edge while Mike surpervises.JPG
    Gary fits an edge while Mike surpervises.JPG
    103.2 KB · Views: 162
  • Fitting to the main slide.JPG
    Fitting to the main slide.JPG
    97.5 KB · Views: 159
  • Main floor in place and sofa installed.JPG
    Main floor in place and sofa installed.JPG
    96.1 KB · Views: 165
Thanks, Ernie. I suspect my work isn't completely up to your standards, but we are pleased with the results.  When I have a chance, I'll be in touch with you about how we did the flush floor slide. As you can see in one of the photos, we did indeed remove the slideout "lip" to gain access to edge of the main floor and it worked out well.
 
Looks great.  We're in the planning stages now for a major update on the older Aerbus we just bought.  We may just replace the old stuff with laminate.  I've done that and it's fairly easy.  But carpet is nice.  Warm and a bit quieter.  Will you be redoing your bedroom?  If so, are you planning on removing the bed pedestal?  Looking forward to the finished project pix. 

By the way, I just read a post on redoing the carpet and pulling the many staples.  The post stated there was a special tool for that.  Did you do that or just pry and pull them with a pliers?


Nice work Gary - an eye-pleasing color too.

Just curious - I was watching my full wall slide come in last weekend (I hold my breath every time that monster goes in or out), and I was noticing that the tolerences between the bottom of the slide's floor and the carpet in the bedroom were pretty tight (That's the only room with carpet). It looked like I might have a clearance problem if I were to replace the bedroom carpet with a thicker pad or carpet. Did you encounter any clearance issues or is your new carpet and pad the same height as what you removed?

Kev
 
Instead of thicker more spongy carpet that the factory likes to install to make the customer think they are getting some plush stuff- use a 3/8 8 pound density padding along with a tight nap Saxony. The firm and soft feel will work better with less height with the slides.
 
Will you be redoing your bedroom?  If so, are you planning on removing the bed pedestal?

I did the bedroom as well - the labor for that is included in 4.5 days mentioned above.  I did not remove the bed itself, but a corner of the bed pedestal is removable to provide access to the engine hatch cover and that was pulled off.

Did you encounter any clearance issues or is your new carpet and pad the same height as what you removed?

I was careful to choose a pad and carpet that would not cause a height problem. I used a premium grade pad (Mohawk Smart Cushion) for a nice cushiony feel and a medium height carpet to keep the height low enough. Length of the pile isn't important to a nice feel - it is the pile density that counts.

I just read a post on redoing the carpet and pulling the many staples.  The post stated there was a special tool for that.  Did you do that or just pry and pull them with a pliers?
I lift the staples with a tack puller (see link below) and then grab them with a pair of needle nose or diagonal cutters (aka dikes). The dikes alone also work pretty well - the pointy tips can get under most staples and then pull them with a twist of the wrist.
http://www.homedepot.com/p/Husky-Tack-Puller-74349/100034526

We may just replace the old stuff with laminate.

We considered that - we are replacing most of the carpet in the S&B house with laminate. We decided to stick with carpet in the coach mostly because of the scratch factor, both from the slide rollers (there are six rollers on the slide that comes across the carpeted area) and sand and gravel we often track in from outside. The "bare feet feel" was the other consideration.

an eye-pleasing color too.
The color in the photos doesn't really do it justice. The carpet is a light beige with caramel threads sprinkled through it and that effect doesn't show in the photos.  We wanted to lighten the coloring a bit (the old carpet color was called "cognac") yet still compliment the cherry wood interior. The idea is that the caramel sprinkles picks up the cherry color of the wood. But maybe it's all in our minds...  8)
 
I finished up yesterday afternoon, though I've still got a couple of pieces of trim to re-install, e.g. the "skirt" on the base of the co-pilot chair.
 

Attachments

  • Almost finished.JPG
    Almost finished.JPG
    213.3 KB · Views: 106
The blind edge along the galley tile, the bedroom entry and along the front entry tile took a lot of patience, especially around the two curved areas. It has a bit of a hump there (carpet is folded back underneath) but I believe some time and foot traffic will flatten it out. I understand that the professional technique is to steam that area to get it to compress - maybe I'll try the wife's steam iron on it!
 
Looks great!!
I'm rounding up material to replace my flooring, going from carpet and  vinyl to Bruce engineered wood.  I've done a lot of wood in my house and I think I'm up to the challenge. Besides, what can I do that I can't pay to have fixed?!?!?

I hope I'm not hijacking your post but I am curious about dealing with in-floor heater registers.  I have two in the middle of the living room floor that I'm going to have to deal with.

Thanks, Terry

 
We are looking at replacing the bedroom carpet this summer I am not sure how to tackle the closet or around the bed. DH wants to put bamboo down. I think carpet would be easier, we have one floor vent, and parts of the slide are carpeted, I think making those kinds of cuts in the wood would be too difficult. I would have to do most of the work, DH cannot get into tight places like I can. Any thoughts would be appreciated.
 
if you have registers in the floor, you just cut the wood around the hole. If they are plastic OEM, throw them out and get some nice ones. Lots of choices out there
 
And how are the knees this week?  The lower back?

Spent a lot of time on my knees, but mostly on carpet or pad, so not too bad. Back not too bad either, especially considering I'm just shy of 70!  Lifting the captain chairs, sofa and corian tabletop definitely required a helper and I (and he) wished the helper had been closer to 25 than 75. Us old guys don't sling stuff around like we used to!
 
You may not sling as much or as fast as you did at 25, but you'll sling a whole lot faster and a whole lot more that most of your contemporaries who paid someone to do their slinging. 
 
Back
Top Bottom