SargeW
Site Team
This is a "How To" thread on installing an exterior TV in my new rig, that didn't come with one from the factory. It helped that I am at CRB right now (the Tiffin Motorhome factory), as it made getting parts easy.
I will start off by saying that before I decided to attempt this project, I did a lot of research first. I got a schematic of the slide wall that showed the aluminum studs, one that showed the location of any wiring that may have been inside the wall. And yes there was some wire in the wall, just not at the end that I was working on. These were obtained from the good folks at Tiffin, which everyone I spoke to was more that happy to help me out. Very good customer relations from the Tiffin employees.
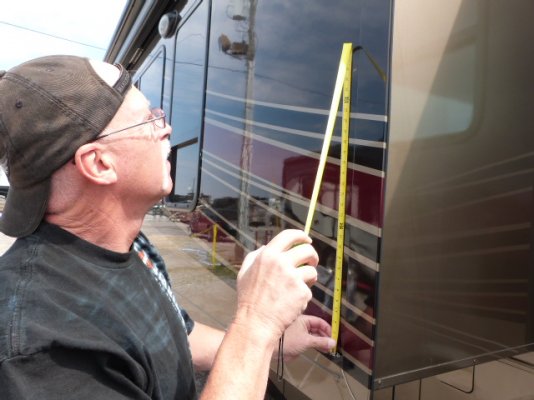
After checking that the wall that I wanted to install the TV box in was clear of obstructions, next came the specific measurements. I ordered a box from the Tiffin store and it took one day to be delivered. The box came with the box frame, the door with lock attached, the lifting struts on the door, and the weather seal already in place. I ordered a box to fit a 32" TV. The box itself was 37" wide and 26" tall. That does not count the 3/4" flange on the outside of the box that covers the edge of the mounting hole. For my needs, I had to have a hole 37 1/2 inches wide, and 26 1/2 inches tall.
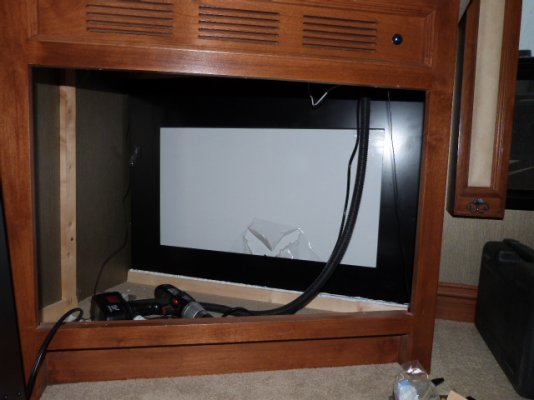
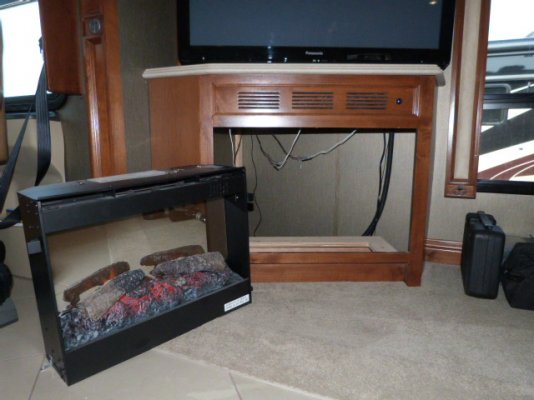
I started by removing the fireplace, and fireplace shelf to gain access to the back of the space where I would be cutting the hole.
I knew that I had to have exactly 37 1/2" to fit the box and no less. Measuring inside the enclosure I knew it would be close. I was about 1/4" short of getting the fit, so I removed a rear side support on the left side rear of the fire box to gain the needed distance.
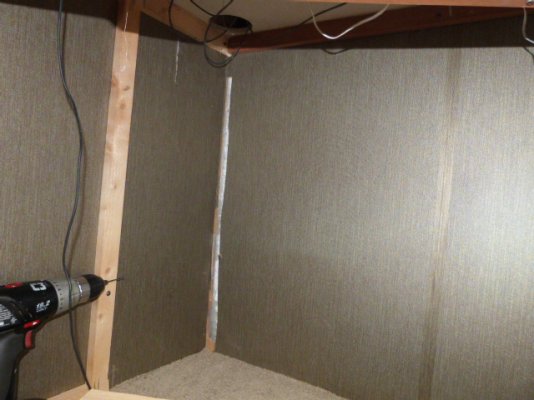
With the brace removed I checked for obstructions by using a small drill bit and drilling into the corner up and down the the length of the intended cut. I could tell when I hit the corner aluminum stud. The next step was to cut away the wall board over the stud to determine the exact amount of space I would have to place the TV box. Notice up to this point, I could back out at any time if I determined that it was not a feasible project.
Clearing the stud and measuring I could tell that I would have exactly enough room to mount the box with a little wiggle room for adjustments if necessary. Next I used a Multi Purpose tool to cut out the wall board on the inside of the rig. I borrowed it from another owner here at CRB, Don. He is here watching Tiffin build his new coach. I have not used one of these before, but it's a pretty slick tool, and highly recommended.
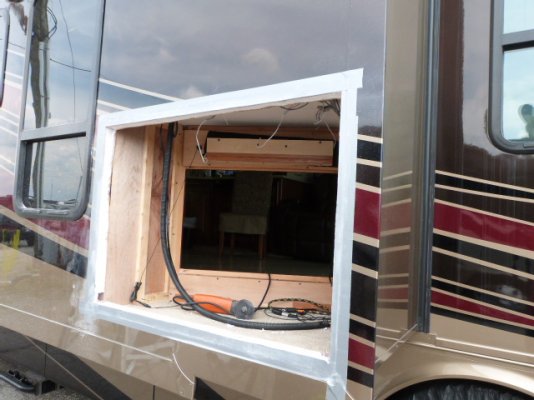
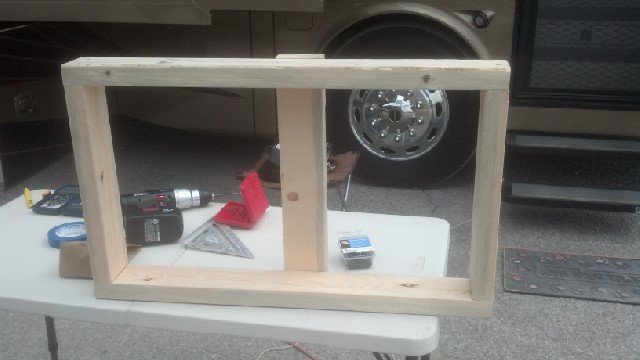
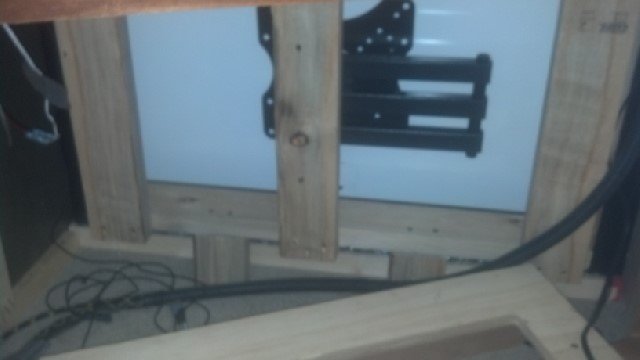
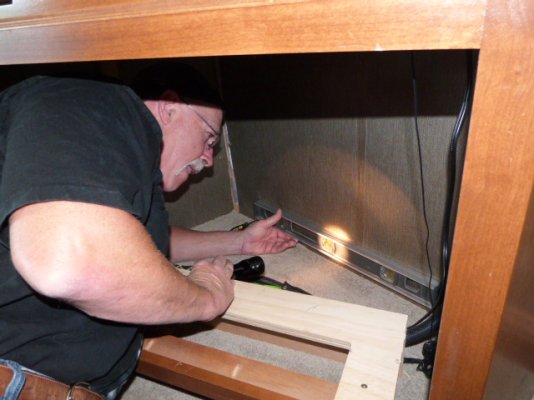
I need to point out here that I learned by stopping by the factory and viewing a slide out room being built that Tiffin uses steel braces in the corners of it's slide out rooms for strength. The braces are 5" long, and 1 1/2' tall and "L" shaped. To raise the box just enough to clear any such braces I purchased a piece of 2X2" lumber from the local lumber yard. I cut apiece to fit on the floor under the box to hold it high enough to clear any such brace material I may run into.
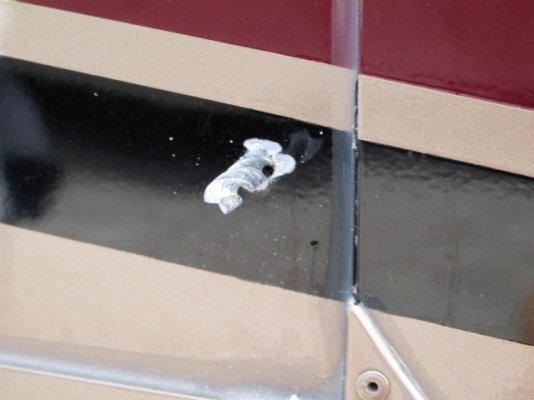
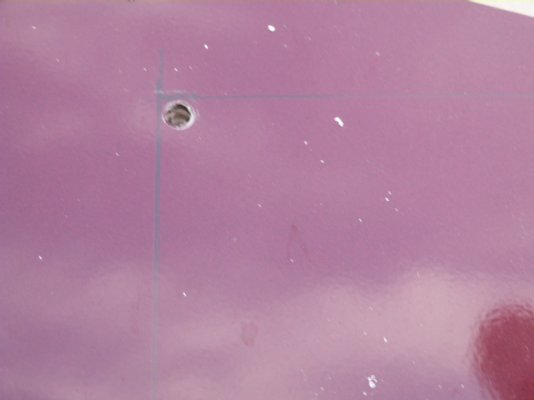
With the box laid out on the inside, I crossed the point of no return and drilled a hole in the lower left corner of the box cut out where the two aluminum studs intersected. That was the point that the whole project would be measured from.
From there I measured out and drilled the other three corner holes, measuring carefully and checking the box for square. I did learn that the trim piece on the outside of the slide is slightly out of square with the wall of the slide, but there is nothing to do about that now!
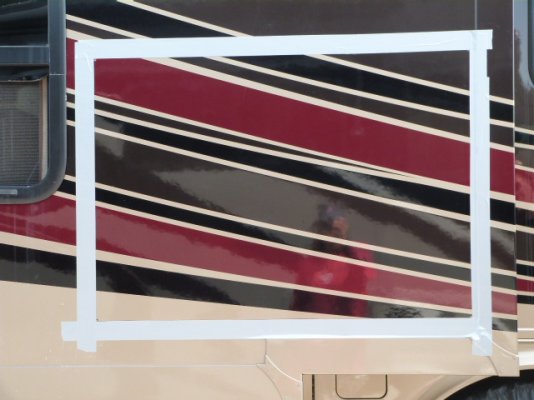
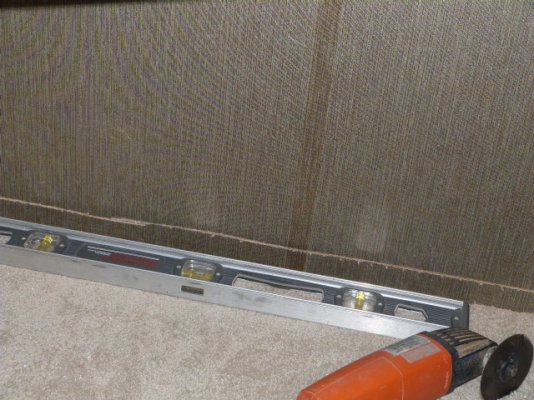
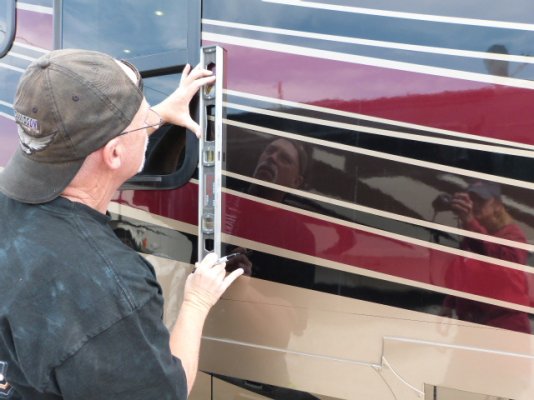
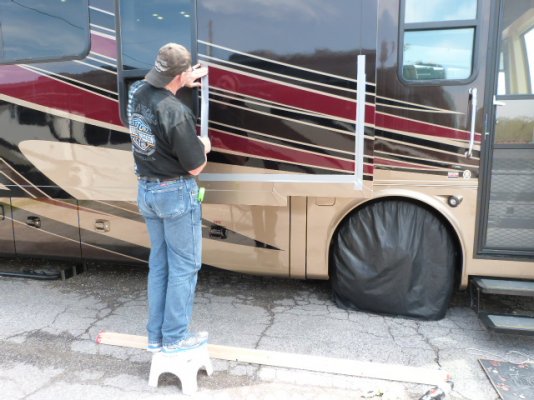
I measured and drew out the rest of the box on the outside using a level and a Sharpie. Then I drilled the other holes from the outside. I then taped the exterior of the layout with duct tape to protect the paint when cutting with the jig saw.
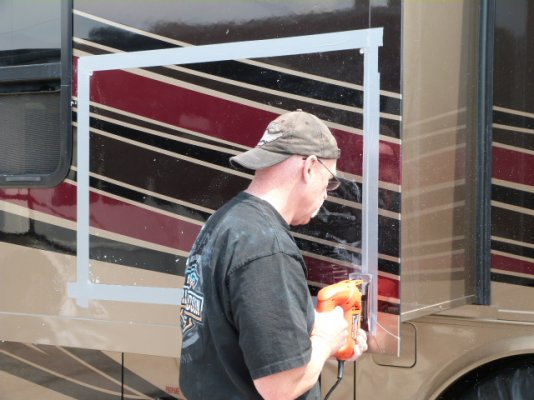
And then I started to cut. Here is the only place that I seriously under estimated the needed tools. I had originally bought a 2 pack of 18 tooth per inch jig saw blades. They were rated for light steel and fiberglass. I needed about 8 total by the time I was done. Thankfully the DW ran back to the hardware store to pick up some more.
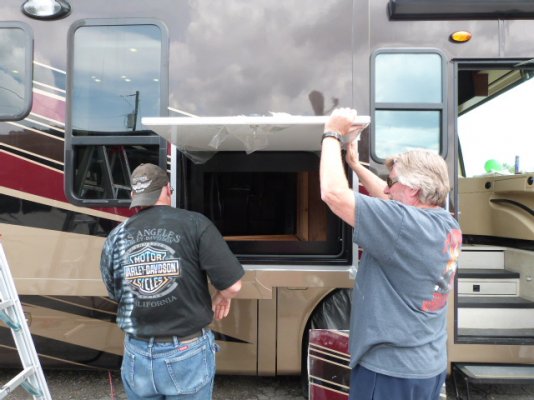
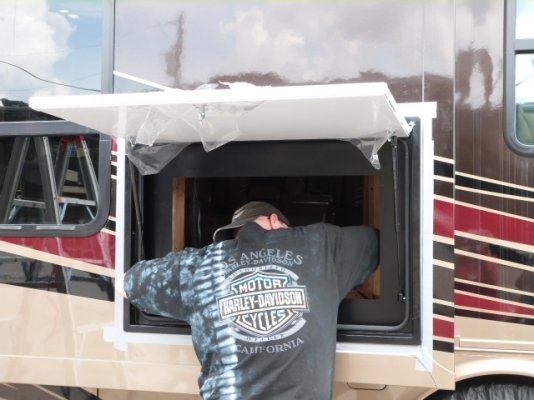
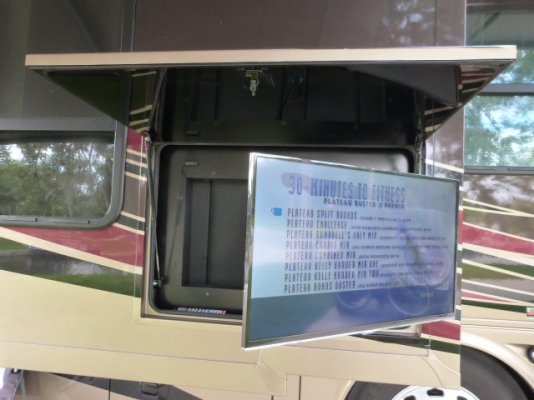
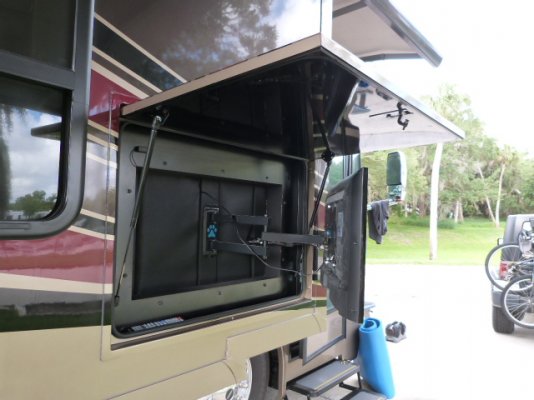
Setting the box was pretty simple. The DW helped me hit the hole, and a neighbor came by to help wiggle it in the hole. There are small rivets sticking out the side of the box in a few places where the factory rivets the two halves of the box together. A little persuasion with a small block of wood and a hammer, and the box popped in.
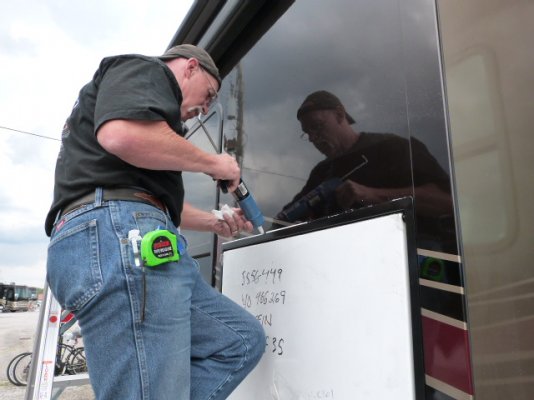
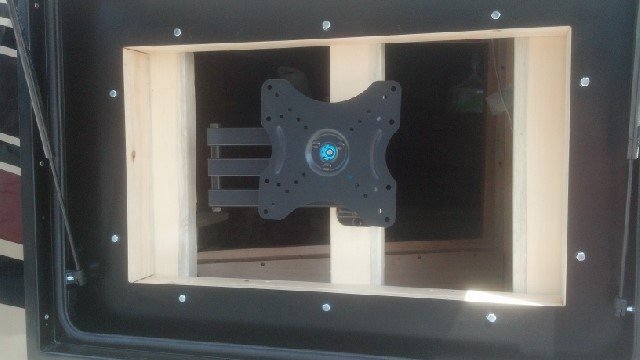
With the box in the hole, I stripped off the duct tape protecting the paint and used some adhesive caulk under the flange. With the box in place I bought some stainless self tapping screws to fasten the box to the aluminum studs on the bottom and left side. I also cut another piece of the 2X2 stock for the top of the box. The box is about 3 5/8" deep, so placing the 2X2 on the top of the box and running some screws up through the box and into the 2X2 locked the top of the box in place.
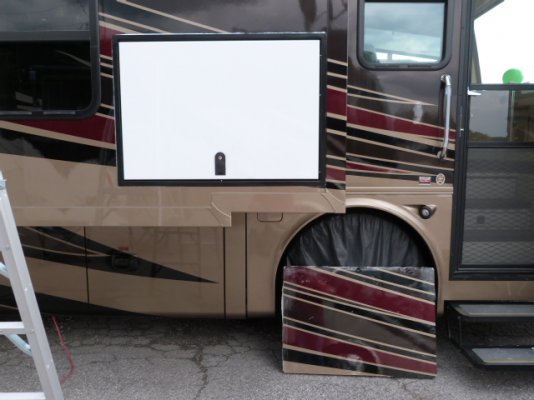
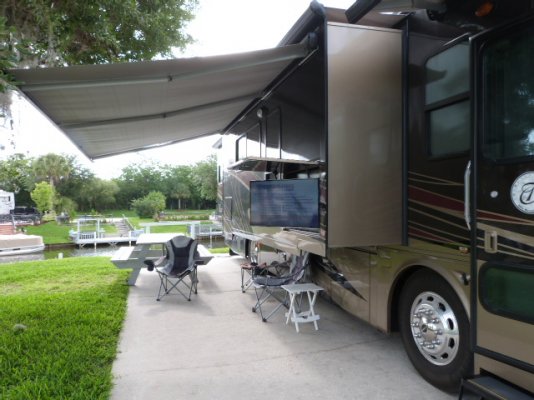
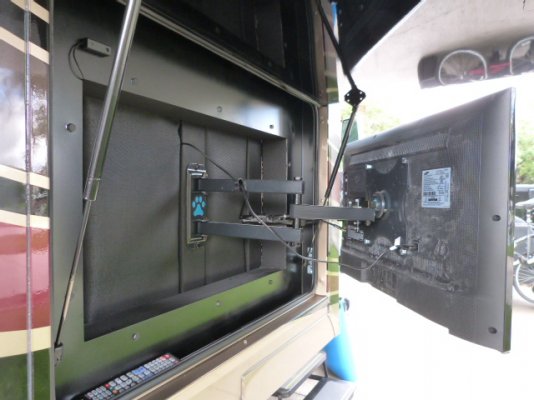
Within minutes of finishing the project, it started to rain. But the box is tight and ready for the TV.
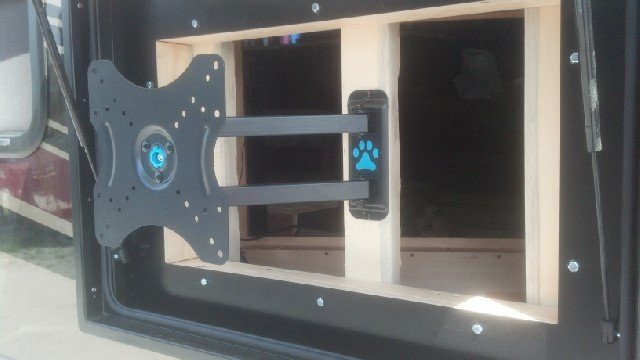
I went to the store to inquire about the mounting bracket for the TV. It will run about $40 to complete. I am hoping to get into a service bay tomorrow, so it may be a few days before I can post pics of the TV mounted.
So the whole project to this point cost me about $350. I already have the TV to put in the box so that is a wash. I would definitely do this again, especially since the estimate from the shop to just install the box without the TV was $1700. I'm a happy camper!
I will start off by saying that before I decided to attempt this project, I did a lot of research first. I got a schematic of the slide wall that showed the aluminum studs, one that showed the location of any wiring that may have been inside the wall. And yes there was some wire in the wall, just not at the end that I was working on. These were obtained from the good folks at Tiffin, which everyone I spoke to was more that happy to help me out. Very good customer relations from the Tiffin employees.
After checking that the wall that I wanted to install the TV box in was clear of obstructions, next came the specific measurements. I ordered a box from the Tiffin store and it took one day to be delivered. The box came with the box frame, the door with lock attached, the lifting struts on the door, and the weather seal already in place. I ordered a box to fit a 32" TV. The box itself was 37" wide and 26" tall. That does not count the 3/4" flange on the outside of the box that covers the edge of the mounting hole. For my needs, I had to have a hole 37 1/2 inches wide, and 26 1/2 inches tall.
I started by removing the fireplace, and fireplace shelf to gain access to the back of the space where I would be cutting the hole.
I knew that I had to have exactly 37 1/2" to fit the box and no less. Measuring inside the enclosure I knew it would be close. I was about 1/4" short of getting the fit, so I removed a rear side support on the left side rear of the fire box to gain the needed distance.
With the brace removed I checked for obstructions by using a small drill bit and drilling into the corner up and down the the length of the intended cut. I could tell when I hit the corner aluminum stud. The next step was to cut away the wall board over the stud to determine the exact amount of space I would have to place the TV box. Notice up to this point, I could back out at any time if I determined that it was not a feasible project.
Clearing the stud and measuring I could tell that I would have exactly enough room to mount the box with a little wiggle room for adjustments if necessary. Next I used a Multi Purpose tool to cut out the wall board on the inside of the rig. I borrowed it from another owner here at CRB, Don. He is here watching Tiffin build his new coach. I have not used one of these before, but it's a pretty slick tool, and highly recommended.
I need to point out here that I learned by stopping by the factory and viewing a slide out room being built that Tiffin uses steel braces in the corners of it's slide out rooms for strength. The braces are 5" long, and 1 1/2' tall and "L" shaped. To raise the box just enough to clear any such braces I purchased a piece of 2X2" lumber from the local lumber yard. I cut apiece to fit on the floor under the box to hold it high enough to clear any such brace material I may run into.
With the box laid out on the inside, I crossed the point of no return and drilled a hole in the lower left corner of the box cut out where the two aluminum studs intersected. That was the point that the whole project would be measured from.
From there I measured out and drilled the other three corner holes, measuring carefully and checking the box for square. I did learn that the trim piece on the outside of the slide is slightly out of square with the wall of the slide, but there is nothing to do about that now!
I measured and drew out the rest of the box on the outside using a level and a Sharpie. Then I drilled the other holes from the outside. I then taped the exterior of the layout with duct tape to protect the paint when cutting with the jig saw.
And then I started to cut. Here is the only place that I seriously under estimated the needed tools. I had originally bought a 2 pack of 18 tooth per inch jig saw blades. They were rated for light steel and fiberglass. I needed about 8 total by the time I was done. Thankfully the DW ran back to the hardware store to pick up some more.
Setting the box was pretty simple. The DW helped me hit the hole, and a neighbor came by to help wiggle it in the hole. There are small rivets sticking out the side of the box in a few places where the factory rivets the two halves of the box together. A little persuasion with a small block of wood and a hammer, and the box popped in.
With the box in the hole, I stripped off the duct tape protecting the paint and used some adhesive caulk under the flange. With the box in place I bought some stainless self tapping screws to fasten the box to the aluminum studs on the bottom and left side. I also cut another piece of the 2X2 stock for the top of the box. The box is about 3 5/8" deep, so placing the 2X2 on the top of the box and running some screws up through the box and into the 2X2 locked the top of the box in place.
Within minutes of finishing the project, it started to rain. But the box is tight and ready for the TV.
I went to the store to inquire about the mounting bracket for the TV. It will run about $40 to complete. I am hoping to get into a service bay tomorrow, so it may be a few days before I can post pics of the TV mounted.
So the whole project to this point cost me about $350. I already have the TV to put in the box so that is a wash. I would definitely do this again, especially since the estimate from the shop to just install the box without the TV was $1700. I'm a happy camper!
Attachments
-
 002 (2).JPG139.1 KB · Views: 216
 -
 017 (2).JPG127.3 KB · Views: 166
 -
 015 (2).JPG137 KB · Views: 154
 -
 020 (2).JPG142.6 KB · Views: 158
 -
 024.JPG151.3 KB · Views: 139
 -
 026.JPG148.9 KB · Views: 144
 -
 035.JPG154.1 KB · Views: 180
 -
 036.JPG154.7 KB · Views: 160
 -
 053.JPG169 KB · Views: 152
 -
 055.JPG164.4 KB · Views: 237