Repairing Paint on Our Dynasty

The friendliest place on the web for anyone with an RV or an interest in RVing!
If you have answers, please help by responding to the unanswered posts.

zmotorsports

Well-known member
Joined
Dec 10, 2010
Posts
1,796
Location
Utah
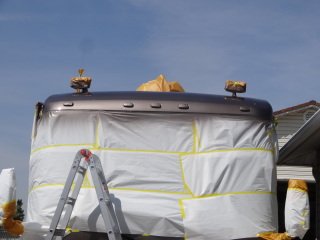
I wasn't sure where to place this thread, Motorhome section of Remodeling.  Although not a "remodel" per se it is definitely a lot of WORK!!!

Hope this helps out anyone who wants to tackle such a project.  Help them in saying "hell no, don't want to do that". :eek:

It seems as though pretty much anyone with about a ten year old coach is going to deal with this unless of course you are one of the fortunate individuals who are able to store your coach in a nice garage.  I am jealous of course in case you can't tell. :p

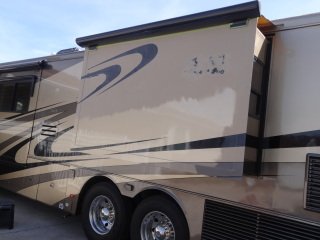
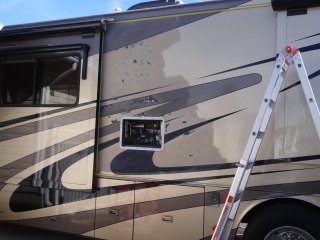
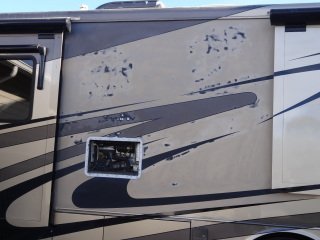
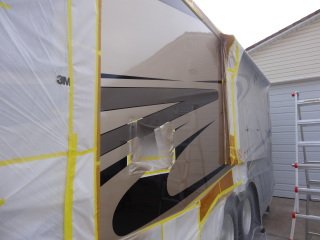
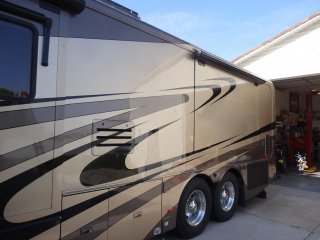
The right side of our coach looks almost like the day it rolled out of the factory, however, the left side sits in the sun when parked and last year I noticed a few spots starting to show the infamous clear coat peeling.  My wife and I were going to get it repainted but I decided the right side was in too good of condition.  Had the right side been like the left I am certain we would have had it painted over the winter as we love the coach and plan on keeping it for at least another ten years.  We are planning on upgrading when we retire but for now we love it and it is almost ready to turn over 100k miles so barely broken in.

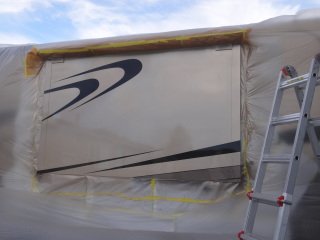
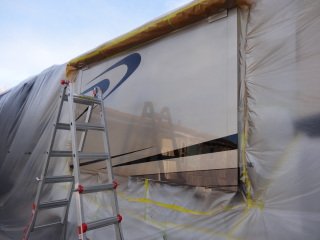
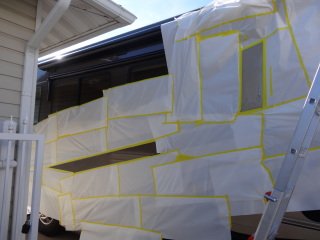
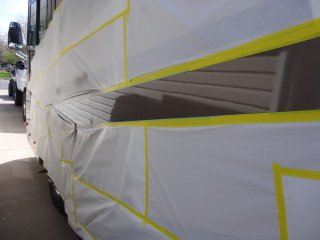
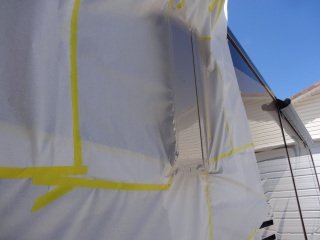
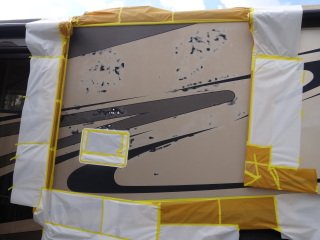
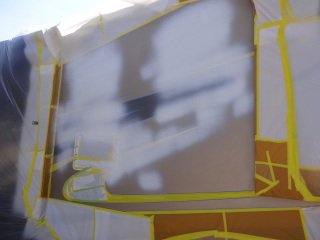
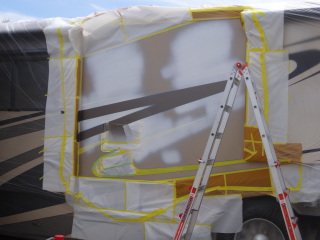
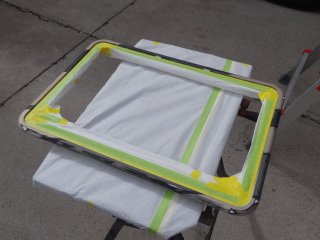
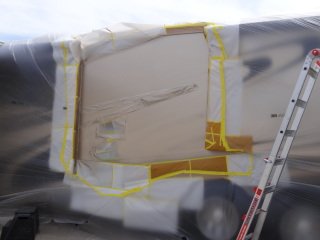
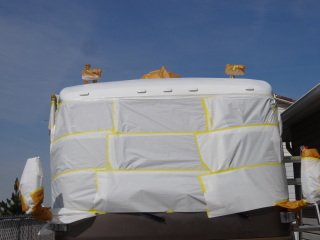
Anyway I am sure you want to see pictures of the undertaking so I will quite yammering on.

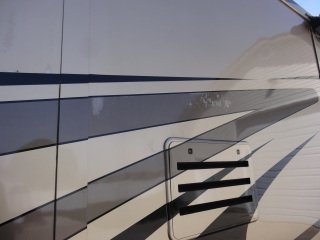
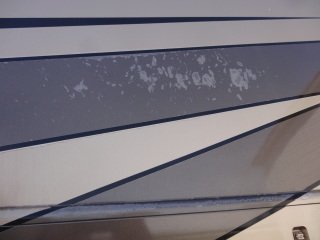
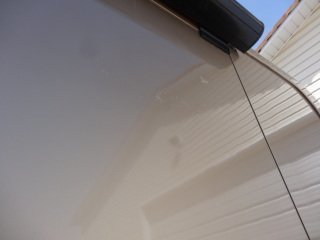
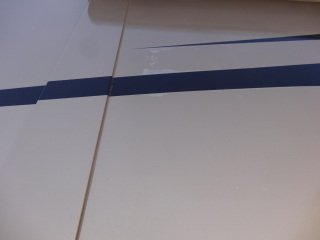
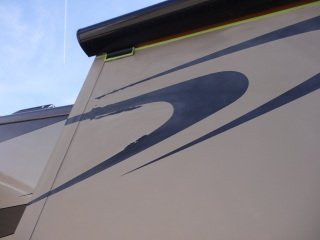
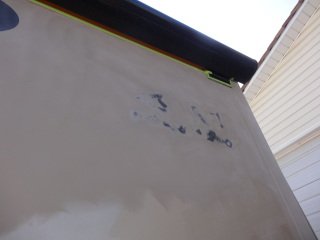
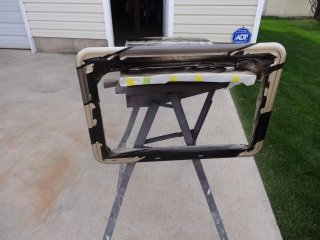
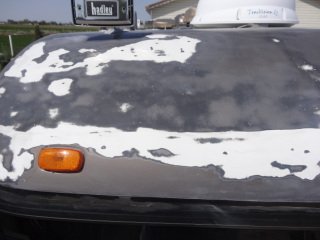
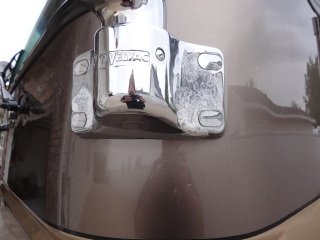
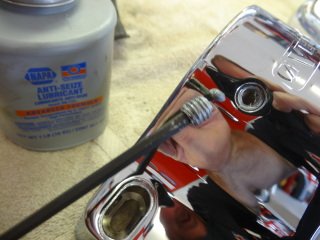
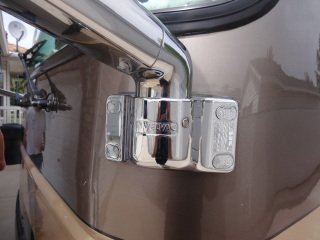
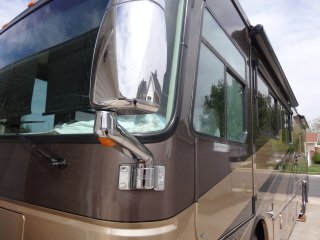
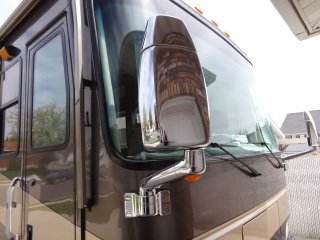
The following pictures are of a couple of the spots that were peeling.

Mike.
 

Attachments

  • dyn1.jpg
    dyn1.jpg
    68.5 KB · Views: 99
  • dyn2.jpg
    dyn2.jpg
    65.3 KB · Views: 83
  • dyn3.jpg
    dyn3.jpg
    58.8 KB · Views: 71
  • dyn4.jpg
    dyn4.jpg
    53 KB · Views: 66
Here are some pictures of the process.


Attachments

  • dyn5.jpg
    dyn5.jpg
    65 KB · Views: 60
  • dyn6.jpg
    dyn6.jpg
    60.5 KB · Views: 63
  • dyn7.jpg
    dyn7.jpg
    75 KB · Views: 64
  • dyn8.jpg
    dyn8.jpg
    72.7 KB · Views: 68
More pictures.


Attachments

  • dyn9.jpg
    dyn9.jpg
    68.9 KB · Views: 56
  • dyn10.jpg
    dyn10.jpg
    73.3 KB · Views: 51
  • dyn11.jpg
    dyn11.jpg
    77.2 KB · Views: 53
  • dyn12.jpg
    dyn12.jpg
    67.6 KB · Views: 49
And yet some more.  This will bring us current as I just sanded/prepped the area between the front slide and the bedroom slide last night.  This has been a two week pain in the you know what.  I figure with being at the mercy of the weather and my 10-hour days at work I am still close to two weeks from being completed. 

My goal is to have it done prior to the Moab rally plus I want to get my wheels polished for the season.

Mike.
 

Attachments

  • dyn13.jpg
    dyn13.jpg
    65.8 KB · Views: 48
  • dyn14.jpg
    dyn14.jpg
    81.7 KB · Views: 48
  • dyn15.jpg
    dyn15.jpg
    78.7 KB · Views: 52
Can I buy a couple of your extra boxes of ambition that you have laying around?I know you must have a good stock of it!

Looks awesome!
 
captsteve said:
Can I buy a couple of your extra boxes of ambition that you have laying around?I know you must have a good stock of it!

Looks awesome!

Thank you.  Trust me, I have procrastinated long enough on this.  I would hardly call it ambition.  The feeling of anxiety every time I see it or think of it peeling was what outweighed the ambition, believe me.

Mike.
 
Hi Mike, That's coming along nicely. I've always enjoyed being a DIY'er but I've never learned how to do a professional-looking paint job like that. Love the pictures.

Kev
 
Kevin Means said:
Hi Mike, That's coming along nicely. I've always enjoyed being a DIY'er but I've never learned how to do a professional-looking paint job like that. Love the pictures.

Kev

Thanks.  I appreciate that. 

Mike.
 
Mike, I can truly appreciate the labor that you have performed doing this project. My first business which I started while I was still in the USN in 1975 was a fiberglass repair, restoration, and paint shop. Doing that type of work in the open is a gigantic battle against nature, but at the end of the day nothing feels better than a job well done. Good job! Thanks for sharing, now maybe I can get the gumption to go and wash mine... :-[
 
Oscar Mike said:
Mike, I can truly appreciate the labor that you have performed doing this project. My first business which I started while I was still in the USN in 1975 was a fiberglass repair, restoration, and paint shop. Doing that type of work in the open is a gigantic battle against nature, but at the end of the day nothing feels better than a job well done. Good job! Thanks for sharing, now maybe I can get the gumption to go and wash mine... :-[

Thanks John, I appreciate the compliments.

Mike.
 
Well over the Easter holiday weekend I was able to get the remaining two large sections completed.  I am glad that job is DONE!!!

The first picture shows it masked and ready for the sealer and color.  The black did not need any repair so I masked it off prior to sealing and shooting the gray.

The second picture is with the PPG DP48LF sealer applied to the areas where I went through.

The third picture is with the gray stripe painted and ready for masking.

The fourth picture is of the refrigerator trim ring being painted.  Originally Monaco had installed the trim ring prior to the painting process.  I can understand this from a production standpoint as to get the stripes correctly orientated.  However, from a performance standpoint it is a poor way of painting.  The paint builds up a "paint bridge" over where the trim ring and the coach wall meet.  This paint bridge began to crack and flake/peel about three years ago and has bugged me ever since.

I chose to paint the side of the coach and the trim ring separate and then install the trim ring and caulk once the painting process is complete.  This takes additional time as you have to check and double check the measurements where the graphics cross the trim ring and refrigerator access door.

More to follow.


Attachments

  • dyn1.jpg
    dyn1.jpg
    78.4 KB · Views: 41
  • dyn2.jpg
    dyn2.jpg
    68.9 KB · Views: 39
  • dyn3.jpg
    dyn3.jpg
    78.3 KB · Views: 40
  • dyn4.jpg
    dyn4.jpg
    75.7 KB · Views: 40
Moving forward.

The first picture is with both the black and gray masked and the sandstone being applied.

The second picture is with the masking removed from the black and gray and the clear coat applied.

The third picture is of the trim ring painted and clear coated.

The fourth picture is of the entire side of the coach unmasked with the trim ring and refrigerator door installed.

Final pictures to follow.
 

Attachments

  • dyn5.jpg
    dyn5.jpg
    68.9 KB · Views: 33
  • dyn6.jpg
    dyn6.jpg
    74.1 KB · Views: 31
  • dyn7.jpg
    dyn7.jpg
    78.2 KB · Views: 31
  • dyn8.jpg
    dyn8.jpg
    79.5 KB · Views: 39
Moving on to the last section.  This was probably the worst section on the entire coach.  The area over the windshield had almost no clear left on it.  I sanded through the paint instantly and so I had to seal the entire roof line with PPG DP48LF prior to applying the gray and finally the PPG DC2021 clear coat.

The first two pictures show how much I had to sand.  I don't have any pictures of the before.

The third picture is of the air horns, satellite dish, marker light and the front of the coach masked and the PPG DP sealer applied.

The fourth picture is of the gray and the clear coat applied but before unmasking everything.

All in all it was about a three week project that I am glad is now completed.  Hopefully it will hold up for a few years yet until we have the entire coach repainted.

Mike.
 

Attachments

  • dyn9.jpg
    dyn9.jpg
    73.4 KB · Views: 38
  • dyn10.jpg
    dyn10.jpg
    75.7 KB · Views: 36
  • dyn11.jpg
    dyn11.jpg
    67.4 KB · Views: 35
  • dyn12.jpg
    dyn12.jpg
    71.6 KB · Views: 37
Kevin Means said:
Looks great! Do you shoot a clear-coat on it now or is that necessary?

Thank you.

It has already been clear coated.  I applied 3 coats of clear after 2-3 coats of color (depending on coverage).

Mike.
 
Finally got around to finishing up the exterior repair yesterday.  In addition to the clearcoat that was peeling I also had the infamous Velvac mirror bases have the chrome peeling off AGAIN!!  This is the second time I have replaced these in the seven years we have owned the coach.

The first picture is of the driver's side mirror base that shows just how severely the chrome was peeling.  There was more chrome missing than was left on the base.  Luckily the arms and heads still looked great.  The last time I had to replace both entire mirror assemblies which were not cheap. 

The second picture is of the new mirror base with the part number.  I had to call Velvac and give them the complete mirror assembly number to have them look up the base part number as it is not listed on their website.  For anyone who has a early to mid-2000's Monaco the base part number should be the same.

The third picture is swapping the bases around.  A major tip is to remove the 3/8" set screws from the base when you get them and coat them with anti-seize.  Trust me you will thank me later.  They leave the set screws in when they chrome the bases, if you merely screw them in to tighten up the arm in the base they WILL rust in there.  I fought them on my original ones when I replaced them about four years ago.  This time they backed right out because of the antiseize I had applied last time.

The fourth picture is of the new base on the left mirror.

Mike.
 

Attachments

  • dyn1.jpg
    dyn1.jpg
    70.7 KB · Views: 29
  • dyn2.jpg
    dyn2.jpg
    85.5 KB · Views: 26
  • dyn3.jpg
    dyn3.jpg
    85.3 KB · Views: 26
  • dyn4.jpg
    dyn4.jpg
    75.4 KB · Views: 34
The last two pictures are of both new bases installed and the mirrors cleaned up.

Now she is presentable and ready to be seen again.

Mike.
 

Attachments

  • dyn5.jpg
    dyn5.jpg
    79.8 KB · Views: 26
  • dyn6.jpg
    dyn6.jpg
    82.1 KB · Views: 27
Back
Top Bottom