Dan Walters
Well-known member
Well, I finally defected and switched to a residential fridge and got rid of my Norcold 1200. I have read so many posts about refrigerator fires and absorption refrigerators not cooling well or going out after only a year or two that I decided it was time to convert to the residential fridge in my motorhome.
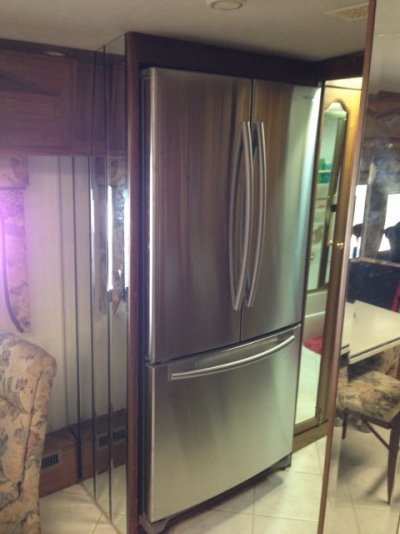
My Norcold 1200 had gotten to a point at 14 years old that it was not cooling as well and was leaking water around one of the door seals that I decided it was time for it to go. I did some reading on many posts here where members has upgraded to residential fridges and were very pleased and after a good bit of reading and research I decided to go with the Samsung RF-197ACRS Refrigerator. The size seemed to be the closest to the 1200 and I felt like I could do the install myself and save some money. Plus, the Samsung doesn't mind operating on a modified sine wave inverter, which I have in the coach.
I ordered the Samsung from Home Depot, which may not have been the cheapest place to purchase it, but it was reasonably priced based on the other places I priced it online. Plus, they had one in stock in their warehouse 90 miles away and could deliver it the same week I ordered it.
I did some measurements on the door to my motorhome before I removed the Norcold and found that the door was wide enough, but there were parts of the dashboard and the overhead cabinets that were in the way and were not easily removeable, so on to plan B. I measured the curbside window and found that it was wide enough to remove the Norcold without the doors and to move in the new Samsung without the doors. The day before the new Samsung was delivered, I took out that window, backed the truck up to the side of the motorhome, got someone to help me and removed the Norcold from the RV and into the truck bed. From there it went into my workshop for later disposal.
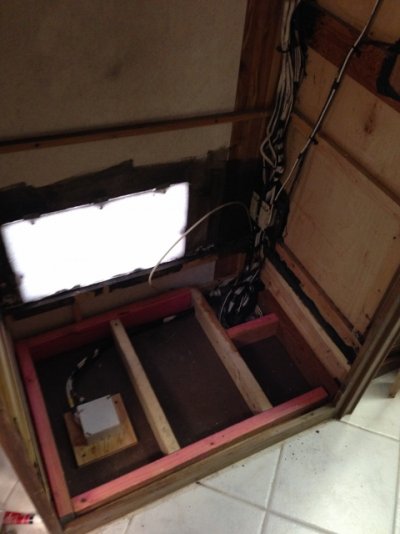
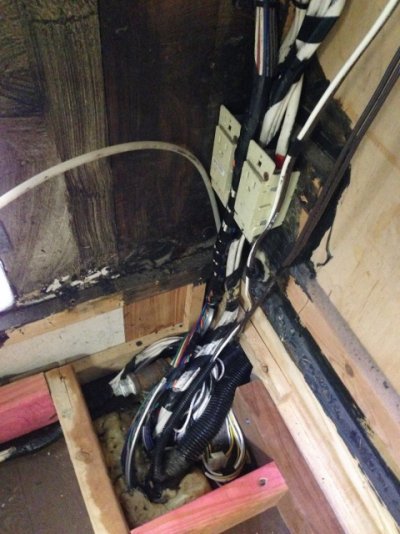
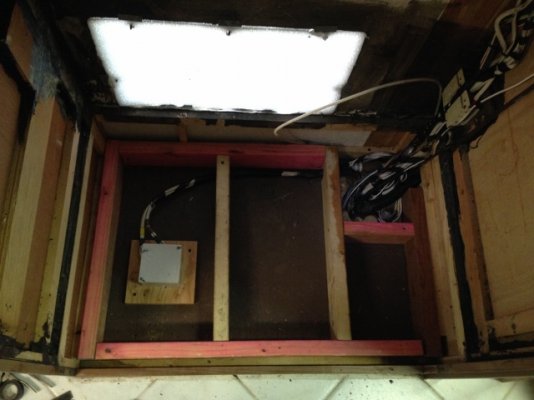
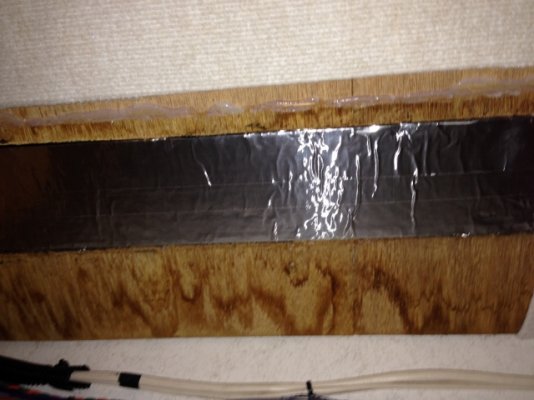
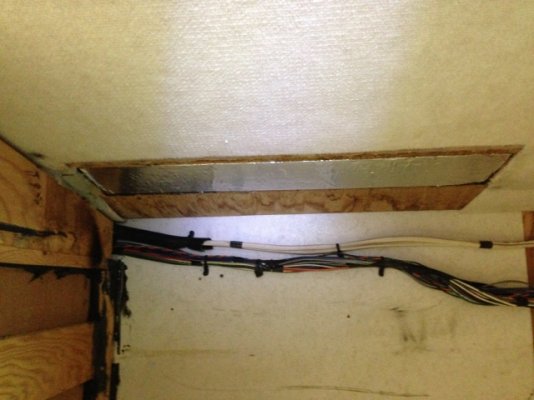
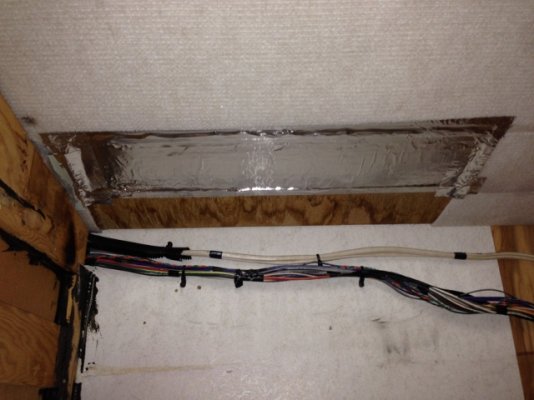
I had to do some modifications to the space where the Norcold was before the new fridge would fit. There were a bundle of wires that came up through the floor along with the LP Gas line the were going to be in the way when the new Samsung was slipped into the space. I first removed the LP Gas line and capped off the line at a junction which was below where the new floor would go. I also had to remove some of the wire straps that secured the wires to the walls around the fridge and lower the lines so they would come up right in the back corner of the fridge enclosure. I also had to move a 110v junction box over to accommodate the framework for the new fridge floor. The first couple of pics are after I did this.
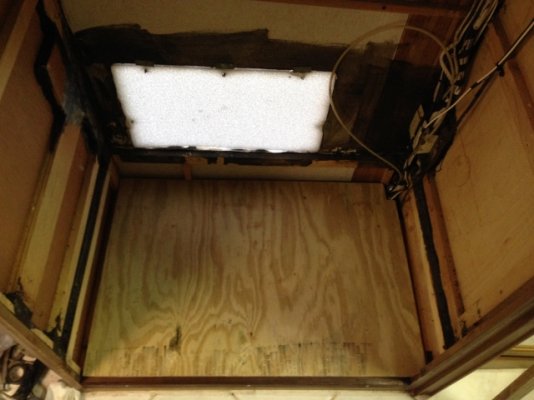
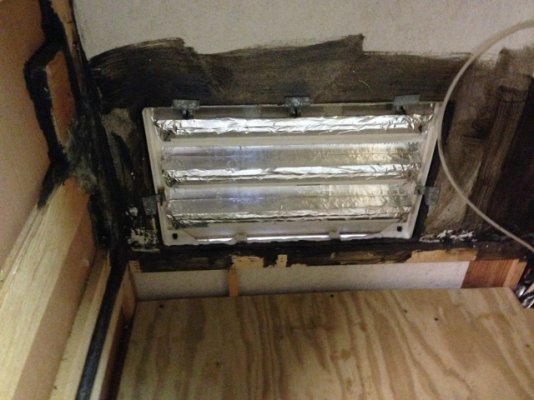
I also had to make the enclosure taller since the new Samsung is about 5 or 6 inches taller than the Norcold. Since there was a drawer under the Norcold, that had to be removed so the floor could be lowered. Then the top of the enclosure had to be raised since the floor couldn't be lowered enough to accommodate the added height of the Samsung. I also removed a metal flashing at the top back of the enclosure that was for the roof vent. I made a plug for the roof vent from a Styrofoam block and covered it with aluminum tape and sealed off the vent with aluminum tape. On the outside, I cut and formed a cap for the vent out of aluminum flashing and taped it down with aluminum tape. I then reinstalled the plastic cap with the screws going through the aluminum cap with some Dicor Lap Sealant on each screw to prevent leaks.
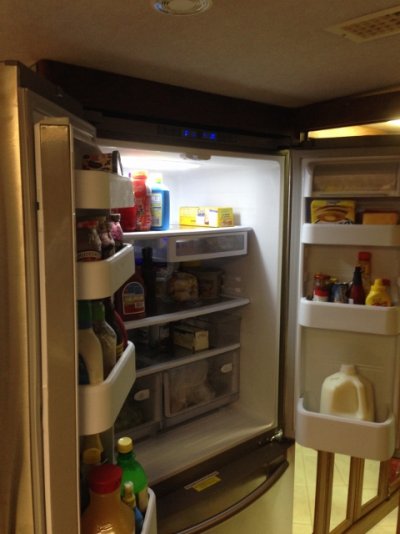
The new Samsung was then rolled into place--a perfect fit. Once I had it in place, I hooked up the icemaker line through the outside access panel that was there for the old fridge. I then put 2 lag bolts through the bottom plate of the Samsung using 2 holes that were already there and screwed them into the treated plywood floor that I cut for the new fridge. That held the refrigerator firmly in place.
I have attached some photos of the enclosure while I was modifying it and of the new Samsung in it's new home. We love the new Samsung. It is colder than the old Norcold and has 50% more room. It sticks out a little farther than the Norcold did, but that's not a problem. Starting our full-time adventure with the new Samsung residential fridge is well worth the trouble.
Dan
My Norcold 1200 had gotten to a point at 14 years old that it was not cooling as well and was leaking water around one of the door seals that I decided it was time for it to go. I did some reading on many posts here where members has upgraded to residential fridges and were very pleased and after a good bit of reading and research I decided to go with the Samsung RF-197ACRS Refrigerator. The size seemed to be the closest to the 1200 and I felt like I could do the install myself and save some money. Plus, the Samsung doesn't mind operating on a modified sine wave inverter, which I have in the coach.
I ordered the Samsung from Home Depot, which may not have been the cheapest place to purchase it, but it was reasonably priced based on the other places I priced it online. Plus, they had one in stock in their warehouse 90 miles away and could deliver it the same week I ordered it.
I did some measurements on the door to my motorhome before I removed the Norcold and found that the door was wide enough, but there were parts of the dashboard and the overhead cabinets that were in the way and were not easily removeable, so on to plan B. I measured the curbside window and found that it was wide enough to remove the Norcold without the doors and to move in the new Samsung without the doors. The day before the new Samsung was delivered, I took out that window, backed the truck up to the side of the motorhome, got someone to help me and removed the Norcold from the RV and into the truck bed. From there it went into my workshop for later disposal.
I had to do some modifications to the space where the Norcold was before the new fridge would fit. There were a bundle of wires that came up through the floor along with the LP Gas line the were going to be in the way when the new Samsung was slipped into the space. I first removed the LP Gas line and capped off the line at a junction which was below where the new floor would go. I also had to remove some of the wire straps that secured the wires to the walls around the fridge and lower the lines so they would come up right in the back corner of the fridge enclosure. I also had to move a 110v junction box over to accommodate the framework for the new fridge floor. The first couple of pics are after I did this.
I also had to make the enclosure taller since the new Samsung is about 5 or 6 inches taller than the Norcold. Since there was a drawer under the Norcold, that had to be removed so the floor could be lowered. Then the top of the enclosure had to be raised since the floor couldn't be lowered enough to accommodate the added height of the Samsung. I also removed a metal flashing at the top back of the enclosure that was for the roof vent. I made a plug for the roof vent from a Styrofoam block and covered it with aluminum tape and sealed off the vent with aluminum tape. On the outside, I cut and formed a cap for the vent out of aluminum flashing and taped it down with aluminum tape. I then reinstalled the plastic cap with the screws going through the aluminum cap with some Dicor Lap Sealant on each screw to prevent leaks.
The new Samsung was then rolled into place--a perfect fit. Once I had it in place, I hooked up the icemaker line through the outside access panel that was there for the old fridge. I then put 2 lag bolts through the bottom plate of the Samsung using 2 holes that were already there and screwed them into the treated plywood floor that I cut for the new fridge. That held the refrigerator firmly in place.
I have attached some photos of the enclosure while I was modifying it and of the new Samsung in it's new home. We love the new Samsung. It is colder than the old Norcold and has 50% more room. It sticks out a little farther than the Norcold did, but that's not a problem. Starting our full-time adventure with the new Samsung residential fridge is well worth the trouble.
Dan
Attachments
-
 271 (480x640).jpg150.6 KB · Views: 217
 -
 272 (480x640).jpg213.6 KB · Views: 186
 -
 273 (640x480).jpg155.3 KB · Views: 161
 -
 274 (480x640).jpg180.1 KB · Views: 170
 -
 275 (640x480).jpg164.3 KB · Views: 149
 -
 276 (640x480).jpg163.6 KB · Views: 146
 -
 277 (640x480).jpg176.2 KB · Views: 143
 -
 279 (640x480).jpg170.2 KB · Views: 130
 -
 280 (640x480).jpg194.1 KB · Views: 159
 -
 281 (480x640) (480x640).jpg164.4 KB · Views: 225
 -
 285 (480x640) (480x640).jpg158.2 KB · Views: 194