2005 Itasca Horizon 40AD - new flooring project

The friendliest place on the web for anyone with an RV or an interest in RVing!
If you have answers, please help by responding to the unanswered posts.

John Canfield

Site Team
Joined
Aug 8, 2006
Posts
14,121
Location
Texas Hill Country
We arrived Sunday in Weatherford, TX at Ernie Eckberg's place for new flooring.  Jane had to drive back home (about 260 miles) since she volunteers in the local library and left me on my own for a week.  Hopefully I won't poison myself or ruin her galley stuff while I'm batching it, thankfully I did get directions on how to use the oven feature in the Advantium microwave/oven  :D.

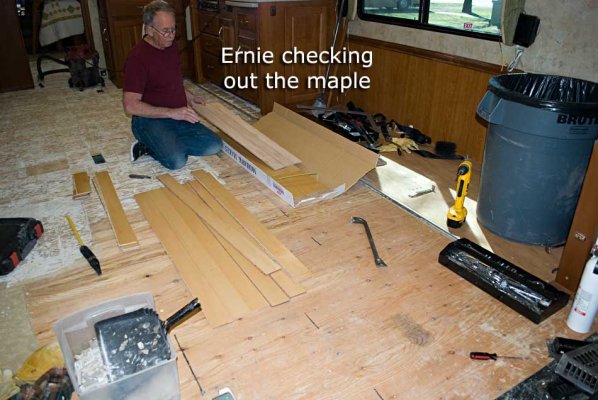
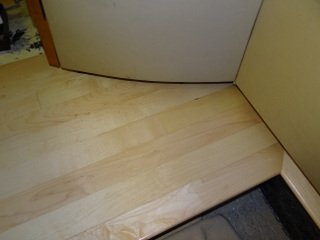
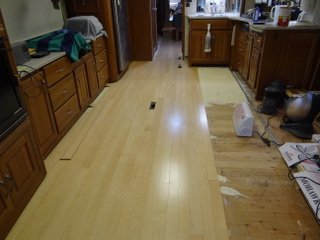
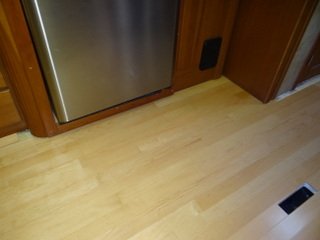
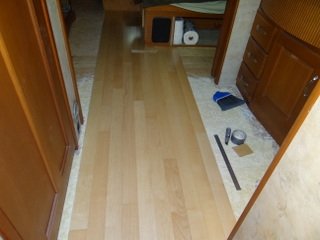
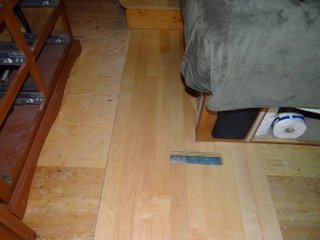
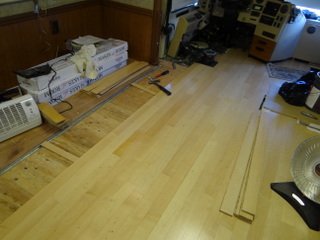
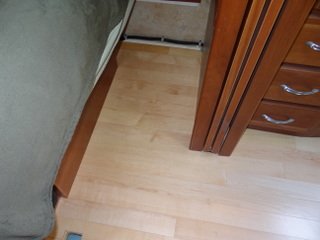
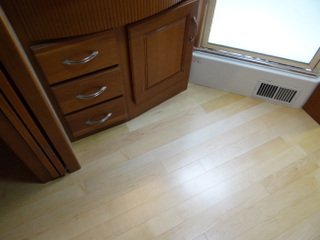
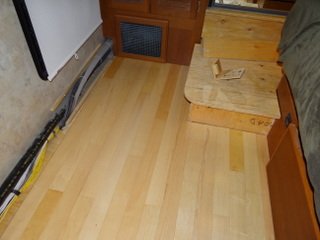
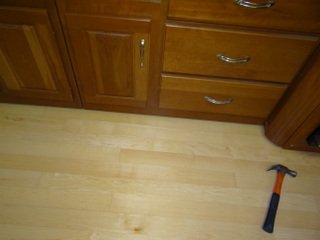
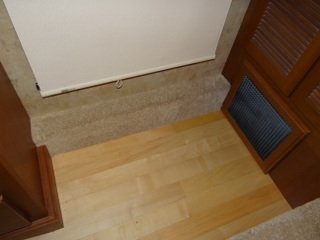
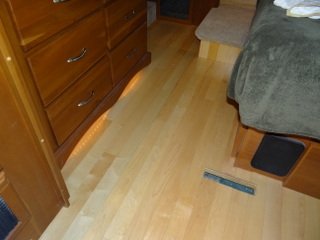
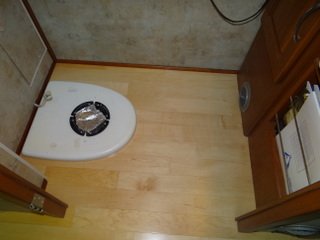
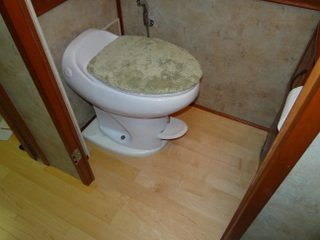
Monday morning we did the usual routine of picking out engineered wood at a nearby flooring business and treads for the entry steps at a place in Ft. Worth.  Most of the wood samples were dark and featured the distressed look (like an old barn or hardware store floor) - wasn't interested in that.  We did find a light colored wood (Mohawk Sheridan Maple) that will keep the interior nice and bright (we took off a large cabinet door with us when we picked out the flooring.)  Ernie calculated we would need 270 sq.ft. so that and some nosing came to $1,614 with tax.

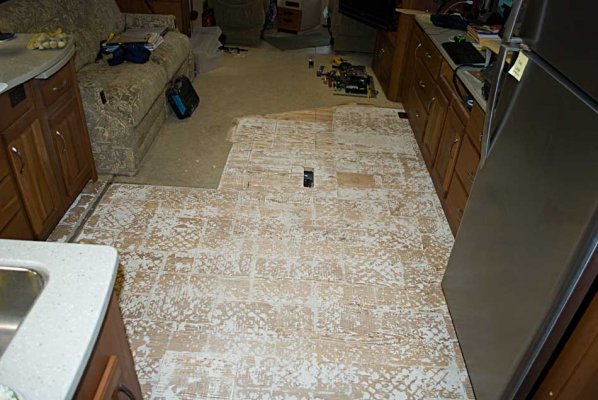
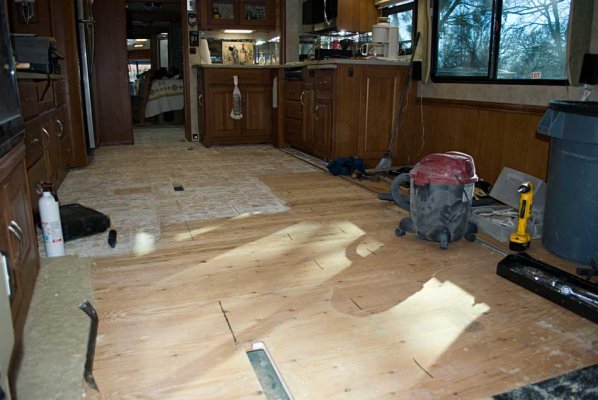
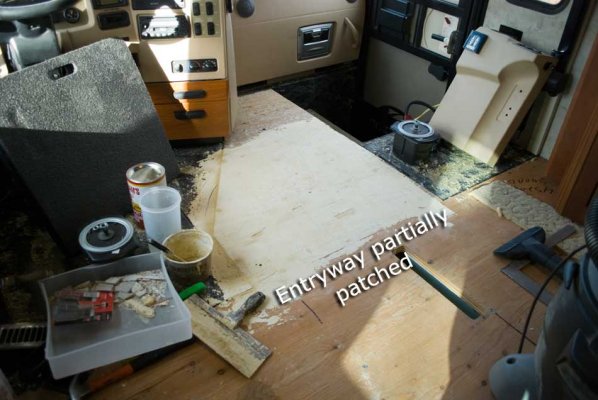
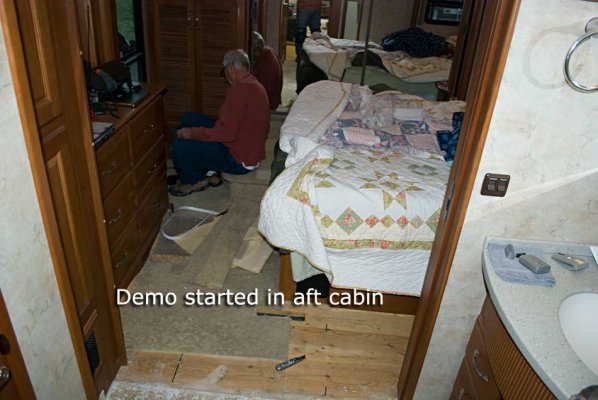
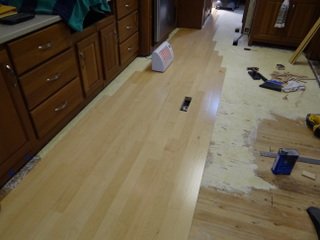
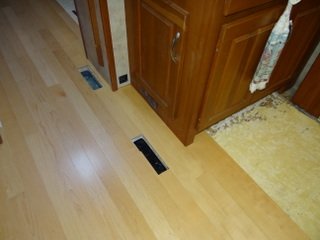
Monday afternoon Ernie and I began chipping out tile and it was going slowly - I thought this would take years but after a full day of work today, we got a bunch of the tile chipped up.  The very tedious job is chiseling the thinset tile cement down to avoid bumbs/humps/ridges when the new flooring is put down.

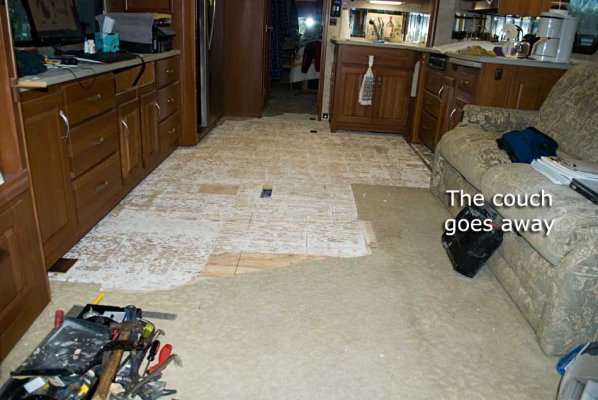
The power recliner sofa we decided is history - neither of us have ever liked it, Jane hates the busy fabric pattern.  In its place will be two La Z Boy Harbor Town rocker/recliners in Platinum (B127335) fabric, Jane just ordered these today with a 6-8 week delivery.

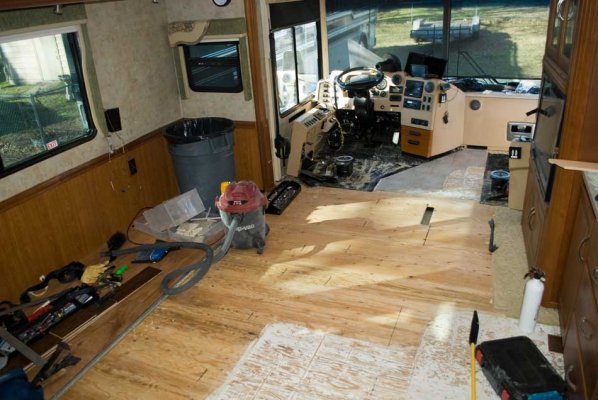
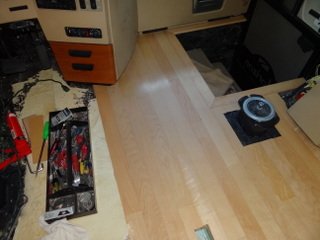
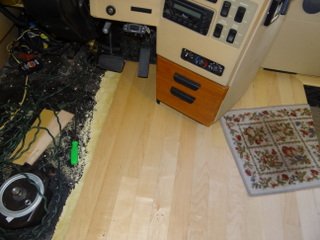
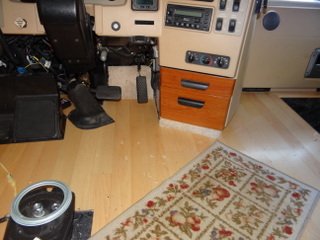
Since I had to remove our fixed table, we both like how that has opened up the salon and I'm seriously considering leaving it out and engineering a pull-out table from the Corian buffet/cabinetry where the old table lived.  Update.. just talked with DW and we're leaving the table permanently out so I'll have to come up with a plan for a pull-out replacement.

More tile chipping tomorrow  :p.


Attachments

  • Day2DemoLookingForward.jpg
    Day2DemoLookingForward.jpg
    74.5 KB · Views: 286
  • Day2DemoLookingAft.jpg
    Day2DemoLookingAft.jpg
    72.1 KB · Views: 232
We had a good full day of work again and Ernie had a friend joining in on the fun - he didn't want to chip tile so I think this isn't his first rodeo  :D.  There is just a little bit of tile left at the entryway and some by the potty, the potty needs to come out before I can tackle that.

Ernie and Bim (the helper) disassembled the recliner couch and removed it in pieces and then most of the carpet was pulled up.  Our wood should arrive tomorrow, I'll be anxious to see what it looks like.
 

Attachments

  • Day3Copilot.jpg
    Day3Copilot.jpg
    90.4 KB · Views: 221
  • Day3CouchRemoval.jpg
    Day3CouchRemoval.jpg
    84.1 KB · Views: 226
  • Day3DriversStation.jpg
    Day3DriversStation.jpg
    100.3 KB · Views: 211
  • Day3LookingAft.jpg
    Day3LookingAft.jpg
    62.2 KB · Views: 214
  • Day3LookingForward.jpg
    Day3LookingForward.jpg
    72.1 KB · Views: 271
Ernie Ekberg said:
glad my shirt was tucked in~
You're always well dressed Ernie!  :D

Some of the day was spent running around, we went to the Mohawk warehouse somewhere near the DFW airport to pick up some of the flooring, for some odd reason only some of the flooring arrives - five boxes worth and the nose trip.  We also picked up a toilet flange seal for when the potty gets re-installed.

And of course, some of our least favorite activity happened today - more work with a chisel trying to get up the tile thinset cement.  It's tedious work but the end of that is at least in sight.  There will be more chisel work tomorrow and I don't know what else we will get to.
 

Attachments

  • Day4Entry.jpg
    Day4Entry.jpg
    66.1 KB · Views: 208
  • Day4MapleCheckout.jpg
    Day4MapleCheckout.jpg
    74.9 KB · Views: 209
  • Day4WoodPile.jpg
    Day4WoodPile.jpg
    76.7 KB · Views: 235
SMR said:
looking good- untuck the shirt if you do plumbing, it seems to help.
Page 42 of the Plumber's Handbook  ;).

Another couple hours of chipping thinset cement <sigh> today.  Ernie uses an inspection camera to locate slide rollers (accommodating slides is the very trick part of flooring an RV) but his camera broke so we went to Home Depot and he bought a new one this morning.  We both love looking at tools so we checked out a Bosch sliding miter saw I was recommending to him (my 2014 Christmas present to myself) and he got to see it in person.  I was also recommending Milwaukee cordless tools and did a show and tell at the Milwaukee display.  To demonstrate my commitment to Milwaukee, I bought a 12V right angle drill/driver right in front of him  :D wow, that was fun.  Hopefully he will follow the lead and ditch his centuries-old DeWalt NiCad right angle drill for a modern Milwaukee LiIon version.

Back to the project...

Ernie was spreading some floor patch today and after lunch we made the last trip to the Mohawk warehouse to pick up the final boxes of the flooring.  As promised, the lot numbers matched and all of the flooring should look the same.  There's a little thinset chipping left, the head needs to be removed and that area worked on (I have to leave for a few days Sunday) so Ernie can do that while I'm gone.  The bedroom (aft cabin for you nautical types) carpet needs to be pulled up.

Thoughts...

I am so glad I didn't attempt this project myself.  I've done a bunch of mods and improvements on our Horizon over the last ten years but I was very reticent to attempt this myself and boy was that a good great decision.  There is expertise involved as to knowing what works and what doesn't work and especially how to deal with slides.  Thoroughly happy with letting Ernie being the lead on this project and me being the day laborer.
 

Attachments

  • Day5PatchSpread.jpg
    Day5PatchSpread.jpg
    57 KB · Views: 164
  • Day5NewInspectionCam.jpg
    Day5NewInspectionCam.jpg
    71.9 KB · Views: 162
  • Day5CamLookingForRoller.jpg
    Day5CamLookingForRoller.jpg
    65.8 KB · Views: 162
  • Day5JohnNewTool.jpg
    Day5JohnNewTool.jpg
    41.9 KB · Views: 161
  • Day5Wood-Progress.jpg
    Day5Wood-Progress.jpg
    56.4 KB · Views: 175
  • Day5Entryway.jpg
    Day5Entryway.jpg
    60.3 KB · Views: 206
We (Ernie, helper Bim, and me) got in a full day's work today with great progress.  Work accomplished today:

- More floor patch in the entryway area

- More thinset tile cement chipped out of the bathroom/shower area (we must have two or three man-days of chipping this very small area - seriously!)

- Bim removed the carpet in the aft cabin (bedroom) and I helped him figure out how to remove the dresser from the wall to pull the carpet out

- Ernie spent a couple of hours fitting nose trim around the entrance stairwell - when the step cover was extended it hit some trim so it took a bit of fiddling to work around that

- After Ernie got that figured out, he started putting a few planks down - whoo-hoo!

I have to put in a little pat on Ernie's back at this point.  I'm a very particular craftsman where it matters, i.e., where something will be obvious to the eye or very particular where something has to work correctly every time.  Ernie pays very close attention to detail - we are birds of a feather.  It's so refreshing to have somebody that cares about the quality of their work.
 

Attachments

  • Day6FloorPatchStairwellTrimCheck.jpg
    Day6FloorPatchStairwellTrimCheck.jpg
    76.8 KB · Views: 173
  • Day6DresserRemovalInvestigation.jpg
    Day6DresserRemovalInvestigation.jpg
    67.5 KB · Views: 166
  • Day6BehindDresserWiring.jpg
    Day6BehindDresserWiring.jpg
    58 KB · Views: 158
  • Day6AftCabinDemoStart.jpg
    Day6AftCabinDemoStart.jpg
    62.3 KB · Views: 158
  • Day6EntryPlanks.jpg
    Day6EntryPlanks.jpg
    80 KB · Views: 190
  • Day6EntryLookinGreat.jpg
    Day6EntryLookinGreat.jpg
    67.5 KB · Views: 179
  • Day6EntryWayClose.jpg
    Day6EntryWayClose.jpg
    58.7 KB · Views: 212
nice job on picking the flooring and color- it will look great when your done. I can see that you are staying out of trouble while the DW is gone! been enjoying the pictures.
 
new maple in John Canfields' Itasca
 

Attachments

  • DSC05137.JPG
    DSC05137.JPG
    38.1 KB · Views: 213
  • DSC05141.JPG
    DSC05141.JPG
    47.6 KB · Views: 208
  • DSC05139.JPG
    DSC05139.JPG
    50.3 KB · Views: 236
I had to leave the coach  :p to go to doctor's appointments this week so I'll have to rely on Ernie for updates.  The maple is a great contrast to the cherry cabinetry - exactly the look we were shooting for.  Thanks for the pictures Ernie!  (And thanks for your craftsmanship!)
 
more photos from today
 

Attachments

  • DSC05145.JPG
    DSC05145.JPG
    60.2 KB · Views: 161
  • DSC05146.JPG
    DSC05146.JPG
    56.3 KB · Views: 161
  • DSC05147.JPG
    DSC05147.JPG
    51.1 KB · Views: 173
  • DSC05148.JPG
    DSC05148.JPG
    40.9 KB · Views: 160
  • DSC05149.JPG
    DSC05149.JPG
    46.3 KB · Views: 161
  • DSC05150.JPG
    DSC05150.JPG
    47.3 KB · Views: 164
  • DSC05151.JPG
    DSC05151.JPG
    46.9 KB · Views: 192
it is looking awesome- great fit and finish. looking forward to seeing the final results.
 
more progress
 

Attachments

  • DSC05153.JPG
    DSC05153.JPG
    51.3 KB · Views: 139
  • DSC05154.JPG
    DSC05154.JPG
    44.7 KB · Views: 119
  • DSC05155.JPG
    DSC05155.JPG
    43.3 KB · Views: 134
  • DSC05159.JPG
    DSC05159.JPG
    46.8 KB · Views: 160
  • DSC05158.JPG
    DSC05158.JPG
    39.8 KB · Views: 137
progress:
 

Attachments

  • DSC05178.JPG
    DSC05178.JPG
    51.1 KB · Views: 120
  • DSC05179.JPG
    DSC05179.JPG
    41.3 KB · Views: 117
  • DSC05180.JPG
    DSC05180.JPG
    46.5 KB · Views: 117
  • DSC05181.JPG
    DSC05181.JPG
    44 KB · Views: 136
  • DSC05182.JPG
    DSC05182.JPG
    57.9 KB · Views: 128
  • DSC05183.JPG
    DSC05183.JPG
    47 KB · Views: 164
wood on the slide
 

Attachments

  • DSC05186.JPG
    DSC05186.JPG
    47.4 KB · Views: 146
  • DSC05187.JPG
    DSC05187.JPG
    47 KB · Views: 160
  • DSC05188.JPG
    DSC05188.JPG
    41.1 KB · Views: 146
Ernie Ekberg said:
wood on the slide

Ernie,
I see that there has to be a space between the floor and the bottom of the wood for the slide. How do you keep the wood from cracking at the joints if you just happen to step on the edge of the slide floor?  It would have the tendency to flex I would think.  ::)
 

Latest posts

Forum statistics

Threads
131,920
Posts
1,387,482
Members
137,673
Latest member
7199michael
Back
Top Bottom