2003 Winnebago Brave - Instrument Cluster Removal

The friendliest place on the web for anyone with an RV or an interest in RVing!
If you have answers, please help by responding to the unanswered posts.

Woofer

Well-known member
Joined
Jul 16, 2014
Posts
71
HELP!!

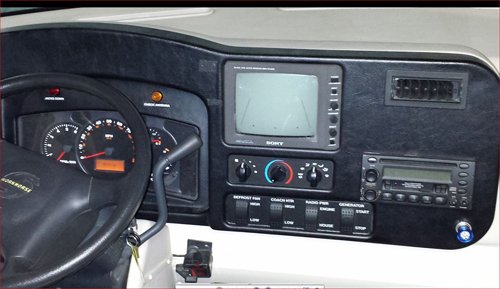
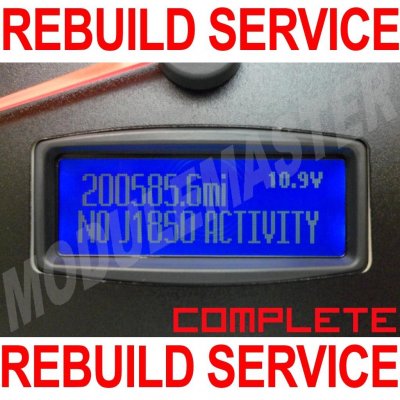
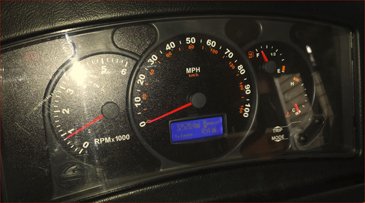
I have a 2003 Brave and need to pull the instrument cluster out to have it rebuilt. How do you remove the instrument cluster from the flip up dash?
The dash will flip up, but the back of the instrument panel shows only the back of the threaded screws. 
It looks like you need to remove the front black fascia trim and plastic window to gain access to the instrument panel mounting screws.


Edit by staff: changed message icon to Topic Solved.  See the end of the thread for how to remove dash
 

Attachments

  • WInPanel.JPG
    WInPanel.JPG
    136.2 KB · Views: 48
This might be a help. I had all my instrument gauges quit (2006 Voyage) only to find the regulator was putting out 19 volts which shut down all my gauges. The cluster shuts down with over voltage. If your gauges work with the key on but the engine not running this is more than likely your problem.  Replace the regulator and might as well replace the alternator with the regulator already attached as age might warrant it. Check to see what voltage you have at idle, should not be 19 volts. I hope this is your problem as alternator is cheaper than new cluster. All you need to verify is check dc voltage with motor running. Good Luck Art
 
Thanks for the reply.
In my case the cluster has a bad display with some of the LED's out rendering the information unreadable.
I have a company that rebuilds these units 30 min away with a two day turnaround.  I just have to get it out of the dash.
 
Still looking to see if anyone has experience pulling a Winnebago Brave 2000 - 2004 instrument panel out of the flip up dash
 
OK I have determined the black dash fascia needs to come off first. It seems there are only a few catch points (screws?) holding it on.
It is a very awkward environment to get into a position to see under the flipped up dash panel.

more to come...
 
Pulled the panel today.
Propped up the dash and from left to right...
- removed the Jack System Connectors
- removed the four small screws holding the jack panel on and set jack panel aside
- Light switches can stay where they are (you can remove connectors for access to O/D Switch)
- Remove the AC hose off back of left vent
- Disconnected the OverDrive engage switch connector
- Removed two nuts holding the OverDrive engage switch
- Bottom center (see pic) removed the two nuts holding the four switch panel below enviromental panel - Leave connectors on switches
- Remove power, audio, and camera conn from back of rear view TV unit
- Remove rear view TV unit (four knarled connectors- two each side be careful of washers)
- Disconnect AC hose off back of right hand vent
- Pull right hand vent out and locate screw on right side of vent opening
- Remove screw from vent opening
- carefully lift Black dash facia just high enough and remove the Instrument panel screws
- Remove instrument panel and carefully disconnect the panel connectors.

...and there you have it.  Drove the panel over to BBA Remanf (30min away) yesterday afternoon and should have it back this afternoon or tomorrow
 

Attachments

  • WInPanel.JPG
    WInPanel.JPG
    136.2 KB · Views: 40
Bad news
BBA has reported back that the LCD connecting cable has delaminated connectors (?) and they are unable to repair it. I picked it up today with no charges due.  Searched the web and sent the panel off to these guys.
ModuleMaster
http://www.ebay.com/itm/281539244264

They claim the following...
"...This COMPLETE rebuild service includes the following work performed on your Workhorse instrument cluster:
Faulty odometer LCD upgraded to a superior industrial-rated BLUE LCD
only the color BLUE is available (see auction photos for example)
Replacement of all gauge motors with new higher quality motors
Restoration of faulty back-lighting
Full power up and test before and after restoration
2-3 day typical turnaround time (turnaround time length depends on workload and any additional issues)
Five year guarantee against return failure
Life time warranty on the LCD panel
We do not charge a bench test fee..."


I am still realing over the cost for this service.
It ain't cheap!
$299 for the work
$51 return frieght
Cost me an additional $72 to insure it and airfrieght off to Idaho.
Yikes!
 

Attachments

  • $_57.JPG
    $_57.JPG
    147.4 KB · Views: 35
Good News
Module Masters reports my unit is done and the panel will be shipped out this morning. Hopefully should have it by Monday.
 
Panel is in and what a difference!
I am one happy camper now!
 

Attachments

  • panel 1.JPG
    panel 1.JPG
    93 KB · Views: 30
Woofer...THANKS! I'm about to do the same repair to my new (to us) 2004 Winnie Sightseer.

I also have a place about 2 hours from me, (Ultra Products) that rebuilds these defective dash clusters.
Gonna give them a call this week. If they can't do a quick turn-around, I'll contact ModuleMasters.
 
UPDATE!
Cluster is working great... Best fix I have done on this rig was getting this cluster upgraded. Easy to read. Well worth the bucks!!
 
Geez...I forgot about this thread. Yes, I had my dash cluster done at Ultra RV Products. (Brazel's RV) near Chehalis, WA. What a difference. They replaced the wonky LED display, replaced the various stepper motors for the gauges., did the Workhorse software update that was needed. PLUS they let us stay in their small RV campground at no charge while they were doing the work.

The BAD part of it...I went in their expecting the mileage to be about 9000 miles. When they were finished, it was 19,000+.  :eek:

That, however, was not their fault. It was the fault of the seller who lied.
 
Back
Top Bottom