Photographing "lit" fountains

The friendliest place on the web for anyone with an RV or an interest in RVing!
If you have answers, please help by responding to the unanswered posts.

Tom

Administrator
Joined
Jan 13, 2005
Posts
51,896
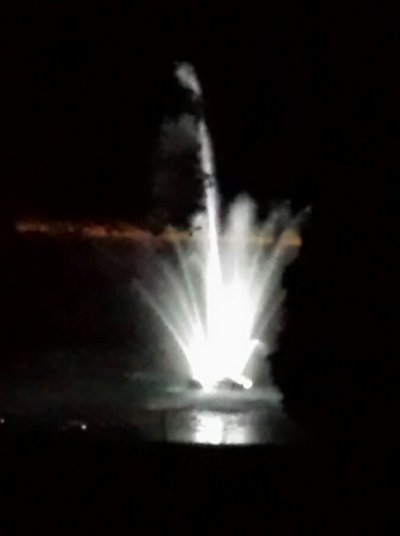
The HOA contractors wired lights to the fountain in the pond alongside our home away from home. Last night was the first time we'd seen the "lit" fountain. I grabbed my cell phone and snapped a few shots, but they were pretty poor. Attached is one of the cropped shots, which I'm embarassed to show.

Plan B - I grabbed one of my DSLRs and tried some of the preset 'scene' settings, including night and fireworks. It was very apparent that I needed a tripod, and this was our first trip when I'd left the tripods at home.

I'm going to try again tonight using a small table in place of a tripod. Anyone have any suggestions for camera settings?

TIA.
 

Attachments

  • Fountain_lit.jpg
    Fountain_lit.jpg
    24 KB · Views: 99
There are no if and or buts... you need a tripod.  I'm suspect there are several people who can help you with low-light motion images but we will need to know what camera and lenses you have available.
 
Unfortunately, my tripods are 2,500 miles away, and we leave in the morning, so no time to get a tripod, even an el cheapo. So I figured I'd use a small folding table instead.

Camera: Canon Rebel XSi.

Lens options: Canon 55-250mm image stabilized, and Canon 18-55mm (probably not any use for this shot).

Note that the prior attachment was taken with a cell phone, not the Canon.
 
You'd probably want to try a number of things, Tom, to get results that please you. Full auto exposure, shutter priority (slow shutter to get the blur), aperture priority (to sharpen some things), perhaps bulb, or manual at several f-stops with very slow shutter (1/15, 1/8/, 1/4, etc.).

It's a good learning experience and you may find several variations that please you in different ways, depending on your personal preferences.

But above all, keep it still (the table while using the timer might be good -- compose first, then touch the shutter release).
 
Thanks Larry, and a good reminder (I'd forgotten) about using the timer to avoid movement.
 
Tom said:
So I figured I'd use a small folding table instead.

Camera: Canon Rebel XSi.

Lens options: Canon 55-250mm image stabilized, and Canon 18-55mm (probably not any use for this shot).

I am a Canon shooter but unfortunately I'm not familiar with the Rebel XSi.  It looks like your max ISO is 1600 but I'll try to do a quick search regarding the capabilities of this camera.  The small folding table is a good idea in lieu of a tripod.  Any chance you have a remote shutter release?  I would use the 55-250 lens.  I will do more research but hopefully other forum members will chime in.
 
Move ISO down, you want a longer exposure for the water blur.  Obviously you don't have your stuff with you.  Maybe a polarizer?  Something to cut the light a bit.  Yes, use 2 sec timer to get your hand away.  Look at the histogram, hit the info button, be sure the right side is not a straight line.

Try multiple shots changing the shutter speed.  Probably use f8 or higher to help in keeping shutter speed slower than 1/30 sec.

 
Many Rebels are capable of bracketing.  If so,, use it with center at the 0, and then right side to meet what had been left side.  Gets 6 brackets the camera does instead of continuing to change settings.

 
PancakeBill said:
Many Rebels are capable of bracketing.  If so,, use it with center at the 0, and then right side to meet what had been left side.  Gets 6 brackets the camera does instead of continuing to change settings.

Pancake Bil, is the Canon XSi capable of six brackets?

Tom,  never leave home without your tripod  ;)
 
I'm somewhat familiar with bracketing, but where's my starting point? Aperture priority, shutter priority? Starting settings around which to bracket?
 
The Xsi would only be capable with a couple setups.  Not all at once.  Set 3, change base, take 3 more. 

Starting point.  Aperture, pick f8, then bracket say 1/15 1/30/ 1/60.  Or however that would  work out.  This way depth of field is the constant.  You want it somwhat slow to get blur unless you want to freeze droplets.  Both good effects.


Thanks for the suggestions. My "table" plan didn't work out too well; Tough to get a good angle on the scene, then realized I couldn't find some of the buttons in the dark. Finally got set up, best I could, and realized my battery was about to die. Back into the house and put the battery on charge before crashing in the chair (it had been a very looong day). I'm going to practice/experiment at other locations and, since we hit the road this morning, I'll get this one next time we're back here, with a tripod! Hopefully I'll be more acquainted with the camera's manual controls.
 
During my research yesterday, I found this article on How to photograph the fountains of the Bellagio at night. A lot more action and lights than our small fountain. I don't recall attempting to photograph this spectacle on the few times we've been to Vegas. Coincidentally, I recently watched a TV documentary of the inner (and underwater) workings of the show.
 
We've never been to Las Vegas but it is on our list.  We'll have to check out the fountains at Bellagio.  I suspect there is a lot of extra ambient light around the fountains. 
 
MN, the fountain is bright, HDR would work best if he had the info.  From what you can see on the original post everything is dark and the fountain has blown out whites.  He needs to expose for the bright area, and with HDR or with some lighting, brighten up the other areas,


I recently was shooting a waterfall in the dark of a new moon, lighting it remotely with a panel light.  So, yes, familiar with the low light.  Still not quite satisfied with results but getting closer.

The tough part is limiting the light to what you want lit.
 
Back
Top Bottom