Samsung Residential Refrigerator Installation in 2003 Monaco Dynasty

The friendliest place on the web for anyone with an RV or an interest in RVing!
If you have answers, please help by responding to the unanswered posts.

zmotorsports

Well-known member
Joined
Dec 10, 2010
Posts
1,796
Location
Utah
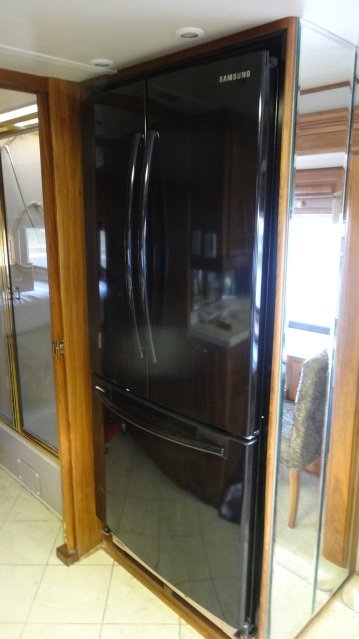
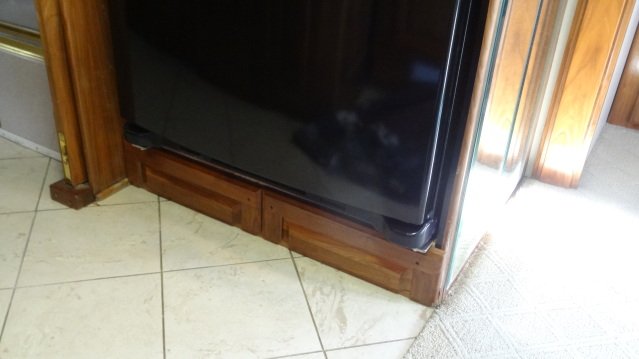
I thought I had posted my residential refrigerator installation last year when I completed the job but I guess I forgot.  I figured I would post up my Samsung RF18 refrigerator installation just in case anyone has a similar coach they are contemplating the modification.

After having this refrigerator installed for several trips and months now, I am glad I did it and would never own another absorption refrigerator, period.  So much more room and I would bet less current draw than the old Norcold RLIM1200 on electric because I don't think with the electric element it ever turned off in warm weather.  Having nice frozen ice cream and a large enough space to pack for a week is a HUGE benefit.  Traveling down the road it performs flawlessly on my MSW inverter although I am contemplating upgrading my converter in the near future.  Mainly to get a few more amps of charging capacity, not that it is having any issues running this refrigerator.

Big thanks to Terry Brewer for talking me over the edge on this last summer in TX.  I was waffling on it as our Norcold at the time was operating just fine.  It wasn't until the trip after that it started to make me nervous as it was not performing up to its capacity and I figured I would swap it out on my time frame before it gave me a time frame that was not conducive to our travel plans.

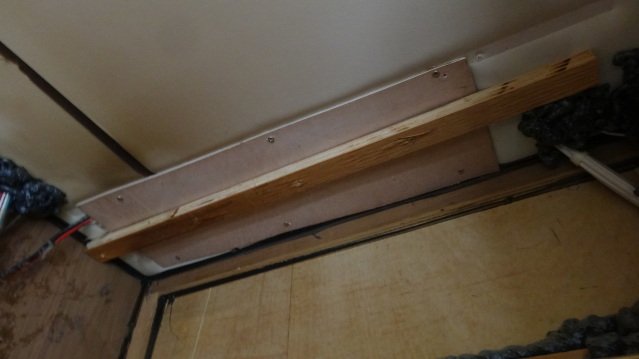
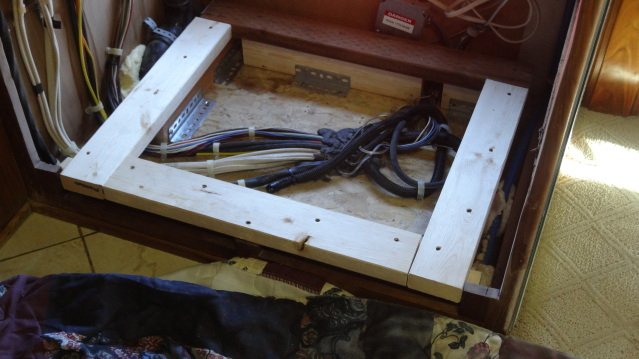
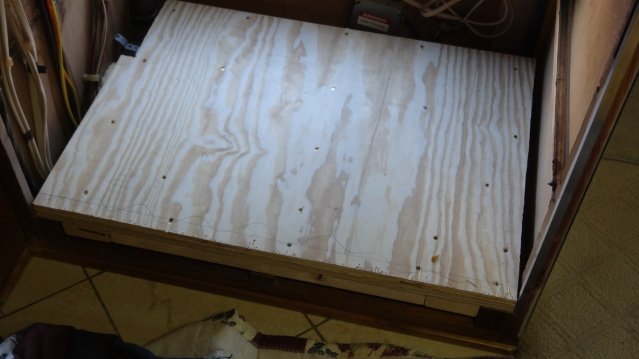
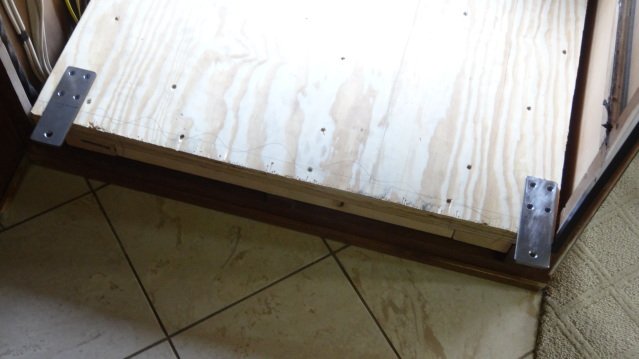
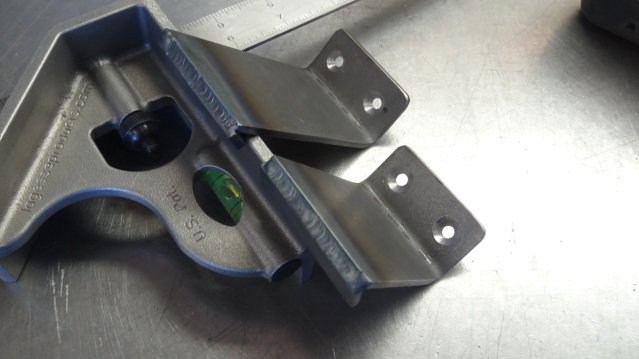
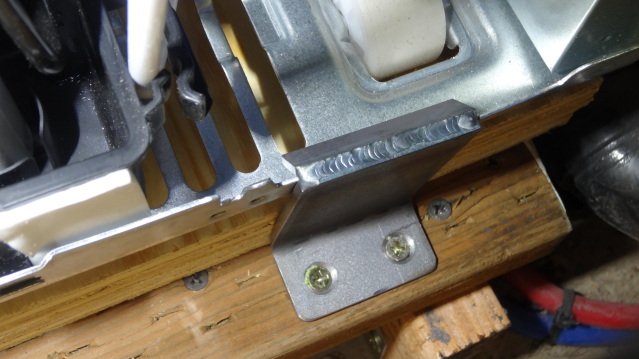
Let me preface by saying I am NOT a carpenter.  I can weld/fabricate/machine just fine but working with wood is not something I excel at nor even like to do.  Wood in my shop is NOT welcome and I think it knows it. :D  That said, this is what I came up with using my very limited carpentry skills.

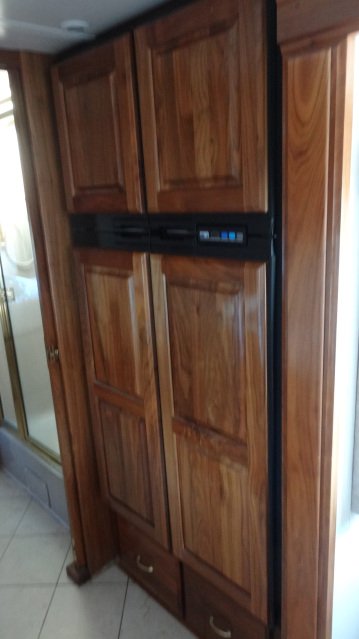
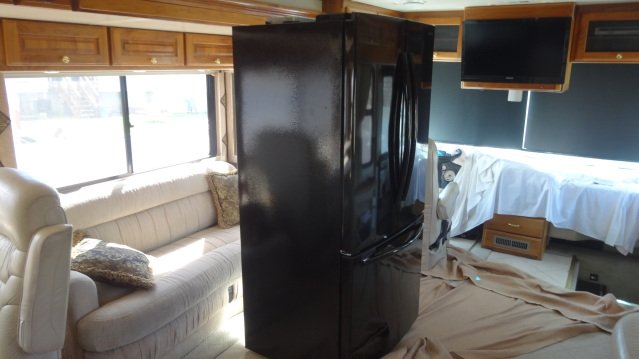
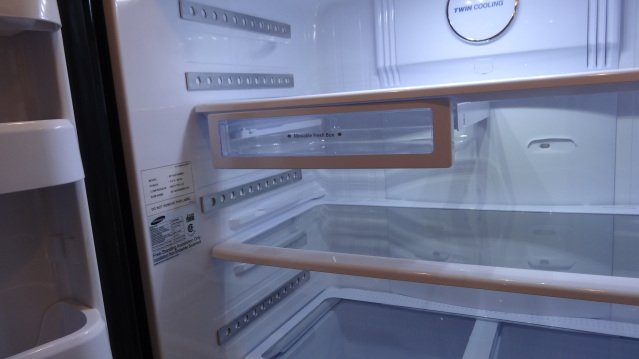
First picture is of the OEM Norcold RLIM1200 four-door absorption refrigerator.

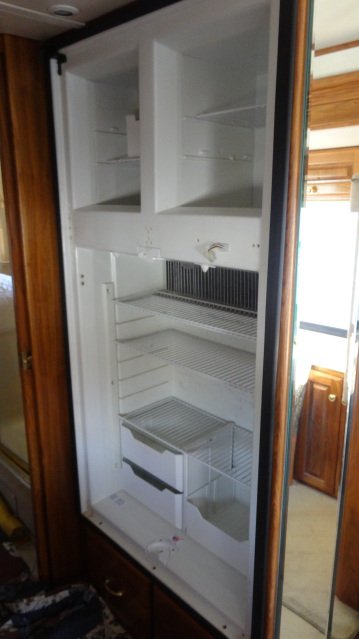
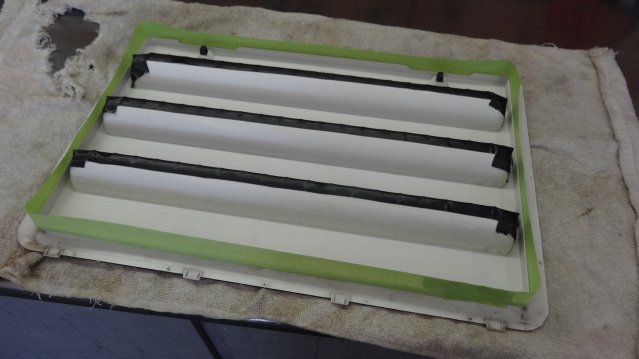
Second picture is with the doors and hinges off to get it out the doorway.

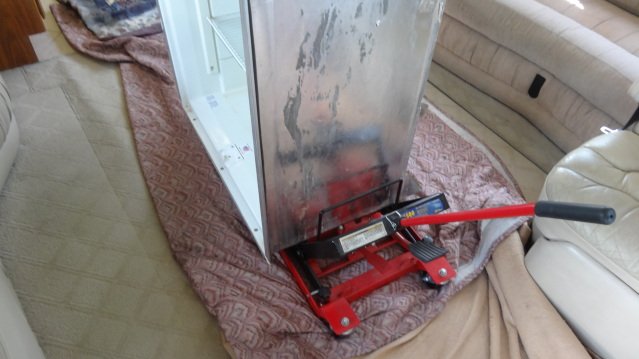
Third picture is with it old Norcold out and on the cart ready to remove from the coach.

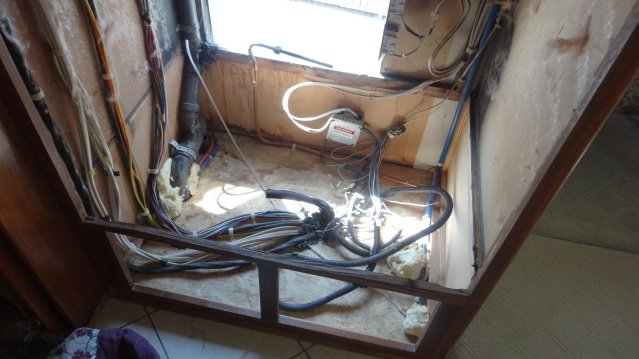
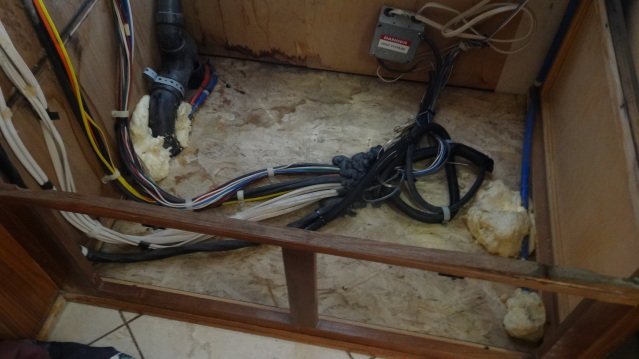
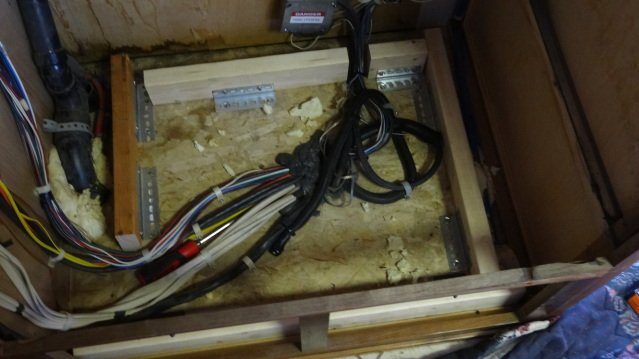
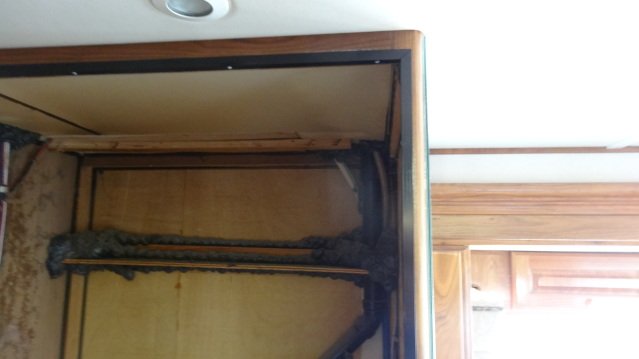
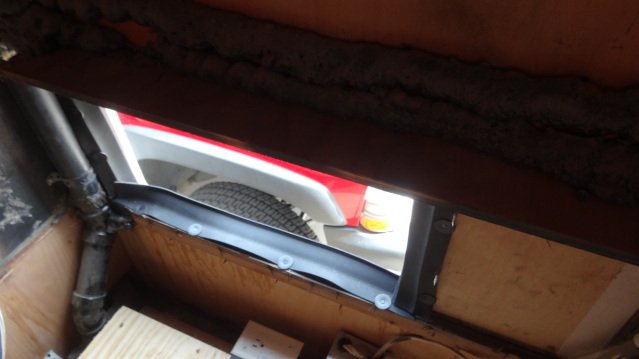
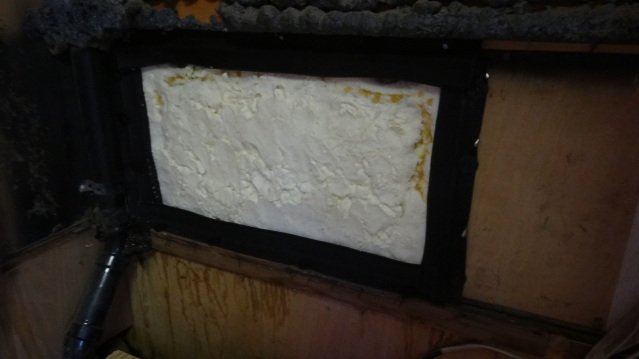
Fourth picture is what is left of the opening after removal.

I was pleasantly surprised as I have seen on other threads/forums where there have been charred markings on the interior of the opening from where the original Norcold had gotten so hot that it started to char the wood.  Thankfully ours was still in pristine condition.

Stay tuned...

Mike.
 

Attachments

  • fr1.jpg
    fr1.jpg
    117.1 KB · Views: 102
  • fr2.jpg
    fr2.jpg
    118.3 KB · Views: 82
  • fr3.jpg
    fr3.jpg
    122.5 KB · Views: 86
  • fr4.jpg
    fr4.jpg
    132.2 KB · Views: 101
First picture is of the gas line once I disconnected it and removed it from the vacant compartment and the basement.

Second picture is of the gas line capped off using the appropriate sealant/tape.

Third picture is with the wiring cleaned up and gathered together a bit to prepare for building up the floor.  I would have liked to have been able to sit the refrigerator right on the floor and then have some cupboards overhead, however, with the floor drain and vent pipe for the shower as well as the wiring running immediately down the middle of the compartment opening, that was not possible.  I had to focus on building up the floor over the wiring and staying far enough away from the vent pipe to not come in contact.

Fourth picture is with the roof vent filled.  I used a piece of luan fastened up into the opening, then insulation and then another piece of luan with a 1x2 fastened across the opening to completely seal it off.  No need to have to be open to the outside as these are made to fit tightly into a counter space.  Just enough room for some air flow across the bottom as the fan pulls air in at the bottom and allows it to exit from the top of the refrigerator into the coach.  No real heat detected thus far as this is a very efficient operating refrigerator.


Attachments

  • fr5.jpg
    fr5.jpg
    96.3 KB · Views: 68
  • fr6.jpg
    fr6.jpg
    101.6 KB · Views: 68
  • fr7.jpg
    fr7.jpg
    124 KB · Views: 68
  • fr8.jpg
    fr8.jpg
    98.8 KB · Views: 74
First picture is with the base starting to go into the opening.  I used some angle steel to fasten to the floor then some 2x4's standing on end screwed to the steel angle.  I had to build up 6.5" to gain enough to clear the drain and vent pipe.  I figured 2x4's stood on end, then

Second picture shows more 2x4's lying down and overlapping to tie in the ends.

Third picture shows the two layers of .75" plywood stacked and making for a very solid floor/platform as well as giving me the 6.5" rise I needed.

Fourth picture shows the sides and top.  I didn't like having bare wood showing so I took some .625" aluminum angle, cut 45-degree corners so they formed a nice 90 degree corner/fitment.  I then scuffed them down and painted them semi-gloss black and used countersunk flathead screws to secure them to the cabinet opening.  This ended up blending in nicely with the new black refrigerator and the Walnut woodwork in our coach.


Attachments

  • fr9.jpg
    fr9.jpg
    125.8 KB · Views: 76
  • fr10.jpg
    fr10.jpg
    134.3 KB · Views: 74
  • fr11.jpg
    fr11.jpg
    114.3 KB · Views: 75
  • fr12.jpg
    fr12.jpg
    92.9 KB · Views: 73
First picture shows the new Samsung RF18 placed inside our coach with the doors and hinges/hardware all reinstalled after having to remove to fit it through my doorway.

Second picture shows the preparation to filling my exterior vent.  I taped up the openings and the perimeter prior to spraying expanding foam onto the backside.  It ended up being approx. 2" in thickness once cured and trimmed down flat.

Third picture is of the inside of the exterior opening.  I used some simple garage door weather stripping to seal off the seam of the opening.  It is fastened at the inside and required a bit of finesse to put the exterior panel back in but I wanted to make sure to have access so I could reach the electrical as well as to be able to fasten the rear of the refrigerator down to the floor.

Fourth picture is of the panel test fit into the opening.  Luckily the day I was working on this we had a horrific wind blowing and it was on the street side of the coach while I was working on it.  Once the panel was secured in place there was absolutely no air leaks so I know this will not be a source of cold air when we are camping in sub-freezing temps.


Attachments

  • fr13.jpg
    fr13.jpg
    115.1 KB · Views: 82
  • fr14.jpg
    fr14.jpg
    109.8 KB · Views: 79
  • fr15.jpg
    fr15.jpg
    101.9 KB · Views: 79
  • fr16.jpg
    fr16.jpg
    94.4 KB · Views: 79
First picture is with some 2"x.188" flat strap in my mill vise to drill mounting holes and start fabricating the mounting apparatus.

Second picture is of the mounting hardware in place after careful measurements were taken to ensure the refrigerator would be placed far enough back as well as side to side gap being equal.

Third picture is where I decided to relocate my electrical outlets while I was in there modifying things.  This way in case I needed to I could remove the exterior panel and move my plug from inverter to shore electrical outlet if needs be.  I don't see that as something I will need to do but just in case.

Fourth picture is of the refrigerator in its new home and bolted down at the front.


Attachments

  • fr17.jpg
    fr17.jpg
    133.8 KB · Views: 72
  • fr18.jpg
    fr18.jpg
    110.5 KB · Views: 72
  • fr19.jpg
    fr19.jpg
    94.2 KB · Views: 70
  • fr20.jpg
    fr20.jpg
    98.2 KB · Views: 80
First picture is of the rear mounts that I had to fabricate.  I have seen other people merely bolt them down at the front and call it good but for peace of mind I wanted to secure them at the rear also.  I measured the base, put some flat .5" aluminum stock under the bottom so it wouldn't pull the stamped steel base of the new refrigerator down and then used these fabricated mounts to secure the rear bottom of the refrigerator in a downward manner with some preload.

Second picture shows one of the rear mounts installed so hopefully it will give an idea of what I was trying to accomplish.

Third picture shows the completed refrigerator installation less the bottom trim installed.

Fourth picture shows the bottom trim piece installed.  I used one of the original Norcold's panels to make the lower trim panels.  I couldn't make them into a storage space like in some coaches because of the wiring.


Attachments

  • fr21.jpg
    fr21.jpg
    108.1 KB · Views: 68
  • fr22.jpg
    fr22.jpg
    131.8 KB · Views: 69
  • fr23.jpg
    fr23.jpg
    124.5 KB · Views: 90
  • fr24.jpg
    fr24.jpg
    104.1 KB · Views: 79
Now that the actual installation was complete, I wanted to turn my attention towards a device to hold items in the box securely.  I have seen people use the expanding shower type rods from various department stores but I wanted something more "kool" or "kustom".  Unique if you will. 

This is what I came up with.  I can't take all of the credit though, a friend of mine on another forum did a version of this in which I liked as well.

First picture shows some 1"x.125" aluminum strap.  I machined four at a time.  These were stacked in my mill vise and clamped so I could precisely drill/machine the opening to exactly .500".

Second picture shows milling the .500" holes through all 4 at a time.  I machined the holes on 1" centers.

Third picture shows the machining process completed and ready to be cleaned up.

Fourth picture is of the backside of the aluminum with some 3M double sided adhesive and the .5" holes cleared of the tape.  These will be placed on the inside of the box equally spaced side to side in the refrigerator box.
 

Attachments

  • fr25.jpg
    fr25.jpg
    118.8 KB · Views: 68
  • fr26.jpg
    fr26.jpg
    132.3 KB · Views: 64
  • fr27.jpg
    fr27.jpg
    111.9 KB · Views: 65
  • fr28.jpg
    fr28.jpg
    119.2 KB · Views: 65
Very nice work! Thanks for the excellent photos too!

I would bet less current draw than the old Norcold RLIM1200 on electric because I don't think with the electric element it ever turned off in warm weather.

No doubt. With two 320 watt heaters that run more or less full time for maybe 15-18 hours/day in warm weather, the Norcold 1200 is a huge power hog. Plus it uses some 12v amps as well for the anti-condensation heaters and control functions. We used to keep the Norcold on when the RV was parked at home, just for the convenience of a spare fridge for odds and ends. Then I monitored it for a a couple weeks and discovered it was costing me about $1/day!  We shut the Norcold off after that!
 
First picture shows the straps secured in place in the box.

Second picture shows the next piece of the puzzle.  Some .5" aluminum rods that I have machined down the ends just slightly less than the OD. 

Third picture displays some Delrin that I had in my scrap pile from another project chucked up in my lathe. 

Fourth picture shows the Delrin turned down and now creating the recess for the SHCS (socket head cap screws).  This will allow the fasteners to be completely concealed inside the Delrin and not interfere with the quick installation or removal of the retention bars.


Attachments

  • fr29.jpg
    fr29.jpg
    98 KB · Views: 66
  • fr30.jpg
    fr30.jpg
    95.5 KB · Views: 55
  • fr31.jpg
    fr31.jpg
    115 KB · Views: 51
  • fr32.jpg
    fr32.jpg
    97.2 KB · Views: 57
Nice write up and good pictures.  Thanks for posting this.  I am going to save this because I have the same refridgerator and the same concerns.  It is working fine but you never know and the ability to not worry about the fire issue is something to consider.

I will probably get another DP soon but I will keep this in case I need to switch it out.

edit:  After looking at the last pictures I guess I need a lathe in my stacker...lol
 
First picture shows an exploded view of what I am doing.  I hope this helps to explain the method behind it.  The spring loaded end will be movable and allow me to compress the end and install or remove the retention rod.  The other end will be a fixed end and merely fit into one of the slots in the side brackets.  The various holes allow me some options for holding either a lot of items on a particular shelf or a few.

Second picture shows all fixed and movable ends machined from the Delrin.

Third picture shows the rods completed and ready for test fitment. 

Fourth picture shows one in place and completed.

I have since polished the aluminum rods which made them look a little more "professional" but other than that this completes my Samsung RF18 residential refrigerator installation.

Again we have used it successfully for several trips and looking forward to many, many more with it.

Thank you for viewing and I hope it will be beneficial to anything contemplating this installation in the future.

Mike.


Attachments

  • fr33.jpg
    fr33.jpg
    109.5 KB · Views: 58
  • fr34.jpg
    fr34.jpg
    94.5 KB · Views: 42
  • fr35.jpg
    fr35.jpg
    104.6 KB · Views: 44
  • fr36.jpg
    fr36.jpg
    93.6 KB · Views: 71
Gary RV Roamer said:
Very nice work! Thanks for the excellent photos too!

No doubt. With two 320 watt heaters that run more or less full time for maybe 15-18 hours/day in warm weather, the Norcold 1200 is a huge power hog. Plus it uses some 12v amps as well for the anti-condensation heaters and control functions. We used to keep the Norcold on when the RV was parked at home, just for the convenience of a spare fridge for odds and ends. Then I monitored it for a a couple weeks and discovered it was costing me about $1/day!  We shut the Norcold off after that!

Thanks Gary.  I appreciate the comments.  Coming from you that means a lot.  I really liked your installation on your American coach.

Mike.
 
I don't have a lathe anymore - just didn't use it enough for the space it took up. Loved the way-cool things I could make with it, though!  I can still do some rudimentary turning with my drill press, but it's not in the same league.
 
HueyPilotVN said:
Nice write up and good pictures.  Thanks for posting this.  I am going to save this because I have the same refridgerator and the same concerns.  It is working fine but you never know and the ability to not worry about the fire issue is something to consider.

I will probably get another DP soon but I will keep this in case I need to switch it out.

edit:  After looking at the last pictures I guess I need a lathe in my stacker...lol

Thanks for the comments Bill.  I was in the same boat.  Our Norcold was working fine and I was seeing all of these people swapping out their absorption refrigerators but ours was working fine.  I waffled back and forth on whether I would ever replace with another absorption, just the cooling unit, OR go right to the residential refrigerator.  After talking with Terry Brewer last year in Texas at the Palo Duro rally I pretty much decided WHEN ours started to give me grief I would replace it with a residential.  I just didn't figure it would be quite so soon. ::)

Oh well, although it was a lot of work and I was trying to make it look original and not like a bad after-thought I can honestly say I am glad it is done, glad I went with the residential refrigerator and I will NEVER own another absorption refrigerator, EVER!!!

Thanks again.

Mike.
 
Gary RV Roamer said:
I don't have a lathe anymore - just didn't use it enough for the space it took up. Loved the way-cool things I could make with it, though!  I can still do some rudimentary turning with my drill press, but it's not in the same league.

It's funny after having a mill and lathe for coming up on 18-ish or so years now, I don't think I could live without them.  I often wonder how people function in the world without them. ;)

Mike.
 
Mike, do you suppose there would be some way you could give me just one tenth of your overall abilities. I did install a res fridge in my coach, but I would have to cover it up before I let you inside.
     
      Gary
 
This is undoubtedly one of the most extensive documentation I have seen to install a residential fridge in an RV on this forum. We also have a Norcold and will face replacement sooner then later I'm sure. This helps to wrap my mind around it and to know I have some planning and measurements to do ! :( So a very beneficial story, well done!

The securing rods are awesome and look very professional.

You guys lost me with the Lathe until I did a search for it, I like coffee latte but discovered this is different. (Yes foreigners mix up words easily :)

Thank you for documenting it!

 
Becks said:
Mike, do you suppose there would be some way you could give me just one tenth of your overall abilities. I did install a res fridge in my coach, but I would have to cover it up before I let you inside.
     
      Gary

Thanks Gary.  I don't think you give yourself enough credit.  You did both yours and the one in your friends Dynasty.  You appear to be better at carpentry than I am, I struggled on trying to complete this and make it look like it rolled out of the Monaco factory with the residential refrigerator.

Mike.
 
DutchEagle said:
This is undoubtedly one of the most extensive documentation I have seen to install a residential fridge in an RV on this forum. We also have a Norcold and will face replacement sooner then later I'm sure. This helps to wrap my mind around it and to know I have some planning and measurements to do ! :( So a very beneficial story, well done!

The securing rods are awesome and look very professional.

You guys lost me with the Lathe until I did a search for it, I like coffee latte but discovered this is different. (Yes foreigners mix up words easily :)

Thank you for documenting it!

Klaas, thank you very much for the kind words.  I appreciate the compliment.

Mike.
 
I love your safety bar idea Mike. We pack the fridge carefully and I try to turn and stop smoothly, because our res fridge doesn't have anything to stop stuff from from sliding off the shelves either. It's rare that something does fall, but it's a PITA when it does. I might steal your idea.

Kev
 
Back
Top Bottom