I got my hands dirty, and I can't stop

The friendliest place on the web for anyone with an RV or an interest in RVing!
If you have answers, please help by responding to the unanswered posts.

JeffandTracy

Well-known member
Joined
Mar 13, 2016
Posts
65
Location
Wes Michigan
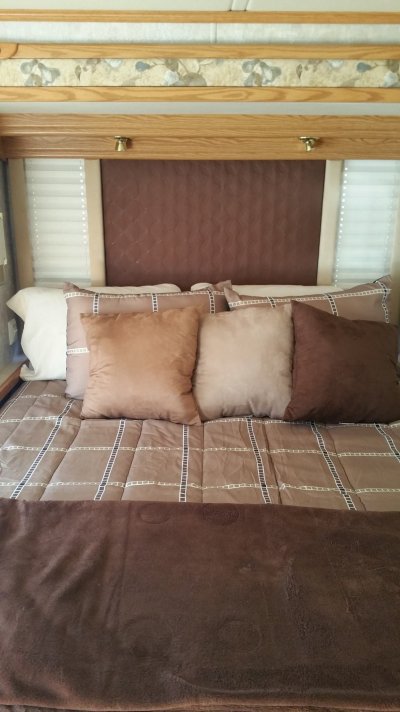
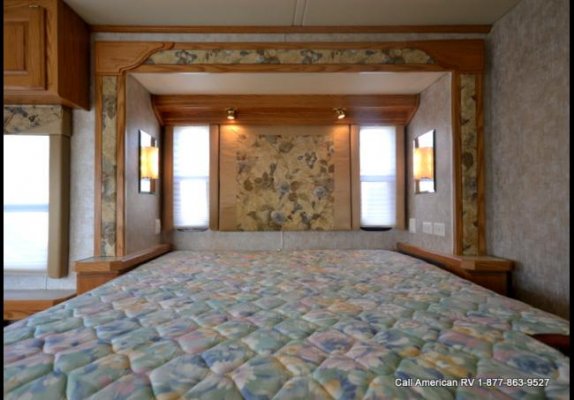
As some are aware, we are new to MH ownership. Picked up a 2004 Holiday Rambler Admiral, good price and decent mileage. Here in lies the problem, I have to upgrade everything!! It's in great shape, no damage, but it's factory and hideous in my eyes.

We've had it for a week, I have painted, replaced cabinet hardware, took shabby valences down. Took most of the brass items (ie: tp holder/towel rack/center lamp) and spray painted them with a brushed bronze paint.

There was a wood, floor console between the captains chairs, I removed that and stained it to more match the dash.

Now on the hunt for blinds. My biggest hurdle will be tearing apart and remove the existing couch (hide-a-bed) while I wait for the new to be delivered. Not to mention how I'm going to attach the new dinette, it had a regular table and chairs. I felt around and found no brackets to attach said dinette or the much needed seat belts. I will leave that project up to the Hub's and my older boys ;)

If I can manage, I will post before and after. Please note, I am in no way shape or form a decorator/crafty/talented/artistic person, but I hope to make it appealing and more 'homey' for me and mine.

The Hubs has also scheduled to have the MH repainted and re-decaled. I knew it wouldn't take long, he didn't care for the blue to begin with..haha

I would love any and all input from anyone who has done any of these things, tricks and hacks are the best  ;D
 
So far, this is the only 'updated' photo I have...haha
I'm either busy, or lazy  ;D
 

Attachments

  • 12891546_10208921925555555_8575399646279664618_o.jpg
    12891546_10208921925555555_8575399646279664618_o.jpg
    227.5 KB · Views: 236
  • 30-DSC_0061.jpg
    30-DSC_0061.jpg
    43.5 KB · Views: 224
Those blinds look very nice there. Looks like you're doing some fine work.

The dinettes are usually stick-built and screwed right through the framing into the floor.
 
Our 2004 Monaco has the same interior, we even have an HR emblem on the front cap of our coach.

What engine do you have and how many miles?
 
Arch Hoagland said:
Our 2004 Monaco has the same interior, we even have an HR emblem on the front cap of our coach.

What engine do you have and how many miles?

"Chassis is called W22. It's a Workhorse chassis with a GM 8.1 engine and an Allison 1000 transmission."

This is actually what you told me it was in the 'Introduce Yourself' thread  ;)

The dealer did infact change the oil and the trany fluid, it has just over 30,000 miles.

Did yours come with the table and chairs? That was my only super drawback of the coach. We have 8 kids and 4 grandkids, not that they will all be traveling with us, but the booth dinette would add 4 more seatbelts and extra sleeping.
 
dverstra said:
Hey Neighbor,
Great start to the remodel

Hahaha....hey neighbor  ;D  Just a smidge North from you  ;)

Thank you! I'm cheap and want everything yesterday. Amazing what some velcro/glue gun/ $3 can of spray paint and a bag of tools can do  8)
 
We have done much remodeling in our 97 Southwind.  I noticed the inset flowered fabric around the bed slide, we had that too, and one of the easiest projects.  Using a 1.5" putty knife, you can easily pry this out, and if a thin fabric, just rewrap, if you go with a thicker fabric the old stuff is just stapled on.  Then using an air nailer, (if you don't own one, buy one, it is invaluable in these projects),fix them back in place, just the almost headless 3/5" brads will do the trick.  Careful with the staple length to fix fabric from behind.

We removed our dinette and built a 'bar' along that wall, used bathroom vanity bases below for storage, but we did not need the extra sleeping.

The backsplash for the kitchen area we installed a tile, then grouted.  That was a pretty easy quick fix.

Being a 2005, you would normally have an old style TV, removing this saves lots of weight and can give you storage when it is removed.

As to changing out so much in color etc, almost seems you should have looked at another coach though.  Must have been a great deal. 
 
I noticed the inset flowered fabric around the bed slide, we had that too, and one of the easiest projects.  Using a 1.5" putty knife, you can easily pry this out, and if a thin fabric, just rewrap, if you go with a thicker fabric the old stuff is just stapled on.  Then using an air nailer, (if you don't own one, buy one, it is invaluable in these projects),fix them back in place, just the almost headless 3/5" brads will do the trick.  Careful with the staple length to fix fabric from behind.

BRILLIANT!!!!!! That is exactly the type of info/hack I was looking for, THANK YOU!!!  The Hubs has PLENTY of tools, including the nailer, the Dewalt Heat Gun was an amazing tool taking down the wallpaper boarder  ;D

Being a 2005, you would normally have an old style TV, removing this saves lots of weight and can give you storage when it is removed.

Actually, the old tube style TV's had already been removed and Flat Screens installed. We did move the smaller flat screen in the bedroom to the center section of the hutch in the dinning area and purchased a slightly bigger one for the bedroom.

As to changing out so much in color etc, almost seems you should have looked at another coach though.  Must have been a great deal.

It was a great deal, 30,000+ miles under $35,000 and absolutely no damage of any kind. Tires are all 2013/2016, previous owners added a motorized awning and a water filtration. I'm funny with colors/decor, never have been a 'flowery' type of girl so that headboard thing had to be changed. Wanted to do the fabric around the slides, but was unsure how to tackle that without destroying it in the process (great advice by you, and now I can tackle that at some point).  The Hubs was just 'OK' with the exterior and only had it quoted with a budget in mind, the quote came back under the budget amount so he went with it.
 
Today's to-do:::

Hubs will finish wiring the Jeep and coach for towing. I will be tackling the couch tear down and removal. Wish me luck that I don't break me, or the MH in the process  ;)

I have 3 areas done but the pictures are having a devil of a time loading....
 
SIDE NOTE

The biggest push for the redo besides just being plain and boring....

The previous owners smoked, NOTHING against smokers, I smoke. But they smoked A LOT and it smells like they never cracked a window..haha

The new paint/furniture and fabric will help reduce the smell, tremendously. Yes, I've tried fabric refresher, carpet cleaner, automatic air fresheners and by the time I walk in the next day, I can smell it. The Hubs bought and replaced all the circular vents in the ceiling because they were soooo yellow.

For the price of the coach and the minimal cost to redo the things we've done ( I had the paint, the fabric I used to cover the headboard was a thin quilt type blanket) it was just easy-peasy to update as well as clean  ;D
 
JeffandTracy said:  "Did yours come with the table and chairs? "

Ours has a table that is anchored in the wall by 14 bolts. It sticks out a couple feet and can be extended about 10" inch's if you pull on it.  Four chairs came with it, two of which are fold-able and we store the fold-able ones under the bed.

Most RV interiors are absolutely horrid and that's across all the brands.  At least that what my wife and I decided many years ago.

 
Most RV interiors are absolutely horrid and that's across all the brands.  At least that what my wife and I decided many years ago.

Totally agree!!!! We looked at a 2008 also, nicely decorated ( although a little on the dark side) but at $80,000....nope, no way, no how!!!

I'd rather spend $100 and get everything the way I want it  ;)

Ours has a table that is anchored in the wall by 14 bolts.

Mine was just a table with fold down leaves...not even bolted down. Found out the hard way as we were driving down the highway and the damn thing tipped over and scare the crap out of both of us!!!!  :eek:
 
Tracy, I've been using Pinterest to get ideas for RV organization, hacks etc. and it is SO nice to see everyone else's ideas and handywork. I have pinned many things so I won't forget them! I bought a lot just for camping in the mountains and it has been tremendous for campsite ideas, so many creative things. I would highly recommend it if you haven't already tried it.
 
Glad I could help.  Somehere here are some pics I took of our project.If you were in the Yellowstone area I would give you the cushionbs (to be recovered) and the under dinette drawers. 


Dvan said:
Tracy, I've been using Pinterest to get ideas for RV organization, hacks etc. and it is SO nice to see everyone else's ideas and handywork. I have pinned many things so I won't forget them! I bought a lot just for camping in the mountains and it has been tremendous for campsite ideas, so many creative things. I would highly recommend it if you haven't already tried it.

Well, just goes to show how my brain works....not well at all  ;D

I TOTALLY was checking out pinterest, even pinned some ideas....annnnnd then totally forgot I even did it. hahahah

I'll have to go back in and recheck what I pinned !!!

I've already used the rubberized shelf liner in all shelves and drawers (put a dryer sheet underneath in the drawers and your clothes smell fresh and clean.
Helps keep things from sliding all willy-nilly.
Also bought small, cheap, plastic baskets at the $store that I used in the deeper drawers to keep things organized and neat. (OCD is a bear sometimes  ;) )
Those same baskets I used under the sink to keep cleaning products organized and so they don't tip.
I used those 3m hooks in the 'pan' cupboard to hang pans from.
I bought a small shower caddy for shower supplies and leave it right on the shower floor. No worries about it tipping, take what you need for your shower out and when your done put the caddy back in the shower and the wet stuff drip-dries.
I have all my dry food products stored in plastic storage containers, they don't get stale and no bugs or rodents...  :eek:
I bought the smaller size ones so they fit perfectly in the cupboards.
I redid the bathroom (it was plain-plain-plain). I got a bunch of those small eye hooks that screw in the wall. I put a little candle type decoration and small basket on the counter and just took a piece of twine, tied it around the candle thing and then tied it through the hook. Can't see it, won't fall off the counter and it makes the bathroom look more homey and not so outhousey...haha
 
PancakeBill said:
Glad I could help.  Somehere here are some pics I took of our project.If you were in the Yellowstone area I would give you the cushionbs (to be recovered) and the under dinette drawers.

Awe...thanks dear ;) Pretty darn far away from Yellowstone...

And yes, your hack worked FABULOUSLY!!!!

I'm fine with the bedroom trim on the slide outs, I painted the back wall a neutral cream color, so it softened the feel of the room quite a bit.
BUUUUUT......I did pull off the 4 sections of trim on the living room slide. It was covered in some blue corduroy-type material, that matched the couch and captains seats. YUCK!! Now it has a soft tan color that will go nicely with the new furniture. (Again, I'm cheap, it was an old thin-ish blanket I had) So I owe you another big thanks, it looks 1,000x's better and I would have never attempted it if you wouldn't have posted  ;)
 
So our to-do list didn't get done but I recovered the fabric trim on the living room slide and put the center console thing back that I stained. The Hubs installed 2 side cameras and a lower rear camera with a new monitor that he mounted next to the factory one. He is now on the search for a GPS...and a light bulb for the under cupboard lights. (I found one that had burned out)

The couch will have to wait for now

Had to go old-school photo method to post before and afters, hopefully it works (taken with the same camera on the same phone but now somehow are too big...hahaha)

http://s204.photobucket.com/user/t_gillette/library/RV%20Renovation
PS...if some other photos show other than RV let me know, haven't used photo bucket in about 10 years ;)

Any extra tips or tricks are more than welcome  ;)
 
Bedroom door, both say before.  Did you eliminate the blinds and drape, or add them?

When at a rally we bought some electric shades for the front, the existing sunvisors required getting out of the seat to adjust, and tough to do while driving.  Got them at a great discount and installed them.

Looking to replace all the pleated shades, last year at IKEA we found some we liked but didn't have measurements with us.  Might stop there and see if we can get something.  Blinds.com might be a source.  Back in our stick house days we bought some Levelor shades that would stay on bottom and go up, or stay on top and go down.  Nice way of eliminating something in view and getting the scene and or light.

Another upgrade coming up is the pull around drape for the front window.  The lining and the material are no longer in sync, plus lining has some water staining.  Lots of cloth and sewing on that project.  I thnk I would go with a darker lining.


Latest posts

Members online

Forum statistics

Threads
131,954
Posts
1,388,153
Members
137,708
Latest member
7mark7
Back
Top Bottom