zmotorsports
Well-known member
Ok, this is quite lengthy but I hope I can describe it well enough and hopefully it will be of benefit to anyone either wanting to tackle this job on their own OR take it to a shop to have the work performed and being familiar with exactly what the mechanic(s) will be faced with.
I tackled a not so pleasant job over the past week (what an understatement). When I say week, YES I mean week. I worked 8+ hours on Friday afternoon, my son and I finally called it quite about 8:30pm Friday evening. Saturday we started promptly at 8:00am and closed up the shop @ 6:30 pm with ONLY stopping for about an hour for lunch. I took a break and let my body heal on Sunday and we commenced again on Monday afternoon about 4:00 and finished up around 9:00 pm. This was JUST replacing all of the radiator and coolant hoses, not pulling a vacuum and adding the 17-gallons of coolant which we did on Tuesday night. A couple more odds and ends tied up and a road test is scheduled for tonight, Friday, one week later. So if you were following along that is 23+ hours of hands down the worst job I have ever done and I have done some doozies.
Monaco at least ran some rigid lines/pipe along the upper chassis over the storage bays with hose nipples at the front for the dash heater core hoses/connections and at the rear over the transmission. BUT they did not run rigid lines for the Aqua-Hot. NOT only did they not provide rigid lines for the Aqua-Hot engine loop lines, BUT they zip-tied the heater hoses going from the Aqua-Hot to the engine in an area between the rear bulkhead and the Aqua-Hot bay, which measured about 34", to the rigid lines. YES, you read that correctly, they zip tied the OEM rubber lines TO the rigid lines in a void or area that is 100% inaccessible once the coach was built. I was completely dumbfounded.
It took me and my son over 4 hours alone just to get the lines separated and replaced from the Aqua-Hot unit to the rear bulkhead. My arms were so cut up and I was bruised from trying to shove my body into a place that was too small. On the rear, I could barely touch the one zip-tie, but couldn't get my diagonal cutters in there to cut that stinkin' thing. At the rear, my son was able to trim about an inch more from the trim panel that at least allowed him to squeeze his arm in there and cut one zip-tie from his side. The one in the middle we basically had to spray lube on and pull back and forth working the lube, then spray and repeat. What a complete and utter pain in the ass. This is nothing more than idiocy in full bloom.
Once we got that short section done, we were able to locate the rigid lines and replace one at a time from the back of the cylinder head of the engine to the hot side rigid going up forward, then the return side from the lower water pump area of the engine up to the rigid line.
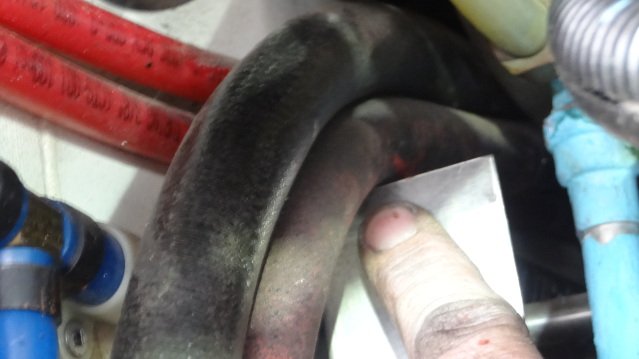
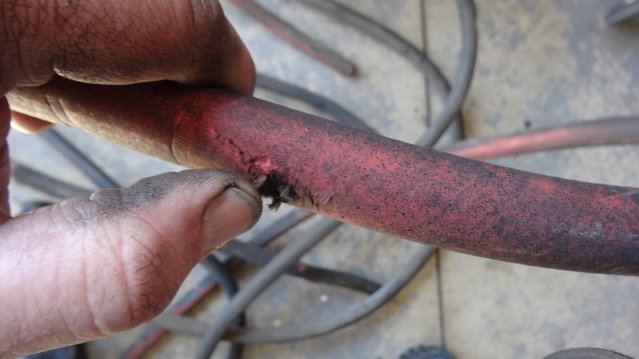
For the most part Monaco did a fair job of routing the lines to avoid chafing and/or rubbing of the lines and hoses. The coach is 14 years old now and has 105k miles so nothing has failed on these lines yet so they must have done something right. That being said, there was one area where the hose on the Aqua-Hot had rubbed on the housing of the cabinet chafing a small hole in the rubber hot side of the Aqua-Hot engine loop. These hoses were routed in a tight area and making quite a sharp bend going up from the Aqua-Hot and then turning 90-degrees and heading towards the rear of the coach. The hoses are almost non-visible until the wiring/wire loom is moved away from the Aqua-Hot.
Follow along and I will describe the pictures.
If you want a few more pictures and description I have a full thread of the repairs and mods to our 2003 Monaco Dynasty over on irv2.com. Sorry I didn't post it here but this forum is a bit more troublesome to post pictures to or I would probably have the exact same thread here. Here is a link if you are interested, this is starting with the coolant lines but there is a LOT more information on our coach throughout the rest of the thread.
http://www.irv2.com/forums/f115/mods-upgrades-to-our-2003-dynasty-237276-27.html
Now on to the pictures. I will continue with other posts following:
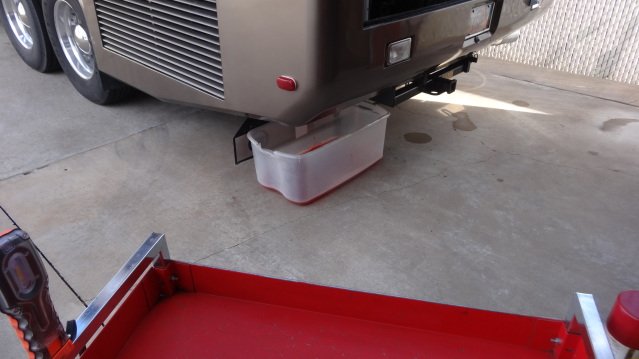
First picture is with my 26 gallon drain bucket in place and starting the drain process.
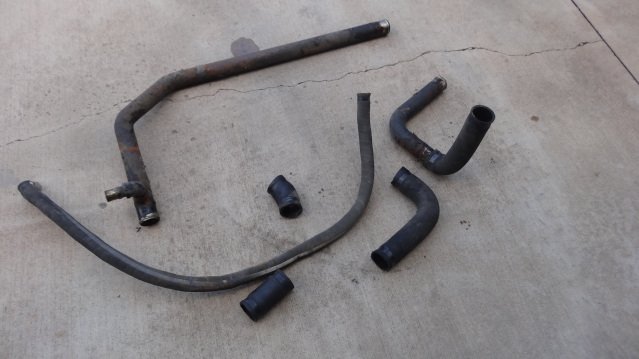
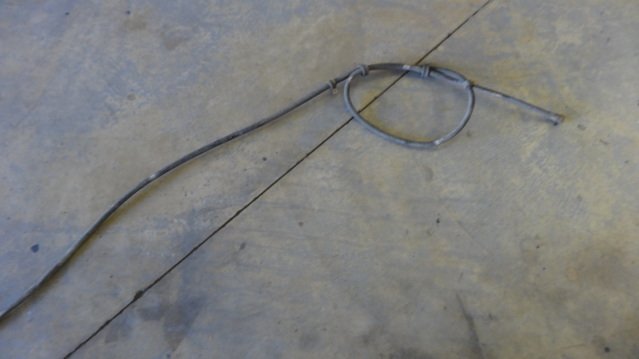
Second picture is of all of the radiator soft and rigid lines removed, both upper and lower.
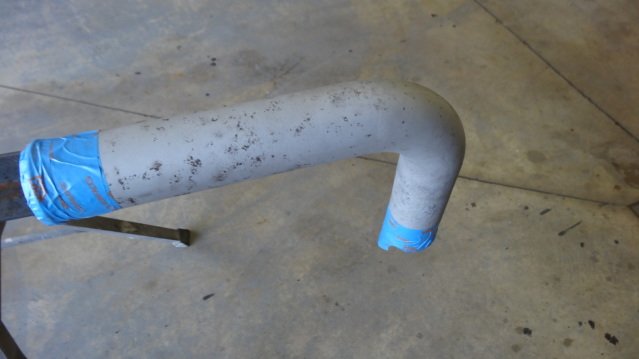
Third picture is of the upper radiator rigid tube beadblasted and ready for paint.
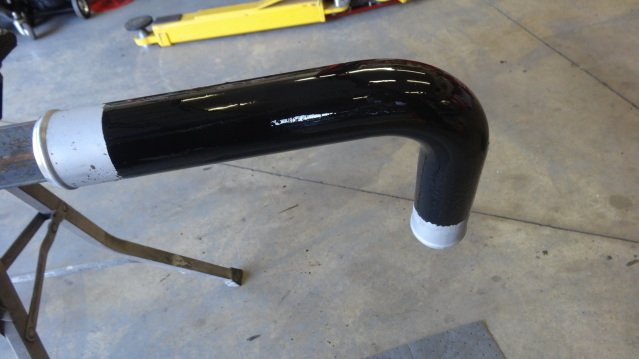
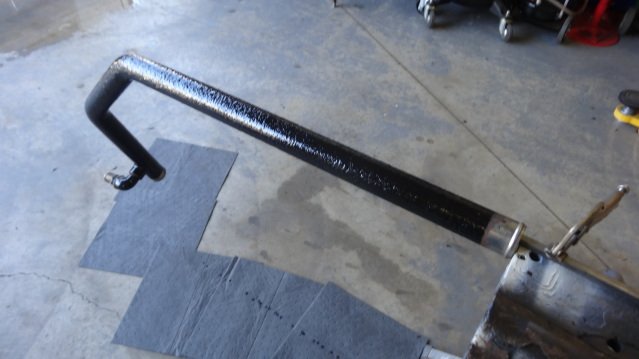
Fourth picture is of the upper radiator rigid tube painted with POR-15.
More to come......
I tackled a not so pleasant job over the past week (what an understatement). When I say week, YES I mean week. I worked 8+ hours on Friday afternoon, my son and I finally called it quite about 8:30pm Friday evening. Saturday we started promptly at 8:00am and closed up the shop @ 6:30 pm with ONLY stopping for about an hour for lunch. I took a break and let my body heal on Sunday and we commenced again on Monday afternoon about 4:00 and finished up around 9:00 pm. This was JUST replacing all of the radiator and coolant hoses, not pulling a vacuum and adding the 17-gallons of coolant which we did on Tuesday night. A couple more odds and ends tied up and a road test is scheduled for tonight, Friday, one week later. So if you were following along that is 23+ hours of hands down the worst job I have ever done and I have done some doozies.
Monaco at least ran some rigid lines/pipe along the upper chassis over the storage bays with hose nipples at the front for the dash heater core hoses/connections and at the rear over the transmission. BUT they did not run rigid lines for the Aqua-Hot. NOT only did they not provide rigid lines for the Aqua-Hot engine loop lines, BUT they zip-tied the heater hoses going from the Aqua-Hot to the engine in an area between the rear bulkhead and the Aqua-Hot bay, which measured about 34", to the rigid lines. YES, you read that correctly, they zip tied the OEM rubber lines TO the rigid lines in a void or area that is 100% inaccessible once the coach was built. I was completely dumbfounded.
It took me and my son over 4 hours alone just to get the lines separated and replaced from the Aqua-Hot unit to the rear bulkhead. My arms were so cut up and I was bruised from trying to shove my body into a place that was too small. On the rear, I could barely touch the one zip-tie, but couldn't get my diagonal cutters in there to cut that stinkin' thing. At the rear, my son was able to trim about an inch more from the trim panel that at least allowed him to squeeze his arm in there and cut one zip-tie from his side. The one in the middle we basically had to spray lube on and pull back and forth working the lube, then spray and repeat. What a complete and utter pain in the ass. This is nothing more than idiocy in full bloom.
Once we got that short section done, we were able to locate the rigid lines and replace one at a time from the back of the cylinder head of the engine to the hot side rigid going up forward, then the return side from the lower water pump area of the engine up to the rigid line.
For the most part Monaco did a fair job of routing the lines to avoid chafing and/or rubbing of the lines and hoses. The coach is 14 years old now and has 105k miles so nothing has failed on these lines yet so they must have done something right. That being said, there was one area where the hose on the Aqua-Hot had rubbed on the housing of the cabinet chafing a small hole in the rubber hot side of the Aqua-Hot engine loop. These hoses were routed in a tight area and making quite a sharp bend going up from the Aqua-Hot and then turning 90-degrees and heading towards the rear of the coach. The hoses are almost non-visible until the wiring/wire loom is moved away from the Aqua-Hot.
Follow along and I will describe the pictures.
If you want a few more pictures and description I have a full thread of the repairs and mods to our 2003 Monaco Dynasty over on irv2.com. Sorry I didn't post it here but this forum is a bit more troublesome to post pictures to or I would probably have the exact same thread here. Here is a link if you are interested, this is starting with the coolant lines but there is a LOT more information on our coach throughout the rest of the thread.
http://www.irv2.com/forums/f115/mods-upgrades-to-our-2003-dynasty-237276-27.html
Now on to the pictures. I will continue with other posts following:
First picture is with my 26 gallon drain bucket in place and starting the drain process.
Second picture is of all of the radiator soft and rigid lines removed, both upper and lower.
Third picture is of the upper radiator rigid tube beadblasted and ready for paint.
Fourth picture is of the upper radiator rigid tube painted with POR-15.
More to come......