Replace mirrors with smart tiles on the kitchen back splash how to fix the wall

The friendliest place on the web for anyone with an RV or an interest in RVing!
If you have answers, please help by responding to the unanswered posts.

DutchEagle

Well-known member
Joined
Aug 9, 2015
Posts
358
Location
Woodbury Minnesota USA
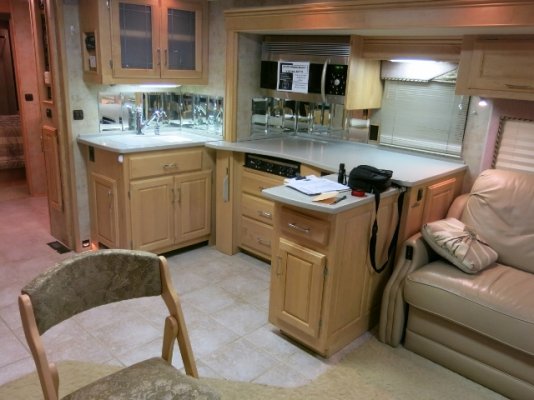
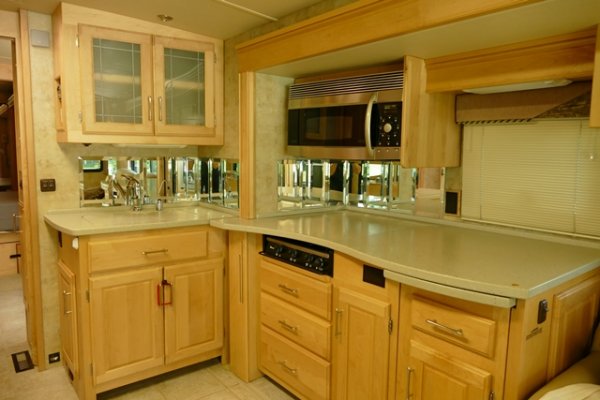
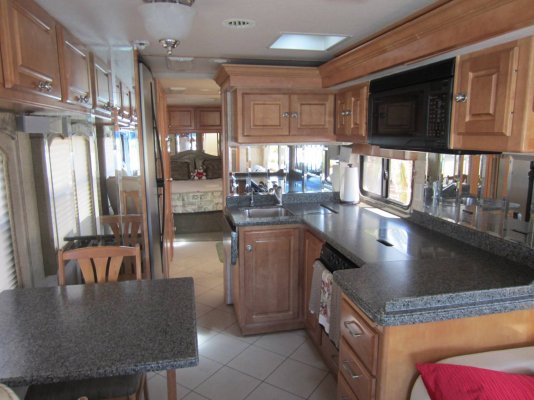
I have the old fashion mirrors as a back splash in the kitchen. We like to remove it and replace it with smart tiles. I suppose that the mirrors are glued to the wall and I can use a heat gun to be able to remove them. (After some taping with duct tape in case they break) But how to remove excess glue and prep the wall?

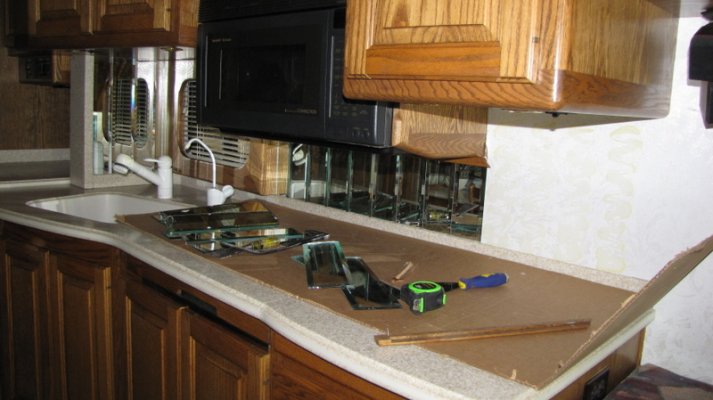
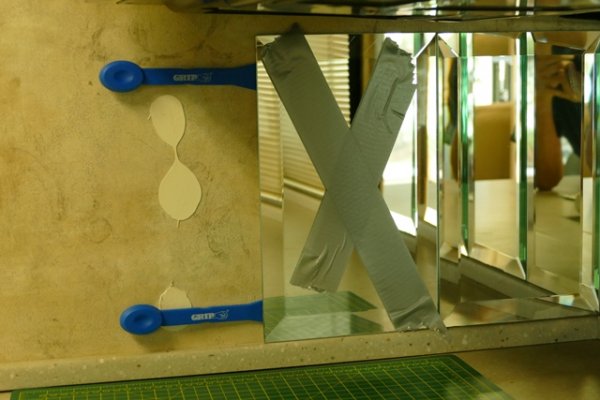
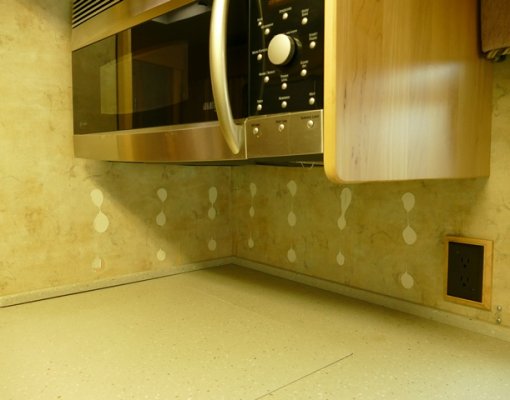
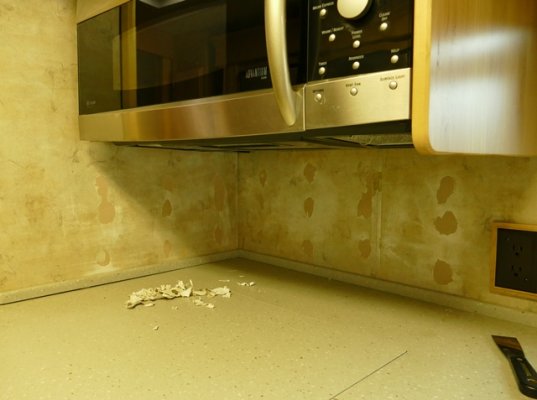
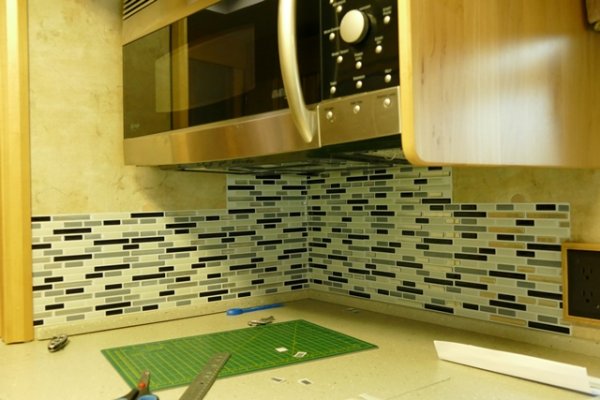
I will take pictures along the way and post them here. The first picture is how it looks now.
 

Attachments

  • mirrors_back_splash.JPG
    mirrors_back_splash.JPG
    237.1 KB · Views: 155
I would first take a very sharp utility knife and cut around the entire outside edge of the wall covering. If it's some type of vinyl, the mirrors will be cemented pretty good and once you start peeling them off, the wall finish behind the tiles whatever it is will also come off. The good news is that is should come off pretty clean and just stick on the new tiles overlapping the cut line.
 
I  too had my  mirrored backsplash removed and replaced with tiles.  Surprisingly  they  mirrors  came of fairly easily with a bit of  prying.  The  glue just released under pressure of a broad flat tool.  Think spackle  tool.  The glue stayed stuck to the wall and no damage to the  back wall.  It was then a matter of scrapping the  glue beads away.  Covering it over was easy and it  updates the look considerably. 
In the  bathroom I used the peel and stick smart tiles I ordered on line from Home Depot.  Read all the reviews on how to install them and got  good hints.  Directions are lacking.  Good luck on remodel. 

Keep photos coming.
 
cover them with duct tape- they will shatter and send shards all over the place. I use a small tack puller to start with the mirrors. I installed some Maniscalco glass tiles from Australia in our coach in place of the 6 cent mirrors
 
Here are some pics of what Betty was describing...
 

Attachments

  • Back Splash-2.JPG
    Back Splash-2.JPG
    149.4 KB · Views: 151
  • Back Splash-3.JPG
    Back Splash-3.JPG
    133.1 KB · Views: 146
  • Back Splash-14.JPG
    Back Splash-14.JPG
    162.8 KB · Views: 165
My Vectra had the mirrors.  Showed every water drop...Took putty knife and pried them loose.  Cracked one.  Did not use tape on front of the either.  Didn't know you should at that time.  Glue mostly came off the wall and was on the mirror.  It scraped of easily.  Bought regular glass tiles, and glued them to the wall, then used regular grout to finish the job.  Been up over 20,000 miles with no problem  This was my first ever tiling job and I am an old lady and had no help.  You can do it.  The real tiles look so much nicer.
 
Betty Brewer said:
I  too had my  mirrored backsplash removed and replaced with tiles.  Surprisingly  they  mirrors  came of fairly easily with a bit of  prying.  The  glue just released under pressure of a broad flat tool.  Think spackle  tool.  The glue stayed stuck to the wall and no damage to the  back wall.  It was then a matter of scrapping the  glue beads away.  Covering it over was easy and it  updates the look considerably. 
In the  bathroom I used the peel and stick smart tiles I ordered on line from Home Depot.  Read all the reviews on how to install them and got  good hints.  Directions are lacking.  Good luck on remodel. 

Keep photos coming.


thats how mine came off, some were ready to fall off. Like th one in the bathroom.
 
Terry A. Brewer said:
Here are some pics of what Betty was describing...

WOW!!! that came out super nice,... now,.. is that the ceramic??? or the rubbery stuff... and mastic right to the wall paper??
 
The mirror in my bathroom was put on with double sided tape. I took a heat gun and got it really hot and I mean really hot and it came off.
 
MYRV2 said:
WOW!!! that came out super nice,... now,.. is that the ceramic??? or the rubbery stuff... and mastic right to the wall paper??

Thank you.  The photos Terry posted  show tile replacements and NOT the Smart Tile peel and stick  stuff.  I had  a professional do it.  I did my bathroom backsplash myself with the  Smart tiles that I purchased on line from Home Depot.
 
Betty Brewer said:
Thank you.  The photos Terry posted  show tile replacements and NOT the Smart Tile peel and stick  stuff.  I had  a professional do it.  I did my bathroom backsplash myself with the  Smart tiles that I purchased on line from Home Depot.
that kitchen is awe some.... My wife Sue  (boss)... was dead set against removing the mirrors... but after seeing yours....she said WOW that looks good!!!!!

is the tile stuck with reg wall mastic.... my concern is them poping off.. and the same with the smart tiles,... the heat in vegas get to 120 degrees and more in the coach...
I've removed the mirrors before, and in fact had the fall off... on our new excursin... they tile a board... then glued it to the wall...when we went to go use the coach... the wood came un glued and the back splash was laying on the counter...
 
Today I started to remove the mirrors from the back splash and installed smart tiles. The title of the pictures describe what you are looking at.
The last pictures show two holes cut in the wall this became visible after I removed the mirrors. (Probably from a repair job on the shower water supply as that is now visible) As of yet I do not know how to solve that to add smart tiles to the wall. Smart Tiles need a sticking surface. I might add a back to the holes and fill it with Spackle but not sure if that would be the best solution.
I'm very happy with the result, this is a nice upgrade.
(The brownish color in some of the tiles is a reflection from the cabinets)
Not one of the mirrors broke when I took them off. I use my wife's hair dryer to soften up the glue after I forces the mirrors off and used a sanding machine to smooth the wallpaper. 


Attachments

  • before_1.jpg
    before_1.jpg
    172 KB · Views: 45
  • remove_mirrors.jpg
    remove_mirrors.jpg
    170.6 KB · Views: 36
  • glue_on_wall.jpg
    glue_on_wall.jpg
    154.7 KB · Views: 37
  • remove_glue.jpg
    remove_glue.jpg
    160.8 KB · Views: 33
  • part_done_1.jpg
    part_done_1.jpg
    176.1 KB · Views: 44
  • done_under_microwave.jpg
    done_under_microwave.jpg
    173.9 KB · Views: 44
  • done_next to sink.jpg
    done_next to sink.jpg
    174.3 KB · Views: 48
  • Problem_above_sink.jpg
    Problem_above_sink.jpg
    169.6 KB · Views: 56
I would cut another panel to go over the whole wall..they make an edge metal that you could use at the end.... they also have a super heavy duty Velcro the would hold the panel to the wall.... you wanna be able to acces that plumping or youll be doing it all over when a problem happens...
 
I wanna do something with the counter tops....I build custom homes, and one kinda rule of thumb if you will, is that you either run the granite up the wall to top to the bottom of the cabinets..... or you tile it .... you don't mix a granite and tile.. on the wall...

one exception of the rule is brewers... their granite matches the tiles and the granite kinda picture frames the tile and makes it look like that's the way it was custom done to begin with...


so my question,... has anyone changed out the granite?

I can't see this looking right on my alpine and keep trying to come up with an idea....
 

Attachments

  • 13502509_1090068074363495_1996700333829568644_o.jpg
    13502509_1090068074363495_1996700333829568644_o.jpg
    268.7 KB · Views: 47

Latest posts

Forum statistics

Threads
131,972
Posts
1,388,445
Members
137,721
Latest member
Dmac3003
Back
Top Bottom