Gutting my TT or Welcome To My Nightmare

The friendliest place on the web for anyone with an RV or an interest in RVing!
If you have answers, please help by responding to the unanswered posts.
lifting the body off the frame sounds intriguing, be sure to post some pics of that!!

ive done major floor repairs on two tt's, about a third of the tt in one case.  I used 3/8 construction grade ply instead of the 1/4 luane

I added 1/8 material everywhere else to make it flat.

places where I had to join sheets together that weren't over framing, I added strips of sheet metal under the plywood to join them together.  the strip were also fastened to the framing where ever possible

 
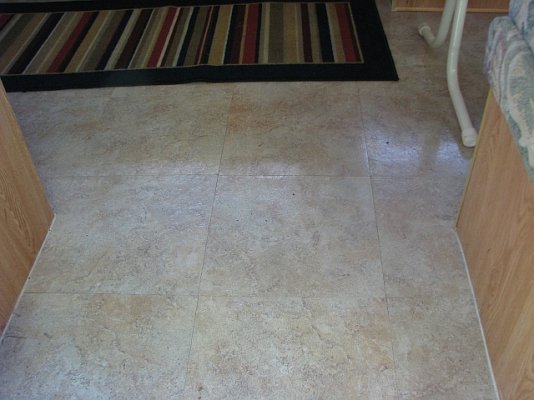
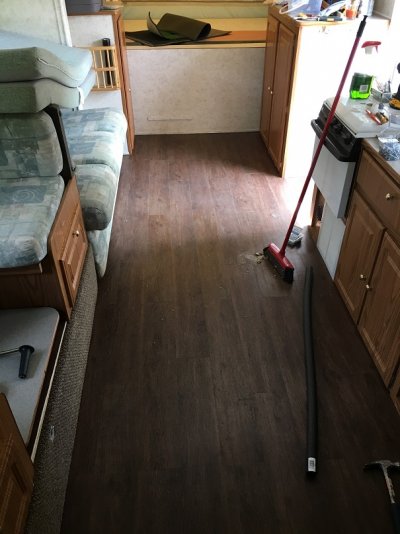
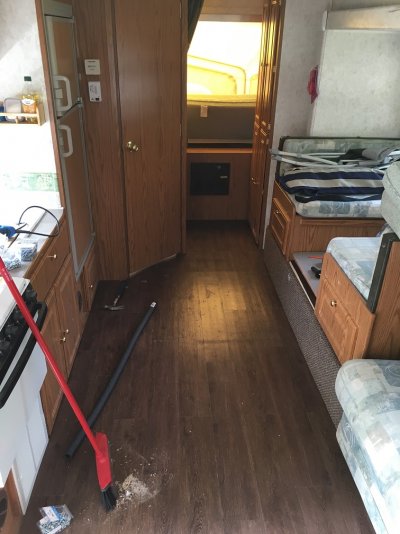
Well the floor is mostly finished.
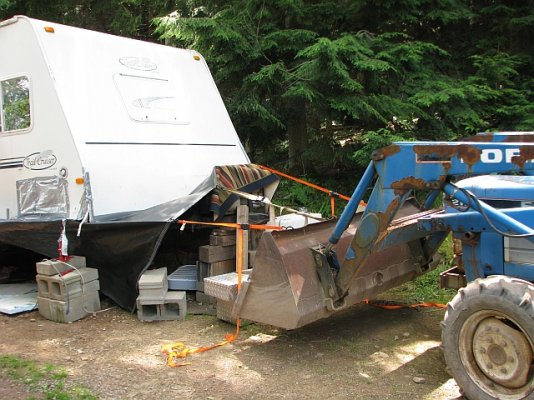
I didn't think to take any pictures of the jacked up frame from the outside.  everything was moving quickly (well not quickly but frantic) and never crossed my mind.  Besides I don't like tempting fate too much.

Still need to add the membrane which will require jacking the camper off the frame one last time...hopefully only about 1/4 inch instead of 2-3 inches.  Afterwards I still need to button the camper up, and re-secure everything to the trailer.  I want to add some butyl tape around the wheel wells, the door and threshold and anywhere else I can place some. Still quite a bit of work before I can begin adding the innards.  Hopefully by the end of the first week in July that process can begin.

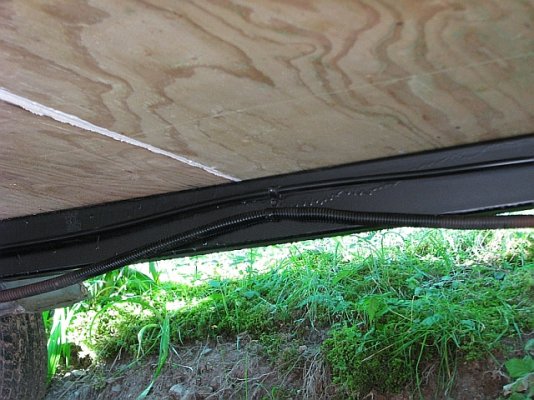
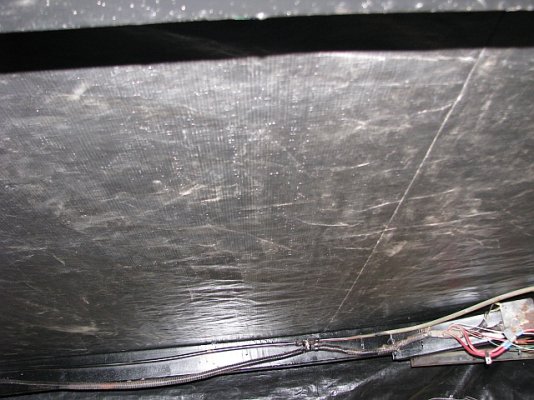
The first image from below and showing the new paint job.  The runs were from the original paint. ;)

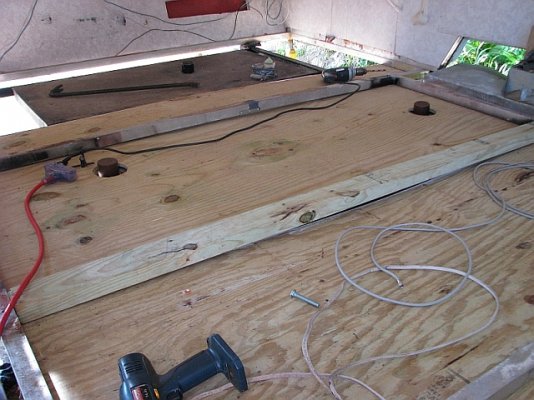
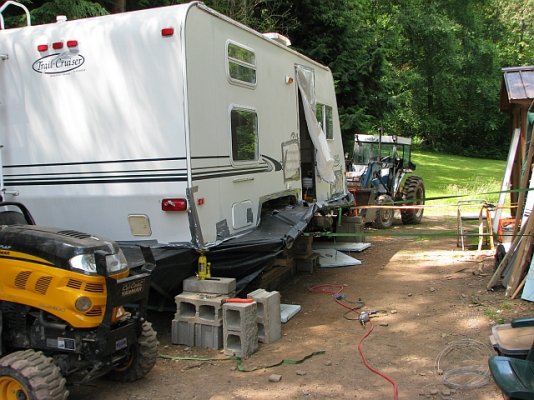
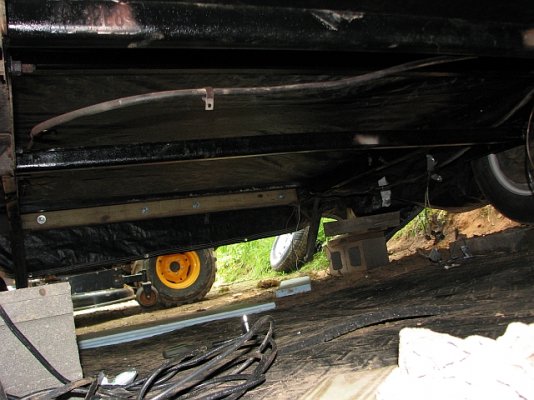
The second was the bottom board phase (1/2" treated ply).  The entire frame/shell was jacked to allow sliding the planks in from the side.  Note the bottle jack in the rear corner.

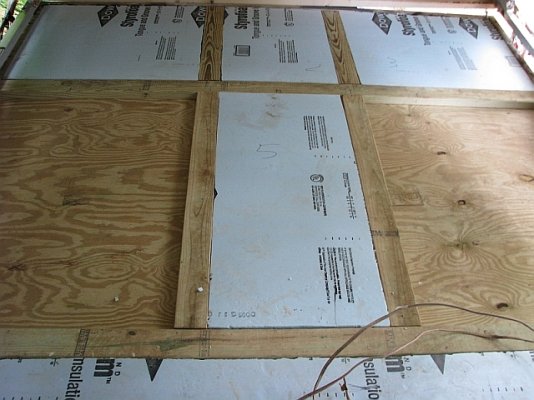
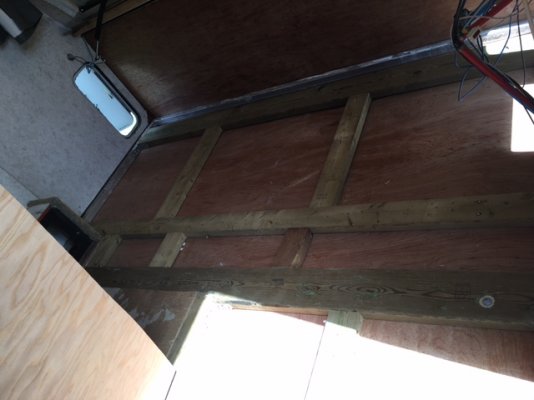
The third shows some of the addition supports added and the foam being placed.  Treated 2x4's were secured from below except where the tanks required screwing from the top.  Not ideal, but still additional support.

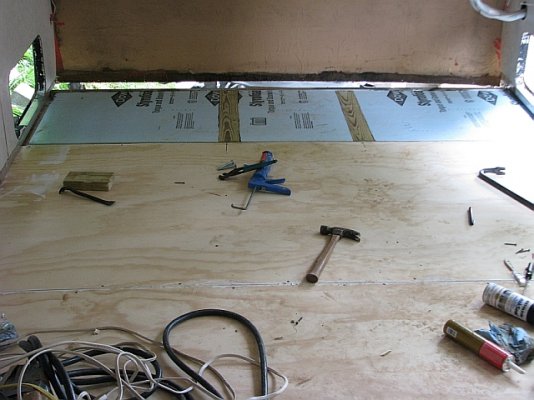
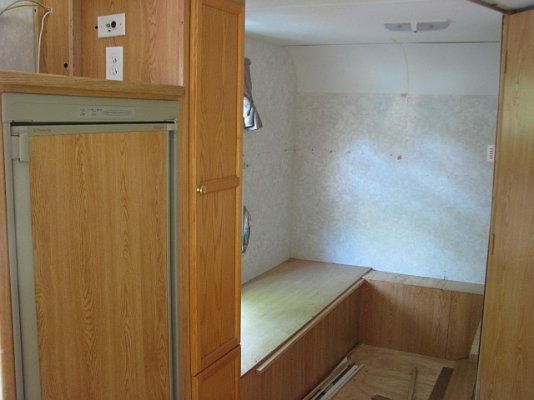
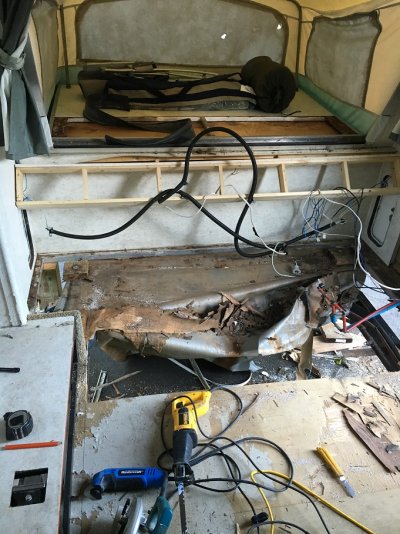
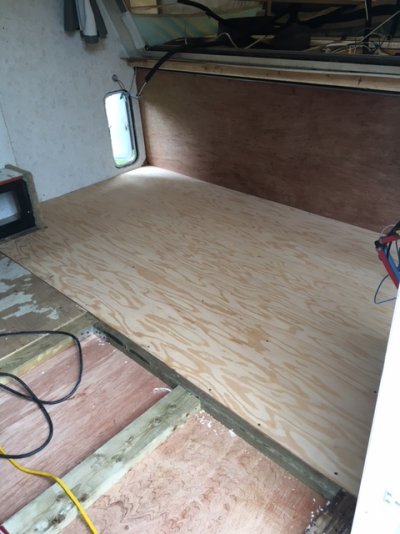
The fourth is the inner floor phase (3/8" sanded ply).  Just the shell is jacked up to allow inserting the planks in the same fashion.
Very dicey and not for the faint of heart.  The 4x4 in the pic was one of two jack points (four jacks).  This one was through the wheel wells.  the camper was currently down and placed on shims to keep the shell sitting flat when down.

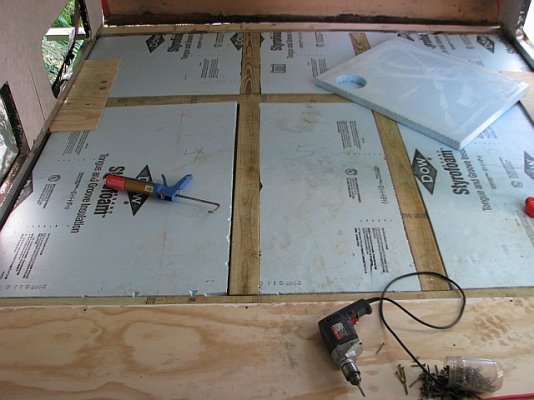
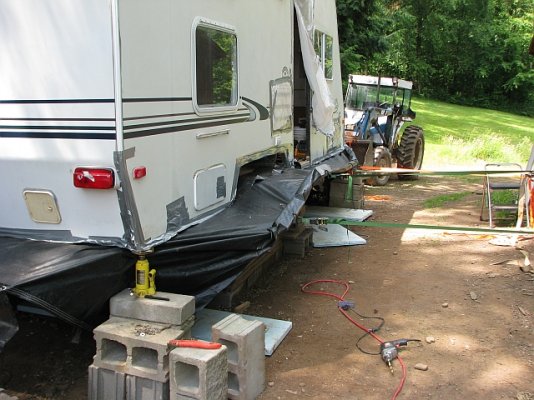
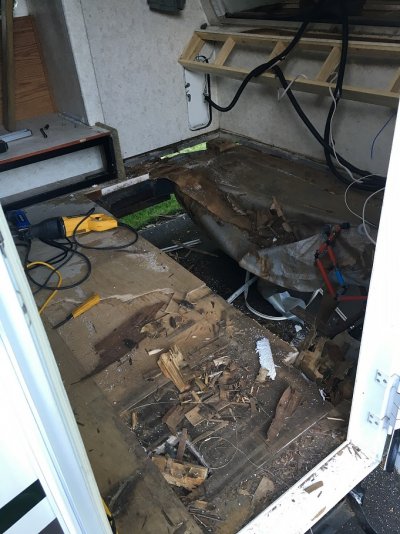
The fifth is more of the same.  The 2x4 running through the front  was the second jack point.

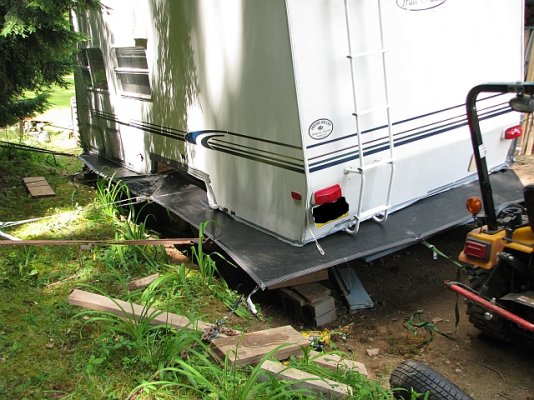
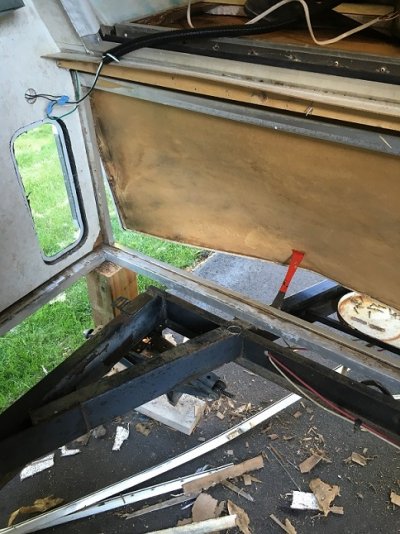
The final pic shows the final board to be placed.  The 4x4 (not shown) was moved through the two storage panel doors to allow access to the front for the final plank.  That one took a while to figure out and be confident of the out outcome. 

All in all it appears to have worked out well, but turned out to be VERY time consuming.  About 43 hours in all to replace the floor in its current condition, which is still technically incomplete.
 

Attachments

  • IMG_0455_small.jpg
    IMG_0455_small.jpg
    296.6 KB · Views: 120
  • IMG_0454_small.jpg
    IMG_0454_small.jpg
    271.3 KB · Views: 118
  • IMG_0456_small.jpg
    IMG_0456_small.jpg
    246.5 KB · Views: 108
  • IMG_0457_small.jpg
    IMG_0457_small.jpg
    277.9 KB · Views: 102
  • IMG_0458_small.jpg
    IMG_0458_small.jpg
    251.4 KB · Views: 95
  • IMG_0459_small.jpg
    IMG_0459_small.jpg
    249.3 KB · Views: 108
Yesterday was layout the membrane day.
Or as I called it @$!$$@@ day. ::)

This morning was stretch the membrane day, which went far better.

The redneck method pictured below. ;D


Attachments

  • IMG_0462_small.jpg
    IMG_0462_small.jpg
    296.8 KB · Views: 116
  • IMG_0463_small.jpg
    IMG_0463_small.jpg
    285.5 KB · Views: 101
  • IMG_0464_small.jpg
    IMG_0464_small.jpg
    293.4 KB · Views: 96
  • IMG_0465_small.jpg
    IMG_0465_small.jpg
    297.1 KB · Views: 101
  • IMG_0466_small.jpg
    IMG_0466_small.jpg
    272.2 KB · Views: 104
  • IMG_0467_small.jpg
    IMG_0467_small.jpg
    264.5 KB · Views: 105
Unbelievable your your going back with that type of membrane. My patience would have run out at the mention of membrane.
great job!
 
tc tom said:
Unbelievable your your going back with that type of membrane. My patience would have run out at the mention of membrane.
great job!

Curious, why you say unbelievable?
TBH I didn't want to go the membrane route, but the weight of other products concerned me. I am already adding more weight to the floor than the original design.  The corrugated stuff was appealing, but the trailer design just didn't work.  So alas it was the membrane.  I managed to find a heavy duty commercial type tarp remnant used for flat beds for $90, so I grabbed it.  Hopefully it will do the job. 
 
Nothing too interesting to report.  The wheel wells were a real pain.  The outside is about 85% closed up.  Still need to come up with a plan for some type of "skirt" for around the lower edge of the trailer.  This is an extra that i want to  add to shed as much water as possible from the bottom corners/edges. 

Tomorrow I need to get the holding tanks back in, seal all around where the bottom membrane meets the edging, possibly get the fender flares back on.

At that point I may get the rough plumbing back in, and start getting the inside back together, and wait on the skirt.  Some time away from it may yield a better plan.


Sort of an observation update.

I noticed when I was gutting the inside some minor water marks under the tub support, and some staining along the rear wall.  Nothing much really.  Now that I am placing everything back inside and paying closer attention, it appears to me that someone may have over flowed the tub.  Just above the lip of the tub there is a sizable gap in the wall and frame.  Probably about a 1/2" where an aluminum cross member runs along the back and where the camper wall makes a bend.  It eventually becomes part of the support system for the bed, and is hidden when everything is in place.  So basically an aluminum runner where water can run along an eventually down the wall.
At the floor there is another gap where a significant amount of water could easily finds its way under the floor to the bottom board.  The damage in that portion of the camper was minimal and almost not worth worrying about if it were not for the trashed bottom board.  So it appears that if the tub was overfilled (forgotten) trapped water could easily have damaged the bottom board.  Hoping that was a significant cause of the damage.

Hope springs eternal.  ;)
 
So, all in all things are  proceeding.  Eventually I will update with some pictures.  The inside is mostly together.
I remain hopeful that by weeks end I will be taking the TT for a test pull.  Lots of small issues need addressing, but the major items are complete, and i'm just trying to get everything functioning for a pull for an hour or so I can see if there are any major issues or if something isn't functioning afterwards.

Don't give up on me....I'm almost there 8)
 
Well finally it is beginning to look like a camper again.
Most everything is completed inside.
The trim still needs to be placed, some flooring, and some repairs I wanted to do to the bathroom because I'm a glutton for punishment.

Wired up everything a few days ago, and zero problems. :)

Probably another week of messing around.

I took it for a 2 hour haul today, and everything felt good. Everything still functions, so it's on to the final phaze....hopefully.

What a project.


Attachments

  • IMG_0468_small.jpg
    IMG_0468_small.jpg
    230.5 KB · Views: 79
  • IMG_0469_small.jpg
    IMG_0469_small.jpg
    231.5 KB · Views: 74
  • IMG_0470_small.jpg
    IMG_0470_small.jpg
    250.6 KB · Views: 76
Some finish pictures hopefully coming soon.
The only thing left is to place some some trim, and give her a good bath inside and out. :)
 
Apologies to those that may be waiting for some pics.
Just been real busy and when I did try to take a couple shots the batteries in my camera were dead.

I'm taking her on a quick trip this weekend and will update with pics when I get back.

BTW thank you to all that replied and those that have been reading this thread.
 
Gods Country said:
Apologies to those that may be waiting for some pics.
Just been real busy and when I did try to take a couple shots the batteries in my camera were dead.

I'm taking her on a quick trip this weekend and will update with pics when I get back.

BTW thank you to all that replied and those that have been reading this thread.

Amazing job! I can appreciate the amount of work, sweat and frustration that went into this having done a floor replacement earlier this summer. I wish I stumbled on this thread earlier as it would have been a great reference. I was under a bigger time constraint which didn't allow me to remove all of the insides, in addition I have a slide which made some of the work tricky. I ended up replacing the front half as it was completely rotted through. Although it proved to be a saving in terms of materials and time, it also limited my choices in how I could tackle the project as I had to match the height of the existing floor. I ended up welding a couple of support beams underneath to the frame and recreating the foamboard sandwich.  As couple of folks pointed out, it's a miracle the body doesn't blow off the frame while towing especially when the bottom structure has been compromised by water and rot. In case of my HTT (2003 Starcraft TravelStar 21SSO) the way it is secured to the frame is by 6 2x6 blocks which are maybe 6" long and were embedded into the styrofoam sandwich and screwed into the frame with carriage bolts. When I was doing the demo. everything around the 2x6 block just crumbled in my hand leaving the entire front half only supported by the outer aluminum frame which as I'm sure you're aware is not strong at all. Crazy!
 
Well pulled the trailer a week ago for a few days.  About 600 mile round trip.  Everything seems fine thus far.
Everything functioned, and still does.  No apparent shifting or settling thus far.

We have a couple fall trips planned.  One to Maine and one to WV.  Hopefully everything goes well.

Haven't tallied the final cost, but it's going to be in the ballpark of $1,500.  About $500 over what I expected.
Mostly due to the countless $40 trips to the hardware store, and changing/fixing things as I went along.

The job has been complete pretty close to a month now, and came out to about 225 hours. :eek:

Clearly I'm insane.

This thing better last 10 years, or there is going to be a big bonfire.

So with no further ado some final pics, and the haul vehicle thrown in for good measure.

I hope to never have to update this thread again. ;D
 

Attachments

  • IMG_0476_small.jpg
    IMG_0476_small.jpg
    286.6 KB · Views: 65
  • IMG_0478_small.jpg
    IMG_0478_small.jpg
    213.7 KB · Views: 57
  • IMG_0479_small.jpg
    IMG_0479_small.jpg
    260.3 KB · Views: 61
  • IMG_0480_small.jpg
    IMG_0480_small.jpg
    248.1 KB · Views: 55
  • IMG_0481_small.jpg
    IMG_0481_small.jpg
    238.1 KB · Views: 56
  • IMG_0482_small.jpg
    IMG_0482_small.jpg
    287.6 KB · Views: 57
  • IMG_0483_small.jpg
    IMG_0483_small.jpg
    253 KB · Views: 58
  • IMG_0484_small.jpg
    IMG_0484_small.jpg
    336.8 KB · Views: 54
slavco said:
Amazing job! I can appreciate the amount of work, sweat and frustration that went into this having done a floor replacement earlier this summer. I wish I stumbled on this thread earlier as it would have been a great reference. I was under a bigger time constraint which didn't allow me to remove all of the insides, in addition I have a slide which made some of the work tricky. I ended up replacing the front half as it was completely rotted through. Although it proved to be a saving in terms of materials and time, it also limited my choices in how I could tackle the project as I had to match the height of the existing floor. I ended up welding a couple of support beams underneath to the frame and recreating the foamboard sandwich.  As couple of folks pointed out, it's a miracle the body doesn't blow off the frame while towing especially when the bottom structure has been compromised by water and rot. In case of my HTT (2003 Starcraft TravelStar 21SSO) the way it is secured to the frame is by 6 2x6 blocks which are maybe 6" long and were embedded into the styrofoam sandwich and screwed into the frame with carriage bolts. When I was doing the demo. everything around the 2x6 block just crumbled in my hand leaving the entire front half only supported by the outer aluminum frame which as I'm sure you're aware is not strong at all. Crazy!

I'm shocked just how poorly these things are put together.  Not so much the manufacturing process, but how they are secured to the trailer.  I like to think mine is secured many times better than the original design.
The only thing I can figure is they easily push out of the way on the ball when encountering high winds.  If they were anchored they would blow off the frame like nothing.

Just before my demo we spent 9 days travelling to the Smokies, Memphis, Kentucky and West Virginia.  I had some really bad cross winds travelling from Memphis to Kentucky from a prolonged storm/rain event.....real bad.
And brief heavy cross wind from a severe storm that I just missed crossing into WV.  There was enough hail on the ground it looked like it snowed. 

So somehow they stay on. 

Have fun with your TT

 
Do you have antisway bar on it? I have one on mine and find it really helps. We ended up moving between parks last trip out, and since it was only a 40 minute drive out of laziness I didn't bother putting the bar on. Could totally notice the difference on the highway and it wasn't a very windy day.

You're right, the way they put these together makes them almost disposable once water gets in.. that's probably what they count on, otherwise people would hang on to their TTs forever. I think the cost increase and extra weight would be minor to do it right. Here's some pics of my reno :)


Attachments

  • 2016-06-14_231116568_23411_iOS.jpg
    2016-06-14_231116568_23411_iOS.jpg
    258.7 KB · Views: 43
  • 2016-06-14_231127376_8DAD1_iOS.jpg
    2016-06-14_231127376_8DAD1_iOS.jpg
    294.1 KB · Views: 37
  • 2016-06-14_231140585_74D6D_iOS.jpg
    2016-06-14_231140585_74D6D_iOS.jpg
    272.1 KB · Views: 39
  • 2016-06-17_224437138_5CF88_iOS.jpg
    2016-06-17_224437138_5CF88_iOS.jpg
    158.4 KB · Views: 35
  • 2016-07-17_180442020_3D569_iOS.jpg
    2016-07-17_180442020_3D569_iOS.jpg
    169.2 KB · Views: 30
  • 2016-07-17_180453929_BB104_iOS.jpg
    2016-07-17_180453929_BB104_iOS.jpg
    244.5 KB · Views: 32
  • IMG_0708.JPG
    IMG_0708.JPG
    86.4 KB · Views: 30
  • IMG_0710.JPG
    IMG_0710.JPG
    130.3 KB · Views: 30
slavco said:
Do you have antisway bar on it? I have one on mine and find it really helps. We ended up moving between parks last trip out, and since it was only a 40 minute drive out of laziness I didn't bother putting the bar on. Could totally notice the difference on the highway and it wasn't a very windy day.

I do have a friction sway bar.  I typically don't use it, and don't find it necessary most of the time, but the time I described I kept saying to myself I should pull over and place the sway bar.  It was a very busy stretch of interstate, and between the road and weather conditions I felt it was safer to not pull over along the shoulder.
I just slowed down and the sway was controllable.  I guess i should use it on interstates just in case.  I tend to be forgetful, and know I will forget to remove it when jacking the trailer around in a tight spot, getting gas or something.

Looks like you had fun with your TT.

It's a love/hate relationship to be sure.
 
Gods Country said:
I do have a friction sway bar.  I typically don't use it, and don't find it necessary most of the time, but the time I described I kept saying to myself I should pull over and place the sway bar.  It was a very busy stretch of interstate, and between the road and weather conditions I felt it was safer to not pull over along the shoulder.
I just slowed down and the sway was controllable.  I guess i should use it on interstates just in case.  I tend to be forgetful, and know I will forget to remove it when jacking the trailer around in a tight spot, getting gas or something.

Looks like you had fun with your TT.

It's a love/hate relationship to be sure.

Love / hate is absolutely right. I did enjoy working on it as it was a good challenge. The toughest part was trying to figure out how to support the floor properly as there were no support  cross beams at all. Welding a couple of square steel tubes did the trick and the floor is solid. I think the extra 20-30lbs of weight were worth it.
I still have a couple of trips planned for this year so definitely worth all the sweat and tears that went into this project :)
 
you really don't want to use marine plywood, the way its made it to retain some moisture, putting it in a closed space will dry it out and actually create soft spots when it starts to decay as well as tons of shrinkage and its like $80 a sheet, depending on the floor system you have and its thickness you can use regular plywood that's whats in my class a once your done make sure you get it professionally under coated.
If you have no leak when hooked up to city water under pressure it could be a drain line, if it stinks its a black water line, if it doesn't probably grey water, you can get a test ball at any plumbing supply store and put a test on the drain lines to check.
I would also consider seeing if your missing some of the factory under coating, the water coming off the wheels in the rain could be the issue as well as a leaking roof, window, door etc.
Resealing the windows is quick, easy and cheap, something I plan to do every few years if it needs it or not.

Gods Country said:
Thanks for the reply Reggie.  The floor design sounds pretty much the same.  I'm still not sure where the water is coming from.  I have been watching it very closely the past two years and have never seen a single drop of water inside the actual camper, so I am assuming for the moment that the windows and perhaps bottom edging around the periphery are suspect.  But I will figure it out.....it's paramount.

I am hoping to find marine plywood, but my area is very rural.
 

Latest posts

Forum statistics

Threads
131,973
Posts
1,388,464
Members
137,722
Latest member
RoyL57
Back
Top Bottom