What to use on aluminum Roof

The friendliest place on the web for anyone with an RV or an interest in RVing!
If you have answers, please help by responding to the unanswered posts.

markhodges78

Member
Joined
Sep 17, 2016
Posts
7
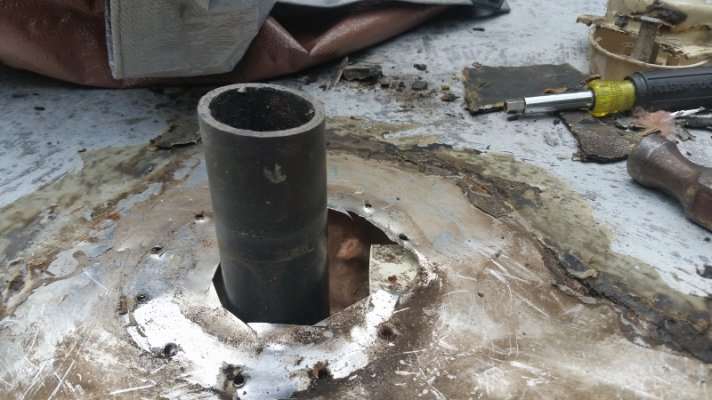
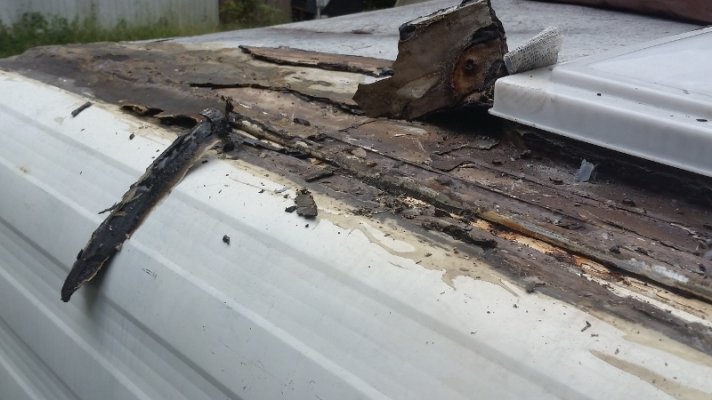
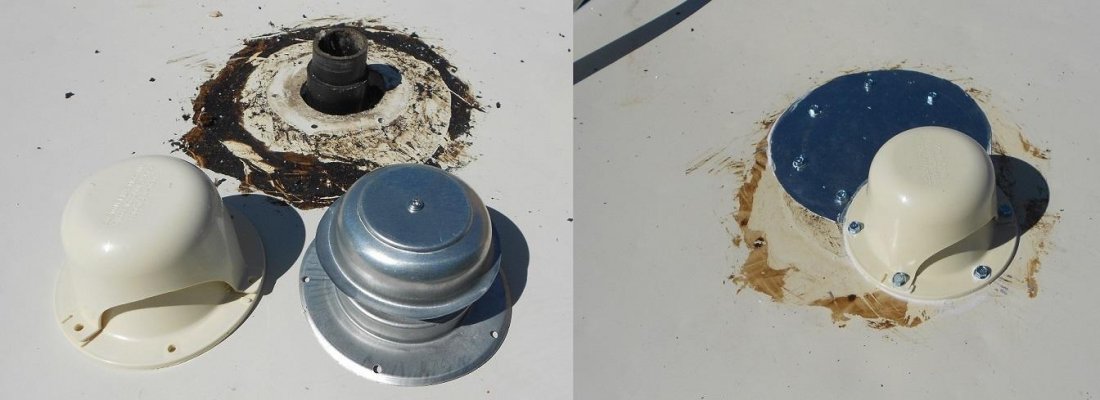
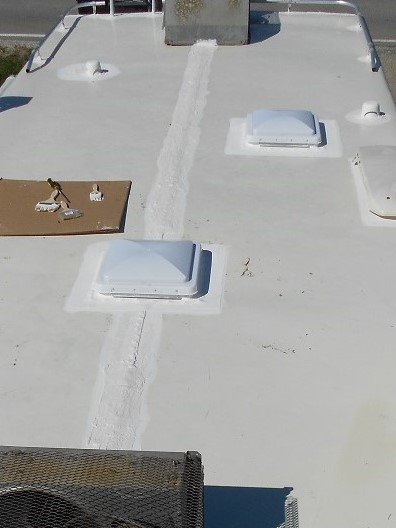
I have a 1984 Skyline Weekender I have been debating on painting / sealing it with something. Today I came home to find I have leaks in the front and the back I believe the leaks are coming from the seams running across at both ends My ? is what can I use to seal the seams I was thanking about using OSI GS121 It says its for Gutter & seam sealant then I was gonna cover it all with some Henry's 887HS Tropi-Cool but looking to see what you guys say..

Thanks Mark
 
The seams are a metal-to-fiberglass joint, right? Any gutter seal (usually butyl caulk) should work fine, but so would regular Dicor RV lap sealant. Likewise one of the roof tapes (Eternabond or Di-seal) should also be fine.

Since the roof is metal, the Henry's product is OK for a top-coat.
 
This unit is aluminium siding as well as roof so it's aluminum to aluminum so I was gonna use the gutter sealer fur the joint then the Henry's  ..  will the Henry's be ok even though it's silicon base


Gary RV Roamer said:
The seams are a metal-to-fiberglass joint, right? Any gutter seal (usually butyl caulk) should work fine, but so would regular Dicor RV lap sealant. Likewise one of the roof tapes (Eternabond or Di-seal) should also be fine.

Since the roof is metal, the Henry's product is OK for a top-coat.
 
Ok so it looks like the previous owner put a few different things on the roof to try and fix also the hole in the roof for the vent as you can see is to big for the roof vent to cover how would i go about fixing this. oh and it is for sure leaking at the seam going  across the camper as well as other places like the vent penetration .. any help would be great

Thanks mark
 

Attachments

  • 20160920_175409 (800x450).jpg
    20160920_175409 (800x450).jpg
    281.3 KB · Views: 32
  • 20160920_175428 (800x450).jpg
    20160920_175428 (800x450).jpg
    275.1 KB · Views: 23
  • 20160920_175435 (800x450).jpg
    20160920_175435 (800x450).jpg
    226.6 KB · Views: 29
I recently moved a vent 3" and had a hole similar to yours. I used the end of an 8" furnace pipe cap as a patch with a notch cut in the edge to fit up against the pipe. I had the furnace pipe cap laying around so I used it. After I sealed things down I covered the area with Dicor tape then went over that with Dicor sealer for a metal roof.

In the second pic it is the vent on the left.
 

Attachments

  • DSCN5650small two.jpg
    DSCN5650small two.jpg
    72.3 KB · Views: 23
  • DSCN5656small - Copy.jpg
    DSCN5656small - Copy.jpg
    109.5 KB · Views: 23
Looks to me like you need to replace the metal sheeting, or at least that section of it. Any aluminum or galvanized sheet you can fit in there will do the trick. Seal up the edges with a lap sealant.
 
Ok guys some updated photos

http://s86.photobucket.com/user/markhodges78/library/camper%20repair
 
Does what I have done so far look acceptable to you guys I still have the front seam to do as well and another sewer vent ,,,
 
Yeap. The real test, though, is how it holds up after a few trips. Those repaired seams could pull apart again as the body of the RV flexes and those seams "work" to some degree.
 
Back
Top Bottom