Heli_av8tor
Well-known member
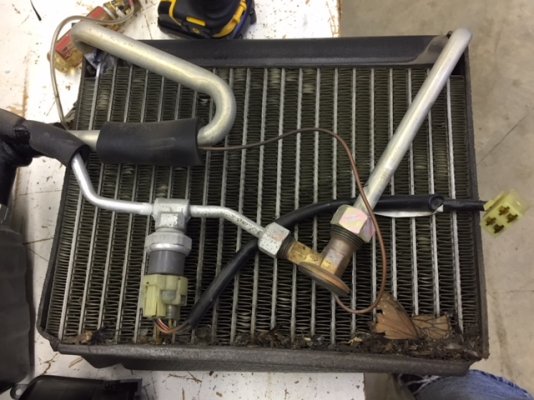
Diagnosing my dash A/C problem led me to a bad Expansion Valve. I looked high and low on the web for instructions on getting to this part but couldn't find anything. It appeared that it may be a major undertaking. After digging into it the job proved to not be so bad.
Here's what it took:
1. Remove Passengers Captain Chair - 4 bolts. (May not be absolutely necessary for younger, more nimble bodies!)
2. Remove Passenger Table and Drawer - standard drawer slide release clips. (Gives better access)
3. Remove Passenger Kick Panel - 4 screws and 120v outlet.
4. Remove Evaporator Coolant Lines - access from under the front hood. (Assuming here that you have legally removed the 134a.)
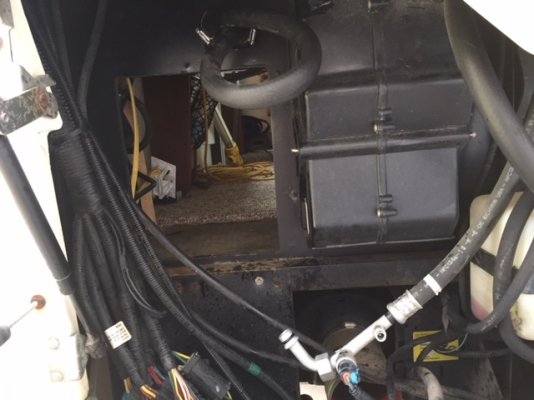
5. Unplug numerous harness connectors around evaporator housing
6. Remove 5 screws around evaporator housing
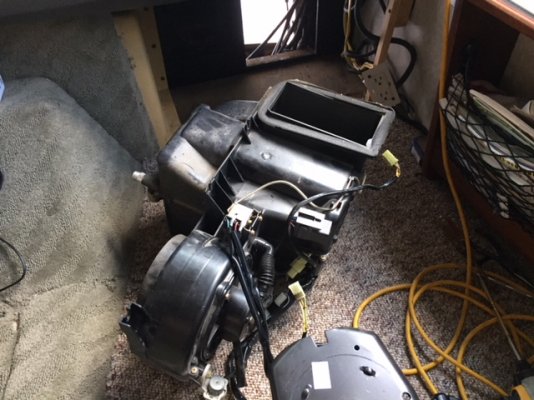
7. Pull evaporator unit out with blower attached.
This part of the system is installed by the coach builder so yours may not be identical but I imagine most would be similar.
Oh, if you are wondering if the new expansion valve fixed the problem I will tell you that I have a very good used one in inventory now.")
Here's what it took:
1. Remove Passengers Captain Chair - 4 bolts. (May not be absolutely necessary for younger, more nimble bodies!)
2. Remove Passenger Table and Drawer - standard drawer slide release clips. (Gives better access)
3. Remove Passenger Kick Panel - 4 screws and 120v outlet.
4. Remove Evaporator Coolant Lines - access from under the front hood. (Assuming here that you have legally removed the 134a.)
5. Unplug numerous harness connectors around evaporator housing
6. Remove 5 screws around evaporator housing
7. Pull evaporator unit out with blower attached.
This part of the system is installed by the coach builder so yours may not be identical but I imagine most would be similar.
Oh, if you are wondering if the new expansion valve fixed the problem I will tell you that I have a very good used one in inventory now.