Adventurer ceiling construction

The friendliest place on the web for anyone with an RV or an interest in RVing!
If you have answers, please help by responding to the unanswered posts.
^^ Winniebago's roofs aren't rubber but a sandwich of Filon, Luan, Styrofoam, Luan, and the headliner ^^

Back to the OP's question - I'm amazed you can't find a qualified shop/person in SW Florida to do a major roof job. Considering your scenario, I would take the money and run.
John,

I am also surprised there is no one around here willing or capable of doing the work. I went to LaMesa RV, the local Winnebago dealer in town and they told me that doing a Winnebago roof all the way down to the ceiling requires pulling the roof, and is so much work, their estimate would be so high, the insurance company will total it. The guy who does their roof work is the one that says he will repair it in his own facility, but he will have to buy lifts, and he has never replaced a ceiling before and isn't sure how he will do it. That doesn't give me a lot of confidence. But it seems like there should be someone who does this type of work for a living. The guy who does all the roof videos on YouTube, AZ RV Repair, just closed his doors on March 1st due to a lack of business from Covid. I am beginning to wonder if I'll begin to have difficulty finding parts for this unit, given its age.

I am now wondering if it would be a good idea to let the insurance company total it, then buy it back from them for salvage value and get only the outside roof replaced or coated with Flex Armor. If the ceiling doesn't give us any health issues, we could use the coach for a few more years and then sell it for what we paid for it with a salvage title. But that's guessing the current salvage value would be around $15,000.
 
I'll ask my contact but I suspect a replacement roof for the Vectra/Horizons is unobtanium .

If a replacement fiberglass roof is no longer available, I know a guy in Arkansas that will remove what's left of the old roof, fabricate rounded edges from flashing and install a rubber membrane. When he's done, you can't tell is wasn't original. He did it for my BIL's Adventurer. Not sure what it costs, but it was cheap enough that the insurance didn't total the coach (and it's a 2000 model).
 
If a replacement fiberglass roof is no longer available, I know a guy in Arkansas that will remove what's left of the old roof, fabricate rounded edges from flashing and install a rubber membrane. When he's done, you can't tell is wasn't original. He did it for my BIL's Adventurer. Not sure what it costs, but it was cheap enough that the insurance didn't total the coach (and it's a 2000 model).
I need to find someone like that down here in Florida since I can't take the chance of driving the coach all the way to Arkansas and getting hit by rain.
 
I need to find someone like that down here in Florida since I can't take the chance of driving the coach all the way to Arkansas and getting hit by rain.
Yeah, my BIL lost about 15' of the fiberglass roof in a bad storm. Took his freshly installed Fantastic vent fan for a ride across the truck stop parking lot.
He ended up throwing a tarp over the coach in the middle of the storm. There was some luan repair my buddy had to do before he put the rubber membrane on.
The tricky part, to me, was the rolled edges. My bud has a press break so he gets regular roof flashing from the home improvement store and runs it through the roller part of the press brake to get the rounded contour. I think there are some pics floating around the forum of a Winnie with the roof removed, which would give you an idea of why the flashing is necessary.

I never actually saw the thing until it was repaired. At that point, you couldn't tell the difference between the repaired roof and the roof on my coach, which came from the factory with a rubber roof.
 
Well, it's taken nine months to come to a conclusion to this story, but today, the insurance company told me that regardless of how much it costs to repair the roof and ceiling, they have decided to total our coach. The good news is they are giving us the same thing we paid for it seven years ago. The adjuster is supposed to call me again tomorrow and discuss the salvage price if we want to repurchase it after they pay off the loan's remaining balance. If their price isn't too high, we'll be able to buy it back, get the roof sprayed with Flex Armor, do some spot work inside wherever there appears to be mold, and still have our coach for future trips around the country.

John Canfield - the insurance adjuster told me that he thinks after an RV is 6 or 8 years old, the state no longer issues salvage titles. If so, how do I transfer ownership when I want to sell it?
 
John Canfield - the insurance adjuster told me that he thinks after an RV is 6 or 8 years old, the state no longer issues salvage titles. If so, how do I transfer ownership when I want to sell it?
Check with Florida's motor vehicle department for their regulations about RVs. Could be if Florida won't issue a salvage title another state might.
 
Buy it back and look at these guys.
I've done a comparison of RV Armor and Flex Armor. It appears Flex Armor, although about $600 more, has a superior product and is considerably thicker. I'll be doing more research into both companies today.
 
It's been 14 months, but it appears this nightmare is finally ending.

We got the salvage title from the insurance company. I filled out all the paperwork and drove it 90 miles to Palmetto, Fl, not trusting the mail, and hand-delivered it to the Department of Highway Safety and Motor Vehicles. The supervisor reviewed it, said it was filled out perfectly, and made an appointment for this coming Tuesday for me to drive the coach to them for inspection. He already stated that he knows it will be a waste of his time because the coach has always been roadworthy.

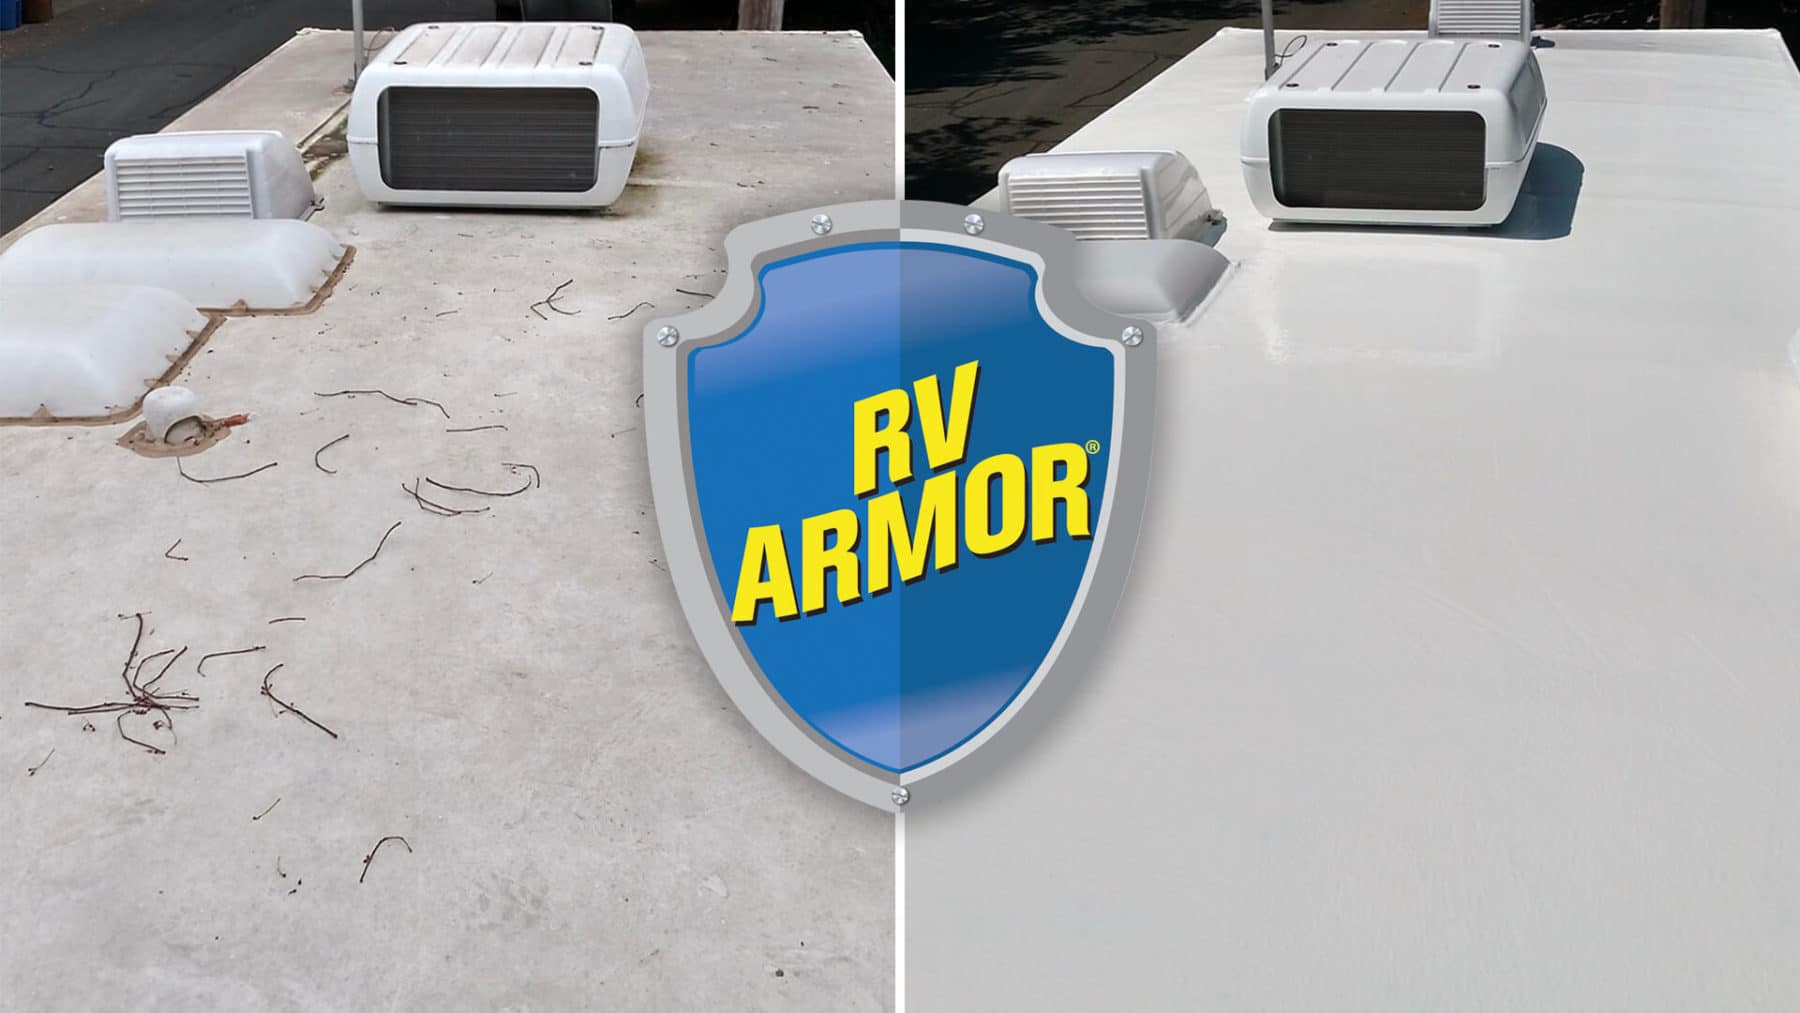
The RV Flex Armor was installed and they did a reasonably clean job of it. They had to replace three sheets of luan before spraying it on. Apparently, there was a lot of water in the styrofoam because I'm still getting the small flakes dropping out of the a/c vents when I'm cooling the coach. I assume that is due to the foam getting wet and then drying out.

The ceiling fabric is stained from the luan getting wet more than we thought. We couldn't extend the main living room slideout due to the hydraulic cylinder blowing, so we couldn't see the stain all the way down the side of the roof the entire length of the slideout. We are going to attempt to remove the stains with a 50/50 solution of bleach water. We will cover every square inch of the coach below where we spray. If that doesn't get rid of the stain, I'll live with it. The luan over the shower around the skylight needs to be replaced, and we will get to that after our upcoming trip to the Midwest.

Since I have read that when one hydraulic cylinder blows out, the rest will usually follow suit, I had my coach mechanic rebuild all six for the front two slideouts. He also found my electrical problem was the hitch plug shorting out, the gas portion of the water heater stopped working due to the control board going bad, and he found my 12v DC dash plug didn't work because of a bad connection. The steps stopped working because the pivot pin broke. I couldn't find anyone who would fabricate one, so I was forced to have LaMesa RV in Fort Myers order new steps. The old ones were in bad shape anyway, and we had been babying them with a lot of white lithium grease, so it didn't bother me to have to replace them. What did bother me was the charge - more than $2,000 for a set of steps installed.

While driving the coach home from the shop, the ABS light came on and the left rear brake seized. I had to have the coach towed back to the shop, where they could not replicate the problem. That is worrisome, but they flushed the fluid completely, tore down the caliper from that wheel, found nothing wrong, and put everything back together. One of the four pistons on the caliper was a little sticky and slow to respond until they cleaned and actuated it, and they think that may have been the problem. The system now has new brake fluid.

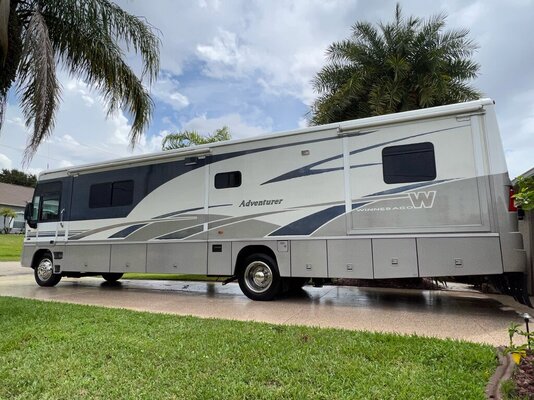
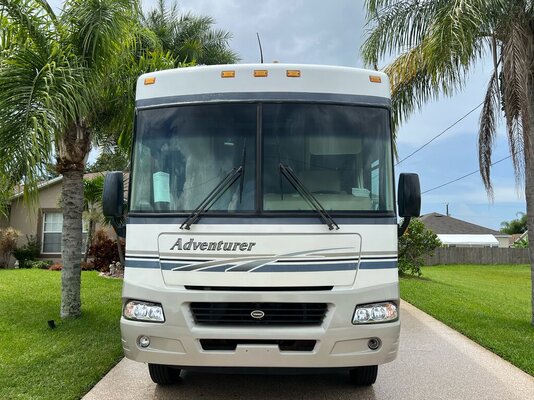
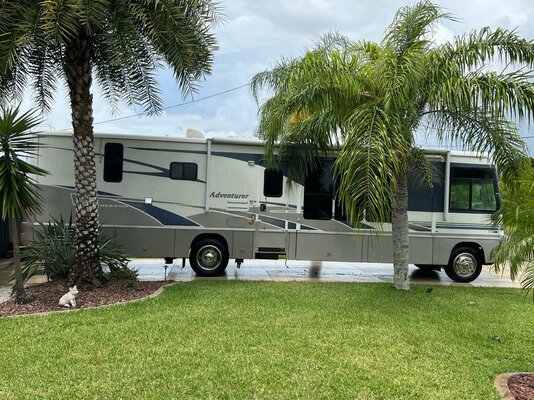
Since I reinjured my back, I hired a man to wash, wax, and buff the coach. It was expensive since nothing had been done to the body for over a year, but he got it looking very good.

By the time I pay the sales tax and registration fees for the new license plate after the coach has been inspected, I will have put in almost as much as the insurance company gave me above the repurchase price of the coach. I'll still be ahead though since my loan is now paid off. We will take the coach for a drive to the Midwest and hope nothing else is wrong with it after sitting in a shop for nearly a year. New house batteries had to be purchased this week since the coach mechanic who stored it for me didn't exercise the generator as often as I would have liked. But it now appears to be the end of this long road. Maybe it will be smooth sailing for a little while.
 

Attachments

  • IMG_1860D.JPG
    IMG_1860D.JPG
    207.3 KB · Views: 14
  • IMG_1861.JPG
    IMG_1861.JPG
    224.8 KB · Views: 14
  • IMG_1862.JPG
    IMG_1862.JPG
    296.8 KB · Views: 14
  • IMG_1863D.JPG
    IMG_1863D.JPG
    123.3 KB · Views: 14
John, you get an A+ for your tenacity getting your coach squared away. I spent a year off and on getting our Horizon ready to sell which involved dropping the basement air twice (long story) so I've been through some of what you have gone through so a big tip of the hat to you.

Thanks for keeping your thread updated as I think this will be a valuable resource for those who follow in your footsteps.

Your Adventurer looks like it just rolled out of Big Bertha but it's a shame you have staining in the interior.
 
While you lost a lot of use of a rv and the experiences of travel, at least the cost of fuel has come down a bit during the time that your rv work was taking place. [One way to look at it anyway] But at least you know what you have now. The mechanics of the motor home could be the same on another one of that age too. So I take that as part of the territory.

If you wish to deal with stains in the inside, find some oil base Kilz and prime it. Its different than the water based paint. The can label is white with only red lettering, unlike the blue lettering on the waterbased cans. That stuff is bullet proof as long as you do not have any mushy and damp mold still lingering. But this has been used over the years inside of houses on the older typical ceiling panels that stained. Then paint if with some Benjamin Moore Satin or Semi gloss paint.

That stuff works wonders and a novice cannot mess it up. Tape off the edges and you may need to touch up the edges with a brush, which is not big deal. In an unopened can of the Kilz, have the store shake it really well to get the bottom silica to mix evenly. Then when applying it thin it a bit with some mineral spirits, not paint thinner to make it flow better. It dries quickly upon contact. So I roll it with a donut roller when painting overhead, which allows me to apply it a bit thinner for multiple coats. It may take a couple of coats. Beware the oil base does have some fumes related with it when its being used inside.
 
John, you get an A+ for your tenacity getting your coach squared away. I spent a year off and on getting our Horizon ready to sell which involved dropping the basement air twice (long story) so I've been through some of what you have gone through so a big tip of the hat to you.

Thanks for keeping your thread updated as I think this will be a valuable resource for those who follow in your footsteps.

Your Adventurer looks like it just rolled out of Big Bertha but it's a shame you have staining in the interior.
John, thanks for the compliment. I had no idea you sold your Horizon. Are you getting another coach soon?
 
While you lost a lot of use of a rv and the experiences of travel, at least the cost of fuel has come down a bit during the time that your rv work was taking place. [One way to look at it anyway] But at least you know what you have now. The mechanics of the motor home could be the same on another one of that age too. So I take that as part of the territory.

If you wish to deal with stains in the inside, find some oil base Kilz and prime it. Its different than the water based paint. The can label is white with only red lettering, unlike the blue lettering on the waterbased cans. That stuff is bullet proof as long as you do not have any mushy and damp mold still lingering. But this has been used over the years inside of houses on the older typical ceiling panels that stained. Then paint if with some Benjamin Moore Satin or Semi gloss paint.

That stuff works wonders and a novice cannot mess it up. Tape off the edges and you may need to touch up the edges with a brush, which is not big deal. In an unopened can of the Kilz, have the store shake it really well to get the bottom silica to mix evenly. Then when applying it thin it a bit with some mineral spirits, not paint thinner to make it flow better. It dries quickly upon contact. So I roll it with a donut roller when painting overhead, which allows me to apply it a bit thinner for multiple coats. It may take a couple of coats. Beware the oil base does have some fumes related with it when its being used inside.
I appreciate the advice on painting the ceiling, but I don't think this kind of ceiling fabric should be painted. This is ozite, which is essentially a plastic carpet with fibers that stand up. Painting that would stiffen the fibers and make it look terrible. I have a can of oil-based Kilz, so I know what you're talking about.

If the bleach water solution doesn't get rid of the stains, which I think it will in most places because they aren't that heavy, I will live with them. The only one that has to be cut and replaced will be around the skylight in the shower because the luan underneath must also be cut out and replaced. I found two distributors who still sell ozite in my color (white) by the foot, so I'll buy as much as needed and try to patch the ceiling in that area. My biggest concern right now is finding the correct thickness of luan to replace whatever I take out. It is basically thin plywood, but difficult to find around here in SW Florida.
 
It sounded like your ceiling was a wainscoting panel in your initial post that created a sandwiched roof section. Check out several boat material outlets. Most of the big box stuff is not fitting for short term doghouses.

There are two outlets on the west coast.
They are showing only 1/4" as the thinnest in marine plywood.

These people sell boat kits, but may be able to find something thinner too in marine grade plywood. They may sell you something that they use for their kits, if they have the sizes.

This outlet in on the east coast, if you wish to take a drive.
They have very durable 4mm meranti plywood.


This is another link.


They also sell 1/4" meranti plywood.

They sell 4mm Okoume, which is not as durable, but thinner. They are also on the east coast of Florida.
 
John, thanks for the compliment. I had no idea you sold your Horizon. Are you getting another coach soon?
No, we're done RVing, the spirit is willing but the body is weak ;). I had my left shoulder joint replaced two years ago, then my left knee last November and now I need to replace my right knee. Hopefully I can get it replaced next month. Not looking forward to that - the first two weeks post surgery was very, very hard on me. And then physical therapy - UGH.

A word about Kilz - the water based product does not stop weeping from sap. We had a three car garage built a couple of years ago and instead of drywall I had 1/2" plywood used on the walls. I did the painting and used Kilz as a primer - after about a year there were little brown spots showing up. Very disappointed in that product. Should have gone oil based.
 
Good luck with the knee, John. I've had a knee, one hip and one shoulder replaced. My spirit won't quit either. Stick with it and keep on going. Wishing you the best.
 

Latest posts

Members online

Forum statistics

Threads
131,972
Posts
1,388,452
Members
137,722
Latest member
RoyL57
Back
Top Bottom