Atwood water heater leak

The friendliest place on the web for anyone with an RV or an interest in RVing!
If you have answers, please help by responding to the unanswered posts.

Bobtop46

Well-known member
Joined
Mar 11, 2011
Posts
989
Location
Bronson FL
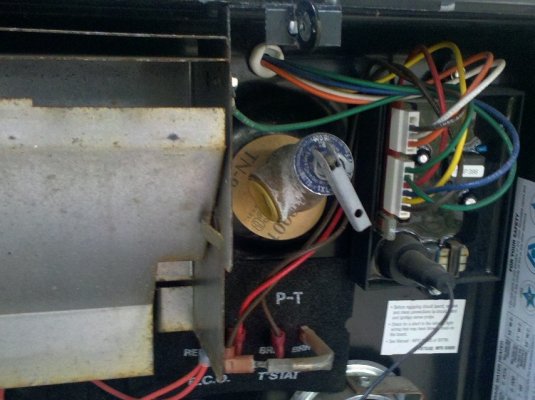
I have a 6 gal Atwood water heater that works great.  The problem that I am having is that it has developed a leak.  It is leaking from the yellow plastic plug near the center and top (picture.)  Here is the strange part it only leaks when the water heater is turned on (i.e. heating)  With the heater off I can run cold water through the hot side of my faucets with no dripping.  If I put on the electic or gas heat when the heater gets to temp the plug starts leaking.  From my experience and without consulting the manual this looks like a relief valve of some kind.  I use a water pressure regulator and an outside water filter. 

Is this as simple as pulling out the old plug and installing a new one???  Thanks for the help 
 

Attachments

  • 2012-10-22_09-31-21_51.jpg
    2012-10-22_09-31-21_51.jpg
    173.6 KB · Views: 58
I'm not sure the plug is available as a replacement part.  Others may know.....

I DO know that the entire valve is easily and cheaply replaceable.

Try opening the valve and letting it snap shut a couple of times.  Sometimes this will stop the leak.
 
I don't even have the yellow plug.

I agrre with Lou,  "try opening the valve and letting it snap shut a couple of times.  Sometimes this will stop the leak."  I also give it a shot of wd40 and work it when I set up and break down for the season, then again my Bride says I'm anal retentive.
 
You may have lost the air cushion in the water heater.  The simplest way to reestablish it is to drain the water heater, then let it fill up again.  This will leave an air cushion that allows the water to expand when it heats.  The valve you see is the Temperature/Pressure relief valve and may be doing exactly what it's intended to do.  The yellow plug is normally removed as that's where the water comes out when the valve opens.

It may be as simple as opening and closing it as Gary suggest.  And as Lou says, it's easily replaceable, but be sure to take the old one with you as RV water heaters use a smaller thread than a household unit.  I think the RV is 1/2" while home units are 5/8", but I do know they are different.  When I replaced ours the RV model cost about 3 times what the household valve did.
 
One of the fun things here is how long the water pump runs after you flush the flusher.

The longer the run, the bigger the air cusion in the acumulator (if you have one) and/or (if you don't) the water heater.

I just drained my heater Saturday night and established a new air cusion .

On my coach, If I re-install the ice maker (I removed it, leaky line and I find I like trays better) If on "Tank" water, 3 burps of the pump is normal ,2 means I just re-did the heater and 4 means I need to.  (When the ice maker cycles).
 
Flushing the toilet, or using any other appliance that uses only cold water, will give no clue as to the state of the air cushion in the water heater.  Misinformation.
 
On one of my previous 5'ers I had the same experience. Snapping the valve closed a few times bought a little time, but eventually I had to replace the valve. Trying to 'reset' the valve and/or  re-establishing an air pocket is good to try first as these are free fixes.
 
The yellow plastic plug is unimportant anyway. Mostly cosmetic, and not the source of the leak. As Ned explained, that assembly is the PT relief valve, and if it is dripping the odds are you have insufficient air head in the tank. Re-establish that first and see if the problem goes away.

It may be that the PT relief valve itself is leaking, but they are usually pretty durable. You can readily replace it if needed - it is a standard plumbing part and not unique to an RV water heater. The new one may even have the little plastic plug with it! Just make sure you get the right thread size.

There are some articles on water heater diagnosis and repair in the RVforum library. Here is one:
http://www.rvforum.net/joomla/index.php?option=com_content&view=article&id=329:water-heater-troubleshooting-and-maintenance&catid=16:rv-how-tos&Itemid=45
 
Update:

Thanks to all.  I did a closer inspection after reading the library yesterday.  I found out tht the plastic plug is nothing more then a thread saver.  I went to camping world and bought the hose attachment for cleaning water heaters and a brass plug.  I pulled the plastic plug, opened the relief valve, and then used the hose attachment to flush out the water heater.  Closed the relief valve, installed the new brass plug and refilled the tank.  I still had the same problem.  So I snapped the relief valve quickly and now no more leak. I will start looking for a new relief valve to be prepared.  I don't like cold showers! 
 
Glad to hear it was a simple fix.  A spare PTR valve is cheap insurance.  I should get one myself :)
 
Ned said:
Flushing the toilet, or using any other appliance that uses only cold water, will give no clue as to the state of the air cushion in the water heater.

Technically I agree with you Ned.  I don't honestly know for sure that there is a check valve on the cold water input on my 10g Attwood but for the purposes of this discussion I'll assume that there is.  Here's the catch:  I use the winterizing bypass to "blend" the hot water coming from my water heater.  Since there isn't any temperature control on my hot water heater I find that the hot water is way too HOT.  By partially opening the bypass it allows the water heater to pressurize both sides of the water system (hot and cold).  By having the bypass partially open turning on a cold water source during a cold start up on the hot water heater will indeed indicate an increase in pressure.

In my opinion the "air space" in these things is a pretty poor design, it looks good on paper but it just doesn't last very long in our situation.  To eliminate the need for re-introducing the air space I installed a one liter accumulator this last spring and I can say that personally I wouldn't have another rig without one.  Is the accumulator absolutely necessary?  Probably not, but it is a very nice addition to the plumbing system.
 
Getting a picture of this thing where it's installed wouldn't do much good but I've included a link at the bottom of this post that will explain a lot I hope.  The accumulator simply installs on the cold side of the plumbing, they're used extensively in the marine industry but for some reason RV manufacturers just don't use them very often.  Basically the accumulator absorbs hydraulic pressure shocks (turning off a faucet quickly) and pressure build ups (within reason) caused by the air space in an RV water heater that has sublimated and gone away.  If you've ever "cold started" your water heater then a half hour later turned on a faucet  and found that you had a pretty good whoosh of pressure come out for a second or two, that's the pressure building up in your entire plumbing system putting a pretty good amount of stress on all those pex lines.  An accumulator will eliminate that pressure spike as it gives the expansion somewhere to go.

The reason I installed this thing is because I had a neighbor a few years ago that was a fulltimer.  Since we were paying a lot for electric at that particular RV park both of us had a tendency to only turn on the hot water heater once a day.  One morning after turning his on, he was sitting at his kitchen table drinking coffee when there was a loud report from under his sink.  Within seconds he was confronted with water running out across the floor from a ruptured water line.  After speaking to a plumber friend of mine in Wyoming he suggested this little trick to reduce the risk of over-stressing the plumbing.

http://www.amazon.com/New-JABSCO-LITER-ACCUMULATOR-INTERNAL-BLADDER/dp/B001IZL3YS/ref=sr_1_2?ie=UTF8&qid=1351525259&sr=8-2&keywords=1+liter+accumulator
 
The  yellow plug is a thread protector, it is installed in the Temp-Pressure Relief valve at teh factory to protect against damage to the internal threads and/or debris entering the valve during storage and handling.

It should have been removed when the valve was installed,  Thus it should be removed now,  Though leaving it in, it appears, won't hurt anything (ff the valve ever lets loose big time the plug will be removed, Techinically the term is "Explosively" (If you don't mind an explosion that is just about strong enough to flip a penny, but might not flip a half dollar).

The air cusion is the normal issue when this happens.. If not the air cusion,, Well TPR valves do, (On occasion) go bat,  They are also standard hardware store items, they come in two sizes one is 1/2 inch (And I think that is what you have) I am not sure of the other.

IF simply draining the heater (Remove the plug at the bottom.. Remove the YELLOW PLUG, and operate the lever on the brass assembly the yellow plug plugs)  STAND BACK,, I like to thread a 1/2 inch pipe in the hole the plug goes in to carry the water out of the compartment.  Flush it with a flush tool if you have one, Or just flush by turning on the water again,, Then once drained, close the TPR valve (Return the lever to where it is now) plug the drain (Replace the plug) and turn the water back on.

If this does not fix it, turn water back off, drain again, remove the TPR valve and visit a hardware.
 
Back
Top Bottom