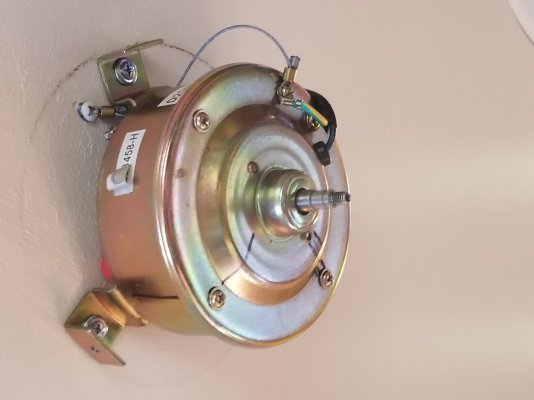
I have an 11 year brushed armature ceiling fan that would shut down after running for several minutes. Since the JY12V, DC12V Wall Switch for Brush DC12V Ceiling Fan controller was getting hot and shutting it off, I assumed the controller was bad. I purchased a new controller from amazon and while it worked better-fan ran twice as long before overheating and shutting down the controller- I realized it was the fan motor.
The switch manufacturer has an insert that comes with the new controller that states that the cause of fan shutting down was often, not the switch, but carbon brush wear material increasing friction and resistive loads to the controller causing it to overheat and shutdown and stated that a new replacement fan was often indicated instead of a new switch.
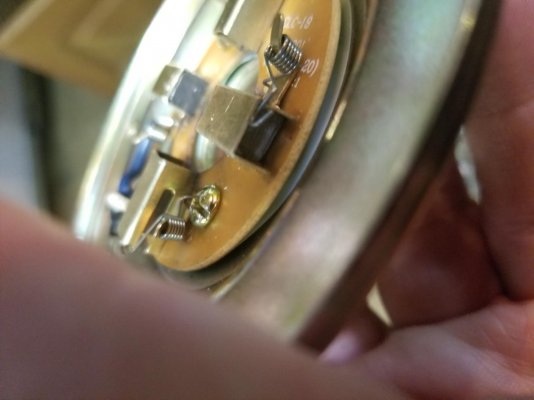
Anyway, I removed and disassembled the motor on the ceiling fan. Yes, there was some carbon brush material inside of the housing but I didn't think it was enough to cause my problem; I was wrong.
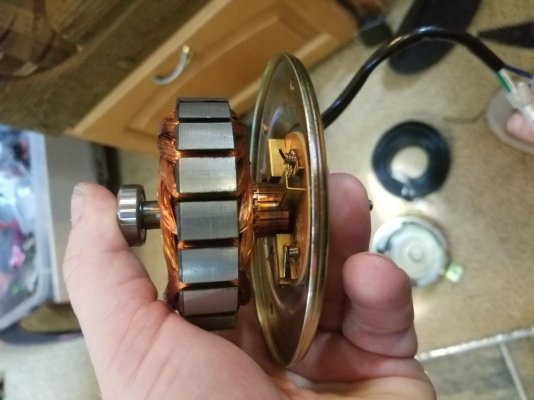
I cleaned out the carbon, flipped the brushes (they were about 1/4 worn), polished the armature, and added a drop of oil into the top and bottom motor bearings and reassembled everything. Well, fan has now been running for 4 hours at full speed and is working perfectly again.
Disassembly is fairly straightforward. Remove everything you can and put it back together the same way. Installing the armature onto the brushes was not difficult because I was able to pull back the wire spring that pressed the brushes against the armature back and lock them out of their slot so they allowed me to insert the brushes into their housing without having to fight brush spring tension. On other motors with a different spring tensioner setup, I used dental floss run across the brushes to prevent them from pressing against the armature when putting things back together.
I am very happy and wanted to share this mod that cost me about an hour of time and a little amount of spray cleaner and saved me from having to buy a new fan.
The switch manufacturer has an insert that comes with the new controller that states that the cause of fan shutting down was often, not the switch, but carbon brush wear material increasing friction and resistive loads to the controller causing it to overheat and shutdown and stated that a new replacement fan was often indicated instead of a new switch.
Anyway, I removed and disassembled the motor on the ceiling fan. Yes, there was some carbon brush material inside of the housing but I didn't think it was enough to cause my problem; I was wrong.
I cleaned out the carbon, flipped the brushes (they were about 1/4 worn), polished the armature, and added a drop of oil into the top and bottom motor bearings and reassembled everything. Well, fan has now been running for 4 hours at full speed and is working perfectly again.
Disassembly is fairly straightforward. Remove everything you can and put it back together the same way. Installing the armature onto the brushes was not difficult because I was able to pull back the wire spring that pressed the brushes against the armature back and lock them out of their slot so they allowed me to insert the brushes into their housing without having to fight brush spring tension. On other motors with a different spring tensioner setup, I used dental floss run across the brushes to prevent them from pressing against the armature when putting things back together.
I am very happy and wanted to share this mod that cost me about an hour of time and a little amount of spray cleaner and saved me from having to buy a new fan.
") )
)