But then I couldn't slide the curtain open; at campgrounds I'd have to pull it down.Depending on the weight of the curtain a few double sided Velcro strips on the ceiling may work. These are incredibly strong these days and can be removed w/o damage.
You are using an out of date browser. It may not display this or other websites correctly.
You should upgrade or use an alternative browser.
You should upgrade or use an alternative browser.
Forward curtain?
- Thread starter CityGuy
- Start date
The friendliest place on the web for anyone with an RV or an interest in RVing!
If you have answers, please help by responding to the unanswered posts.
If you have answers, please help by responding to the unanswered posts.
Thought: There's an aluminum fab shop I've used. They might only work flat sheet, but if the do tubing they'd be less than half the cost of the tuna tower folks, and I'd be just as happy with aluminum inside.But then I couldn't slide the curtain open; at campgrounds I'd have to pull it down.
Ray-IN
Well-known member
3/4" PVC pipe and a heat gun will solve that. Heat the inside of a curve more than the outside, otherwise the outside will stretch too thin to be strong. Then if the PVC isn't strong enough, you have a pattern to make one of aluminum.Thanks for your response. If I could go side to side in a straight, perpendicular line, that would work -- but I can't.
Boat Bum
Well-known member
I was thinking more of using a velcro loop around a pole stuck to the velcro squares on the ceiling . If anchored at the two wall points and one in the middle you could conceivable split the curtain in half and pull closed from both sides.But then I couldn't slide the curtain open; at campgrounds I'd have to pull it down.
Not trying to sell the idea just what I was thinking for using the velcro.
!! That's an approach I would never have thought of! I'm imagining something more elegant than PVC, but that should be an easy solution. And I could paint the PVC, too. Hmm.3/4" PVC pipe and a heat gun will solve that. Heat the inside of a curve more than the outside, otherwise the outside will stretch too thin to be strong. Then if the PVC isn't strong enough, you have a pattern to make one of aluminum.
Ah! Misunderstood. Suggestion appreciated.I was thinking more of using a velcro loop around a pole stuck to the velcro squares on the ceiling . If anchored at the two wall points and one in the middle you could conceivable split the curtain in half and pull closed from both sides.
Not trying to sell the idea just what I was thinking for using the velcro.
JudyJB
Well-known member
Do you have any places to screw in snaps? My Class C came with a curtain that snapped around a curved space in the front. I bought a snap kit from Jo Ann Fabrics and made a mesh privacy screen to use during the daytime so that I could still see out. I just bought some mesh speaker cover fabric at JoAnns and used iron-on tape to fold the top down a couple of times. Then I added the snaps to fit in the nighttime privacy screen area.
I also have a covered wood panel on either side of my cab, and i was able to drill pilot holes and screw the bottom parts of the snaps in so they would wrap all the way around.
I also have a covered wood panel on either side of my cab, and i was able to drill pilot holes and screw the bottom parts of the snaps in so they would wrap all the way around.
Thanx for the suggestion, but no -- all printed particleboard (?). Might even be a window below on the curb side.Do you have any places to screw in snaps? My Class C came with a curtain that snapped around a curved space in the front. I bought a snap kit from Jo Ann Fabrics and made a mesh privacy screen to use during the daytime so that I could still see out. I just bought some mesh speaker cover fabric at JoAnns and used iron-on tape to fold the top down a couple of times. Then I added the snaps to fit in the nighttime privacy screen area.
I also have a covered wood panel on either side of my cab, and i was able to drill pilot holes and screw the bottom parts of the snaps in so they would wrap all the way around.
CharlesinGA
Well-known member
My 2007 Winnebago View originally came with a curtain that hung across the back edge of the cab over bed. There were two snap fasteners on each side, not on the bed, but on the columns/trim just behind the cab doors. The curtain was missing. I got a curtain panel that was the exact correct height and width when hung SIDEWAYS. This was a fairly flimsy material but the right color and did let light thru. I took some inch wide woven strap material and sewed patches at the locations where the snaps went, and added one in the middle. I then used a very pointed soldering iron to burn a hole in the right place, took it to work and used the DOT fastener tool to crimp the fastener in place. Back home, I pulled it snug and marked and burned the next hole and back at work the next day, set the next fastener. Did this for all four plus the one I added in the middle that was attached to the bottom of the flip up bunk. If you accidentally raised it with the fastener snapped it just popped loose. Since the curtains came in a pack of two (from the Ollies outlet store) I did both of them to have a spare.
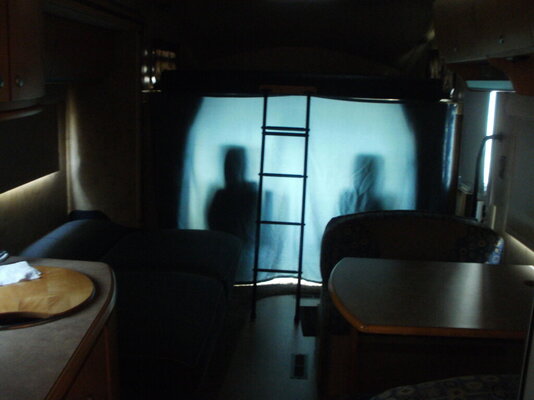
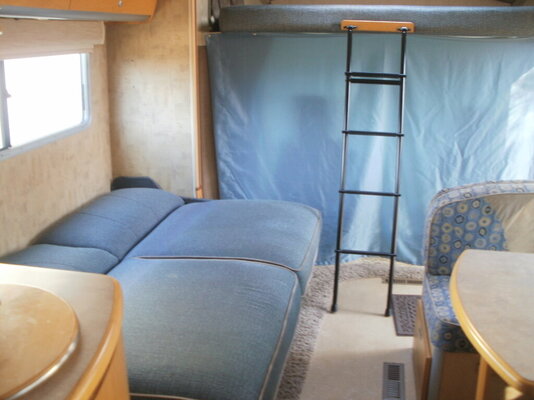
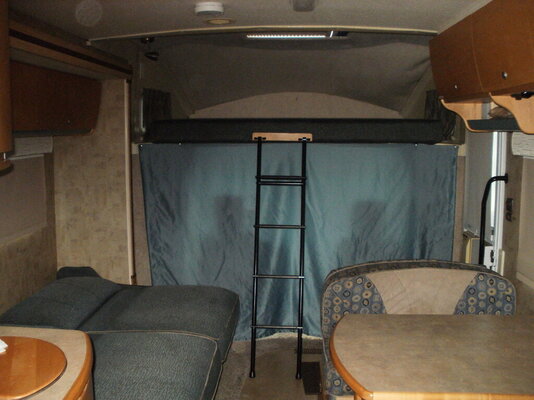
First pic is outside in full daylight with all shades pulled down. In the third shot you can just make out the silver DOT fasteners, two in each upper outer corners. Middle one was on the bottom of the bed screwed into the steel frame.
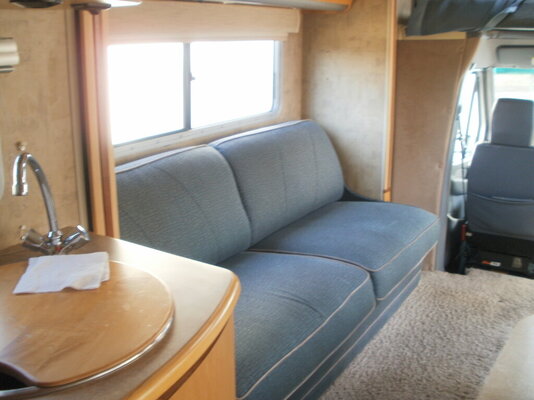
It did wonders for keeping the air conditioning in the cab while traveling and I had no other way to get any privacy as it did not have a windshield/cab door covers. Last pic, the curtain is snapped and I just threw it up on the bunk bed. Most of the time I unsnapped the right side and middle and left the left side snapped.
Charles
First pic is outside in full daylight with all shades pulled down. In the third shot you can just make out the silver DOT fasteners, two in each upper outer corners. Middle one was on the bottom of the bed screwed into the steel frame.
It did wonders for keeping the air conditioning in the cab while traveling and I had no other way to get any privacy as it did not have a windshield/cab door covers. Last pic, the curtain is snapped and I just threw it up on the bunk bed. Most of the time I unsnapped the right side and middle and left the left side snapped.
Charles
Attachments
Last edited:
FunSteak
Well-known member
Maybe something like this?
CharlesinGA
Well-known member
JRProducts markets a variety of different curtain tracks, sliders, snaps, etc.
Curtain Archives
Page 2 Curtain Archives
Recmar products also makes curtain tracks, sliders, etc. The web site requires a lot of perusing to see it all and which sliders work with which tracks, the web site will link you to a retail source for their products. The make stuff for the commercial aviation industry in addition to RVs and other businesses.
Charles
Canadian Eh
Member
I made up one running in the location that you described. I use aluminum I beam style curtain rod and guides. I bent the rod to follow the curvature of the header. Makes it a lot easier to close up.
Adventurous Traveler
Well-known member
Two seasons ago when we journeyed to Key West from WNY in early Febuary during a snow storm I had the same idea for my motor home. I wanted some kind of barrier to keep the dash heat up front knowing I could never heat the whole rig with it.
What I did is use two of the always handy Scotch Brand clear plastic mounting hooks many of us use to hang pictures and such in our rigs with their removeable double face tape. I placed one on each sidewall just behind the driver and passenger seats. To stick good I cleaned the attachment spots on the walls with a light paint thinner to clean off any residue. In my basement at home I had old tent poles from the days of our canvas tent. This worked well because they are adjustable with the little holes and spring clip to colapse the pole when not in use. I hung a clear shower curtain with cheap shower hooks, using clear plastic so we wouldn't get claustrphopic! Wow did it work great keeping the heat in. When we stopped at a rest stop we couldn't believe how cold the rear of the RV was compared to upfront.
What I did is use two of the always handy Scotch Brand clear plastic mounting hooks many of us use to hang pictures and such in our rigs with their removeable double face tape. I placed one on each sidewall just behind the driver and passenger seats. To stick good I cleaned the attachment spots on the walls with a light paint thinner to clean off any residue. In my basement at home I had old tent poles from the days of our canvas tent. This worked well because they are adjustable with the little holes and spring clip to colapse the pole when not in use. I hung a clear shower curtain with cheap shower hooks, using clear plastic so we wouldn't get claustrphopic! Wow did it work great keeping the heat in. When we stopped at a rest stop we couldn't believe how cold the rear of the RV was compared to upfront.
Adventurous Traveler
Well-known member
To the OP if you know an electrician they can bend conduit almost any way or shape you need for your application.