Living in a Van?

The friendliest place on the web for anyone with an RV or an interest in RVing!
If you have answers, please help by responding to the unanswered posts.

theLegionWithin

Active member
Joined
May 6, 2022
Posts
29
Location
Seattle, WA
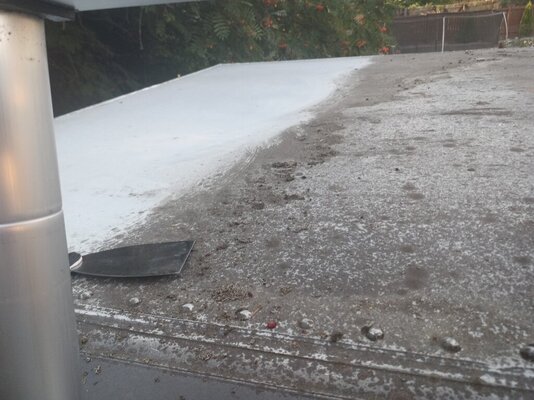
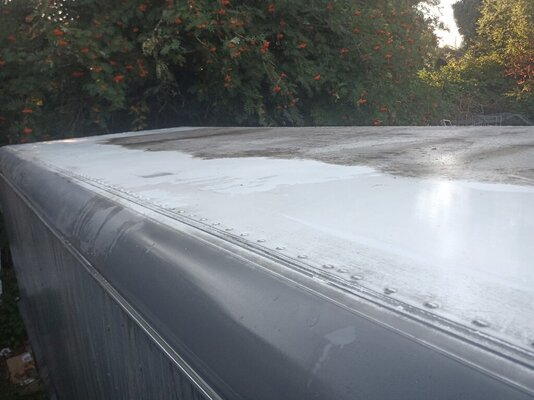
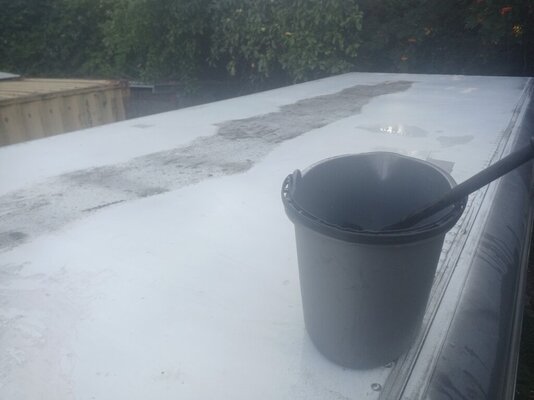
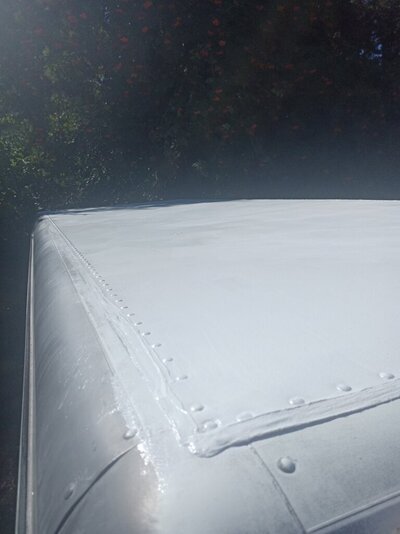
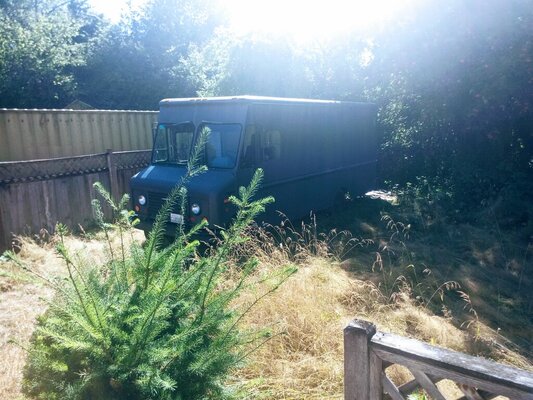
I'm converting a 1987 Ford Grumman Step Van into an RV/tiny home & intend to live in it for at least 5+ years - primarily boondocking in the desert/on BLM land (will probably trade up to a longer Step Van or maybe toy hauler eventually). it's perfectly doable - and more "normal" than it was in 2010 when the thread was started. what with covid screwing up society/crazy inflation started pricing folks out of houses/recession maybe incoming, living in a vehicle is probably my best move.

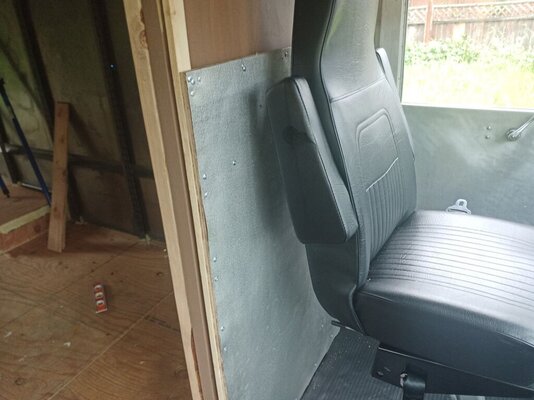
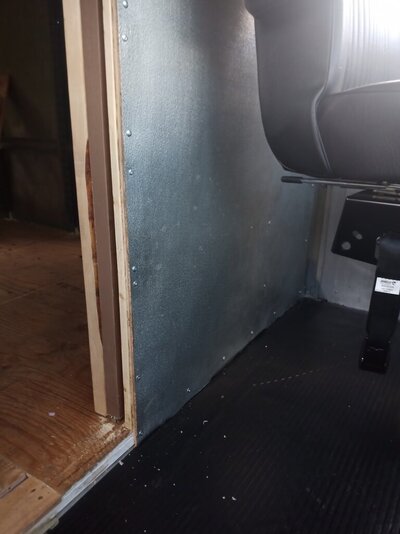
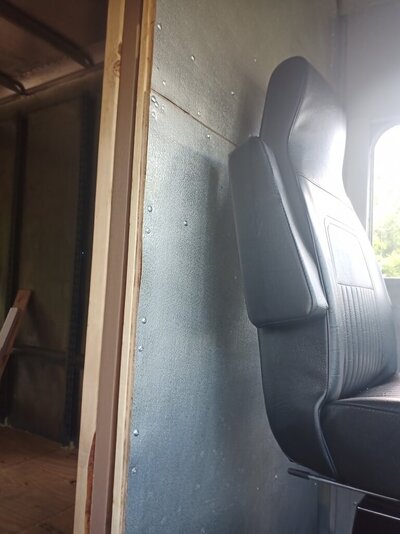
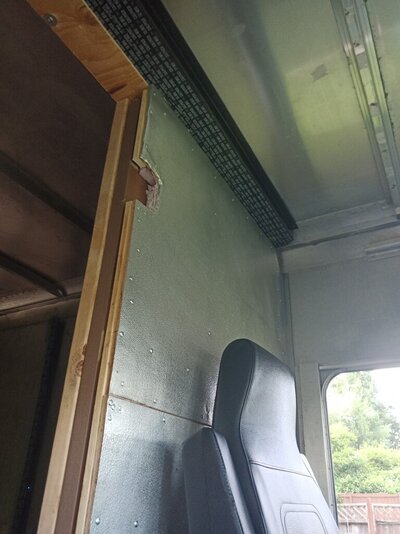
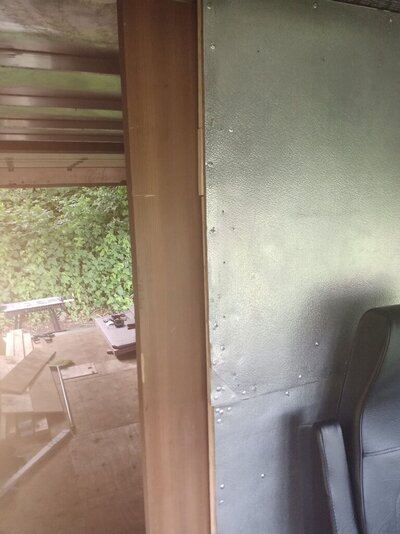
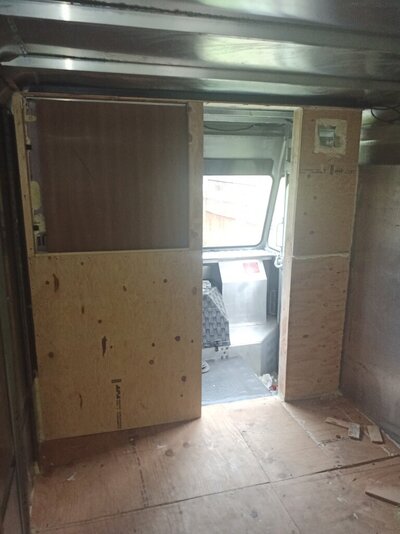
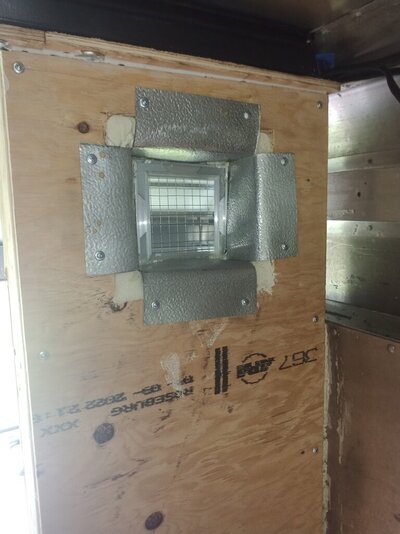
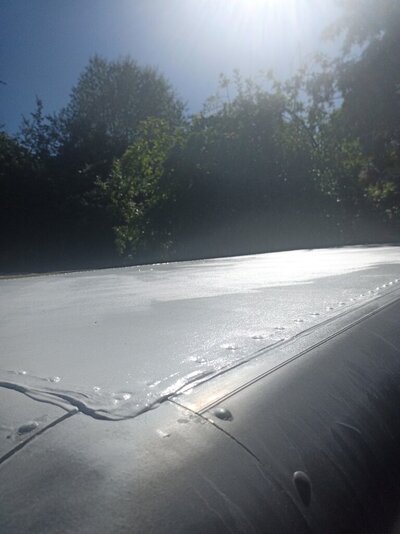
the conversion is slow going, I have no experience with tools, so sort of learning as I go. this weekend I started building a bulkhead wall to separate the cab from the living space, riveting aluminum sheeting that used to be on the walls to my new walls ;)

some pics for ya.
 

Attachments

  • 1.jpg
    1.jpg
    87.2 KB · Views: 18
  • 2.jpg
    2.jpg
    204.3 KB · Views: 18
  • 3.jpg
    3.jpg
    115.1 KB · Views: 18
Our son did this with an old Uhaul moving truck. He has experience with tools; he was a carpenter, welder and locksmith for the Air Force for 12 years. His intention was to travel in it but he ended up living in it on our property in SW Virginia. He went through a winter with no electric or running water. It was rough but we do have electric now and he gets water for bathing and washing dishes from the creek or the spring. It’s all a learning curve.
 
Utilities are important, so you need to install 30 amp electrical hookups for eventual heating, AC, and lighting. Ditto for grey and black water tanks, as well as a fresh water tank so you will have a sanitary system when you boondock. And vents in the ceiling are also important for air flow and to allow light in when you do not have electricity.

The good thing is that your van is large enough to put all you want into it.
 
Welcome to the forum! Lots of great resources here.

That’s a huge project and, for the right kind of person, a fun one, too! A few initial thoughts:
Don’t expect to save all that much money. There are thousands of used RVs that more or less fit your target that can be had for what your project is going to cost you, or less.
Keep weight in mind with every thing you put on. (How much weight did that bulkhead add?)

Agree with SpencerPJ, paint it white and do it now. Any sun, not just desert, will make working inside it miserably hot on a sunny day. You may even want to install at least one roof vent, too. Figure you’ll want at least two roof vents; one over cooking area and another over toilet. (I assume you have a floor plan drawn up and know where those areas are going to be.)

Keep us posted… always fun to follow along on folk’s projects.
 
There are several youtube videos of this type of conversion. Here is a good place to start.
yeah I watched his videos several times each while I was shopping around for the stepvan. ended up using facebook marketplace to find a local seller. also a fan of the bread trucker guy, forget his channel's name - oh and AdventureVanMan, love that channel.
 
Our son did this with an old Uhaul moving truck. He has experience with tools; he was a carpenter, welder and locksmith for the Air Force for 12 years. His intention was to travel in it but he ended up living in it on our property in SW Virginia. He went through a winter with no electric or running water. It was rough but we do have electric now and he gets water for bathing and washing dishes from the creek or the spring. It’s all a learning curve.
oh yeah, I've been researching for at least a year - probably close to 10 hrs a week minimum, trying to figure out the best way to do stuff, watching and critiquing build videos on youtube. if it wasnt for youtube I wouldnt even attempt something this far outside of my scope of knowledge. I wont actually move into it until it's a self contained unit though.
 
Utilities are important, so you need to install 30 amp electrical hookups for eventual heating, AC, and lighting. Ditto for grey and black water tanks, as well as a fresh water tank so you will have a sanitary system when you boondock. And vents in the ceiling are also important for air flow and to allow light in when you do not have electricity.

The good thing is that your van is large enough to put all you want into it.
yep, 15' behind the cab (probably a few inches more when I remove the roll up door) x 7' high x7' wide - loads of room. 30amp shore power is in the plans - probably going to get a Victron Multiplus-II inverter/charger, it has a smart switchover that can autodetect when shore power is active, among other nice features. I wont have a black tank, will be using a composting toilet instead - but fresh and grey water tanks will be large.

still trying to decide between a maxxair fan and a fantastic fan. I'm going to also try to put a vent in the bulkhead wall (something like this - DANCO 7-3/4 in. x 4 in. Steel Floor Register with 7/8 in. Drop in White 62067) as there are side-vents in the cab already - down sort of near the floor pedals area on both sides of the vehicle. if those are open and the floor register/vent is open it should provide air flow with the ceiling fan.
 
Welcome to the forum! Lots of great resources here.

That’s a huge project and, for the right kind of person, a fun one, too! A few initial thoughts:
Don’t expect to save all that much money. There are thousands of used RVs that more or less fit your target that can be had for what your project is going to cost you, or less.
Keep weight in mind with every thing you put on. (How much weight did that bulkhead add?)

Agree with SpencerPJ, paint it white and do it now. Any sun, not just desert, will make working inside it miserably hot on a sunny day. You may even want to install at least one roof vent, too. Figure you’ll want at least two roof vents; one over cooking area and another over toilet. (I assume you have a floor plan drawn up and know where those areas are going to be.)

Keep us posted… always fun to follow along on folk’s projects.
not really doing it to save money - doing it because I want something I can mostly stand up in (I'm 6' 11") - prior to putting in an insulated floor I was able to stand up all the way but not any more - that's fine, it's still better than a lot of options that exist. also doing it because I've always wanted to get out of the city & never come back / get out in nature, and I figure if I build my own RV then I'll be able to customize it exactly how I want it to work so I can do the things I want to do - without too many compromises.

bulkhead wall is actually pretty light, only about 1/4 of the wall is up as of a few hours ago (I'll attach pics - hole in the wall is for a handle to be bolted into the door) - the door was maybe 75lbs, 2x4's and plywood construction, the aluminum sheet facing (riveted to the plywood) is very light, and the insulation is foam board. the roll up door is crazy heavy, when I remove that I'll have even more weight budget. as it stands now I'm still several thousand lbs under gvw.

I plan on painting it white & then royal purple on the bottom - gotta customize the outside too ;) planning on 1x roof vent, over the kitchen area. toilet will be composting so it will have its own exhaust fan / vent to the roof / etc.

I'll make sure to post more pics as the build progresses. I appreciate the constructive criticism!!
 

Attachments

  • IMG_20220605_154317_701.jpg
    IMG_20220605_154317_701.jpg
    77.1 KB · Views: 14
  • IMG_20220605_154321_069.jpg
    IMG_20220605_154321_069.jpg
    96.2 KB · Views: 13
  • IMG_20220605_154324_759.jpg
    IMG_20220605_154324_759.jpg
    121 KB · Views: 14
re-did the top panel on the drivers side, I decided on a different door handle (which amazon lost during shipping, lol) - decided not to insulate behind the pocket door, that wall is thick enough. got the other side of the wall constructed & put an aluminum vent grate in it for air movement, fully insulated that section of the wall and sealed it up - using spray foam around the rear side of the vent grate, slow process of filling gaps and then cutting it flush. once it's squarish I'm going to build a "picture frame" w/ some fine-mesh screen material backing, so if insects make it through the vent they'll get trapped there - then I can remove the frame & clean out that space - maybe shape some aluminum sheeting to cover the interior, have lots of it left.

some updated pics here ;)
 

Attachments

  • IMG_20220612_144256_993.jpg
    IMG_20220612_144256_993.jpg
    113.3 KB · Views: 11
  • IMG_20220613_182125_154.jpg
    IMG_20220613_182125_154.jpg
    122 KB · Views: 11
  • IMG_20220615_185807_091.jpg
    IMG_20220615_185807_091.jpg
    96.8 KB · Views: 11
Looking good. Not sure where you hope to spend much of your time, keep in mind that aluminum can warm to the touch, even inside. I totally understand the height thing, I'm a taller guy and had to look for a travel trailer that felt comfortable. Keep the pictures coming, good luck.
 
Looking good. Not sure where you hope to spend much of your time, keep in mind that aluminum can warm to the touch, even inside. I totally understand the height thing, I'm a taller guy and had to look for a travel trailer that felt comfortable. Keep the pictures coming, good luck.

thanks! yeah I know what you mean, the walls/ceiling will eventually be more insulated that the floor is - probably 1 1/2 inches on the walls and at least 2 inches on the ceiling (not counting whatever covering I choose for the insulation). the stepvan is just a place to sleep, cook, bathe, work (remote IT job) from - I want to do a lot of outdoorsy stuff, I plan on spending most of my leisure time outside/in nature when possible once I can actually start living in it.
 
Beginning a journey of this undertaking is the easy part compared to what you will endure, but when you come out the other side you will have skills beyond what you know now. And there's nothing like living the dream! ...Just don't get yourself thrown in jail by being in the wrong place at the wrong time.

At some point you will be thinking about how to construct your power grid, so I have attached a schematic that will help you take the next step... after you you figure out how to build an outside portable shower and come up with a portable BBQ.

No doubt you will choose the right side of the schematic since it's based on LiFeP04 batteries. Feel free to pick it apart to suit your needs, and I recommend you turn to YouTube for more tips.

Good luck and don't hesitate to share and to ask for help. We are always glad to lend a hand.
 

Attachments

  • Add 300W Solar.jpg
    Add 300W Solar.jpg
    140.4 KB · Views: 9
Beginning a journey of this undertaking is the easy part compared to what you will endure, but when you come out the other side you will have skills beyond what you know now. And there's nothing like living the dream! ...Just don't get yourself thrown in jail by being in the wrong place at the wrong time.

At some point you will be thinking about how to construct your power grid, so I have attached a schematic that will help you take the next step... after you you figure out how to build an outside portable shower and come up with a portable BBQ.

No doubt you will choose the right side of the schematic since it's based on LiFeP04 batteries. Feel free to pick it apart to suit your needs, and I recommend you turn to YouTube for more tips.

Good luck and don't hesitate to share and to ask for help. We are always glad to lend a hand.

thanks for the diagram! I've got a lot of roof space, thinking I can fit 4 or 5 350w+ panels on the roof without issue, probably will go with a 48v electrical system for batteries, then stepdown to 12v for appliances/lights (plus the usual inverter for ac appliances). I'm less concerned with electrical than I am with propane (cooking, hot water), figuring out a safe but effective propane system is going to be tricky.

one step at a time - next step is to remove the roll up door and put something else there, either a wall or another kind of door.
 
bulkhead wall w/ pocket door is completed - installed the deadbolt last weekend & just finished the rear-side of the wall-vent - the interior side has a picture frame backed with fine-mesh screen door netting that is secured to the wall with velcro strips - if any insects make it past the cab-side of the vent, they'll die in there... then I can clean that space out.

I've filled in the gap between the door and the door frame with some expanding foam weather stripping - it can compress to 1/4" and expand up to 1". seems to work pretty well.
 

Attachments

  • IMG_20220620_152214_486.jpg
    IMG_20220620_152214_486.jpg
    131.6 KB · Views: 10
  • IMG_20220619_124908_999.jpg
    IMG_20220619_124908_999.jpg
    107.3 KB · Views: 10
  • IMG_20220623_163526_541.jpg
    IMG_20220623_163526_541.jpg
    72.2 KB · Views: 10
it's been a while but I've got another update - I've been meaning to get a telescoping ladder so during the most recent Prime Day, got one from Amazon for pretty cheap & was able to get up on the roof. I had originally thought that the roof was grey like the rest of the body - lol nope. it should have been white - and sort of was under years, possibly decades of pine sap, lichen, mildew, ants/spider colonies, etc.

a judicious amount of elbow grease along with plenty of scrubbing/scraping and I got it clean(er). next step was to get a new coating of paint on the roof. I used 1 gallon of SEMCO Liquid Membrane™ after prepping the roof with Semco's power cleaner and stone soap products. it took about a week to finish the painting, using a 1/2" nap paint roller w/ a 4 to 8 foot telescoping handle (Wooster brand), I put one coat on every other day - the edges where the bolts/rivets are and the middle bit where the ants and lichen had eaten the previous paint job got 4x coats, the rest of the roof received 3x coats.

got some fun pics ;)
 

Attachments

  • IMG_20220727_180127_802.jpg
    IMG_20220727_180127_802.jpg
    140.2 KB · Views: 10
  • IMG_20220727_185241_055.jpg
    IMG_20220727_185241_055.jpg
    119.3 KB · Views: 9
  • IMG_20220728_191124_091.jpg
    IMG_20220728_191124_091.jpg
    69.7 KB · Views: 8
  • IMG_20220814_162348_355.jpg
    IMG_20220814_162348_355.jpg
    76.5 KB · Views: 8
  • IMG_20220814_162438_866.jpg
    IMG_20220814_162438_866.jpg
    94 KB · Views: 9
  • IMG_20220814_162532_067.jpg
    IMG_20220814_162532_067.jpg
    214.1 KB · Views: 10
update and sad news - got the Stepvan into the shop to check on the engine (Cummins 4bt diesel) and it's shot - imminent catastrophic failure. LS swapping it out now, also replacing the transmission (auto instead of standard), converting to gas (diesel prices are upwards of $6/gal in my area now), and replacing the exhaust system.

might be out of the shop in a month or so.
 
Back
Top Bottom