New Project: Video Security System

The friendliest place on the web for anyone with an RV or an interest in RVing!
If you have answers, please help by responding to the unanswered posts.
thru a router and the setup looks like it would require someone with networking skills
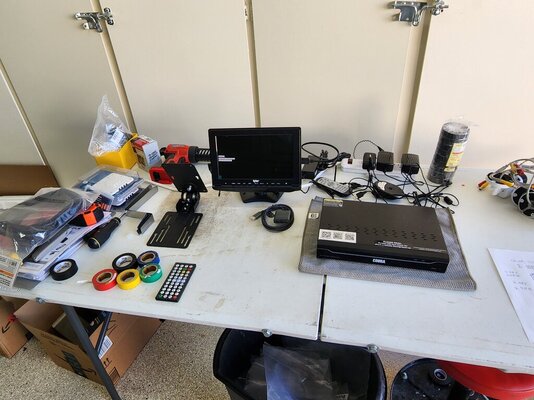
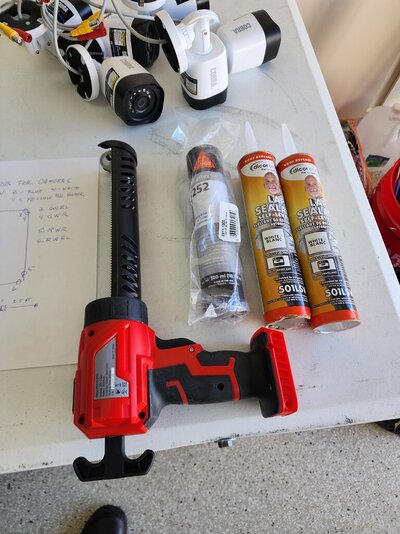
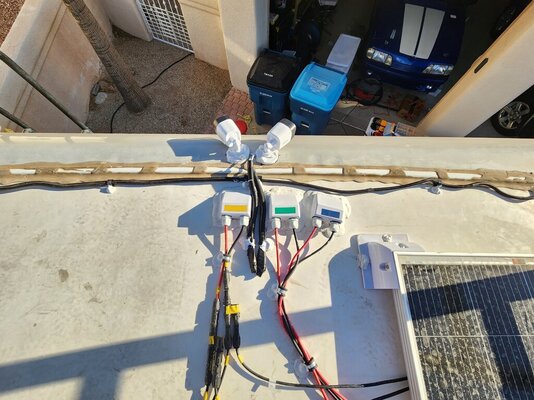
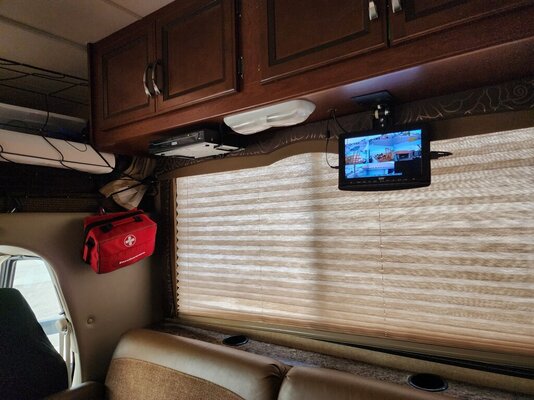
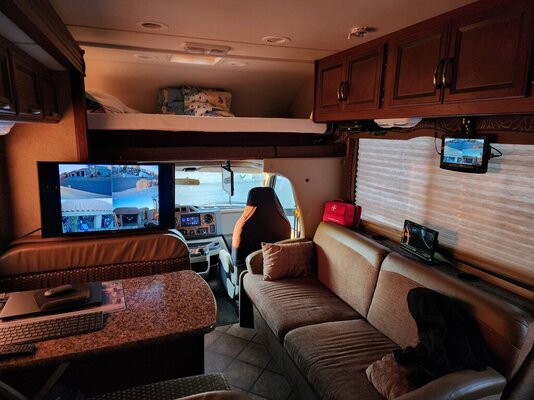
Just the basic skills. The Cobra setup? I have that exact same set-up here (as well as another <Swan for wireless cameras>) and I can view this Reno house inside and out from my Auburn house and vice versa.

If you can download the program, you should see my log-in page there, but only if you're using a compatible browser and these days, that means Windows 11 in the IE mode:


I can probably help you set it up, by using the same info, in mine to get yours going. But you need to be using Windows 11.

And then it is best to set up a DNS as your dynamic internet IP can change on you at any time and then you lose the connection over the web.

The HFT works better than I expected, but not nearly as good as the Swann setups with the digital cameras.

Edit: I just now realize I replied to a very old message. Should I assume you got the HFT setup going okay?

-Don- Reno, NV
 
Last edited:
Update on Security system for new Class C:

I have been waiting for the two cameras that were out of stock.

I first wired it up on a table and checked out each camera and cable.

The plan is now to install it Wednesday.

The teenager across the street will do the roof work. The cameras will be mounted on the corners and front and rear centers along the edge. Each camera has a field of view of 105 degrees so I will have 360 degrees of coverage with 8 of them, I think that we can do all the work from the ladder or scaffold. The roof is covered with solar panels and hard to get around.

While waiting for the cameras, I spent some time prewiring the harness to connect everything.

The wiring is protected by the wire protectors sold at Harbor Freight. There are two harnesses, front and rear that each have four cables in them.

Both sets will enter thru the roof above the cabinet that runs along the passenger side.

I found out that it is much easier to get the cables into the shrouds if I first tape them all together with black electrical tape.

One word of caution. There is a difference between the camera end and the DVR end of the power wire. The power lead connections are male and female. The BNC video connectors are the same on both ends.

The harnesses will be secured with cable clamps.

I am using two of the cable covers shown in the pictures below along with lots of Dycor.

The cameras will be mounted using Silfllez adhesive and screws sealed with Dycor.

All eight of the cables are color labeled to make it easier to organize the views on the monitors.

The DVR, (main box), will be mounted under the cabinet along with a small monitor that has a flip down mounted screen.

I also got a HDMI splitter so that I can also view the same screen with my large computer monitor at the desk by simply changing the input with the remote for the TV.

I will post a few more pictures in the following post.

I
 

Attachments

  • 20221127_143954.jpg
    20221127_143954.jpg
    225.5 KB · Views: 8
  • 20221127_145155.jpg
    20221127_145155.jpg
    210.5 KB · Views: 7
  • 20221127_145255.jpg
    20221127_145255.jpg
    220.4 KB · Views: 8
  • 20221127_151120.jpg
    20221127_151120.jpg
    172.1 KB · Views: 8
  • 20221127_150428.jpg
    20221127_150428.jpg
    147.3 KB · Views: 7
  • 20221127_150433.jpg
    20221127_150433.jpg
    154.6 KB · Views: 8
  • 20221127_161207.jpg
    20221127_161207.jpg
    120.4 KB · Views: 7
Last edited:
More pictures

The caulking gun is battery driven and much easier than using your hand to pump it.

I also added a long power strip in the cabinet so that I could have plenty of outlets and also charge my Milwaukee batteries.
 

Attachments

  • 20221127_150428.jpg
    20221127_150428.jpg
    147.3 KB · Views: 7
  • 20221127_150700.jpg
    20221127_150700.jpg
    158.3 KB · Views: 7
  • 20221127_150730.jpg
    20221127_150730.jpg
    144.1 KB · Views: 7
  • 20221127_150756.jpg
    20221127_150756.jpg
    155 KB · Views: 7
  • 20221127_151038.jpg
    20221127_151038.jpg
    115.9 KB · Views: 7
  • 20221127_151100.jpg
    20221127_151100.jpg
    133.3 KB · Views: 7
Last edited:
Roof Installation:

Ryder, The fellow from across the street came over and we did the roof part of the project.

I did not get on the roof at anytime but I did watch some from a sturdy ladder

We laid out the wiring harness and secured it to the roof with cable clamps and stainless steel screws and covered the screws with Dycor.

Next we mounted the cameras with Siflex industrial strength adhesive and screws. The cameras are supposed to have a 105 degree field so we mounted them with two in the middle of the front to give a 180+ degree view.

The two side cameras on each side point towards each other to cover the entire sides of the RV.

The same orientation is used for the back four cameras.

I still am one camera short as Harbor Freight is still waiting for their delivery.

We will put it on from the ladder when it comes in.

Here are some pictures.

I need to hose off those solar panels, They are very dusty

In a day or two I will complete the inside installation.
 

Attachments

  • 20221130_152015.jpg
    20221130_152015.jpg
    169.8 KB · Views: 7
  • 20221130_152017.jpg
    20221130_152017.jpg
    177.9 KB · Views: 7
  • 20221130_152040.jpg
    20221130_152040.jpg
    119.1 KB · Views: 6
  • 20221130_152100.jpg
    20221130_152100.jpg
    233.4 KB · Views: 6
  • 20221130_152103.jpg
    20221130_152103.jpg
    176.6 KB · Views: 6
Last edited:
Now for the rest of the story.

I finished the inside part of the installation of the system.

I mounted both the DVR and the small 12 volt TV under the cabinet at the location where the cables come in from the roof.

I used a HDMI splitter to also send the output to a large flat screen TV that I use at my desk, (dinette), for watching TV or for a computer display.

I can duplicate a much larger display of the small camera detail by just using the TV remote to change the input.

Using the DVR remote I can also select a single camera or a group of four cameras.

I used two pieces of wood inserted into the empty space between the cabinet top and bottom to make sure that the mount screws will hold.

I also bought a second small TV and mount because I am considering adding a third display. Maybe a pull down like over the couch but under the overhead bunk above the passenger seat. No one ever sits in that seat and if anyone wants to sit in that seat, I can just flip it up.

It might give me some better views outside in all directions while driving.
 

Attachments

  • 20221205_160032.jpg
    20221205_160032.jpg
    155.7 KB · Views: 5
  • 20221205_160023.jpg
    20221205_160023.jpg
    168.5 KB · Views: 5
  • 20221204_171710.jpg
    20221204_171710.jpg
    99.1 KB · Views: 5
  • 20221204_171720.jpg
    20221204_171720.jpg
    100 KB · Views: 5
  • 20221204_171752.jpg
    20221204_171752.jpg
    159.1 KB · Views: 5
Now for the rest of the story.

I finished the inside part of the installation of the system.

I mounted both the DVR and the small 12 volt TV under the cabinet at the location where the cables come in from the roof.

I used a HDMI splitter to also send the output to a large flat screen TV that I use at my desk, (dinette), for watching TV or for a computer display.

I can duplicate a much larger display of the small camera detail by just using the TV remote to change the input.

Using the DVR remote I can also select a single camera or a group of four cameras.

I used two pieces of wood inserted into the empty space between the cabinet top and bottom to make sure that the mount screws will hold.

I also bought a second small TV and mount because I am considering adding a third display. Maybe a pull down like over the couch but under the overhead bunk above the passenger seat. No one ever sits in that seat and if anyone wants to sit in that seat, I can just flip it up.

It might give me some better views outside in all directions while driving.
Did you set it up so you can check on your RV from miles away?

I got some use out of my home system here. A car was going down the street here yesterday morning with a guy on each side of the street checking mailboxes. A neighbor reported it to me via email. Yesterday was Sunday, so it makes little sense. But I checked my cameras and saw it at 0641hrs and 5 seconds on Sunday March 4. Was still a bit dark so it wasn't clear enough to be useful.

BTW, I could still have checked here in Reno if I were in Auburn. I can check from anywhere I can get a connection. I always check on my houses, inside and out, during RV trips.

I was wondering if they were putting something in the mailboxes, but that was not the case as they are all empty.

I never thought about using the system for what you're using yours for, inside an RV.

-Don- Reno, NV
 
Actually, there is another addition to this security system.

Thought it might be nice to be able to see all around the RV while driving including the dead spots.

So, I mounted a third monitor where I could easily see it from the driver's seat.

I did not want it to block any of my view from the front seat. I also wanted it to be easily moved out of the way for access to the passenger seat which is never occupied, well almost never.

I can switch it from four to eight cameras. but I prefer four because of the duplication of my ordinary vision.

The two top views of the display are from the front, and the bottom are the back.

The placement of the camera views can be moved around.

I might use the two side cameras facing back instead of the center back ones, however I do already have cameras in my side mirrors,

I will try different ways.

It was almost dark when I took these pictures.

I ended up with an extra 12 volt TV like one over the sofa. I will be giving it away at Q.
 

Attachments

  • 20221210_170238.jpg
    20221210_170238.jpg
    173.3 KB · Views: 11
  • 20221210_170254.jpg
    20221210_170254.jpg
    157.2 KB · Views: 11
  • 20221210_171924.jpg
    20221210_171924.jpg
    150.3 KB · Views: 11
Last edited:
Don,

I have a Verizon 5G WiFi hotspot that I leave in the RV. I may go ahead and hook up the network features similar to the Ring doorbell at home.
 
We bought one of the security cameras a few years ago and it worked great. So we decided to buy some more for our ranch. I definitely recommend it. The app for these cameras is great too. Easy to use. Easy to install.
 
Back
Top Bottom