Re-sealing advice?

The friendliest place on the web for anyone with an RV or an interest in RVing!
If you have answers, please help by responding to the unanswered posts.

larryr

Well-known member
Joined
Jun 20, 2016
Posts
70
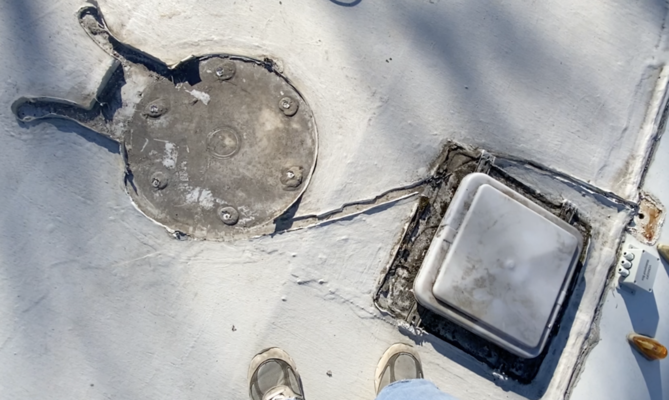
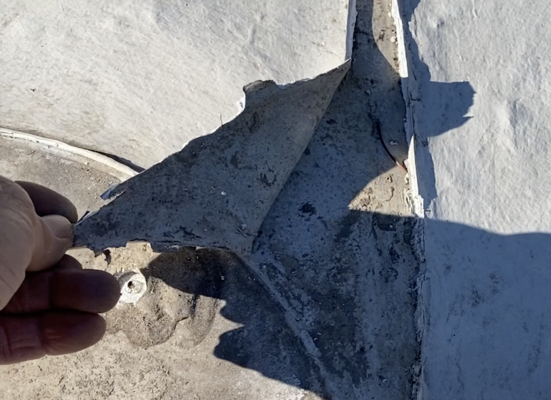
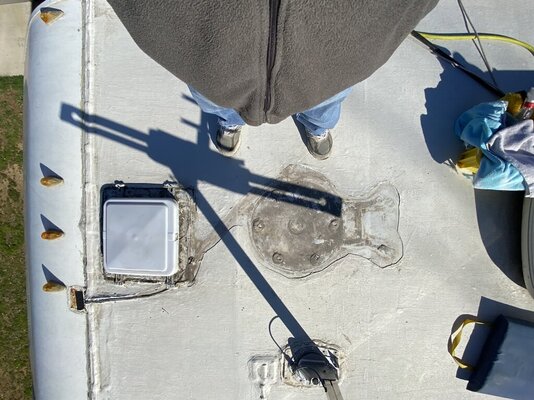
I am not sure how to peel back and remove loose sealant without making the job bigger than it needs to be. The roof itself seems to be a rubber membrane.

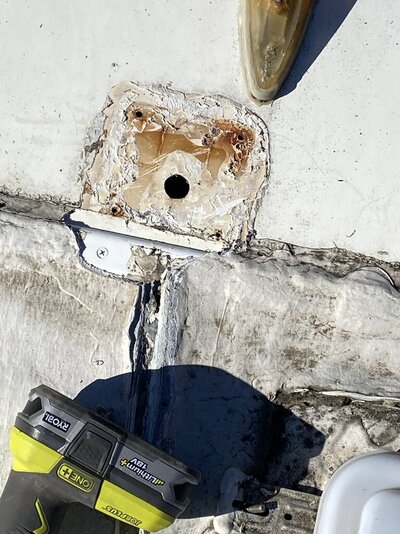
I'm planning on covering the hole with a water resistant box with cable glands running cat cable to a wifi above the sealant and potentially to a solar panel or two.

TIA for help.Larry
 

Attachments

  • roof seal wide.png
    roof seal wide.png
    941.7 KB · Views: 9
  • open peel.png
    open peel.png
    977.3 KB · Views: 9
Remove any caulk that peels up easily. If it is well-adhered, just clean it and caulk up to it or over it.

The rubber membrane should be glued down, but sometimes the installation was sloppy and not all of it adheres well. That can allow a bubble to lift when driving down the highway (reduced air pressure over the roof lifts the loose skin). Such bubbles aren't a leak problem, though.
 
I see no experts have weighed in yet. I think there are two key things to think about.

One - Peel back as far as it takes to get to good adhering old material. Don't want to have to do it again later.

Two - Use the right stuff and I am sure silicon isn't it. I have read about some different coating types so maybe an expert weighs in on that. Also in this category is prep, prep, prep. Just like a paint job the material you use is 10% of the equation - proper prep is 90% - clean, clean clean so you get good adhesion.

(ETA - Looks like a real expert beat me by a minute - LOL)
 
Thanks for the advice guys. I agree that prep is THE most important part.
I've gotten loose areas cut back and need co clean, do a little further cutting back. At the place where the hole is and the box is going to cover, I've gotten down to the plastic joiner piece between the roof and the nose over cab. The old sealant is pretty well attached on both sides and I don't want to wind up stripping and resealing the whole width. Couple of pics showing progress attached.
 

Attachments

  • start wednesday.jpg
    start wednesday.jpg
    181.6 KB · Views: 4
  • hole sized-joint exposed.jpg
    hole sized-joint exposed.jpg
    200 KB · Views: 4
Nice work so far. If the photo with the holes is not going to get a device installed I personally would install a mechanical barrier/cover like a screwed on plate. I'd consider plastic as the half life is probably >1,000 years. I'd seal the plate screw it down then add the roofing goo.

Have you picked a product yet?
 
Thanks. The hole is going to get a "waterproof" box with aft facing cable glands and a "conduit" from the bottom of box thru the headliner. I'm going to use dicor self leveling sealant. First cable will be cat for a bullet wifi rig.
 

Attachments

  • "waterproof box".png
    "waterproof box".png
    728.3 KB · Views: 2
  • vent cover w wifi.jpg
    vent cover w wifi.jpg
    136.2 KB · Views: 3
Cool - Please post details about your equipment and subsequent performance when it goes in. I am starting to noodle WiFi bridging repeaters myself. Rooftop antennas are making a lot of sense to me lately.
 
Back
Top Bottom