Tiny, a 2002 Monaco Monarch

The friendliest place on the web for anyone with an RV or an interest in RVing!
If you have answers, please help by responding to the unanswered posts.

Bent Valve

Well-known member
Joined
Aug 8, 2021
Posts
86
Location
Knob Noster, Missouri
Hello All!

I am not doing extensive remodeling, mostly cleaning up a few things but I figure I'll keep a record here.

We took Tiny out Saturday for a test spin to see how things worked. We stopped at a food trailer, grabbed some lunch, parked behind where I work and ate a nice lunch. May be a little silly but it beats eating in the car!

If you are traveling 65 through Missouri, on the south side of Sedalia, on the east side of the road is a green food trailer, Mizuma (3905 S Limit Ave Sedalia MO 65301). Hibachi chicken, an extra Yum Yum sauce, and you will be a happy , full camper. It's fortunate that you have a bed near by! :)

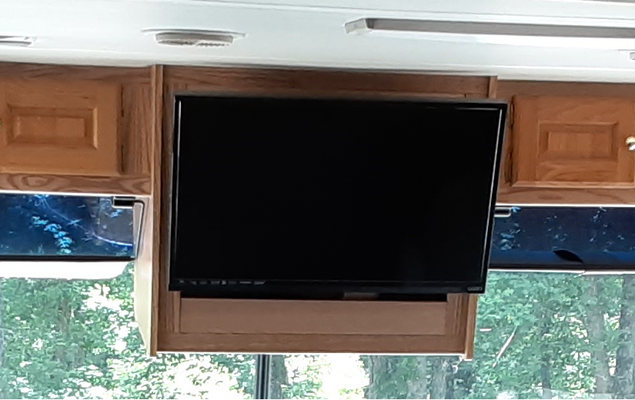
Anyway, Tiny has a big TV hanging over our heads, it kinda worried us. It had a bungee cord around it to hold it in place, but that's not in the image.
TV_001.png

Its not the best looking mount but the mounting is fairly solid. There is a smaller TV in the bedroom. It will fit inside the cabinet, and with the mount on this larger TV it will be secure and not wiggle around.

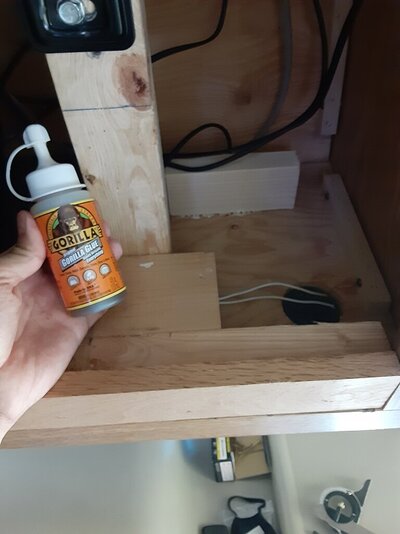
I moved the mounting board back 3.5 inches (9 cm) and added more screws. Then I was putting a shelf in and on everything I used screws, nails and glue. I have never tried Gorilla glue in a situation where there is this type of vibration. You can see it bubbled out from under the board where it expanded. It needs some moisture to set up so I wipe a damp cloth over the board then glue it. I nailed it from the bottom to keep it from pushing the board up.
TV_002.jpg

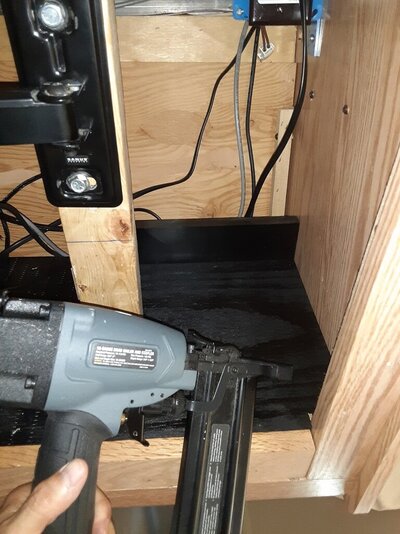
I painted the shelf black and these nail / staple guns are invaluable for this type of work.

TV_003.jpg

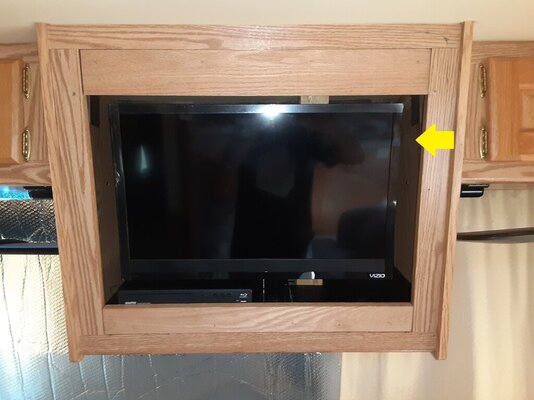
So everything mounted up. I didn't want to leave the cabinet open so I can control the blueray, I moved it to the bottom left, remote works, its discreet. Also I am going to get some black material and cover the areas (yellow arrow) behind the tv so it looks nice.
TV_004.jpg

On the left side of the TV it looks like a dent but its the plastic wrap from the factory, I'll pull it off when I'm done.
 
Looks good Marc, great to see you are able to use it already. Keep us posted with the rest of the stuff and your trips.
 
I can hear the water flowing and see it flushing out the bottom of the RV, oh wait, these valves must be the drain valves and they are open. I shut all three of them ...

From inside I hear "TURN IT OFF, TURN IT OFF!"

I guess I should back up. Its Thursday night, late and Pyro a.k.a Beverly doesn't have to work Friday. She wants to sleep in so she decides to sleep in Tiny. I say ok, then she says she want the water hooked up so we drag the hose over.

I have not hooked this one up to water yet as I am still working on the other RV that we sold. I haven't checked everything out. I should have known better. But I am a clumsy klutz in the morning and she would get more sleep out in the RV instead of listening to me trying to wake up and shower and get ready for work.

Well I grabbed the hose and crimped it in my hand as she is watching water go everywhere in the kitchen. As she wanders around looking at the mess and trying to clean up I casually mention I can't hold this hose forever ...

We get the wet dry vac and suck up the water, pull a shelf out and clean under it and it seems to be limited to the kitchen.

:rolleyes:

As I am making headway with getting the carpet dry I hear darkly muttered curses from the bathroom, I am sure a small plant burst into flame somewhere from that curse. Anyway apparently we have a blown line in the bathroom too.

I have to ask why do the RV makers ALWAYS put carpet in the bathroom? Really?

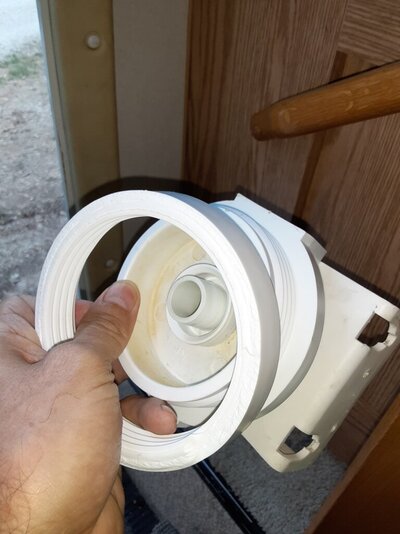
So the main culprit is the broken filter housing under the sink. A wide open 1/2 inch line was blowing water everywhere. The threaded ring in the image is supposed to be a filter canister.

20210913_174008.jpg

So in a word, plumbing. Its like electricity, mention either and there are 3 to 18 trips to the store required to fix the issue.

And I didn't take pics of much of it but I ripped the toilet mount out to find the blown pipe.

Fast forward through a couple of days. I get the sink to not leak, can't find the leak in the bathroom because, there isn't one. Best guess, the water flowed behind the cabinets down the wall to the bathroom.

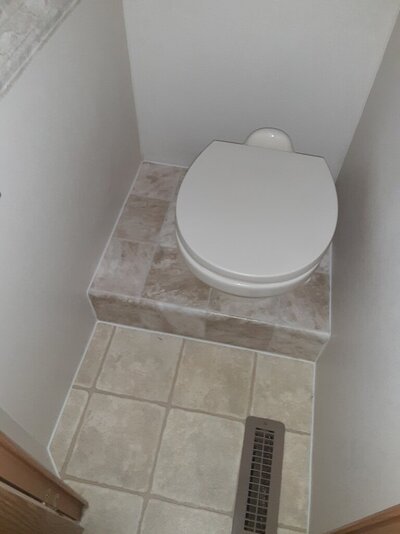
So I put new wood structure, better than original, back in and got vinyl to cover it making it easier to clean. And the vinyl we found is close to the original. Then i chalked the edges and cleaned up the pressure line behind it. It had like 3 extra angles and some push to connect connectors, not original.

I am getting good at this bathroom repair thing, no, I am not free next weekend.... :D

20210913_174057.jpg

So that was 2 weeks ago while we were trying to finish up the other RV. This weekend we got busy cleaning up brush and cutting the hill next to the barn where we are going to put the shelter for the RV.

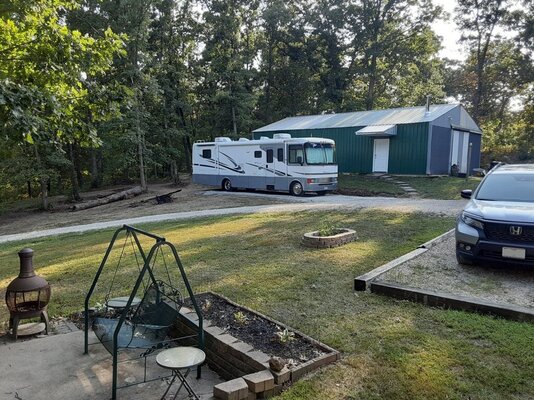
It looks like this now.

20210913_171531.jpg

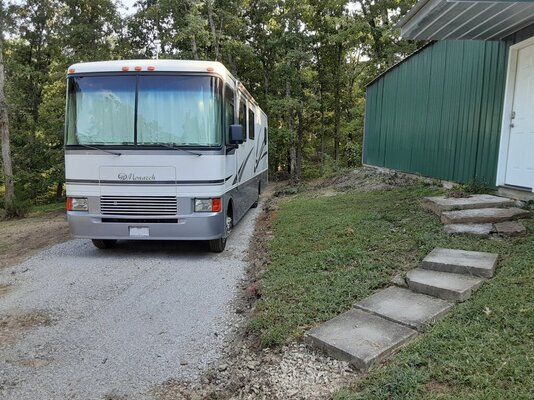
I can pull up and back into the space, turning around is fairly easy with the gravel parking area in front of the big barn door.

I still have to cut a bit more back for the retaining wall.

20210913_171600.jpg

The plumbing works like its supposed to now, we are organized as far as parking. We are getting stuff organized inside it.

Next, awning repair. :rolleyes:
 
Last edited:
I am impressed at your energy! Good that you are finding these whilst parked somewhere where it is easy (relatively) to do the repairs with all your tools etc.
 
There is still just one stop light. Still a very small town.

I live southwest of the base, Knob Noster address, Leeton school district, and Warrensburg phone number when I had a land line. If you look at a cell phone reception map I live in the center of that black dot indicating "No service" (funny thing is I'm not joking) :D
 
Its Saturday, next week or so we leave for a longer trip. Last Saturday we "camped" in the driveway to see what we were missing.

We missed fixing a leak.

I guess I should back up some.

A few weeks ago we tried to find someone to repair the awning. Its a Carefree of Colorado unit.

"Uh, yeah, (you could tell he hated that brand) we can get to that the last week in October."

and then the other place it was the end of November.

What happened was the spring broke that kept it rolled up, while going down the road. The PO bought a worm gear conversion and the awning fabric but hadn't had them installed.

I didn't get many pic but here we are threading the cord that keeps the awning in the mount. Lots of silicone, effort and luck. This pic is of the first attempt. I removed 4 more slats that cover the awning when its closed and had them assembled because just one slat was so flimsy that I was afraid it would fold. Then we slid them all back into the mount on the rv.

20210917_194209.jpg

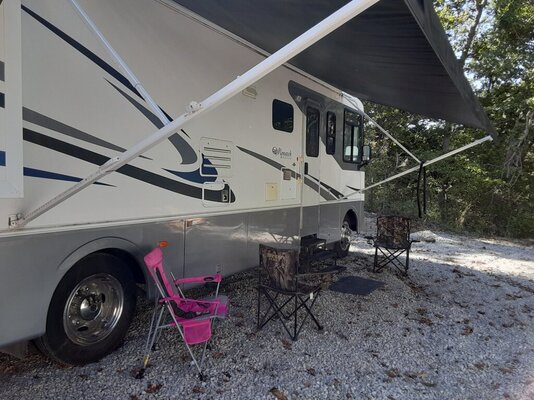
I got no pics of assembling the worm gear unit but here it is out in our test "camp".

20210926_151205.jpg

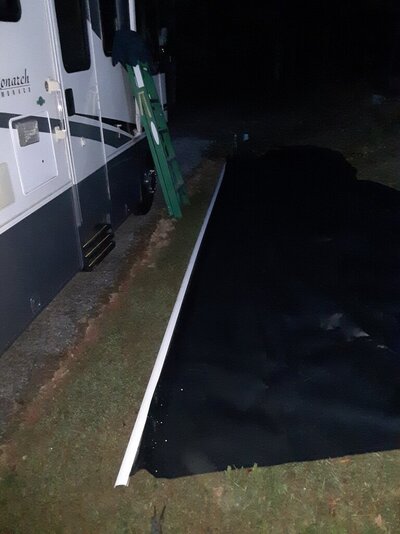
We are really worse than 2 kids with a tent in the back yard. We cooked with the griddle and did everything that we would camping.

It went ok except for the Ziggy factor, and plumbing.

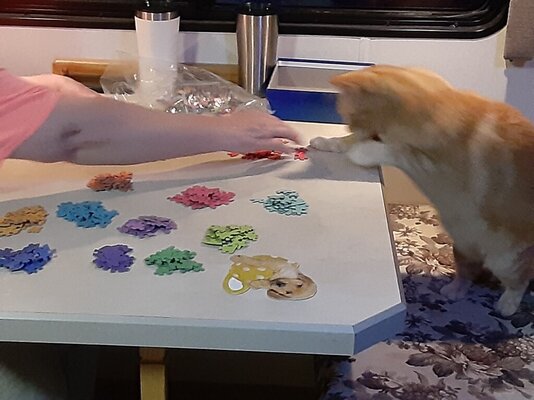
Pyro was making a puzzle, lots of mini puzzles really, and Ziggy wanted to help.

20210925_192346.jpg

Then that curse word, plumbing, popped up. The sink in the bathroom leaked because I didn't replace the seal in connector.

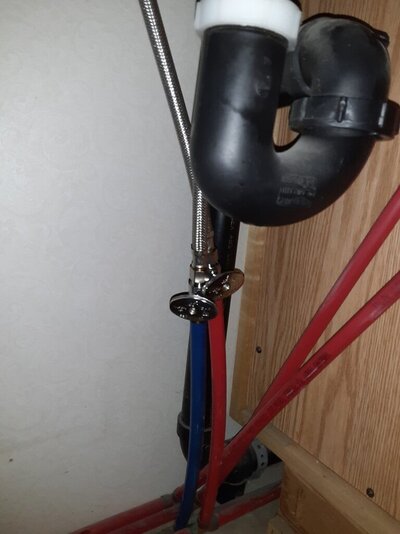
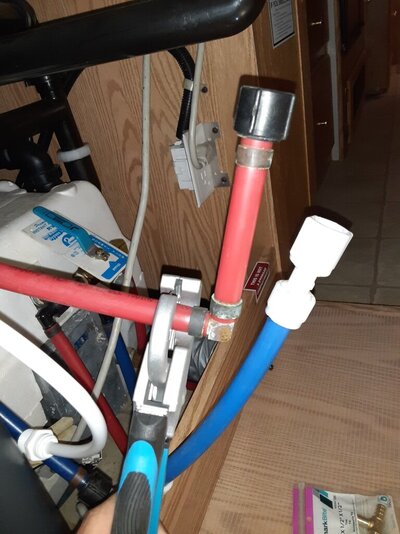
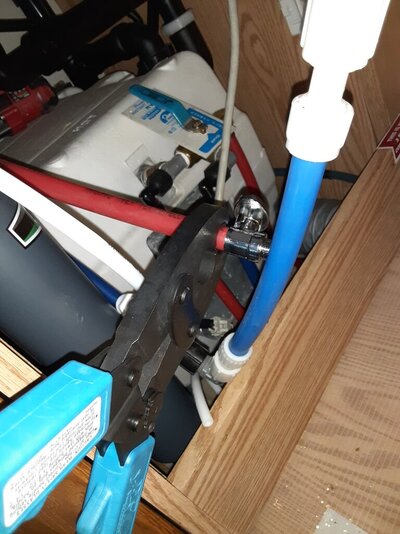
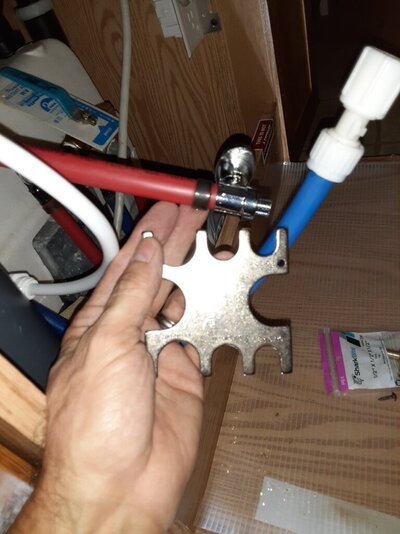
Fast forward, I am tired of plumbing issues. I installed cutoff valves on all hot and cold lines to the sinks. I put new connectors from those valves to the faucets. AND we put a new faucet on the kitchen sink. So they look like this now.

20210926_151459.jpg

I cut these off ..

20210926_152433.jpg

And I highly recommend getting a PEX crimping tool with a go - no go guage.

20210926_152610.jpg

20210926_152703.jpg

So now ALL the leaks are fixed, we have tried every appliance, system, latch, button, switch, awning, bed, couch, light, water heater, curtain, blind, water heater, water pump, refrigerator, stove burner, furnace and even the shower!

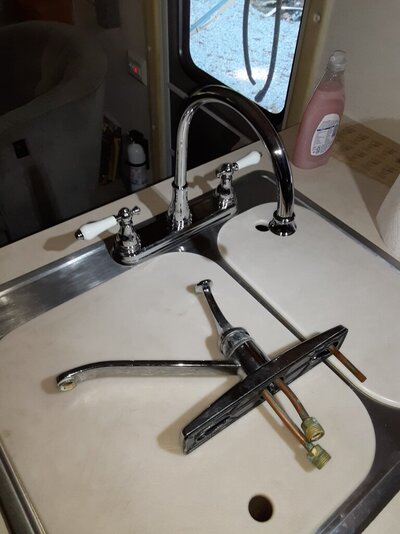
Oh and we put a nicer kitchen faucet in.

20210926_155723.jpg

So I figure I need to pack ALL my tools because obviously I have overlooked something vital and it will bite us on the way to Branson and beyond ...

;)
 
Last edited:
Any RVer who is at all "handy" soon ends up carrying a lot of tools, to be able to handle the inevitable small problems. Plumbing, electrical, cabinetry, etc.
 
Lawyer crap: I am not an expert, this is just how I do stuff, it might be wrong, (doubt it), it might be right, (hopefully), but it is just my way. Try it this way if you like what you see.

On to content. There will be about 3 post in this series. I looked at my roof before I left on our first trip but didn't have time to do it right. So the first post is how to temporarily patch a leak. The second post is how to clean up old sealant. The third post is how I like to reseal stuff.

So we were going on a long trip, I was rushed so I sealed the crap i found good enough to make the trip.

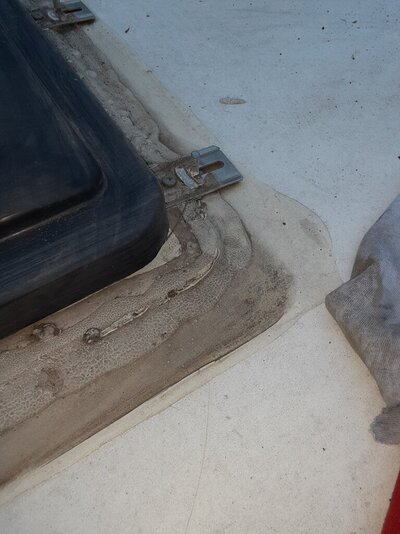
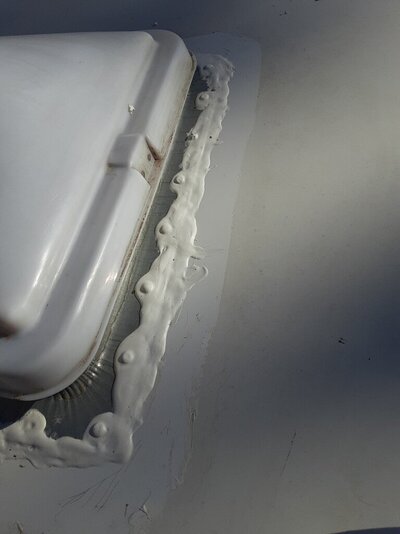
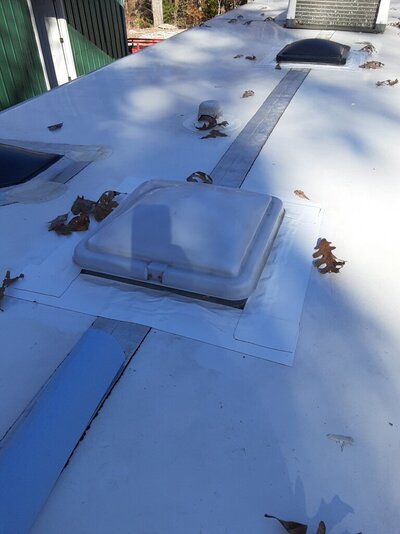
I found cracks:

20211004_182229.jpg

This RV was stored inside, and it had max vent cover on it. But age still got to the sealant. It may have been alright in the short term but I have learned to not take chances.

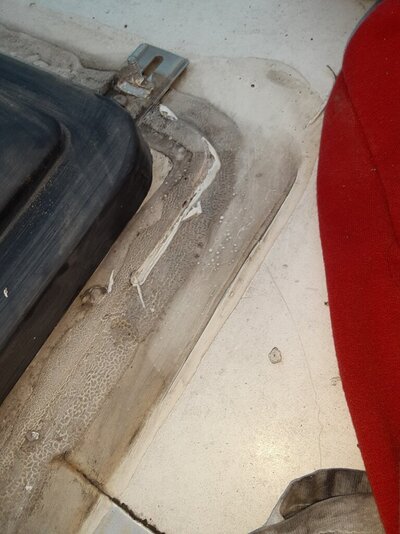
So I cleaned out the crack enough to get sealant in there.

20211004_183041.jpg

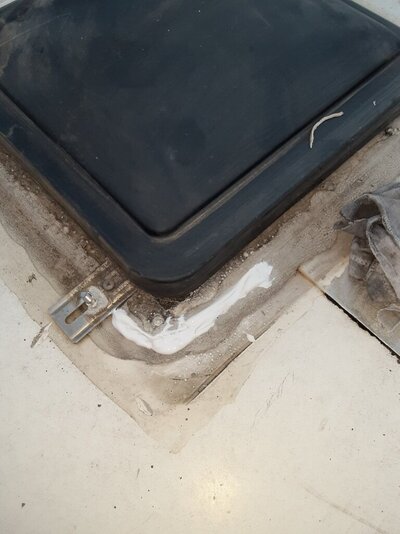
So I then cleaned it and applied some Dicor 501 to prevent leaks on our trip.


20211004_183921.jpg

I can hear you thinking, "But it's still grey! he didn't clean anything!"

Yup, it's still grey, mineral spirits, a couple of other cleaners, nothing really cut it down. I don't know what kind of sealant this was originally, but it was hard, dry and brittle.

Stay tuned for another post, because you will see just how hard this crap is.
 
We went on our trip, had a great time. Then it was over. Time to fix stuff!

Now that was just one vent in the previous post, I had to do several before we left.

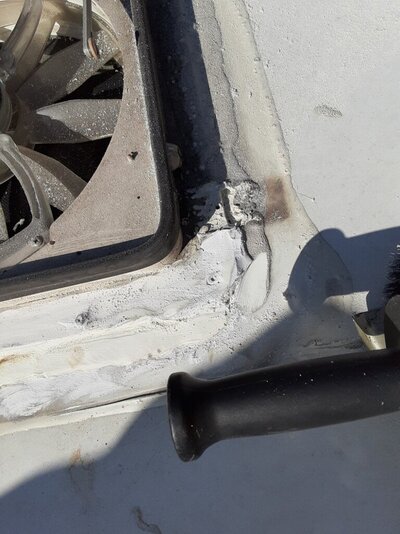
So to clean up the old hard stuff it took a grinder, be very careful if you have to resort to a grinder. Note, I used a wire cup wheel.

If you take your time you can get rid of most of it :

20211026_115326.jpg

The heat generated also softened it enough to pry it up.

That left clean place to put new sealant:

20211108_095056.jpg

I did scrap the roof a bit as you can see in the lower part of the image. But that's ok because I am going to seal that also.

And I lied, I thought this would be 3 posts, but I'll be done in 2. Sorry.

I cleaned the set up Dicor 501 and surrounding area and used primer:

20211108_095248.jpg

I must restate, this wasn't done all in one day. After I cleaned and removed the old stuff, I applied Dicor 501 and let that set for several days.

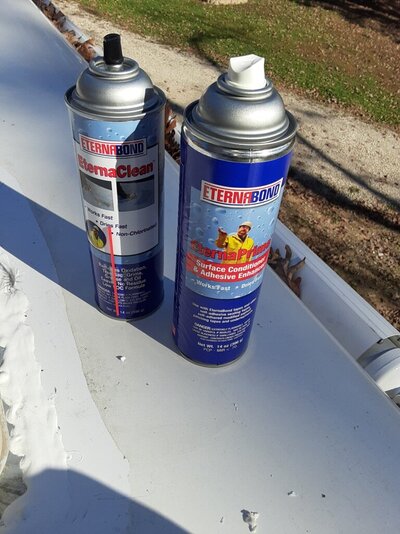
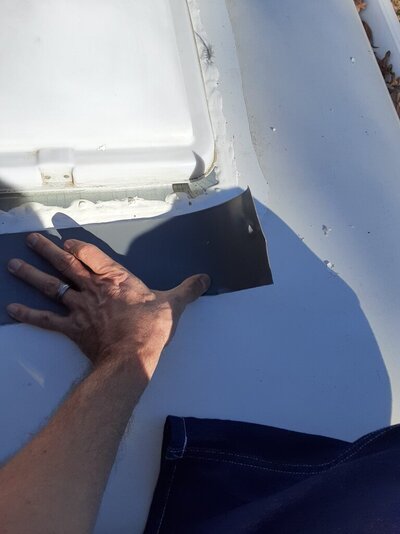
But then I cut and applied the Eternabond tape to double seal and protect the Dicor:

20211108_095220.jpg

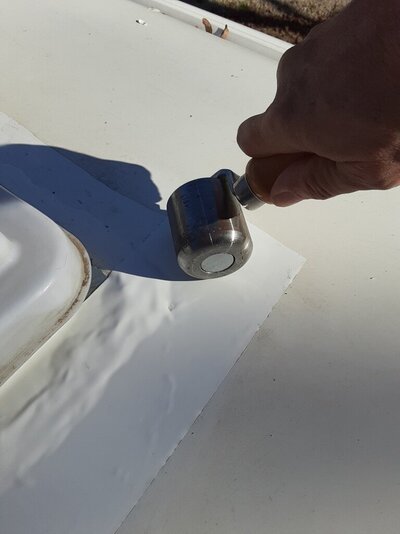
And rolled the snot out of it:

20211108_095619.jpg

And when it's all done I don't worry about leaks. yes I will check it in the spring, but I seriously doubt I will have issues this soon after resealing the roof.

20211108_095709.jpg

Not shown in the images were the front and end caps, I resealed those, the only thing I didn't reseal was the shower skylight. I may have to give it some attention in the spring.

Next post, adventures in alternators... :D
 
Thanks for sharing all your maintenance in this thread. I haven't had to do any of the stuff you've done but I am logging in tips ad tricks.

I did put in a faucet like yours. The "hoop" faucet makes so much more sense than the low profile one. Especially for the smaller sinks in an RV. Now I can get the bigger pots under the faucet for rinsing. I also added a sprayer head which is also useful.
 
I do industrial maintenance for a living. Tackling a simple repair job on an RV is almost relaxing for me.

Troubleshooting pneumatic, hydraulics, dc and ac electrical are things I do every day. I also have to make repairs and / or new construction to the buildings.

So I figure I would share what I have learned about RV's here. While I am not an RV expert, I am also not a complete hack job. (I hope :D )

About being an RV expert, I have started looking at becoming a certified RV inspector. I haven't decided yet. I already have many of the tools and skills required. Going to the NRVTA course would fill in the gaps in my knowledge and solidify what I already know.
 
So the first trip was pretty good, a few issues, then winter came and we winterized Tiny, food grade antifreeze, battery tenders, starting the engine and moving it each month.

Now Spring is in sight and we are planning a trip to Texas for 2 weeks. And the trip is approaching fast!

I'll post prep here instead of starting a new thread.

No pic but today I moved Tiny next to the front door. Because our parking is unlevel I put down solid concrete blocks and a board to level it up. And it will be freezing this week.

On the list of To Do's -- replace the water pump / fan assembly, the fan didn't engage when the temp rose and they should be replaced as a unit due to balance issues. I'll flush the cooling system while I have this drained.

While I have the front of the engine torn apart I am going replace the brand new alternator with the original that I got rebuilt locally. The new one puts out a bit much voltage for my taste and may lead to a boiled battery. I am going to find the idler pulleys and tension mounts this week and replace them also. It has a new belt so that part is fine.

Tune up / oil change on the gen set. I may need to de-carbon the engine. I'll pull out the bore scope and see what is what.

The engine powered ac leaks. New hoses to cut out the rear unit may be in its future. It would cut the volume and possible leaks. AC at the dash would be much better than what we had last year.

If I have time the trans could use a flush and filter.

I may weld up some mounts for a set of led driving lights that I have. This is optional and depends on what else I get done.

And at this point in the list I will need that vacation! :oops:
 
Sorry for going silent. I was sent the wrong parts, got the right parts, except, not quite.

Everything is off just enough to make a simple remove and replace a time sink of a project.

So I started off replacing the thermostat, which is hidden but engine and RV bodywork.

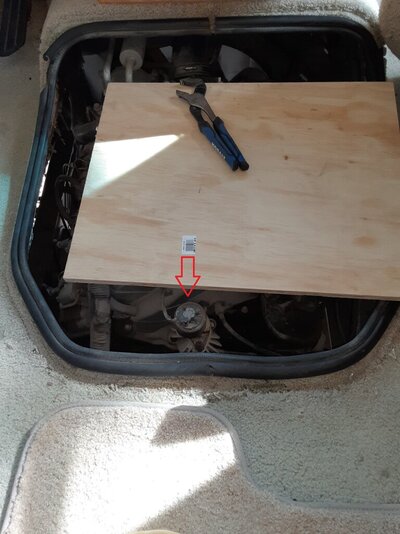
In the image below the arrow points to a engine position sensor, if you do work on a 8.1 Vortec DO NOT lean on or break this. Its a big part and kind of expensive. I placed the board on the intake to support me and not on that part.

20220314_111155.jpg

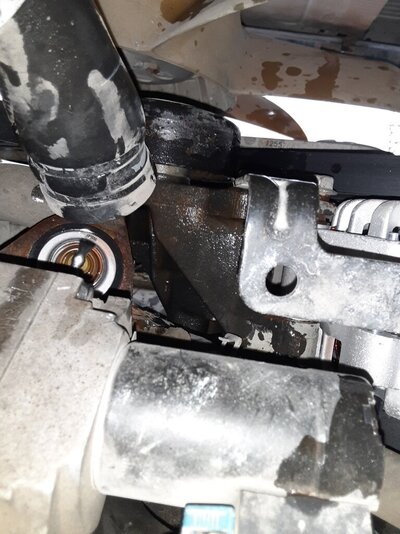
Just shoving my phone up under the body work and clicking a pic shows what I was changing. About center, left side you can see the thermostat (black and silver circle). It wasn't bad, as in sticking open or closed, but since I am replacing the water pump this is cheap insurance against more work down the line.

20220314_111811.jpg

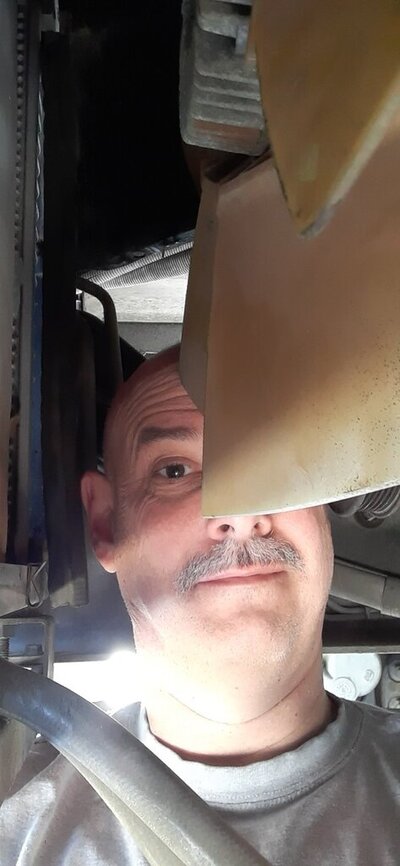
As big as an RV is there is not much room to get to parts of the engine. You may have to get intimate with your rig.....

20220316_115356.jpg

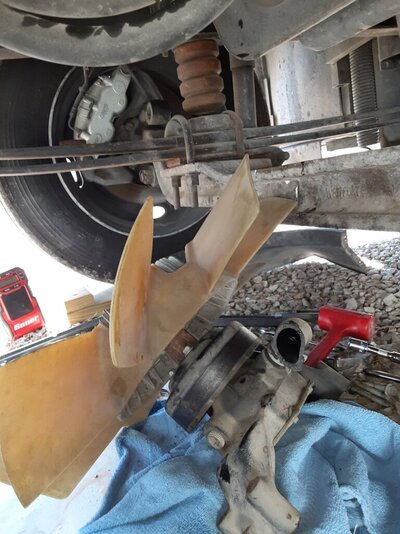
And since I couldn't break the fan loose, not enough leverage, I had to remove the entire thing as a unit. I placed cardboard over the radiator to prevent damage to the cooling fins.

Fortunately, I am good at 3d puzzles. Even if they weigh 6 billion pounds. No stitches required either so I call it a success!

20220316_121536.jpg
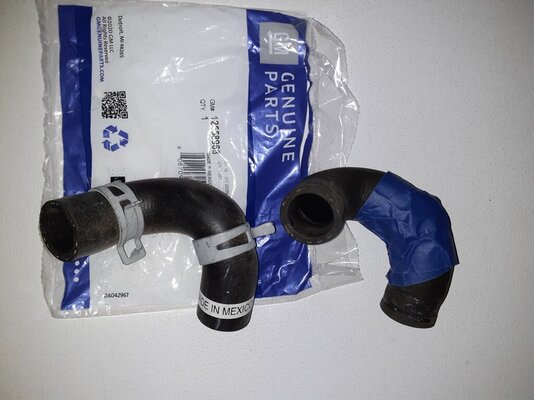
Then the bad, in the image above you can see the hose I cut to get this mess loose. Guess what Gates doesn't manufacture any more? And its not the same as one from a 2500 or 3500 series pickup with the same motor. After a week of searching, visiting every parts store in a 30 mile radius i found one, by accident, I hope.

It was at the bottom of the page on Amazon as I was ordering the fan belt. Not linked and it looked right, it's number crosses with the right number. So in 2 days I will find out if its correct.

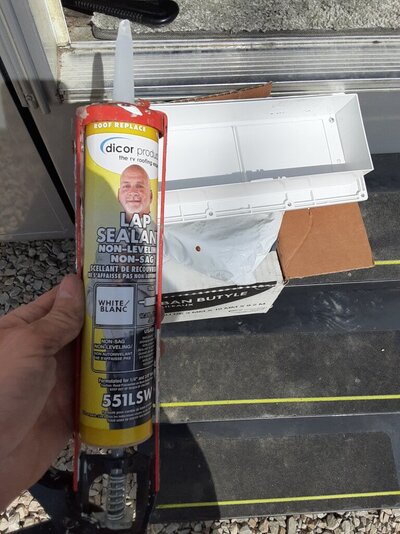
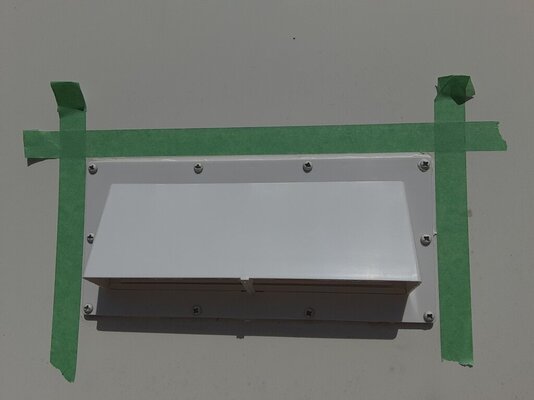
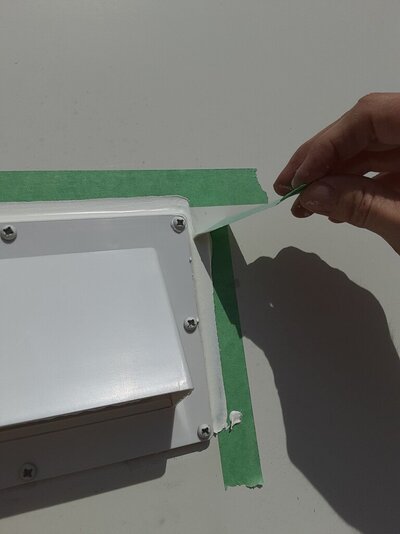
I also am replacing a few other parts like the kitchen vent. My OCD is showing...

The right parts and sealant!

20220314_120053.jpg

I filled the groove around the edge with sealant, then to make double sure it doesn't leak I added more around the outside.

20220314_121023.jpg

Yes i did take off the caulk.

20220314_121246.jpg

And work decided to change my schedule so I had to adjust my reservations by a day. I'll post more tinkering soon, I have no idea how blogger's get anything done. I can work much faster than I can write it up!
 
I can hear the water flowing and see it flushing out the bottom of the RV, oh wait, these valves must be the drain valves and they are open. I shut all three of them ...

From inside I hear "TURN IT OFF, TURN IT OFF!"

I guess I should back up. Its Thursday night, late and Pyro a.k.a Beverly doesn't have to work Friday. She wants to sleep in so she decides to sleep in Tiny. I say ok, then she says she want the water hooked up so we drag the hose over.

I have not hooked this one up to water yet as I am still working on the other RV that we sold. I haven't checked everything out. I should have known better. But I am a clumsy klutz in the morning and she would get more sleep out in the RV instead of listening to me trying to wake up and shower and get ready for work.

Well I grabbed the hose and crimped it in my hand as she is watching water go everywhere in the kitchen. As she wanders around looking at the mess and trying to clean up I casually mention I can't hold this hose forever ...

We get the wet dry vac and suck up the water, pull a shelf out and clean under it and it seems to be limited to the kitchen.

:rolleyes:

As I am making headway with getting the carpet dry I hear darkly muttered curses from the bathroom, I am sure a small plant burst into flame somewhere from that curse. Anyway apparently we have a blown line in the bathroom too.

I have to ask why do the RV makers ALWAYS put carpet in the bathroom? Really?

So the main culprit is the broken filter housing under the sink. A wide open 1/2 inch line was blowing water everywhere. The threaded ring in the image is supposed to be a filter canister.

View attachment 148884

So in a word, plumbing. Its like electricity, mention either and there are 3 to 18 trips to the store required to fix the issue.

And I didn't take pics of much of it but I ripped the toilet mount out to find the blown pipe.

Fast forward through a couple of days. I get the sink to not leak, can't find the leak in the bathroom because, there isn't one. Best guess, the water flowed behind the cabinets down the wall to the bathroom.

So I put new wood structure, better than original, back in and got vinyl to cover it making it easier to clean. And the vinyl we found is close to the original. Then i chalked the edges and cleaned up the pressure line behind it. It had like 3 extra angles and some push to connect connectors, not original.

I am getting good at this bathroom repair thing, no, I am not free next weekend.... :D

View attachment 148885

So that was 2 weeks ago while we were trying to finish up the other RV. This weekend we got busy cleaning up brush and cutting the hill next to the barn where we are going to put the shelter for the RV.

It looks like this now.

View attachment 148888

I can pull up and back into the space, turning around is fairly easy with the gravel parking area in front of the big barn door.

I still have to cut a bit more back for the retaining wall.

View attachment 148889

The plumbing works like its supposed to now, we are organized as far as parking. We are getting stuff organized inside it.

Next, awning repair. :rolleyes:
 
Ok, so I have to update this thread.

Life got a little busy. BUT! The cooling system on the RV is finished!

The hose on Amazon was the right one.

20220324_103632.jpg

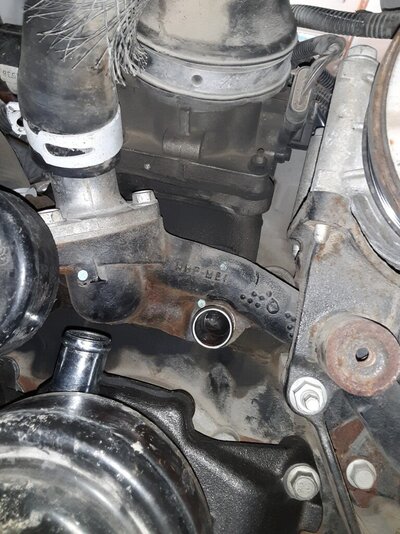
The spot it goes in can only be seen with a camera.

20220320_151036.jpg

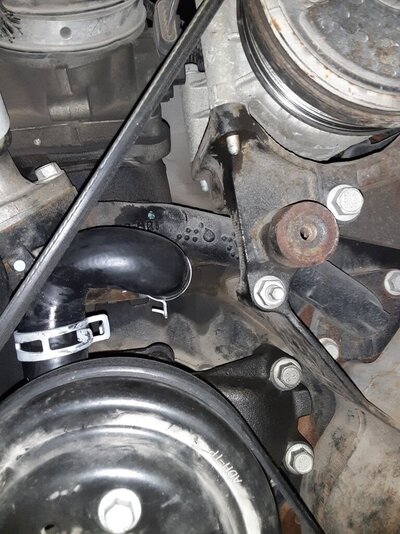
With the hose in place.

20220324_133537.jpg

And i took that picture to make sure it was on right.

After I put it all back together I cleaned and flushed the radiator and filled. A good heat / cool cycle to get the air out and it is rock steady on temp even pulling big hills! So i am a happy camper now.
 
So I finished the repairs and have meant to update this thread.

But first I need to correct a bit of misinformation. The crankshaft position sensor is to the left of the arrow in the image up a few posts.

Why is this important? Well, ummm ......

20220414_182006.jpg

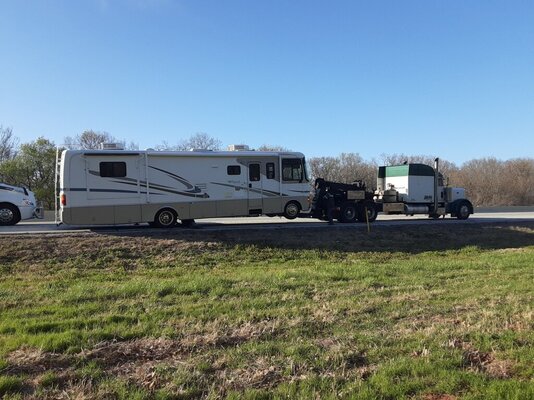
We are home, Tiny is taking a break, pun intended, in Carthage Missouri. The trip was great, we were rolling home and 11 miles from Missouri the engine started chugging and shutdown.

The cooling system held up perfect, the alternator, great. Fuel pump? Just got news from Robbie at Schrader Towing that its the fuel pump. No word yet on when we can go get Tiny. It's less than 3 hours from the house.

I'll try to catch the posts up in the next few days.
 
Back
Top Bottom