Dan Walters
Well-known member
I promised to post a thread showing my modifications to my 2005 Winnebago Vectra that is new to me. I started this project and did most of the work on it over the Christmas/New Years Holidays and just competed the project last week.
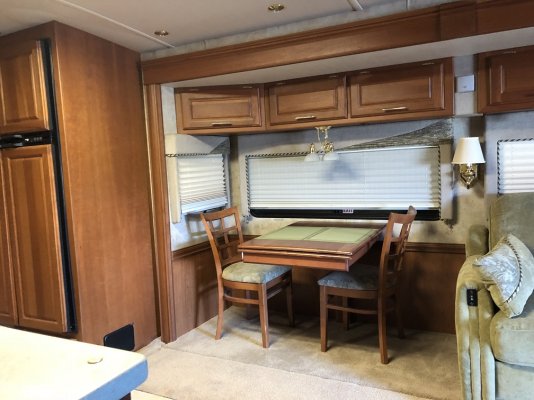
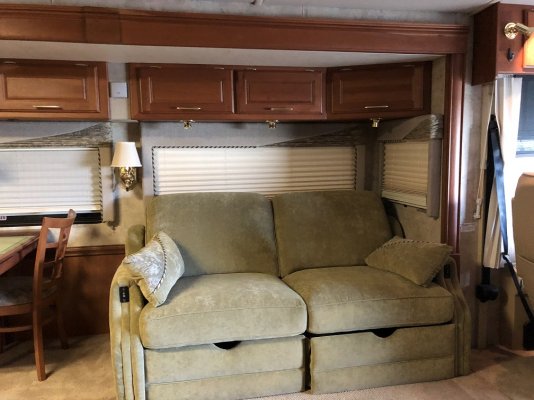
The TV in our Winnie is mounted in the front, like many motorhomes, and had been updated prior to my owning the rig to a flat screen from the old CRT television. I like having that one there while I work at the dining table and face the front of the motorhome. But, it is not the very good for just sitting on the couch, which faces the curb side of the coach, and watching a movie or other shows for longer periods of time. I would get a sore neck doing that. So, my plan was to remove the jackknife sofa in the curb side slide out and build a cabinet that would house a TV lift, a fireplace, and add some storage space. Most of the time, it's just me and my wife in the coach, so we really didn't need the other sofa. When our grandkids occasionally stay with us overnight, I use an air mattress for them to sleep on, which is more comfortable than the jackknife sofa anyway.
I had seen a post on another web site from someone who had done this by removing the dinning booth and I based my build generally on his build, with some modifications specific to my coach. The first thing I had to do was to add an electrical outlet to power the tv, lift, fireplace and sound bar. There was an outlet on the end of the kitchen cabinet, but it was too high and too far toward the front of the cabinets to be hidden inside the new cabinet that I was going to build. The wires running to that cabinet were long enough for me to splice a new electrical box down low and further toward the outside wall of the slide.
I then started building my frame for the cabinet, taking up the whole space where the sofa was. I mounted the tv lift to the floor and to two 2" X 4" supports mounted to the outside wall of the slide, measuring to make sure I had enough space for the top door to swing up and open when the tv lifts out of the cabinet. From there, I boxed in the tv and built a frame for the fireplace to mount in front of the tv, leaving about 7 or 8 inches between the back of the fireplace and the front of the tv enclosure. I used 1" X 2" cedar strips and a couple of 1" X 4" cedar boards to build most of the frame to keep the weight down. I glued and screwed the strips together and to the slide walls and used wood glue and a Kreg jig for the screws. The front is cut out of a sheet of 1/2 inch birch plywood and the top is cut out of a sheet of 3/4 inch birch plywood.
I made the doors out of 1/2 inch plywood and glued the wooden cabinet doors off of my Norcold 1200 rv freezer doors to the larger plywood doors so that it would match the other cabinets in the motorhome. The Norcold rv fridge had gone out and I replaced it with a residential fridge, so I saved the wood panels off of that. I also replaced the sofa on the drivers side slide out with 2 recliner/theater seats since we now have a 55 inch tv in the lift cabinet straight accross from those seats.
Anyway, here are some pictures of the build. Feel free to comment or ask questions about it and thanks for reading.
Attachments
-
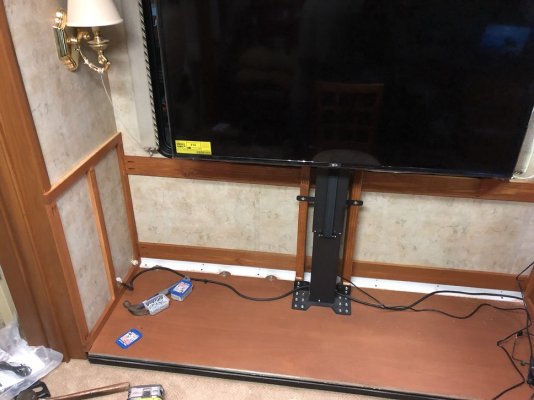 Photo Dec 26, 3 16 54 PM.jpg197.3 KB · Views: 109
 -
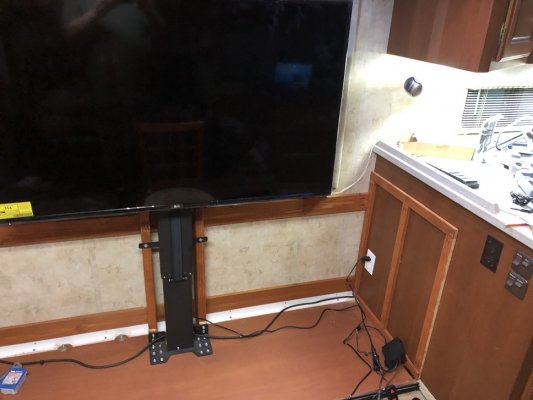 Photo Dec 26, 3 16 57 PM.jpg174.8 KB · Views: 76
 -
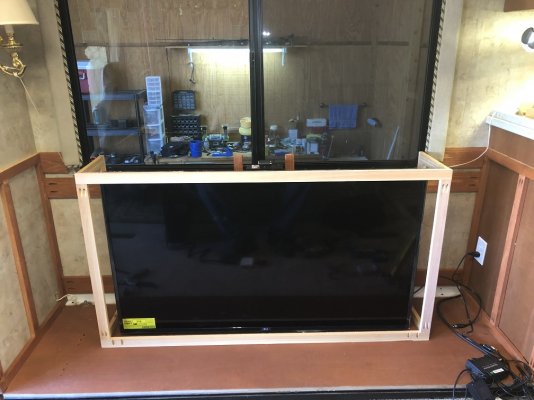 Photo Dec 27, 11 41 11 AM.jpg214.6 KB · Views: 83
 -
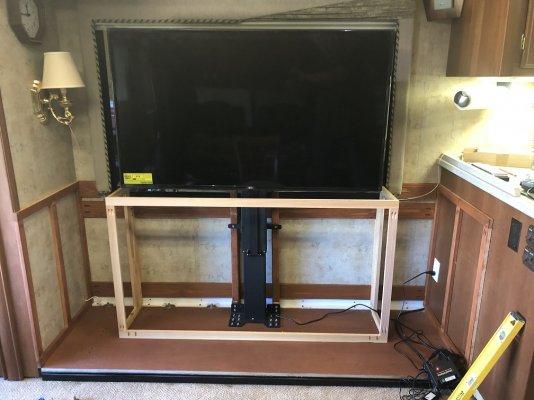 Photo Dec 27, 11 45 51 AM.jpg227 KB · Views: 76
 -
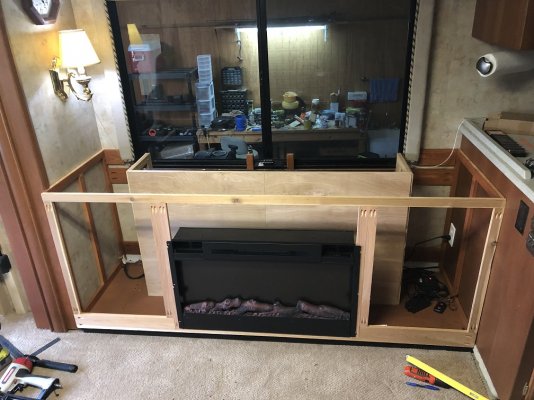 Photo Dec 28, 4 52 11 PM.jpg270.2 KB · Views: 75
 -
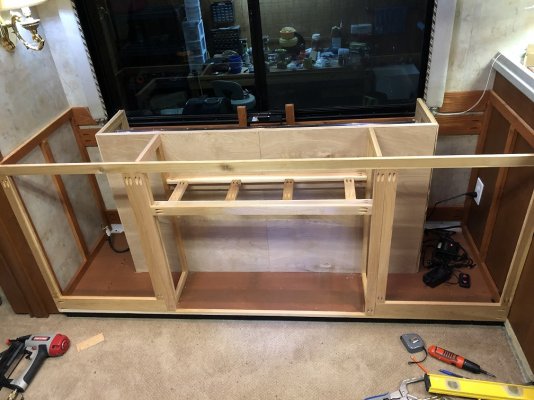 Photo Dec 28, 8 41 40 PM.jpg275.7 KB · Views: 79
 -
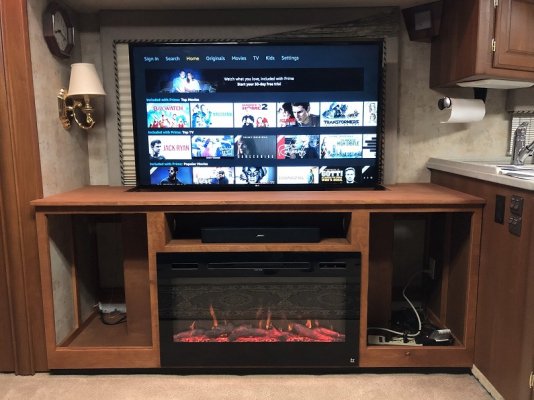 Photo Jan 01, 8 20 23 PM.jpg192.9 KB · Views: 83
 -
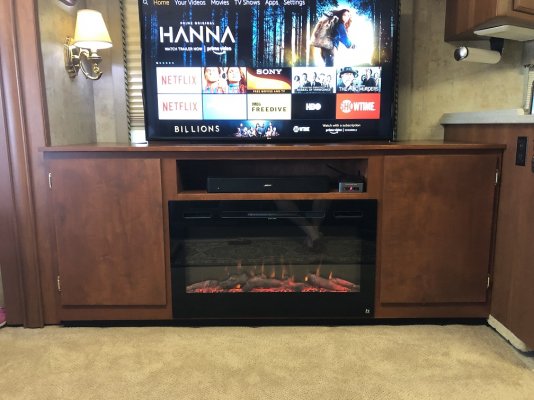 Photo Feb 17, 12 56 39 PM.jpg269.5 KB · Views: 75
 -
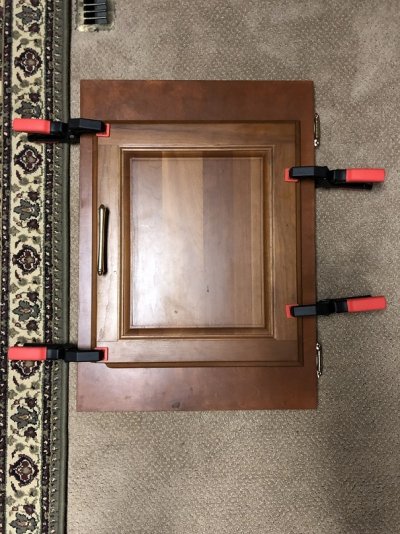 Photo Feb 20, 7 58 24 PM.jpg251.7 KB · Views: 78
 -
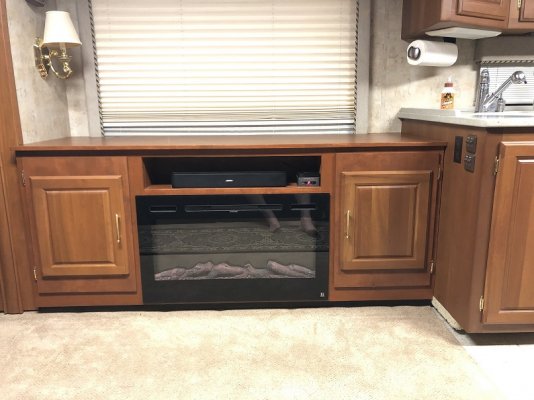 Photo Feb 21, 11 50 52 PM.jpg177.3 KB · Views: 76
 -
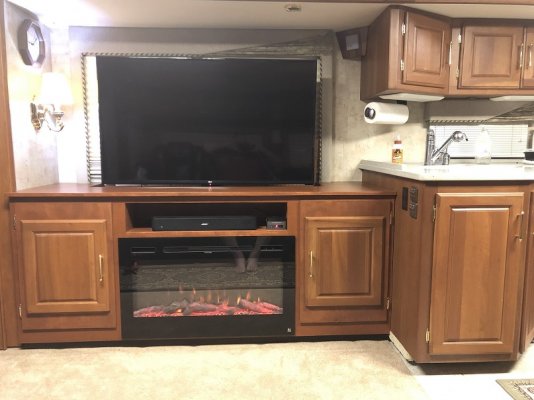 Photo Feb 21, 9 09 10 PM.jpg158.4 KB · Views: 91
 -
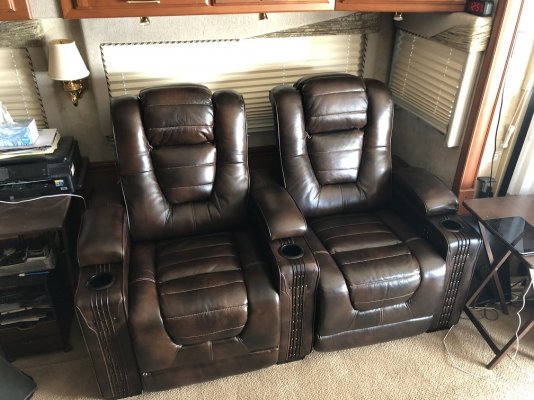 Photo Dec 03, 12 53 09 PM.jpg290.5 KB · Views: 87
") )
) 
![gunstock-varathane-interior-stain-340619-64_1000[1].jpg](/data/attachments/50/50720-fdf8705e58c46f3d9e05fd6ce02a9cd6.jpg)